Managing Agents
Agentic Fabric provides a registry of enterprise, endpoint, and browser agents used across your organization with visibility into their activity and relationships across humans, agents, machine identities, and resources. On the Agent Registry page, you can manage the ownership of agents, organize them by their associated business app, and access their identity graphs.
Viewing the Agent Registry
You can review the agents discovered and registered from connected agentic platforms, browsers and endpoints, and SaaS applications in the agent registry.
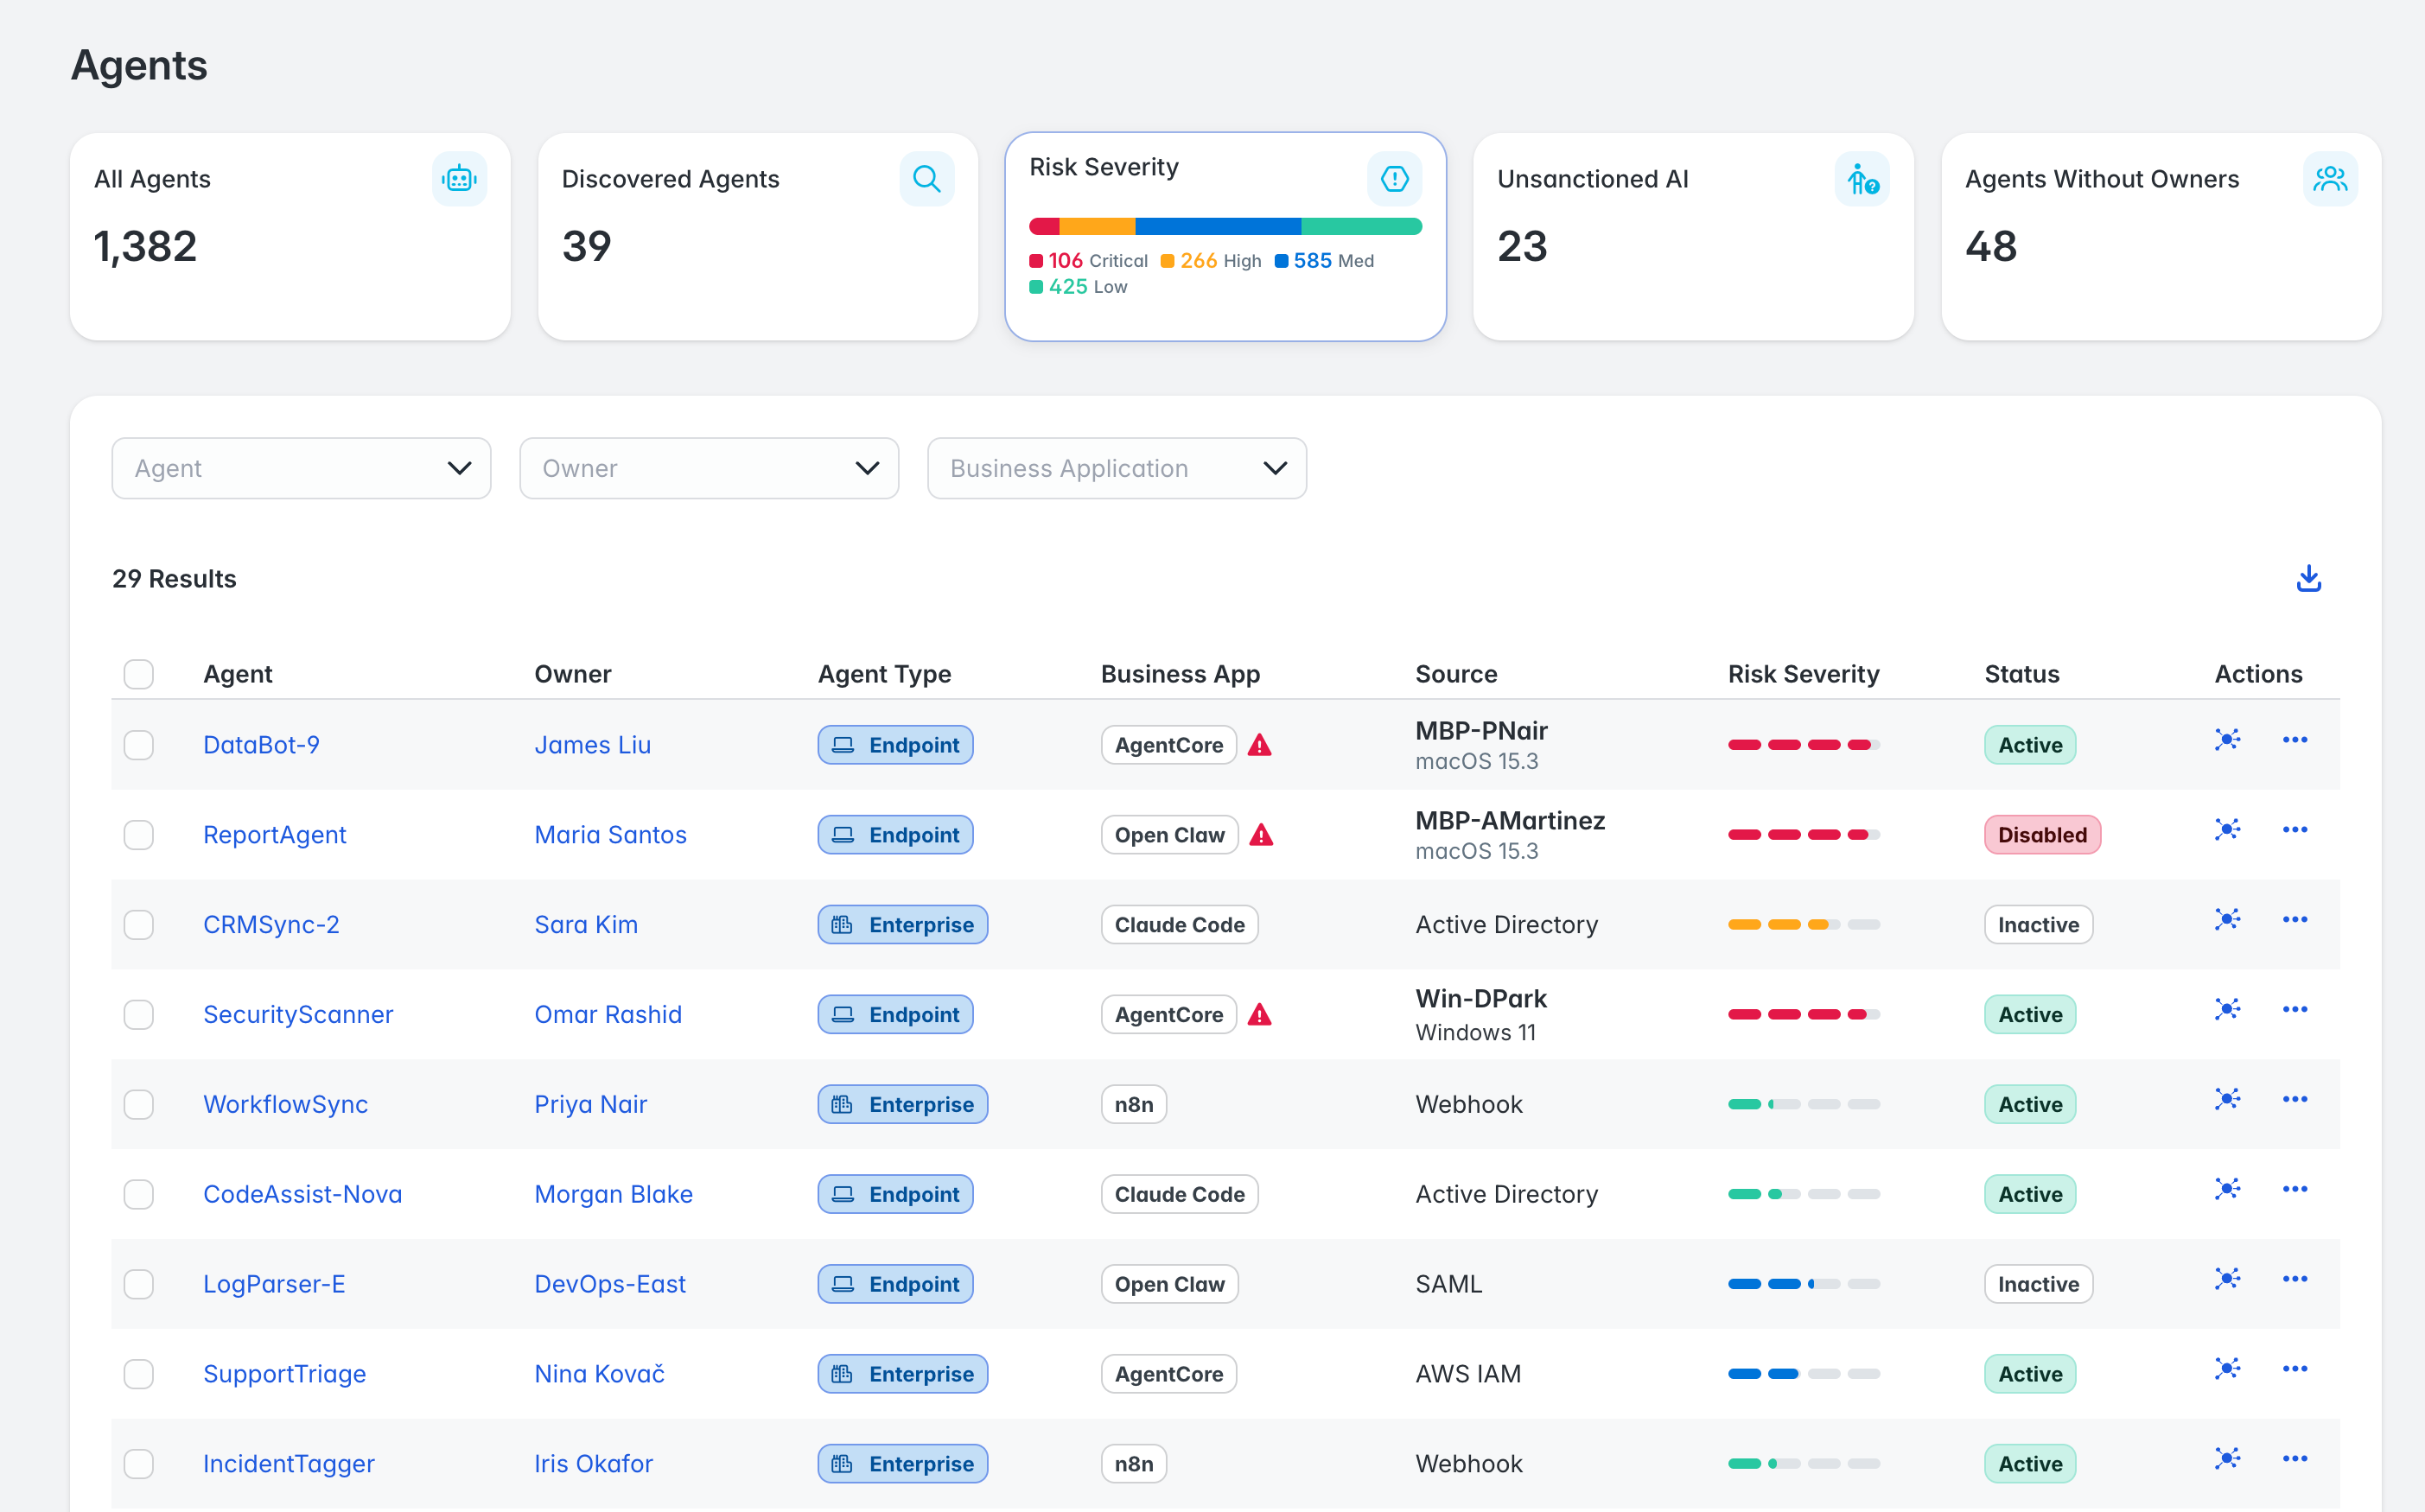
To view the agent registry:
-
Go to Agentic Fabric.
-
From the navigation menu, go to the Non-Human Identities section and select Agents.
Select the quick filters on the Agent Registry page to refine the agents listed in the table. You can view agents discovered in the last 30 days as well as those marked as unsanctioned or missing an owner. On the All Agents and Discovered quick filters, you can hover over the line graph to view the agent count by day.
Additional filtering can be applied by selecting + More. Select Clear All Filters to clear all configured filters.
From the agent registry, you can review the following information about each agent:
- Owners: The agent’s primary owner and additional owners.
- Agent Type: Indicates whether the agent is an enterprise, browser, or endpoint agent. If Agentic Fabric detects new agent activity that it has yet to classify, the Agent Type will be listed as Unknown. This may occur in cases where a newer agent is discovered.
- Business App: The business app the agent is associated with. The business app may display a warning if the app is unsanctioned by your organization.
- Status: Indicates whether the agent is active or inactive. You can change the status of an agent by activating or deactivating it.
Viewing an Agent's Details
You can access an AI agent’s details page to view additional data about the agent, including its attributes, user entitlements, and change history.
To access an agent’s details page:
-
Go to Agentic Fabric.
-
From the navigation menu, go to the Non-Human Identities section and select Agents.
-
Find and select an AI agent to view its details page.
From this page, you can perform the following actions:
- View and copy
 the agent's attributes in the Details tab.
 - View the user entitlements that grant identities access to the agent in the Details tab. You can also select a user entitlement to view further information about it, including the identities that receive access to the agent through the user entitlement.
- Review the agent’s identity graph in the Access tab.
- Review the entitlements assigned to the agent's correlated non-human accounts in the Access tab.
- View and update the non-human accounts correlated to the agent in the Accounts tab.
- View the abilities an agent can use or perform (MCP clients, tools, skills, or plugins) in the Capabilities tab.
- Review changes in the Change History tab.
- Update the agent by selecting the Actions menu in the upper-right corner of the page.
Accessing an AI Agent’s Identity Graph
You can access an agent’s identity graph to visualize the agent’s relationships across human identities, machine identities, entitlements, and other access items.
-
Go to Agentic Fabric.
-
From the navigation menu, go to the Non-Human Identities section and select Agents.
-
Find or search for an agent.
-
Select the View in Identity Graph icon
 .
.
You can now review the agent’s relationships and identify possible risks through visualization.
Updating AI Agents
If an agent’s owner leaves your organization, you can update the agent to change its primary owner and add additional owners for succession planning.
-
Go to Agentic Fabric.
-
From the navigation menu, find the Non-Human Identities section and select Agents.
-
Find the agent that requires updates and select Actions
 > Update Agent.
 -
Update the AI agent's attributes.
-
Select Save to update the AI agent.
Activating AI Agents
You can activate an agent your organization has started using. Agents can be activated on the following sources:
To activate AI agents:
-
Go to Agentic Fabric.
-
From the navigation menu, go to the Non-Human Identities section and select Agents.
-
Find the agent that you want to activate and select Actions
> Activate Agent. -
If your request requires approval, enter the business justification for activating this agent in the Comment field and select Request.
-
If your request does not require approval, select Activate. The AI agent becomes active on the source.
If you submitted a request, you can track its status the Agent Requests page in your Request Center. You’ll also receive email notifications about the request throughout its approval and provisioning process.
If your request is approved, the agent is activated on the source. If your request is denied, no action is taken on the agent.
Deactivating AI Agents
You might need to deactivate a suspicious AI agent to contain a potential security threat. You can deactivate agents on the following sources:
To deactivate AI agents:
-
Go to Agentic Fabric.
-
From the navigation menu, go to the Non-Human Identities section and select Agents.
-
Find the agent that you want to deactivate and select Actions
> Deactivate Agent. -
If your request requires approval, enter the business justification for deactivating this agent in the Comment field and select Request.
-
If your request does not require approval, select Deactivate. The agent is deactivated on the source.
If you submitted a request, you can track its status the Agent Requests page in your Request Center. You’ll also receive email notifications about the request throughout its approval and provisioning process.
If your request is approved, the agent is deactivated on the source. If your request is denied, no action is taken on the agent.
Documentation Feedback
Feedback is provided as an informational resource only and does not form part of SailPoint’s official product documentation. SailPoint does not warrant or make any guarantees about the feedback (including without limitation as to its accuracy, relevance, or reliability). All feedback is subject to the terms set forth at https://developer.sailpoint.com/discuss/tos.