Managing API Keys and Personal Access Tokens
You can use API keys and personal access tokens to allow API clients to integrate with Identity Security Cloud.
Managing API Keys
To access APIs, you'll need to generate a client ID and secret that you can use to authenticate with the platform. You can create and delete your API keys on the API Management page.
Note
On the API Management page, you may see different values in the Type column:
- VA keys are generated when you create a virtual appliance. You cannot create or delete the VA key on this page. You must delete the VA to remove the related VA key.
- If you see a value other than API or VA in the Type column, the user created it using a REST client and specified a type other than API.
Creating an API Key
Note
SailPoint Support and Services accounts that have been granted access to your tenant cannot create API clients through the user interface.
Caution
API keys created by the process below will fail when Data Segmentation is enabled and you attempt to search for roles or entitlements. This happens because API keys don't tie access to a specific person, and least privilege requires access to be tied to a user.
In this case, you can turn off Data Segmentation if it's not being used, or replace the generic API key with a personal access token, which will allow segmentation to be enforced.
- Go to Admin > Global > Security Settings.
- Select the API Management tab.
- Select Create API Client to open the New API Client window.
-
Enter a meaningful Description for your API key and select the appropriate OAuth 2.0 Grant Type for your use case.
Note
- If you select Refresh Token, specify a value from the associated dropdown list to indicate how long you want the token to be valid for (or accept the default value of 1 month).
- If you select Authorization Code, you’ll also need to specify a valid Redirect URL.
-
Select Require user consent if you want users to be required to consent during authorization.
-
Use the checkboxes to select the desired scopes.
If no scopes are selected, the default scope will be assigned. The default scope only grants permission for endpoints that do not require authorization.
Selecting
sp:scopes:allauthorizes all scopes granted by the user’s assigned user levels.Best Practice
To follow the principle of least privilege, only select scopes that are needed by the application.
Refer to the SailPoint Developer Community for the scopes required for each endpoint. If no scope is listed for the endpoint, select
sp:scopes:all. -
Select Create to generate the client credentials.
-
Copy the client ID and the client secret somewhere safe.
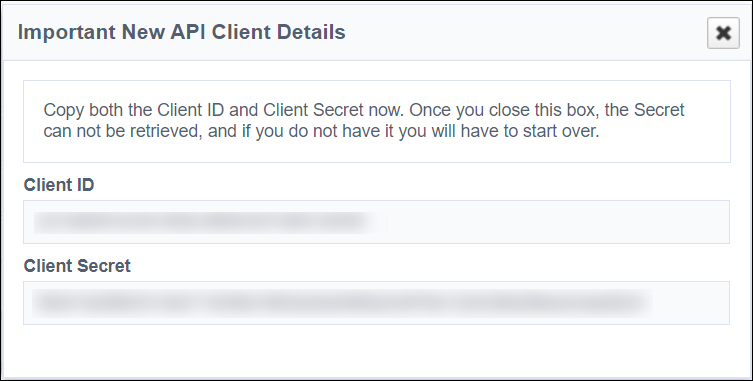
Important
Do not close this window without copying your client secret. You cannot view or change it later, and you'll need these credentials to use the Identity Security Cloud APIs.
These credentials can now be used to access APIs. To update an API client, select its client ID and make any needed changes. Select Update to save these changes.
You can also create an access token that can be used to authenticate requests. For more information on the authentication model, refer to Authentication.
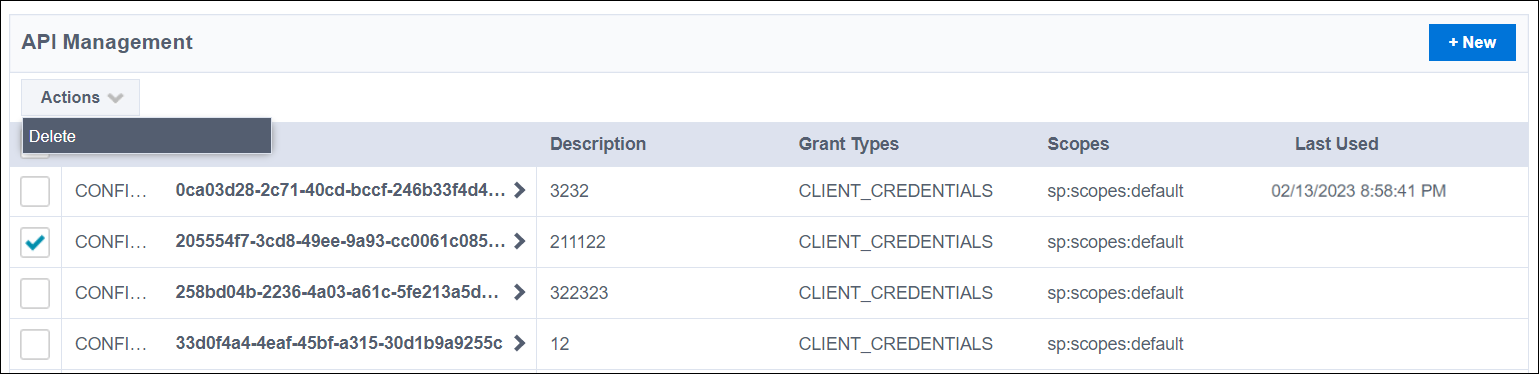
Deleting an API Key
You can check the date an API key was last used to determine whether it is no longer needed and can be deleted. If you lose the client secret for an API key, you can also delete that key and create a new one.
- Go to Admin > Global > Security Settings.
- Select the API Management tab.
- Select the checkbox's beside the API key's you want to delete.
-
Select Bulk Delete.
-
Select Delete to confirm the deletion.
Your API key is removed from Identity Security Cloud.
Managing Personal Access Tokens
External applications or programmatic scripts (API clients) integrating with Identity Security Cloud must provide credentials for authentication and authorization. In addition to general-use API keys, users can generate and use personal access tokens for this purpose.
A personal access token is a set of user credentials that an API client can use to connect to SailPoint’s APIs. Tokens improve integration security by replacing the need to store the user's username and password in your client application. For more information about personal access tokens, refer to the SailPoint Developer Community.
Generating a Personal Access Token
Any user can create a personal access token. However, tokens cannot provide permissions beyond those granted by the user's access levels. You can select scopes to further restrict the access granted by the token.
Tokens created by end users may have insufficient permissions to access an endpoint. If a token has insufficient permissions, the call will fail. To resolve this, use a personal access token generated by a user with elevated access.
Note
SailPoint Support and Services accounts that have been granted access to your tenant can create personal access tokens. However, these tokens will automatically be deleted when the tenant access expires.
To create a personal access token:
- Select the User icon
 from the upper-right corner of the page.
 - From the dropdown menu, select Preferences.
-
Select Personal Access Tokens from the left menu and select New Token.
Note
Each user can have up to 10 personal access tokens.
-
Specify where this token will be used in the What is this token for? field. This can help you recognize when a token is no longer needed and can be deleted from Identity Security Cloud.
-
Set an expiration date for the personal access token. By default, the expiration date is set for 6 months. If this field is left blank, the token is created with no expiration date.
The token will expire at midnight on the designated date. For example, if the expiration date is set to 08/03/2026, the token will expire at 12:00 AM on August 3. To set a different time, use the Create Personal Access Token API to create the token.
As a token's expiration date draws near, you can update it to prevent interruptions in service.
Note
An expired token can be restored for up to 3 months after its original expiration date. Update the token's expiration date to restore it.
-
Use the toggles to select the desired scopes. To learn more about scopes, refer to the SailPoint Developer Community.
If no scopes are selected, the default scope will be assigned. The default scope only grants permission for endpoints that do not require authorization.
Selecting
sp:scopes:allauthorizes the personal access token to all scopes granted by the user’s assigned user levels. If a user creates a personal access token with this scope and is later granted another user level, their token will take on the updated permissions.Note
When changing scopes for an existing personal access token, allow up to 30 minutes for the changes to take effect.
Best Practice
To follow the principle of least privilege, only select scopes that are needed by the application that will use this token.
Refer to the SailPoint Developer Community for the scopes required for each endpoint. If no scope is listed for the endpoint, select
sp:scopes:all. -
Select Create Token at the bottom of the window to generate and view the Secret and Client ID.
Important
Copy and save the Secret value before you close this panel. Otherwise, you will have to delete the token and create a new one since this value cannot be retrieved later.
-
Save the Secret value somewhere safe.
You can now use this personal access token. Select the Edit icon ![]() in the Actions column to update the description, expiration date, or scope for this token.
in the Actions column to update the description, expiration date, or scope for this token.
Deleting a Personal Access Token
You can check the Personal Access Token page to view when a personal access token was last used and determine whether it can be deleted.
Caution
You cannot recover a deleted token, so be sure it’s no longer in use or required before deleting.
- Select the Delete icon
 in the Actions column for the token you want to delete.
 - Select Confirm to confirm the deletion.
Documentation Feedback
Feedback is provided as an informational resource only and does not form part of SailPoint’s official product documentation. SailPoint does not warrant or make any guarantees about the feedback (including without limitation as to its accuracy, relevance, or reliability). All feedback is subject to the terms set forth at https://developer.sailpoint.com/discuss/tos.