Using Event Triggers
Identity Security Cloud provides event triggers that you can configure and use to connect to webhooks and send event payloads to custom applications. For example, you can subscribe to an event trigger that notifies a third-party system when an identity has been removed from Identity Security Cloud.
Follow the instructions below to subscribe to any event triggers that are available in your site.
Note
Early Access Event Triggers must be requested before they can be added to your site. Refer to the Event Triggers section of the Developer Community for more information.
Prerequisites
- A familiarity with event triggers and webhooks.
- Access to a third-party system with the ability to configure webhooks.
Event Trigger Details
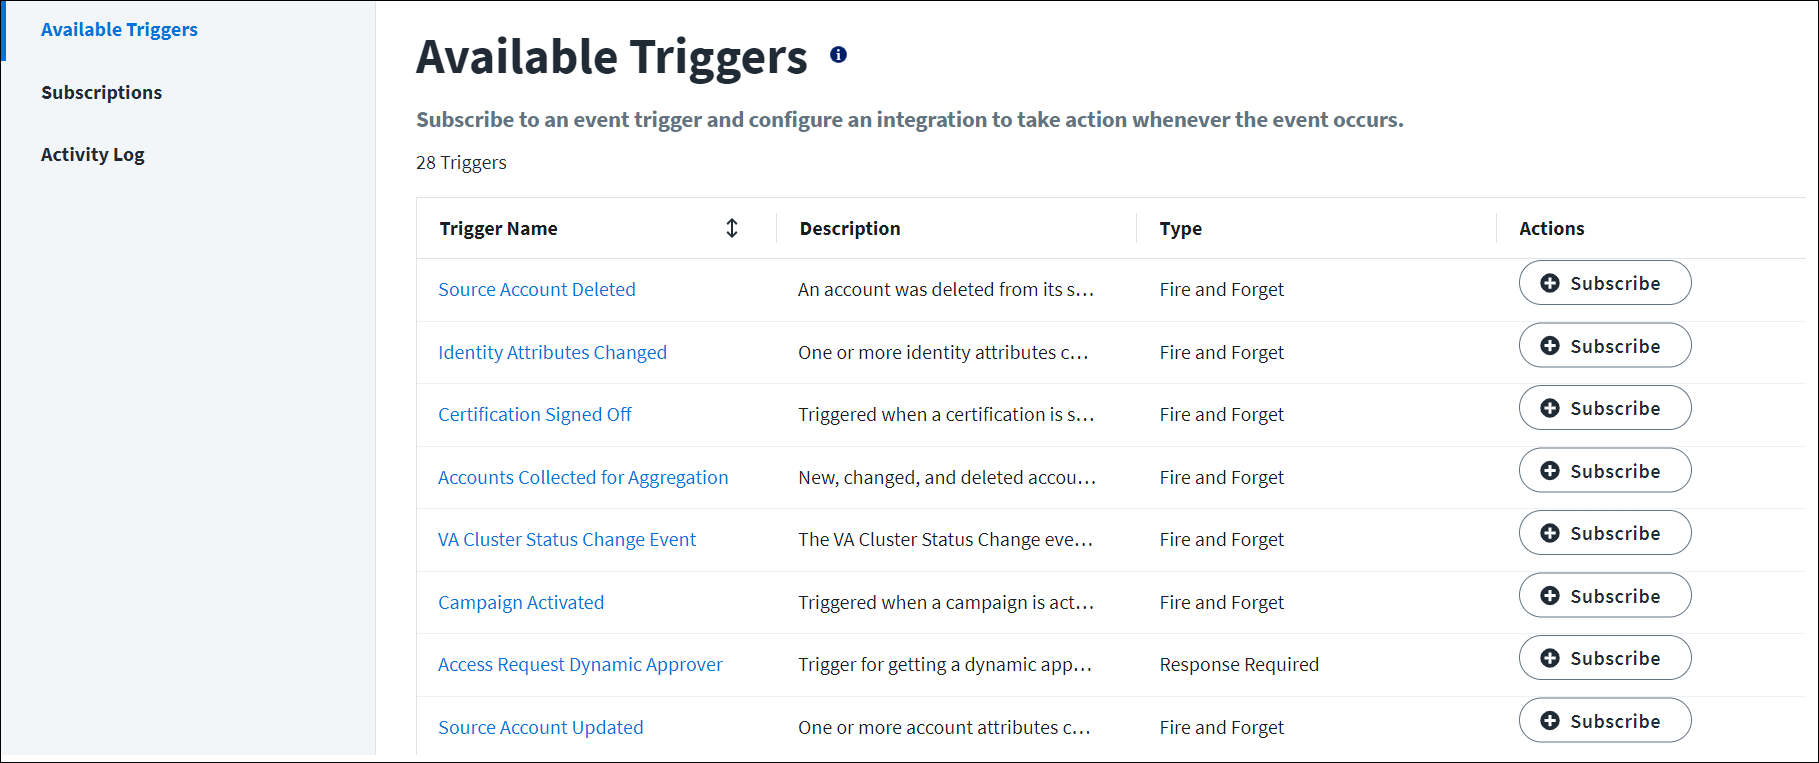
Select Admin > Event Triggers to display a list of available triggers. Select an event trigger to view important details, including the information that you'll need to configure the webhook:
| Field Name | Description |
|---|---|
| Trigger Name | The name of the trigger in SailPoint's cloud services. |
| Trigger ID | The unique ID of the trigger. |
| Description | A description of what causes the trigger to fire. |
| Type | Whether the trigger is a Fire and Forget trigger or a Response Required trigger. |
| Input Schema | The schema of the JSON blob Identity Security Cloud sends to the webhook. You can also see an Example Input. |
| Output Schema | The schema of the JSON blob Identity Security Cloud expects to be returned from a webhook for Response Required triggers. You can also see an Example Output. |
Subscribing to Event Triggers
Follow the instructions below to subscribe to event triggers using the UI. You can also subscribe to all event triggers using the API. Refer to the Developer Community for more information.
Important
Before subscribing to an event trigger, make sure you've configured the information the webhook needs to receive event triggers.
To subscribe to event triggers:
-
Go to Admin > Event Triggers to display a list of available triggers.
-
Select the + Subscribe button beside a trigger to subscribe to it.
Note
You can have up to 50 subscriptions to each Fire and Forget trigger, and one subscription to each Response Required trigger.
-
Enter a unique Subscription Name and meaningful Description for the subscription, to help differentiate it from others.
-
For Subscription Type, select HTTP or Amazon Eventbridge.
-
For HTTP subscriptions, complete the following:
- Enter the URL of the webhook in the Integration URL field.
-
For Response Required triggers, specify whether you want the response to be synchronous, asynchronous, or specified by the integration (sometimes referred to as dynamic).

-
For Authentication Type, select None, Basic Auth or Bearer Token.
- For Basic Auth, enter your User Name and Password for the integration service account.
- For Bearer Token, enter the bearer token used for authentication into the integration.
-
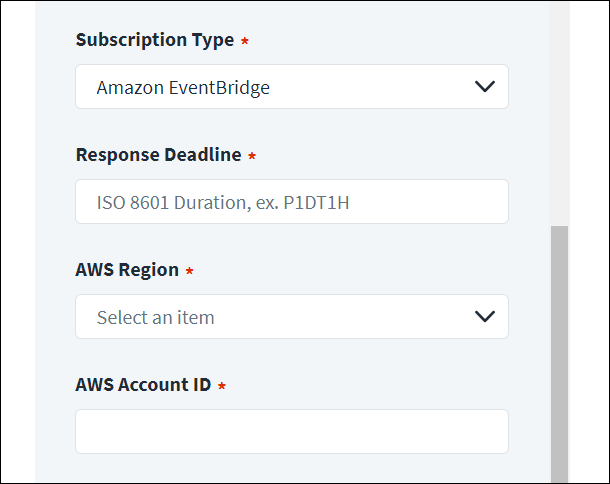
For Amazon EventBridge subscriptions, complete the following:
-
For Response Required triggers using an asynchronous response type, specify how long SailPoint's cloud service should wait for a 200 response before timing out in the Response Deadline field.
Use ISO 8601 Duration format. The default Response Deadline is 1 hour.
Note
The Response Deadline for synchronous triggers is 10 seconds. This can't be modified.
-
Select your AWS Region from the dropdown menu of supported regions.
- Enter your AWS Account ID in the provided field.
-
-
-
(Optional) In the Filter field, enter a JSON XPath filter expression to specify the conditions under which this trigger should fire.
-
Select the Enabled/Disabled toggle to enable or disable the subscription.
-
Select Save to subscribe to the event trigger.
If you enabled the subscription, the event trigger is live and will notify the third-party system when that specific event occurs in Identity Security Cloud.
After you’ve subscribed to an event trigger, your new subscription is added to the Subscriptions page.
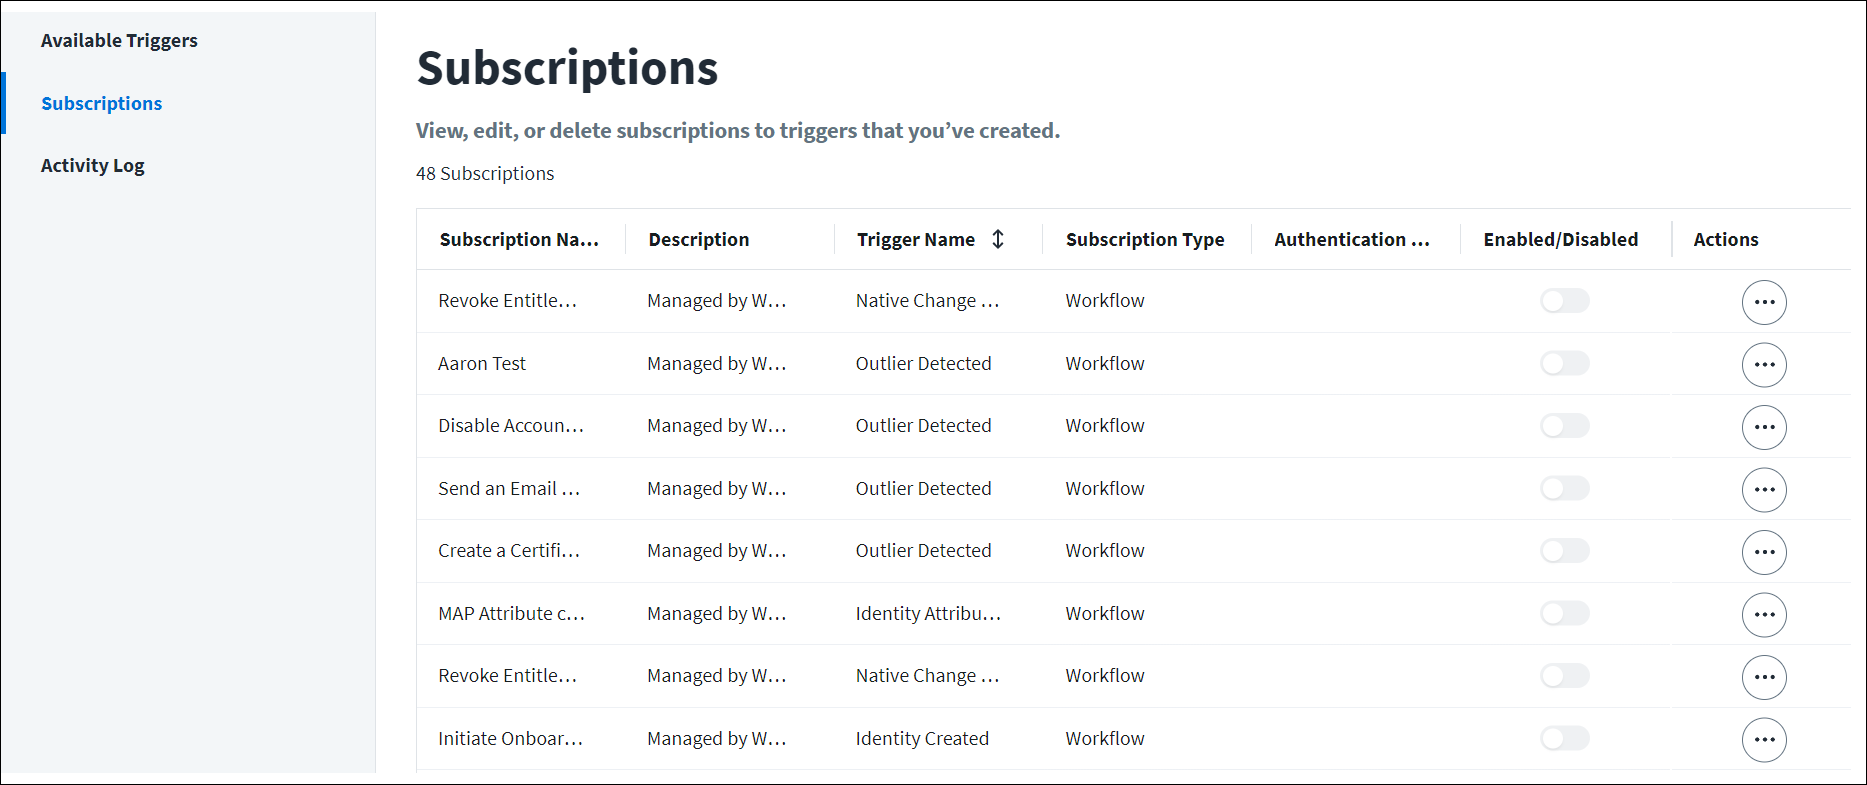
From the Subscriptions page, you can do the following:
-
Select the toggle in the Enabled/Disabled column to enable or disable the subscription.
-
Select the Menu icon beside a subscription to:
- Edit an existing subscription.
- Delete that subscription.
- View the Activity Log for that specific trigger.
- Select Test Subscription to send a test of this trigger using mock data.
-
Select Activity Log in the left menu to see a complete list of activity for all subscriptions in your org. Successful executions are stored for at least 24 hours, and unsuccessful executions are stored for at least 48 hours. A maximum of 2,000 total executions are displayed.
Documentation Feedback
Feedback is provided as an informational resource only and does not form part of SailPoint’s official product documentation. SailPoint does not warrant or make any guarantees about the feedback (including without limitation as to its accuracy, relevance, or reliability). All feedback is subject to the terms set forth at https://developer.sailpoint.com/discuss/tos.