Configuring Source Account Provisioning
When a user is granted access on a source where they don't already have an account, an account is created for them as part of the provisioning process. This applies regardless of how the provisioning action was initiated.
When a new account is created on a source, the attributes on that account must be populated with values. Each source can have its own configuration that specifies which attributes to include in account creation and how to set their values.
On direct connect sources, Identity Security Cloud automatically creates the account based on the configurations in the Create Account page. For flat file sources, Identity Security Cloud is not directly connected to the source and therefore is unable to push changes to the external system. Instead Identity Security Cloud creates a provisioning task containing the attribute values for the new account, assigns it to the source owner, and sends a notification email so they can create the account manually.
Notes
- To disable automatic account changes on a direct connect source, you can use the Update Source API and disable the PROVISIONING and ENABLE features. When account changes are required for this source, manual work items will now be created and sent to the appropriate user. These work items are automatically generated and cannot be disabled.
- Accounts that have been created by Identity Security Cloud have the account attribute
manuallyCorrelated=true.
Editing the Account Creation Configuration
Most source types have predefined attributes used for account creation, but you can edit the way they are mapped. Refer to the connector documentation for source-specific details and information on default account attributes.
If your org has licensed SailPoint application onboarding ![]() , you can view account attribute mapping suggestions to increase the efficiency of account provisioning. Refer to Using Recommendations to Provision Accounts.
, you can view account attribute mapping suggestions to increase the efficiency of account provisioning. Refer to Using Recommendations to Provision Accounts.
- Go to Admin > Connections > Sources.
- Select or edit the source you want to update.
- In the Account Management section, select Create Account.
-
In Account Attribute Mappings, for each source attribute, select a mapping type and set the related attributes:
-
Identity Attribute - Use an identity attribute’s value to set the account attribute. For example, to use the identity’s work email address to set an account attribute value, select Identity Attribute and then choose Work Email from the Attribute list.
Important
The built-in Manager identity attribute can be used to set an account attribute in the Create Account definition. However, it cannot be used in attribute sync. If you need to sync users' manager names to their source accounts, define a custom identity attribute (for example, managerToSync) and configure its mapping to populate it with the user's manager name. Then use that attribute in both your Create Account definition and Attribute Sync configuration.
-
Generator - Generators compute a value for the account attribute, usually based on a pattern you specify. Select the name of a generator that will create the value for the source attribute during provisioning. For example, the Create Unique Account ID generator produces an account ID for each account based on the pattern you enter in the Pattern Used field.
Patterns can use text values and variables. For variables:
- Reference identity attributes with
$(attributeTechnicalName). An attribute's technical name can be found in parentheses next to the attribute in the Mappings tab of the identity profile. For instance, the technical name for the identity attributeFamily Nameis$(lastname). - Optionally, include a counter that generates a unique number with
$(uniqueCounter).
For example, the default pattern for
distinguishedNameon Active Directory sources is:CN=$(firstname).$(lastname)$(uniqueCounter),OU=YOURCONTAINER, DC=YOURDOMAIN.Generator patterns cannot reference other Create Account attributes.
Note
While you can select new attributes for any of these fields, SailPoint recommends using the default values in the Generator fields for the generated attributes. To add generators to the list, your implementation team can create Attribute Generator rules.
- Reference identity attributes with
-
Static - Enter a simple text value or build a value for the attribute using an Apache Velocity script template. Static values use the same Velocity syntax as Static Transforms. These scripts can reference other account attributes defined higher in the Create Account list with
$attributeName.Static values cannot reference identity attributes.
-
Disable - Select this option to omit the attribute when creating a new account.
- You can add mappings for existing attributes or create attributes to use in your create account configuration.
- Select Save when you've finished mapping the source attributes.
-
API Configurations
- To change the set of account attributes listed in the definition, you can use the update provisioning policy API. However, SailPoint recommends using the BeforeProvisioning rule for most cases. For more information, refer to the Developer Community.
- You can also use the create provisioning policy API to specify attributes for other operations, such as account updates.
- Use the API to create or modify these definitions when you need to set attribute values through transforms for more complex calculation logic.
Adding Existing Attributes
You can add existing account attributes to the create account configuration so those attributes are assigned values during provisioning actions.
- Go to Admin > Connections > Sources.
- Select or edit the source you want to add account attributes to.
- In the Account Management section, select Create Account.
- At the bottom of the list of attributes, select Add Mapping.
- Select Add Existing Attribute.
- Select the attribute to add from the Account Attribute dropdown list.
- Select Add.
- Update the attribute's provisioning configuration as described in Editing the Account Creation Configuration.
Creating Attributes
You can create attributes in your account creation configuration so values can be provisioned to attributes that exist on your source but aren't included in your account schema.
This attribute must exist on your source and be supported for the create account operation. Refer to the Connector documentation to determine which attributes your source supports for account creation.
Note
This attribute will not be included in account aggregations unless it is separately added to the account schema for aggregations.
- Go to Admin > Connections > Sources.
- Select or edit the source you want to update.
- In the Account Management section, select Create Account.
- At the bottom of the list of attributes, select Add Mapping.
- Select Create New Attribute.
- In the Attribute Name field, enter the name of the attribute to add as it appears on the source. This field is case-sensitive.
- Select Add.
- Update the attribute's provisioning configuration as described in Editing the Account Creation Configuration.
Editing the Attribute List
Attribute values are calculated for an account in the order in which they appear on the Create Account page. You can reorder the attributes in this list so they are provisioned correctly, or remove them from the list entirely.
If an attribute relies on data from another attribute to set its value, the attribute used to calculate the second value must be listed first.
Example
If an account’s email attribute is defined based on its name, the name attribute must come before email in the list to make the name available for building the email address.
- Go to Admin > Connections > Sources.
- Select or edit the source you want to update.
- In the Account Management section, select Create Account.
-
In the list of attributes, use the up or down arrows next to the attributes to reorder them. You can also drag and drop attributes to reorder.
Use the Delete icon
 to remove the attribute from the list.
-
Select Save.
Using Recommendations to Provision Accounts
If your organization has licensed SailPoint app onboarding ![]() , you can receive suggestions on attribute mappings you can use to improve the efficiency of your account provisioning. The number and quality of account mapping recommendations depend on the quality of your identity data and account data.
, you can receive suggestions on attribute mappings you can use to improve the efficiency of your account provisioning. The number and quality of account mapping recommendations depend on the quality of your identity data and account data.
To use recommendations to provision accounts:
- Go to Admin > Connections > Sources.
- Select or edit the source you want to use recommendations on.
-
In the Account Management section, select Create Account.
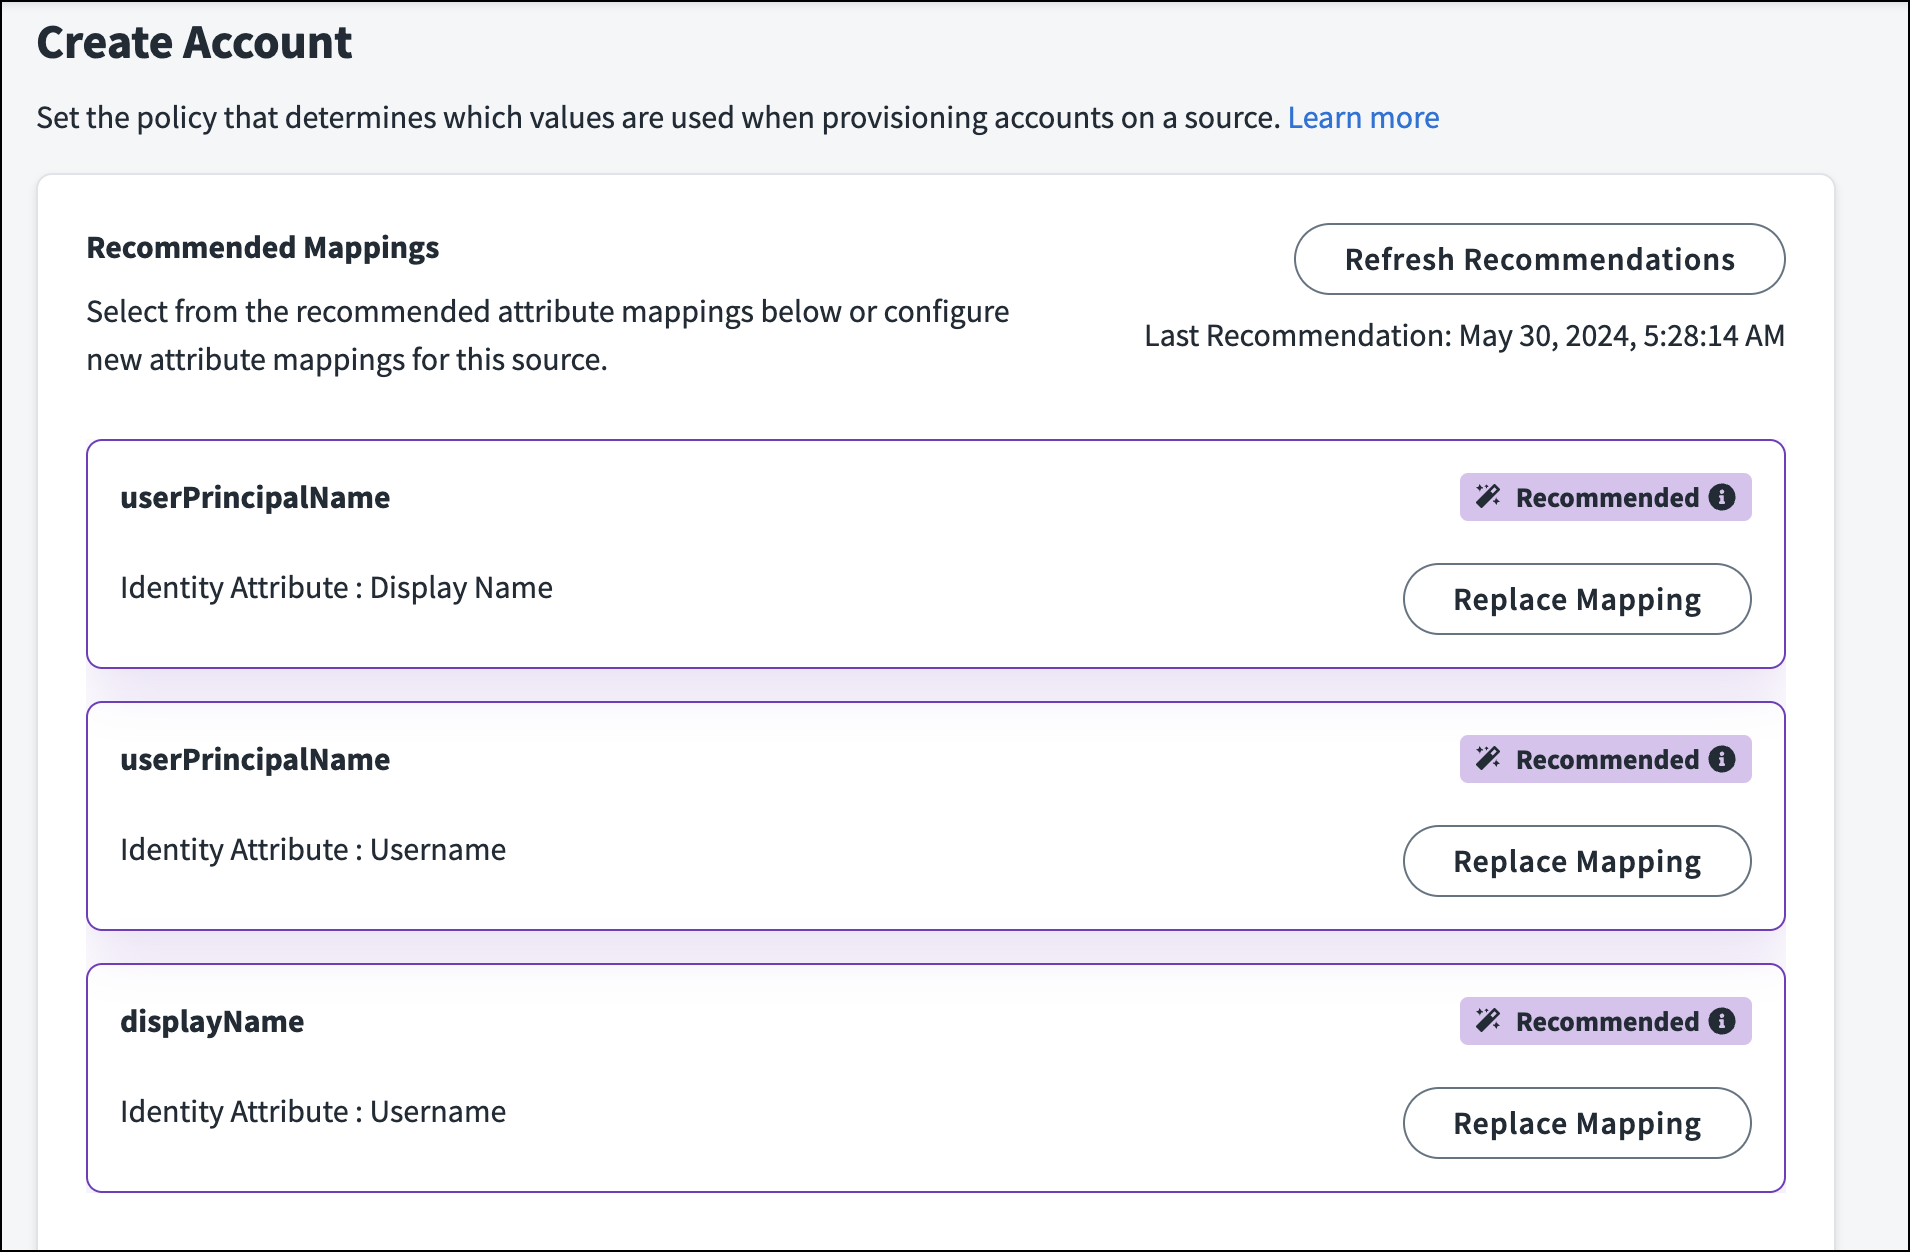
-
If you do not see recommendations, select Refresh Recommendations. Recommendation generations can take several minutes.
Note
Recommendations are provided based on how well they match your account attributes. By default, recommendations that match fewer than 50% of your accounts are filtered out. You can select the Filter icon
 to change this threshold percentage. To view more recommendations, lower the accuracy percentage. If you have too many recommendations, increase the accuracy threshold to return the best matching recommendations.
 -
You can select Why was this recommended? on a mapping suggestion to view the percentage of values on the selected account attribute that match the value of the suggested identity attribute.
- To add an attribute, select Add Mapping and choose an existing attribute, or create an attribute for your provisioning policy. Select Add.
- To replace an existing mapping, select Replace Mapping. If multiple identity attributes can fit with an account attribute, select the attribute pairing that best fits your needs.
-
Identity Security Cloud maps account attributes one at a time in the order they are listed in the Account Attribute Mappings form. Use the up or down arrows next to the attributes to reorder them. You can also drag and drop attributes.
Use the Delete icon
to remove the attribute from the list. -
When you have completed your mapping configuration, select Save.
Refer to Account Provisioning Recommendations for information on how recommendations are generated.
Dismissing Recommendations and Leaving Feedback
If you don't want to use a recommended criteria pair, you can dismiss the recommendation to prevent it from being shown in the future. You'll be given a prompt requesting feedback on why you dismissed the recommendation.
You can select one or more of the following options:
-
The recommended identity attribute does not match enough account attributes.
-
Other - this opens a free text field for you to enter your feedback.
After leaving feedback, select Send. Feedback is reviewed to improve the quality of future suggestions.
Select Dismissed to view the recommendations you've hidden. You can add dismissed recommendations to your profile configuration from here or select Give Feedback to reopen the feedback prompt for that recommendation.
Best Practices for Account Attribute Definitions
Refer to the following best practice documents for guidance on these common account-creation requirements.
- Generating Usernames in Identity Security Cloud
- Provisioning with Passwords in Identity Security Cloud
- Provisioning Multi-Valued Attributes
If you need additional help with these configurations, contact SailPoint Services.
Documentation Feedback
Feedback is provided as an informational resource only and does not form part of SailPoint’s official product documentation. SailPoint does not warrant or make any guarantees about the feedback (including without limitation as to its accuracy, relevance, or reliability). All feedback is subject to the terms set forth at https://developer.sailpoint.com/discuss/tos.