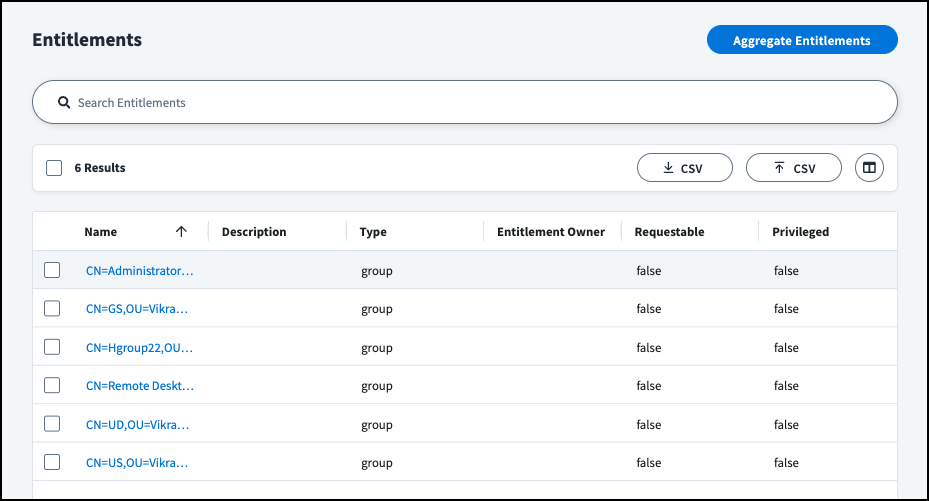
Loading Entitlements
Entitlements are the access rights an account has on a source. Each source’s account schema specifies which account attributes represent its entitlements. When you aggregate accounts, the accounts are marked with the entitlements they have, creating a simple representation of the entitlements in the source’s entitlement catalog.
Many sources also contain enhanced data about their entitlements, such as display names, that can help users better understand what they mean. You can also collect that information from the source through a separate process called entitlement aggregation.
Though not mandatory, it is both common and recommended to define an entitlement type and run entitlement aggregations to collect this information, providing these important benefits:
- It defines the entire catalog of entitlements associated with the source, regardless of whether they're already associated with accounts.
- It can aggregate additional attributes for each entitlement, including display names, descriptions, and relationships to other entitlements.
- It allows entitlements aggregated as account attributes to be linked to the entitlement details. Refer to Managing Source Account Schemas for more information.
Creating and Managing Entitlement Types
Each source can have at least one entitlement type, and many support multiple entitlement types. Each entitlement type has a schema that defines its attributes - the enhanced information you want to aggregate about that type. Most direct connect sources come with an entitlement type and schema configured by default.
You can edit the default schema to fit the data in your source. If your direct connect source doesn't have an entitlement schema by default, you can create a new one.
Creating an Entitlement Type
For sources that have no predefined entitlement type or that support multiple entitlement types, you can create a new entitlement type and manage its schema through the user interface.
- Go to Admin > Connections > Sources.
- Select or edit the direct connect source you want to update.
-
In the Entitlement Management section, select Entitlement Types.
If you already have one or more types of entitlements for this source, they are listed here.
Notes
- Not all source types include the Entitlement Types screen. If that option does not appear, the source's entitlement type schema can only be edited through the API.
- An entitlement type cannot be used for multiple attributes on the same account schema.
-
Select Create Entitlement Type.
-
Enter a name and description for this entitlement type.
Important
- The name you give your entitlement type must exactly match the name of the entitlement type as it appears on the source. This is sometimes called the native object type.
- Do not create an entitlement type called
permissionwith any capitalization. Entitlements of the typepermissionconsidered direct permissions, and they are are aggregated and handled differently than other entitlements. Refer to Entitlement Permissions for more details.
-
To aggregate indirect permissions granted through this type of entitlement, select the Include permissions in aggregations checkbox. This information appears in certifications to aid decision-making about access to the entitlements.
-
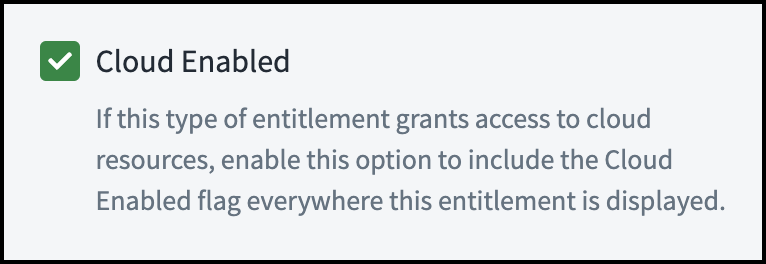
If you use Cloud Access Management or SailPoint CIEM, and this entitlement type can grant access to a cloud resource, select the Cloud Enabled checkbox.
-
Select Save.
Your new entitlement type is added to the list. You can then define the entitlement type schema attributes.
Defining Entitlement Type Schema Attributes
-
Within the entitlement type on the Entitlement Types page, select Add Attribute to add an attribute to this entitlement type's schema.
-
Enter a name and description for this attribute.
Important
- The attribute's name should exactly match the attribute name in the source system.
- Entitlement attribute names cannot include periods.
- Attributes cannot exceed 128 characters.
-
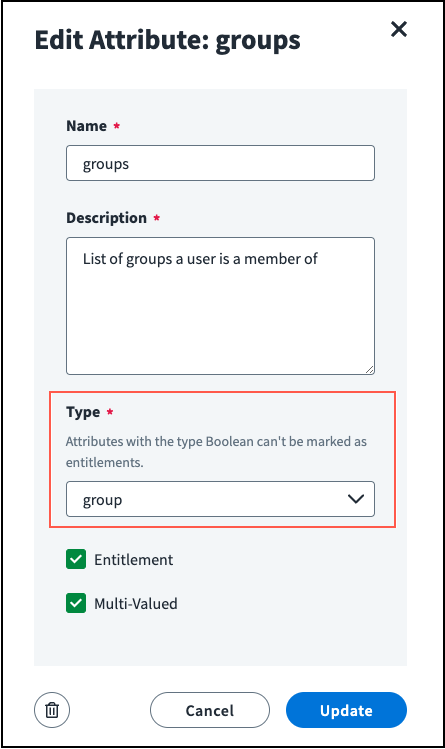
Under Type, choose the type of value this attribute will contain. You can choose string, long, int, or boolean, or you can link entitlement types by choosing another entitlement type.
-
To mark this attribute as an entitlement, select the Entitlement checkbox. This option should only be used if you selected another entitlement type from the Type dropdown list.
- To configure this attribute to support multiple values, select the Multi-Valued checkbox.
- If you want to add another attribute after saving this one, select the Add Another checkbox.
-
Select Save.
Important
- When you create the first attribute in an entitlement schema, it is automatically marked as both the Entitlement Name and Entitlement ID. This can be edited later.
- Be sure to select the correct entitlement name and ID before aggregating entitlements of this type. Changing these attributes later can cause duplicate entitlements to be aggregated.
-
Repeat the above steps for each attribute you want to include in this entitlement schema.
-
If necessary, edit which attributes are listed as the Entitlement Name and ID by editing the entitlement type.
Note
Populated entitlement schema attributes will appear in certifications as additional attributes within the entitlement's details page. Reviewers can use these attributes to help inform their decisions.
Linking Multiple Entitlement Types
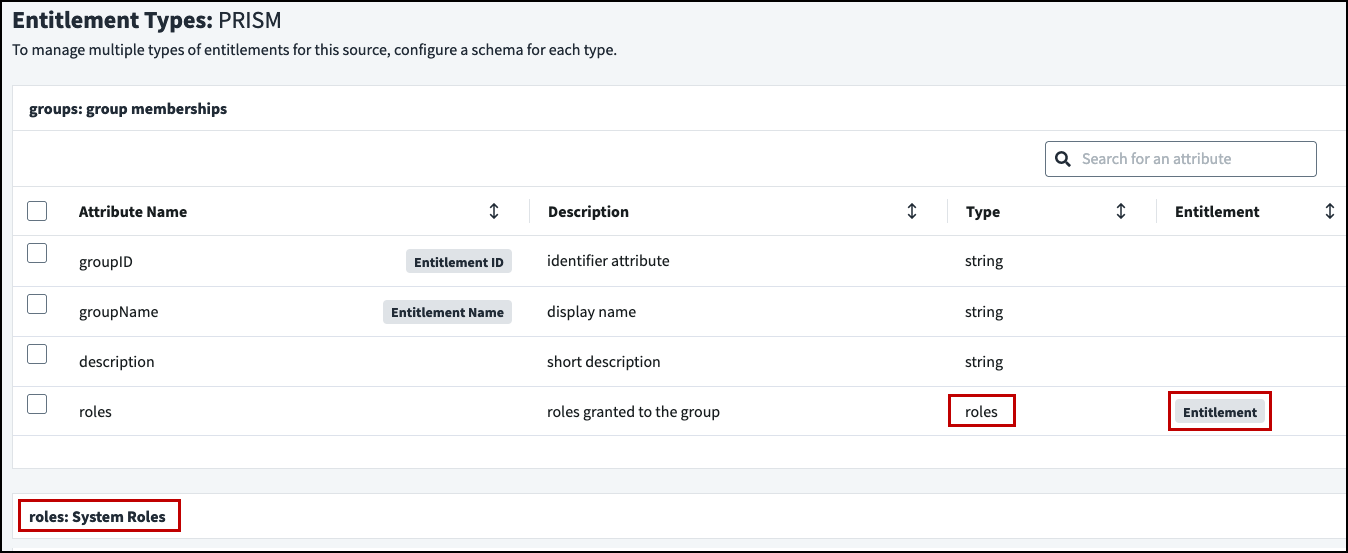
In systems with multiple types of entitlements, one entitlement type might contain and grant entitlements of another type. In that case, the Type of the attribute that connects them should be set to the other entitlement type.
For example, if a system has both group and roles as entitlement types, and a group can grant role entitlements to its members, then the group schema will contain an entitlement attribute of type roles, linking groups to the roles they grant.
Note
If you choose an entitlement type as an attribute's Type, Entitlement is automatically selected.
Connecting Account Data to Entitlement Type
When you have an entitlement type and schema, your account schema's entitlement attribute needs to be connected to the entitlement data by setting the Type of that attribute to the entitlement type.
- Go to Admin > Connections > Sources.
- Select or edit the direct connect source with the account schema you want to update.
- In the Account Management section, select Account Schema.
- Select Actions
 > Edit on the attribute marked as an Entitlement.
 -
Set the Type to the entitlement type you want and select Update.
Editing an Entitlement Type
You can edit the entitlement schema on any source through a Update Source Schema (Full) API call. For source types that support UI creation of entitlement types, you can also edit them in the UI.
- Go to Admin > Connections > Sources.
- Select or edit the direct connect source with the entitlement schema you want to update.
- In the Entitlement Management section, select Entitlement Types.
- On the entitlement type, select Actions > Edit Type.
- Make any necessary changes, such as adding the permissions in aggregations or changing which attributes are used as the Entitlement ID and the Entitlement Name.
-
If you use Cloud Access Management or SailPoint CIEM, and this entitlement type can grant access to a cloud resource, select the Cloud Enabled checkbox.
-
Select Update.
If you changed the attributes marked as the Entitlement ID and Name, you'll be asked to confirm your selections. Updating these attributes after aggregating your entitlements can cause duplicate entitlements to be aggregated.
-
To edit attributes within the entitlement type, select Actions
> Edit on the attribute row. - You can edit and add schema attributes as you did when creating the entitlement type.
- To mark multiple attributes as multi-valued, select the checkboxes on the rows and select Multi-Valued.
Deleting an Entitlement Type
To delete an entitlement type and its associated schema, select Actions ![]() > Delete Type.
> Delete Type.
You can delete schema attributes individually by selecting Actions ![]() > Delete on the attribute row or in bulk by selecting the checkboxes on the attribute rows you want to delete and choosing Delete Attributes.
> Delete on the attribute row or in bulk by selecting the checkboxes on the attribute rows you want to delete and choosing Delete Attributes.
Deleting an entitlement type does not delete the associated entitlements. Entitlements of that type will not be aggregated or updated until another type is created for them. Refer to Deleting Entitlements for more information.
Loading Entitlements for a Direct Connect Source
You can aggregate entitlements from a direct connect source just as you can aggregate accounts: manually or on a schedule.
To aggregate entitlements from a direct connect source:
-
Go to Admin > Connections > Sources.
-
Select or edit the direct connect source you want to aggregate entitlements on.
-
In the Entitlement Management section, select Entitlement Aggregation.
-
In the Entitlement Aggregation section:
-
For source types that do not support entitlement type edits through the UI, choose whether to perform a one-time manual aggregation or to schedule recurring aggregations.
-
For source types that support entitlement type edits and aggregations through the UI, choose whether to perform a one-time manual entitlement type aggregation or to schedule recurring entitlement type aggregations.
-
Starting a Manual Aggregation
From the Entitlement Aggregation page, select Start Aggregation to start a manual aggregation.
Your aggregation begins immediately and occurs once. Information about the most recent entitlement aggregation is displayed under Latest Entitlement Aggregation. To view the list of all entitlement aggregations, go to the Aggregation History page.
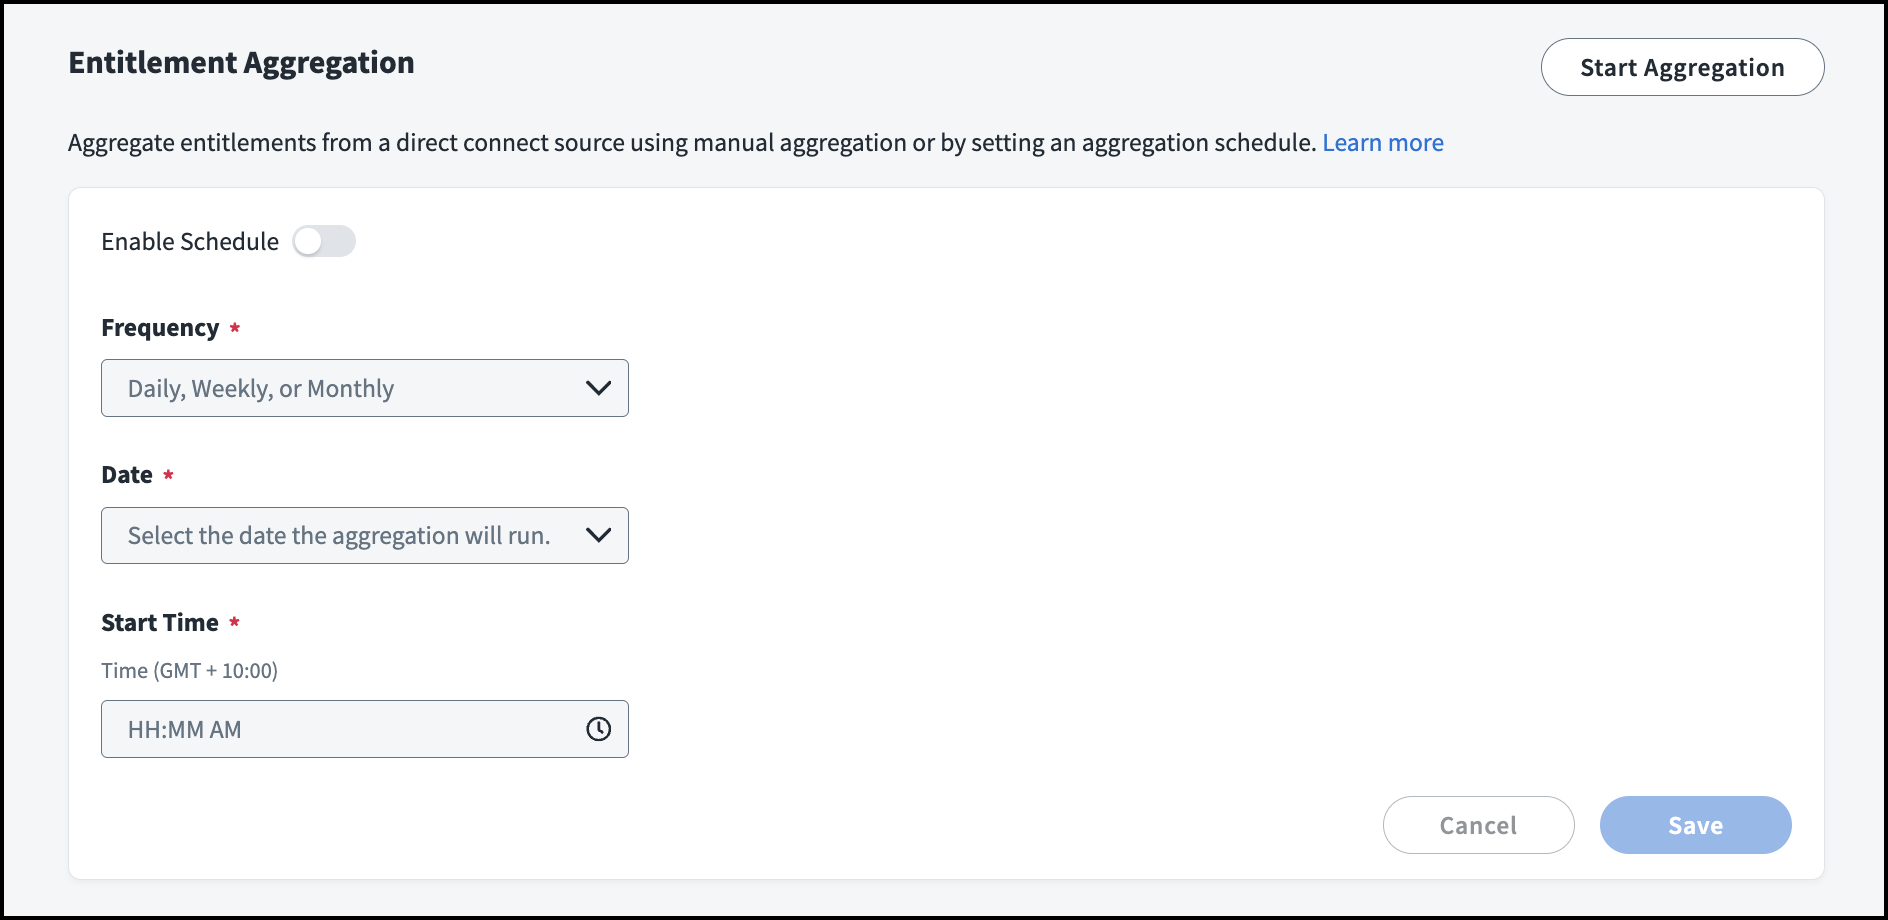
Scheduling Recurring Aggregations
-
From the Entitlement Aggregation page, select Enable Schedule.

-
Choose how often the aggregation should run:
- Daily: choose starting time and frequency
- Weekly: choose day of week and time
- Monthly: choose day of month and time
Notes
- If you choose Daily, the time period selected in the Reoccurs Every field determines how often the aggregation occurs after the time selected. For example, if you schedule a daily aggregation for 5 PM to recur every 4 hours, the aggregation will run only at 5 PM and 9 PM, depending on the load.
- The time zone (GMT offset) for the entitlement aggregation schedule is determined by the time zone set for the connected virtual appliance cluster.
-
Select Save
The aggregation is added to the processing queue at the time you defined. Other queued or in-progress operations might delay the start of your aggregation.
Aggregating Specific Entitlement Types
Some source types support entitlement type edits and aggregation through the UI. For those sources, you can specify which entitlement types are aggregated on a one-time manual basis, or schedule recurring aggregations.
To manually aggregate by specific entitlement type:
-
In the Entitlement Aggregation page, select Specific Types and choose which entitlement types will be aggregated for this source:
-
Select Start Aggregation to start a manual aggregation.
Your aggregation begins immediately and occurs once. Information about the most recent entitlement aggregation is displayed under Latest Entitlement Aggregation. To view the list of all entitlement aggregations, go to the Aggregation History page.
To schedule recurring entitlement type aggregations:
-
From the Entitlement Aggregation page, select Enable Schedule.
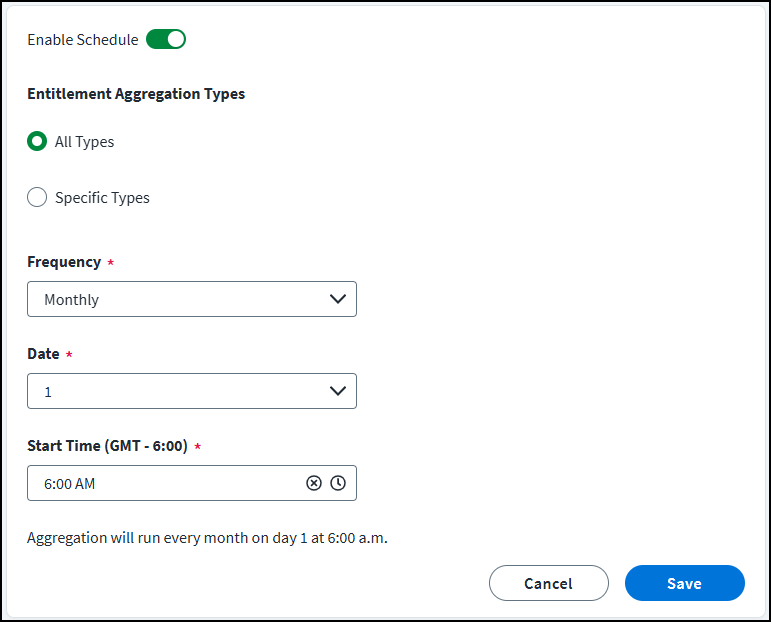
-
Select Specific Types and choose which entitlement types will be aggregated for this source.
-
Choose how often the aggregation should run:
- Daily: choose starting time and frequency
- Weekly: choose day of week and time
- Monthly: choose day of month and time
Notes
- If you choose Daily, the time period selected in the Reoccurs Every field determines how often the aggregation occurs after the time selected. For example, if you schedule a daily aggregation for 5 PM to recur every 4 hours, the aggregation will run only at 5 PM and 9 PM, depending on the load.
- The time zone (GMT offset) for the entitlement aggregation schedule is determined by the time zone set for the connected virtual appliance cluster.
-
Select Save
The aggregation is added to the processing queue at the time you defined. Other queued or in-progress operations might delay the start of your aggregation.
Loading Entitlements for a Flat File Source
You can aggregate entitlements from a flat file source by uploading a flat file containing your entitlement data. It is not possible to schedule recurring entitlement aggregations or configure multiple entitlement types for a flat file source. The most common type of flat file source is a delimited file.
To upload entitlements from a flat file source:
- Go to Admin > Connections > Sources.
- Select or edit the flat file source you want to add entitlements to.
- In the Entitlement Management section, select Entitlement Aggregation.
- Use the dropdown list to select the entitlement type to aggregate.
-
If you are creating a file to upload for the first time, select Download Entitlement Schema to download the .csv template with the required columns.
All default entitlement schemas will include at least these columns:
- id - the unique identifier for the entitlement
- name - the technical name for the entitlement
- displayName - the name for the entitlement that displays in the Identity Security Cloud UI
- description - the description of the entitlement visible in the UI and during certifications
The id column is required for each entitlement. This is the unique identifier for the entitlement and is matched to the values in the entitlement column of the account schema.
Note
The file you upload for a source must use the column headings included in the entitlements template for that source. Column headings differ based on the type of source you're downloading entitlements from.
-
Enter your entitlement information in the .csv file with the required columns or edit your existing entitlements file to include the template's column headings.
Important
- Names and descriptions should help users to make good decisions when reviewing access requests or certifications.
- You cannot change the columns by rearranging, adding, or omitting columns in this file. To change these fields, you must modify the entitlement schema.
- The file you upload for a source must not exceed 1 MB.
If you need help setting up this entitlement file, contact SailPoint Expert Services.
-
In the Entitlement Aggregation section of the flat file source, upload your entitlement aggregation .csv by selecting the Upload icon
 or dragging and dropping the file.
While an aggregation is running, the Start Aggregation button will be disabled. You can view the progress of this aggregation in the Account Aggregation section on this page.
You can view aggregation activity on the Aggregation History page in the Aggregation History and Connections section.
After uploading this file, you can edit entitlements as described in Managing Entitlement Details. You can add or remove entitlements by importing a new file.
Note
For both flat files and direct connection aggregations, Identity Security Cloud truncates entitlement descriptions longer than 2000 characters.
Troubleshooting Entitlement Aggregation Issues
The following list describes common aggregation issues that may occur and their typical causes:
Entitlements that contain emojis or the + character in their names are not aggregating.
Entitlement names do not support emojis or the + character. Identity Security Cloud supports the UTF8MB3 character set, which excludes emojis and some special characters. Review information about the Basic Multilingual Plane for details.
Documentation Feedback
Feedback is provided as an informational resource only and does not form part of SailPoint’s official product documentation. SailPoint does not warrant or make any guarantees about the feedback (including without limitation as to its accuracy, relevance, or reliability). All feedback is subject to the terms set forth at https://developer.sailpoint.com/discuss/tos.