Creating Identity Profiles
Most organizations have one or two authoritative sources: sources that provide a complete list of their users, such as an HR source or Active Directory. When you define a source as authoritative in Identity Security Cloud, an identity is created for each of its accounts.
You make a source authoritative by configuring an identity profile for it. The identity profile determines:
- Security settings for the identities associated to the identity profile, such as authentication settings.
- Mappings for populating identity attributes for those identities.
- The access granted to or removed from those identities when Provisioning is enabled and their lifecycle states change.
Prioritizing Authoritative Sources
Each identity can be associated to only one identity profile. If a user can exist in multiple authoritative sources for your organization, it is important to set the priority order of those sources' identity profiles correctly. Identities will be associated with the highest priority identity profile where they have an account on its authoritative source.
By default, identity profiles are prioritized based on the order they were created. The earlier an identity profile is created, the higher priority it is assigned.
If you need to change this order, you can use the Update Identity Profile API to change the identity profiles' priority attribute values.
Setting Up Identity Profiles
-
Go to Admin > Identity Management > Identity Profiles.
-
Select Create New.
-
Enter a name for your identity profile. As a best practice, describe the source for this identity profile.
-
Choose a source from the dropdown list. This source will become an authoritative source, and the source's users will become identities in Identity Security Cloud.
-
Enter a description for this identity profile.
-
Configure the identity profile's sign-in and security settings:
Invitation Options
- Unless you configure external authentication options (such as pass-through authentication or single sign-on), only invited users can sign in to your tenant. You can choose to invite users manually or automatically. If you have the provisioning service enabled for your org, you can configure the identity profile to automatically invite users to join Identity Security Cloud when they enter a specific lifecycle state.
- Refer to Inviting Users to Register with Identity Security Cloud for details.
Sign-in Method
< Site >User Name & Password - Users in this identity profile sign in to Identity Security Cloud with the username and password created during their registration process.- Directory Connection - Users loaded from the identity profile sign in using the password associated with the source selected from the Authentication Source dropdown list. This type of authentication is also referred to as pass-through authentication.
- Multifactor Authentication - Users in this identity profile sign in using a mobile authenticator application such as Google Authenticator or Duo Mobile. Admins will still be required to use MFA even if this checkbox is disabled on the identity profile.
Password Reset and User Unlock Settings
- Enable Two-Factor Authentication - Select this option to require users to complete two (rather than the standard one) of the enabled Password Reset and User Unlock Methods before resetting their passwords or unlocking their Identity Security Cloud accounts. Refer to Enabling Two-Factor Authorization for more information.
- Mask Phone Numbers - Select this option to enable phone number masking when users are resetting their passwords.
Block Access From
-
Off Network - If you select this option, users with IP addresses outside of your specified network block won't be able to sign in to Identity Security Cloud. Configure a network block in Restricting Identity Security Cloud Access.
Caution
If you select Off Network without specifying a network definition, all users associated with the identity profile will be blocked from accessing Identity Security Cloud.
-
Untrusted Geography - You might have configured a list of untrusted countries. If you select this option, users in those countries won't be able to access Identity Security Cloud.
Alternatively, you might have created a list of trusted countries. If this is the case, and you select this option, users outside of those trusted countries won't be able to access Identity Security Cloud.
Password Reset and User Unlock Methods
- Select the checkbox beside the options you want users to have for resetting their Identity Security Cloud passwords or unlocking their accounts. You can learn about the available methods in Configuring User Authentication for Password Resets.
-
Select Save.
Note
An identity profile cannot be created while an account aggregation is running.
Now that you've set up an identity profile, you are ready to map the identity profile attributes to the appropriate source attributes.
Defining Identity Profile Attributes
Mappings define how each identity profile's attributes, also known as identity attributes, should be populated for its identities. Identity attributes can be mapped from account attributes on any source and can differ for each identity profile.
For example, your Employees identity profile could map most attributes from your HR system while the email attribute is sourced from Active Directory. At the same time, contractors' information might come exclusively from Active Directory.
You can also configure and apply a transform or rule if you need to make changes to a source value in setting your identity attributes.
Important
The special characters * ( ) & ! . cannot be used in the source attribute mapped to a username or alternative sign-in attribute. If the username or other sign-in attribute includes any of these special characters, the user associated with the identity may not be able to sign in to or otherwise access your tenant.
Mapping Identity Attribute Values
The Mappings page contains the list of identity attributes. This includes both the default attributes included with Identity Security Cloud and identity attributes you have added for your site.
Default attributes should not be deleted. Contact SailPoint Support for assistance.
Default Attributes
The following attributes are available by default in newly-created tenants:
- city
- costCenter
- country
- department
- displayName
- endDate
- firstname
- identificationNumber
- inactive
- initials
- lastname
- licenseStatus
- location
- locationCode
- middleName
- nextProcessing
- organization
- personalEmail
- phone
- postalCode
- preferredName
- startDate
- state
- streetAddress
- timezone
- title
- uid
- workPhone
To map identity attributes for identities in an identity profile:
-
Open the identity profile you want to edit and select Mappings.
In some cases, Identity Security Cloud sets a default mapping from attributes on the account source.

Required Attributes
- The identity attributes User Name (uid), Work Email (email), and Last Name (lastname) are required. They must be set with a mapping for each identity profile and cannot be null for any identity.
- User Name must be unique across all identities from any identity profile.
- Work Email cannot be null but is not validated as an email address.
-
To change or set the source attribute mapping for an identity attribute:
- Select the desired source from the Source dropdown list.
- Select a source attribute from the Attribute dropdown list.
-
If an identity attribute cannot be set directly from a source attribute, you can use a transform or rule to calculate the attribute value.
-
To apply a transform, choose a source and an attribute, then choose a transform from the Transform dropdown list.
Transforms
Identity Security Cloud provides the following simple transforms:
- E.164 Phone Format - Converts a phone number into the E.164 standard for phone numbers.
- ISO3166 Country Format - Converts the name of a country into the two-character ISO 3166 format for countries.
- Remove Diacritical Marks - Converts diacritical marks to their base characters.
- ToLower - Converts the value in the selected attribute to lowercase letters.
- ToUpper - Converts the value in the selected attribute to uppercase letters.
Additional transforms available for tenants onboarded after February 7, 2024.
- RFC5646 - Converts an incoming string into an RFC 5646 language tag value.
- User Preferred Name - Converts an identity’s Display Name value using the Preferred Name value when it exists over the Given Name value. The Family Name value is then appended to form the complete Display Name.
You can combine simple transforms to create complex transforms that perform multiple operations on a single attribute, like automatically calculating an identity's lifecycle state based on the start date attribute. You can also create and upload transforms. Note that if you contact SailPoint Services to help with this effort, it will be considered a billable service.
Important
- To allow identities with this profile to use international phone numbers, you must apply the E.164 Phone Format transform to the Work Phone attribute.
- Adding a multi-value attribute to a mapping transform will take the first value only and transform it to a single value attribute.
-
To use a rule, choose Complex Data Source from the Source dropdown list and select a rule from the Transform dropdown list.
Note
Rules can provide more flexibility to perform complex calculations of identity attributes, modify provisioning instructions, interact with a connector, and more. Unlike transforms, rules must be reviewed by SailPoint Services before they can be implemented for your org. Refer to the Developer Community Rules documentation for guidelines and review information.
-
-
To unmap an attribute, select None from the Source dropdown list.
Special Attributes
- If you have Provisioning and want to use lifecycle states to perform provisioning tasks, the Lifecycle State attribute must be mapped.
- If you plan to use functionality that requires users to have a manager, make sure the Manager Name attribute is mapped, and then define manager correlation logic for the source. Download an audit report for a list of identities without managers.
Adding Identity Attributes
You can define custom identity attributes for your site. Any attribute you add under any identity profile will appear in all of your identity profiles, but you do not have to map and use all attributes in all identity profiles.
To add a new attribute for your site:
-
Select Add New Attribute at the top of the Mappings page.
-
In the Add New Attribute overlay, enter the name for the new attribute. The Name field only accepts letters, numbers, and spaces. The Technical Name field populates automatically with a camel case version of the name you typed in the Name field.

-
Select Add to save and add the new attribute.
-
Map the attribute to a source and source attribute as described in the mapping instructions above.
-
Repeat these steps for any additional attributes, and then select Save.
-
Use the Preview feature to verify your mappings. Make any needed adjustments and save your changes.
-
Select Apply Changes at the top of the page to apply your changes to the identity profile's identities.

Verifying Mappings with Preview
Use preview to verify your mappings using your data.
-
Select Preview at the upper-right corner of the Mappings page of an identity profile.
-
Select an Identity to Preview and verify that your mappings populate their identity attributes as expected.
-
To return to the Mappings page to edit or apply your changes, select < Mappings at the top of the page.
Deleting Identity Attributes
You can delete custom attributes you no longer need. This deletes them from all identity profiles. Be mindful of where the attribute may be in use in your implementation and the implications of deleting them.
To delete a custom attribute:
- Select Remove on the attribute you want to delete. This immediately removes the attribute from the mappings list, though it is not yet deleted.
- Select Save.
-
Review the warning message about deleting custom attributes. Select OK to proceed with the deletion, or select Cancel to abort the deletion and restore the attribute to the mappings list.
Note
If you select Cancel, all other unsaved changes will also be reverted.
Impact of Deleting a Custom Identity Attribute
Deleting a custom identity attribute may have unintended consequences.
-
Deleting a custom attribute from an identity profile deletes the attribute from all identity profiles, not just the identity profile you are editing.
You must individually run identity processing on each identity profile in the Identity Profiles list. This is required even if the attribute is not mapped in the identity profile.
-
Deleting the attribute could cause data integrity issues if it's used in other areas of your tenant, such as:
-
Roles whose membership criteria are based on the value of this attribute.
-
The Identity Security Cloud User Name field if it has been configured to use this attribute.
-
A custom app's User Name field if it has been configured to use this attribute.
-
SAML attributes including the attribute maps. Refer to SAML Configuration Guide for details.
-
Rules or transforms that call this attribute in the related code.
This can include calculations to determine:
-
Lifecycle states which could impact provisioning.
-
Exclusion rules which could impact certifications.
-
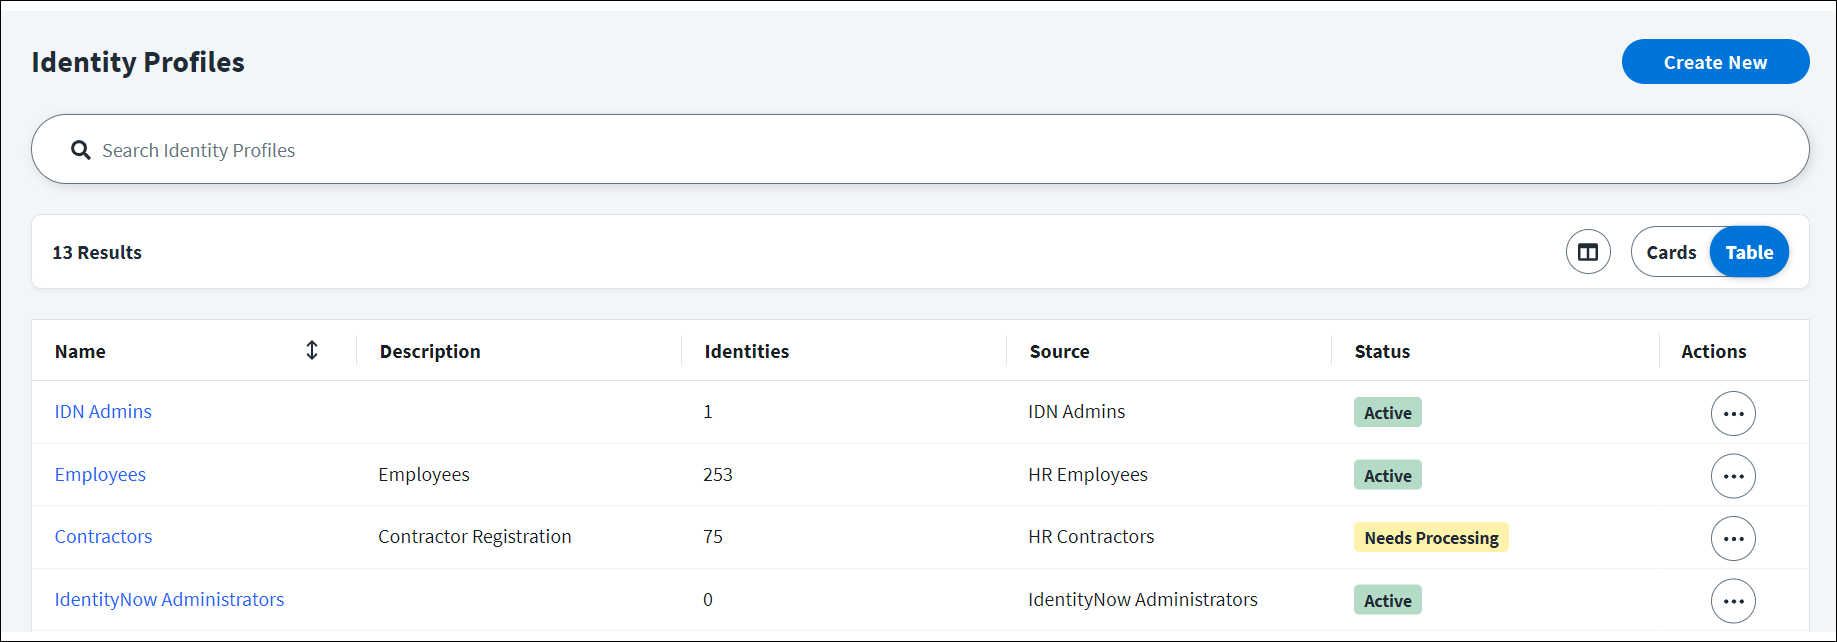
Viewing Identity Profiles
You can view your identity profiles, as well as their identity exceptions, priority, and statuses, by going to Admin > Identity Management > Identity Profiles.
Identity Exceptions
An identity exception occurs when an account on an authoritative source is missing values for one or more of the required attributes. If an identity profile contains identity exceptions, you can select the Identity Exceptions icon ![]() to download a .csv or .pdf file to resolve the identity exceptions.
to download a .csv or .pdf file to resolve the identity exceptions.
Priority
Identity profiles are prioritized based on the order they were created. The earlier an identity profile is created, the higher priority it is assigned. By default, the first identity profile created will be assigned 10 as a priority and will have the highest priority. The next identity profile created will be assigned 20 and will have a lower priority. This pattern continues for each identity profile you create. You can change the priority order of identity profiles through the Update the Identity Profile API. For more information about an identity profile’s priority, refer to Prioritizing Authoritative Sources.
Scheduled Processing
An identity profile will be marked as having scheduled processing if it has an identity attribute mapped to a rule or transform that is tagged with @requiresPeriodicRefresh. For more information, refer to Scheduled Processing.
Status
An identity profile can have an Active or Needs Processing status. For identity profiles that need processing, you can select Actions ![]() > Apply Changes to apply changes made to that identity profile. For example, if you make changes to your mappings, the identity profile needs processing to apply those changes.
> Apply Changes to apply changes made to that identity profile. For example, if you make changes to your mappings, the identity profile needs processing to apply those changes.
Resolving Identity Exceptions
When you aggregate data from an authoritative source, if an account on that source is missing values for one or more of the required attributes, Identity Security Cloud generates an identity exception. A duplicate User Name (uid) also generates an exception. You can resolve identity exceptions by updating the missing attributes in the source.
Note
Identities missing required attributes also appear as Incomplete Identities on the Identities page.
-
Go to Admin > Identity Management > Identity Profiles.
-
Find an identity profile with the Identity Exceptions icon
 . Select either Download CSV or Download PDF to download the report. The CSV option downloads the report as a zip file.
If these buttons are disabled, there are currently no identity exceptions for the identity profile.
-
Review the report and determine which attributes are missing for the associated accounts.
-
Edit the account in the source to resolve the data problem.
-
Manually aggregate the source again or wait for a regularly scheduled aggregation to confirm that the exceptions were resolved.
Identity Security Cloud automatically processes identity data changed in aggregation, so you can be sure you're working with the latest identity data.
Deleting Identity Profiles
When you attempt to delete an identity profile, you'll receive a warning message that describes the implications of deleting the identity profile. Deleting an identity profile:
- Does not delete its account source, but it does make the source non-authoritative.
- Does not delete the source's accounts in Identity Security Cloud or deprovision them from the source system.
- Deletes its identities unless they can be reassigned to other identity profiles in your system. When identities get deleted, all of their source accounts become uncorrelated.
Before deleting an identity profile, verify that any associated identities are not source or app owners. If they are, you won't be able to delete the identity profile until those connections are removed.
To delete an identity profile:
- Go to Admin > Identity Management > Identity Profiles.
- Select the Actions icon
 next to the identity profile you want to delete.
 - Select Delete Identity Profile.
- Select Delete.
Note
An identity profile cannot be deleted while an account aggregation is running.
Documentation Feedback
Feedback is provided as an informational resource only and does not form part of SailPoint’s official product documentation. SailPoint does not warrant or make any guarantees about the feedback (including without limitation as to its accuracy, relevance, or reliability). All feedback is subject to the terms set forth at https://developer.sailpoint.com/discuss/tos.