Snowflake Onboarding
Follow these steps to integrate Snowflake with SailPoint Entro.
Navigation Path
Management → Accounts & Integrations → Add New Account (top right) → Snowflake
Pre-Requisites
-
User with ACCOUNTADMIN in Snowflake
-
User with Admin/Integrator role in SailPoint Entro
Step 1 - Create the Integration Role and User
Login to Snowflake with an ACCOUNTADMIN user. Click on Query Data in the Snowflake homepage.
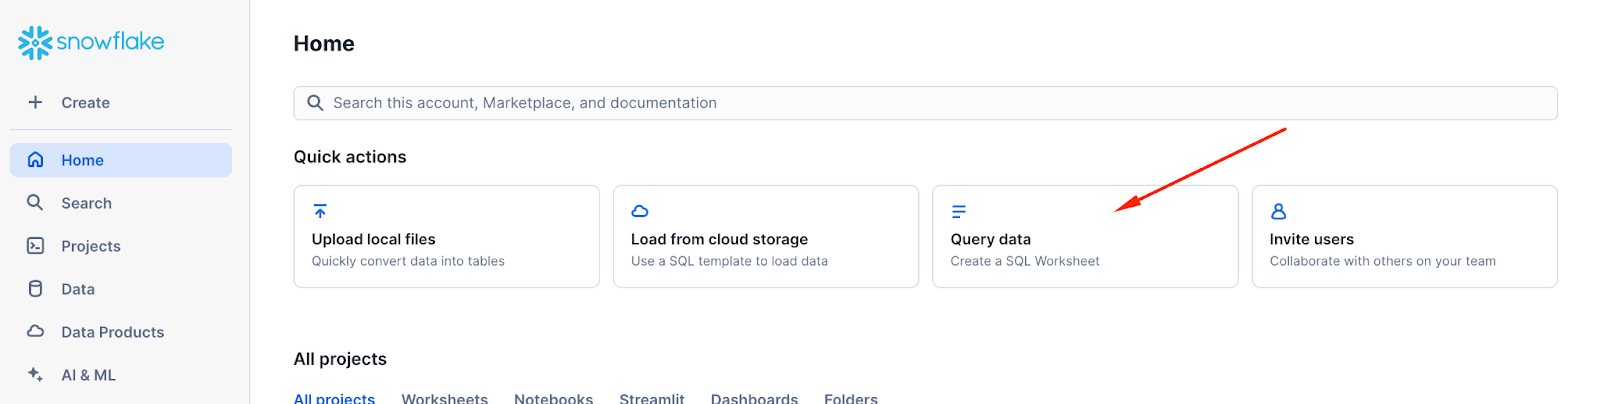
Run the following commands sequentially.
Activate AccountAdmin role
Create SailPoint Entro role
Create SailPoint Entro user
CREATE USER IF NOT EXISTS ENTRO
PASSWORD = '<EnterPassword>'
DEFAULT_ROLE = ENTRO_ROLE
DEFAULT_WAREHOUSE = <AssignToDefaultActiveWH>
MUST_CHANGE_PASSWORD = FALSE;
Note: Do not set a password for this user. The integration authenticates with an RSA key pair, which you will register in Step 3.
Grant the SailPoint Entro role to the SailPoint Entro user
Step 2 - Grant Read-Only Privileges to ENTRO_ROLE
Run the following commands to grant the necessary read-only privileges to the SailPoint Entro role.
Grant the MONITOR privilege at the account level
Grant access to the SNOWFLAKE database where system usage views reside
Grant read-only access to the ACCOUNT_USAGE schema
GRANT USAGE ON SCHEMA SNOWFLAKE.ACCOUNT_USAGE TO ROLE ENTRO_ROLE;
GRANT SELECT ON ALL VIEWS IN SCHEMA SNOWFLAKE.ACCOUNT_USAGE TO ROLE ENTRO_ROLE;
GRANT SELECT ON FUTURE VIEWS IN SCHEMA SNOWFLAKE.ACCOUNT_USAGE TO ROLE ENTRO_ROLE;
Grant read-only access to the ORGANIZATION_USAGE schema
GRANT USAGE ON SCHEMA SNOWFLAKE.ORGANIZATION_USAGE TO ROLE ENTRO_ROLE;
GRANT SELECT ON ALL VIEWS IN SCHEMA SNOWFLAKE.ORGANIZATION_USAGE TO ROLE ENTRO_ROLE;
GRANT SELECT ON FUTURE VIEWS IN SCHEMA SNOWFLAKE.ORGANIZATION_USAGE TO ROLE ENTRO_ROLE;
Grant read-only access to the ORGANIZATION_USAGE schema
GRANT USAGE ON SCHEMA SNOWFLAKE.ACCOUNT_USAGE TO ROLE ENTRO_ROLE;
GRANT SELECT ON ALL VIEWS IN SCHEMA SNOWFLAKE.ACCOUNT_USAGE TO ROLE ENTRO_ROLE;
GRANT SELECT ON FUTURE VIEWS IN SCHEMA SNOWFLAKE.ACCOUNT_USAGE TO ROLE ENTRO_ROLE;
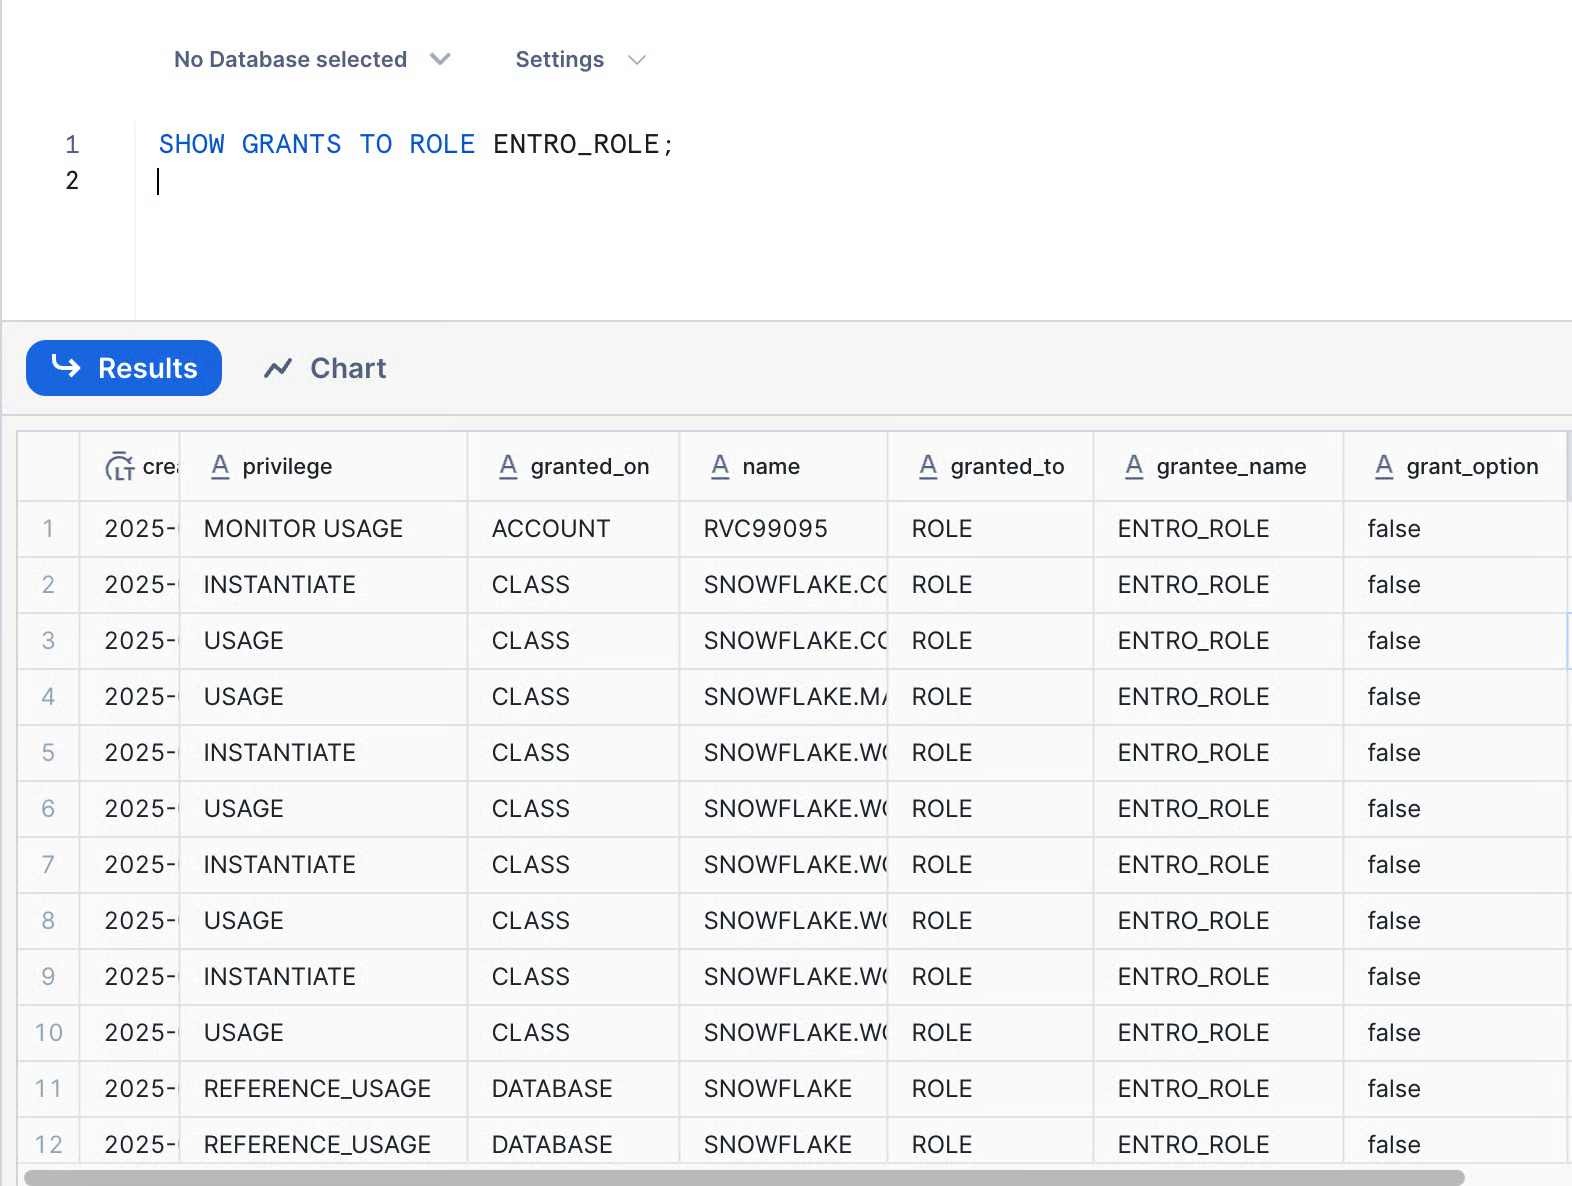
Run the command below to verify that Usage grants have been added to ENTRO_ROLE.
Grant imported privileges
Step 3 - Validate Access
Run the command below to test that ENTRO_ROLE has access to the data.
Validate access as ENTRO_ROLE
USE ROLE ENTRO_ROLE;
SELECT CURRENT_USER(), CURRENT_ROLE();
SELECT * FROM SNOWFLAKE.ACCOUNT_USAGE.USERS LIMIT 1;
Step 4 - Connect Snowflake to SailPoint Entro
-
Connect from the SailPoint Entro Dashboard
Navigate to Management → Accounts & Integrations → Add New Account → Snowflake
-
Fill in account details
Complete the following fields in the SailPoint Entro form:
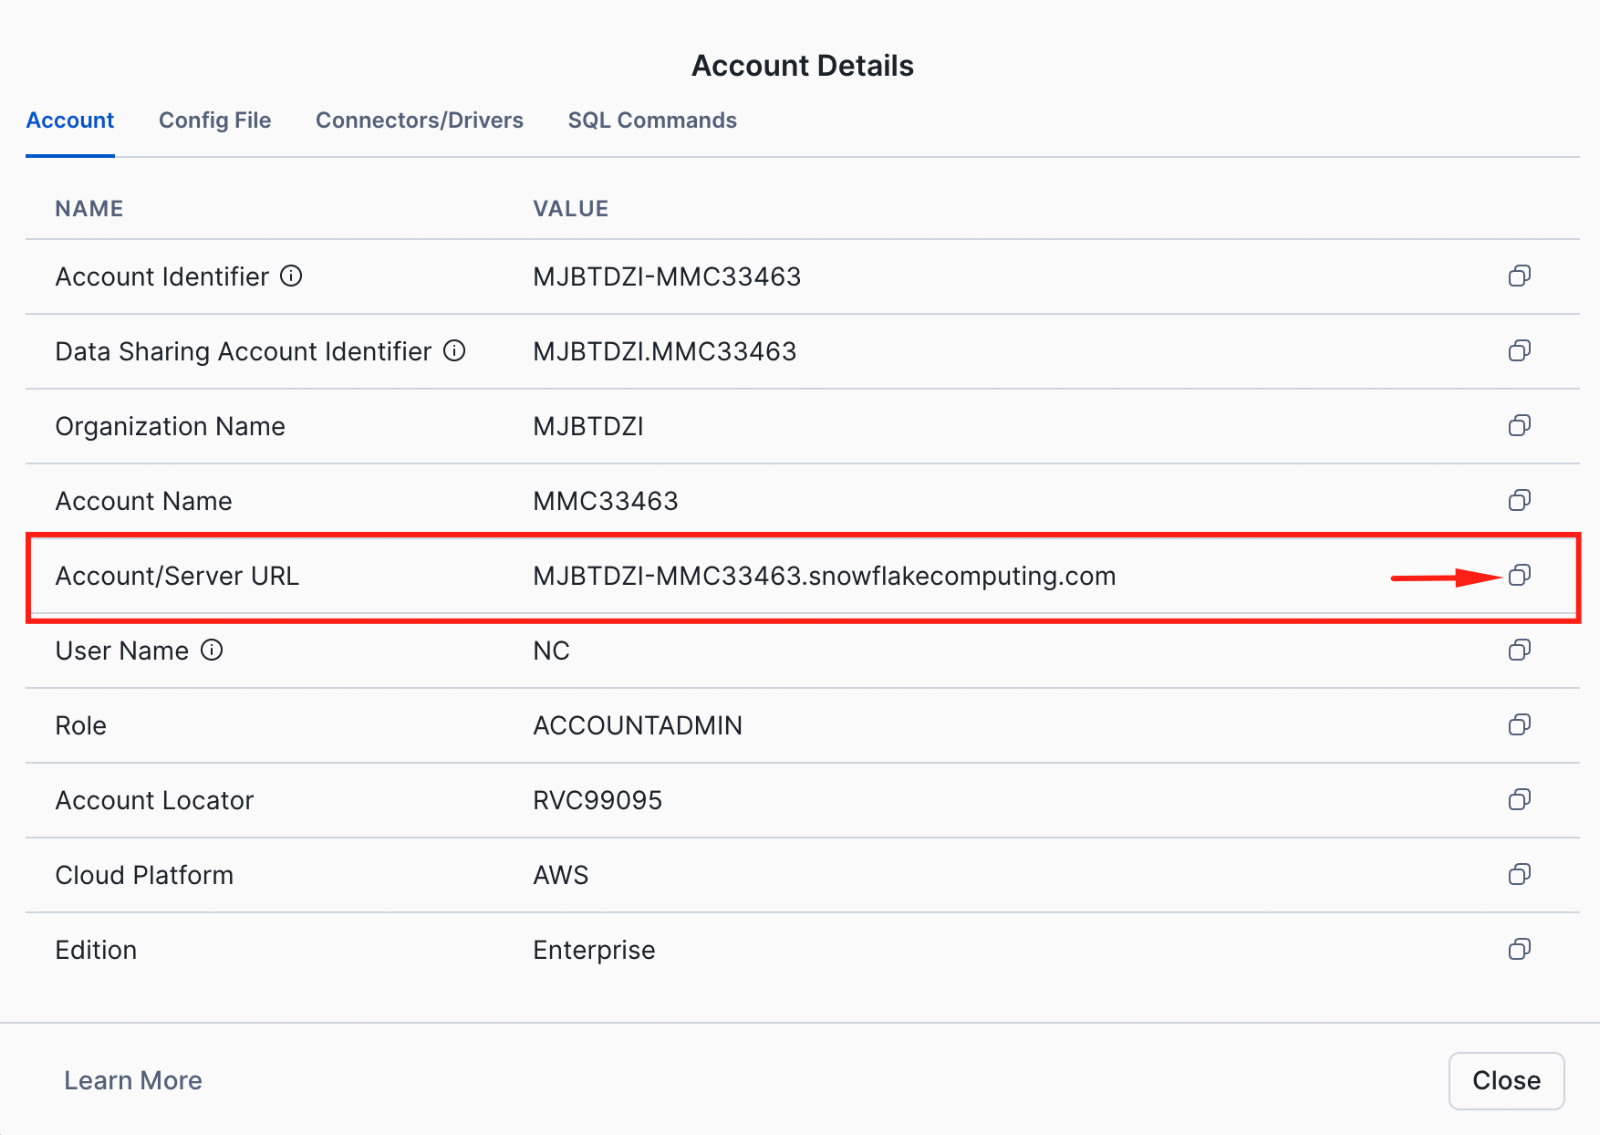
Field Description Environment Custom name for the Snowflake environment Display Name Optional friendly label for the account Account URL https://<your-account>.snowflakecomputing.com(found in Profile → Account → View Account Details)Worker Group (Connector) Select the relevant connector for scanning 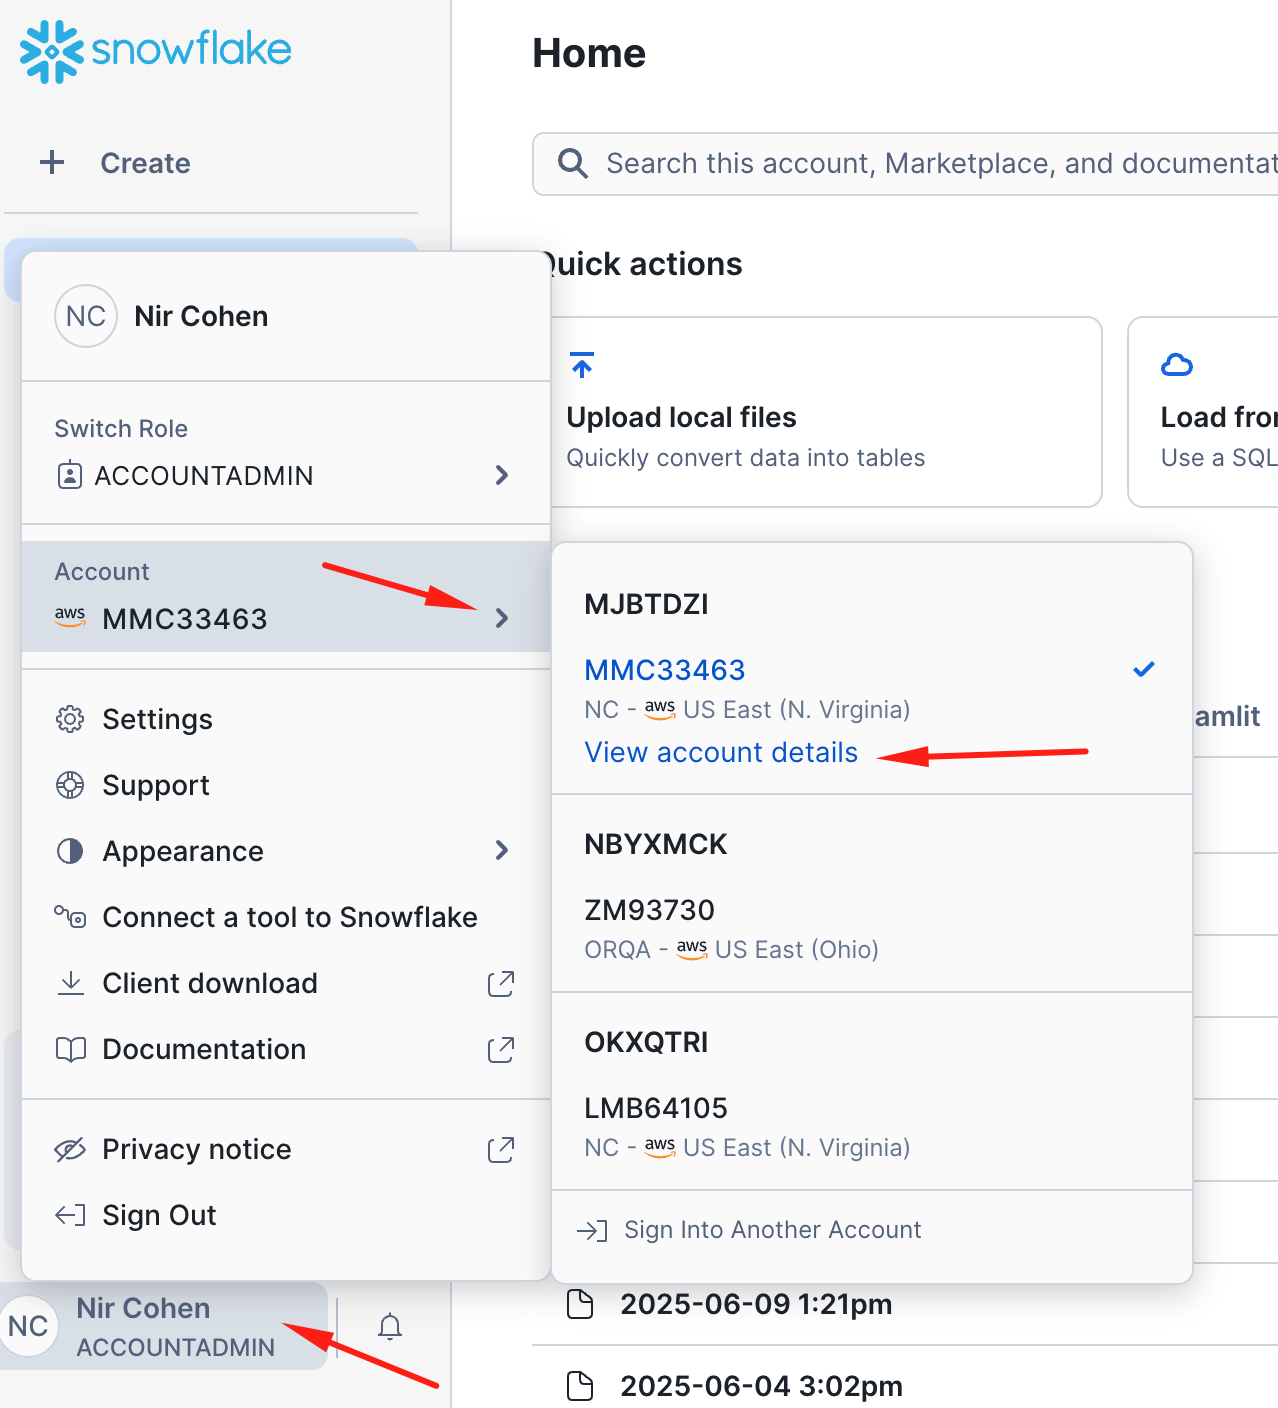
-
Register SailPoint Entro public key
Go back to Snowflake and paste the
ALTER USERstatement to register SailPoint Entro public key (generated by SailPoint Entro for this onboarding session).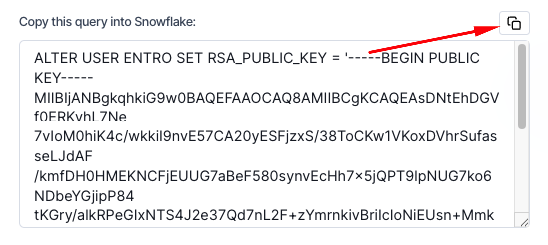
Note: The public key is generated per onboarding session and is held by SailPoint Entro for a limited time (~30 minutes). Complete the onboarding promptly; if it expires, reopen the form to generate a new key and re-run the ALTER USER statement.
-
Finalize
Once the SailPoint Entro public key registration query has completed successfully in Snowflake, click Create Account in SailPoint Entro.