Microsoft Azure Entra ID (SSO)
-
On the left menu, click on
Users and groups, and then onAdd user/group.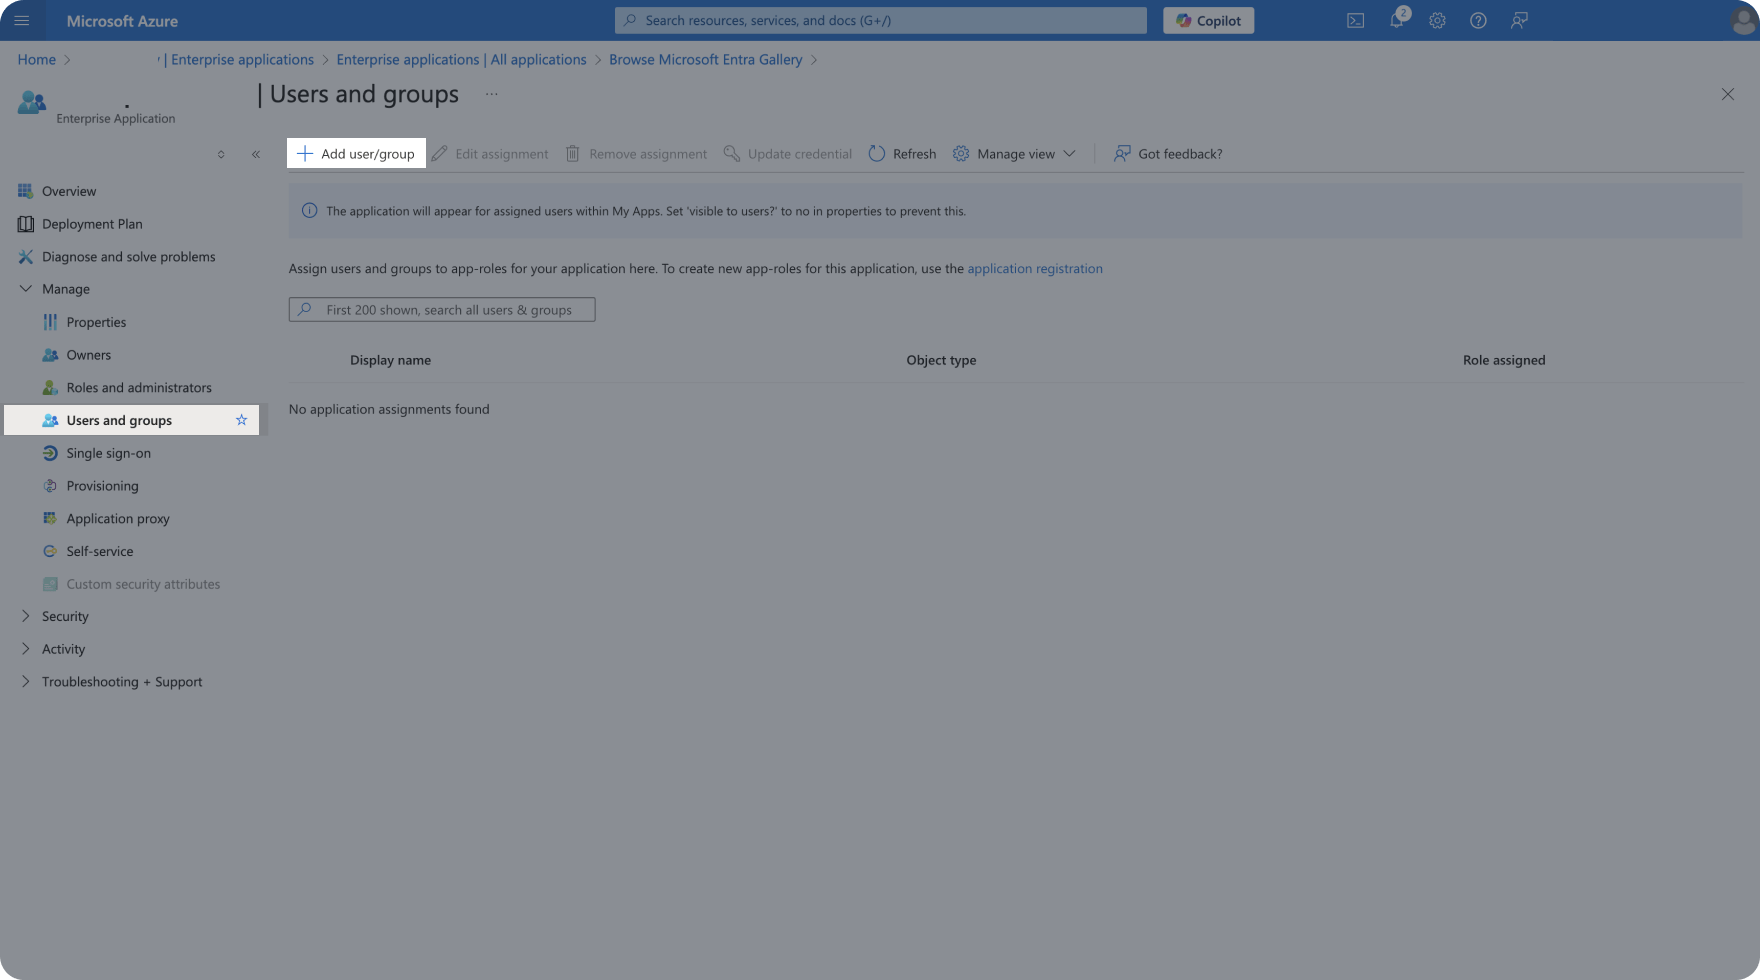
-
In the Users section on the left, click on
None Selected. On the right side pane, select the users or groups you want to give access to your application. Finish by clicking onSelectat the bottom.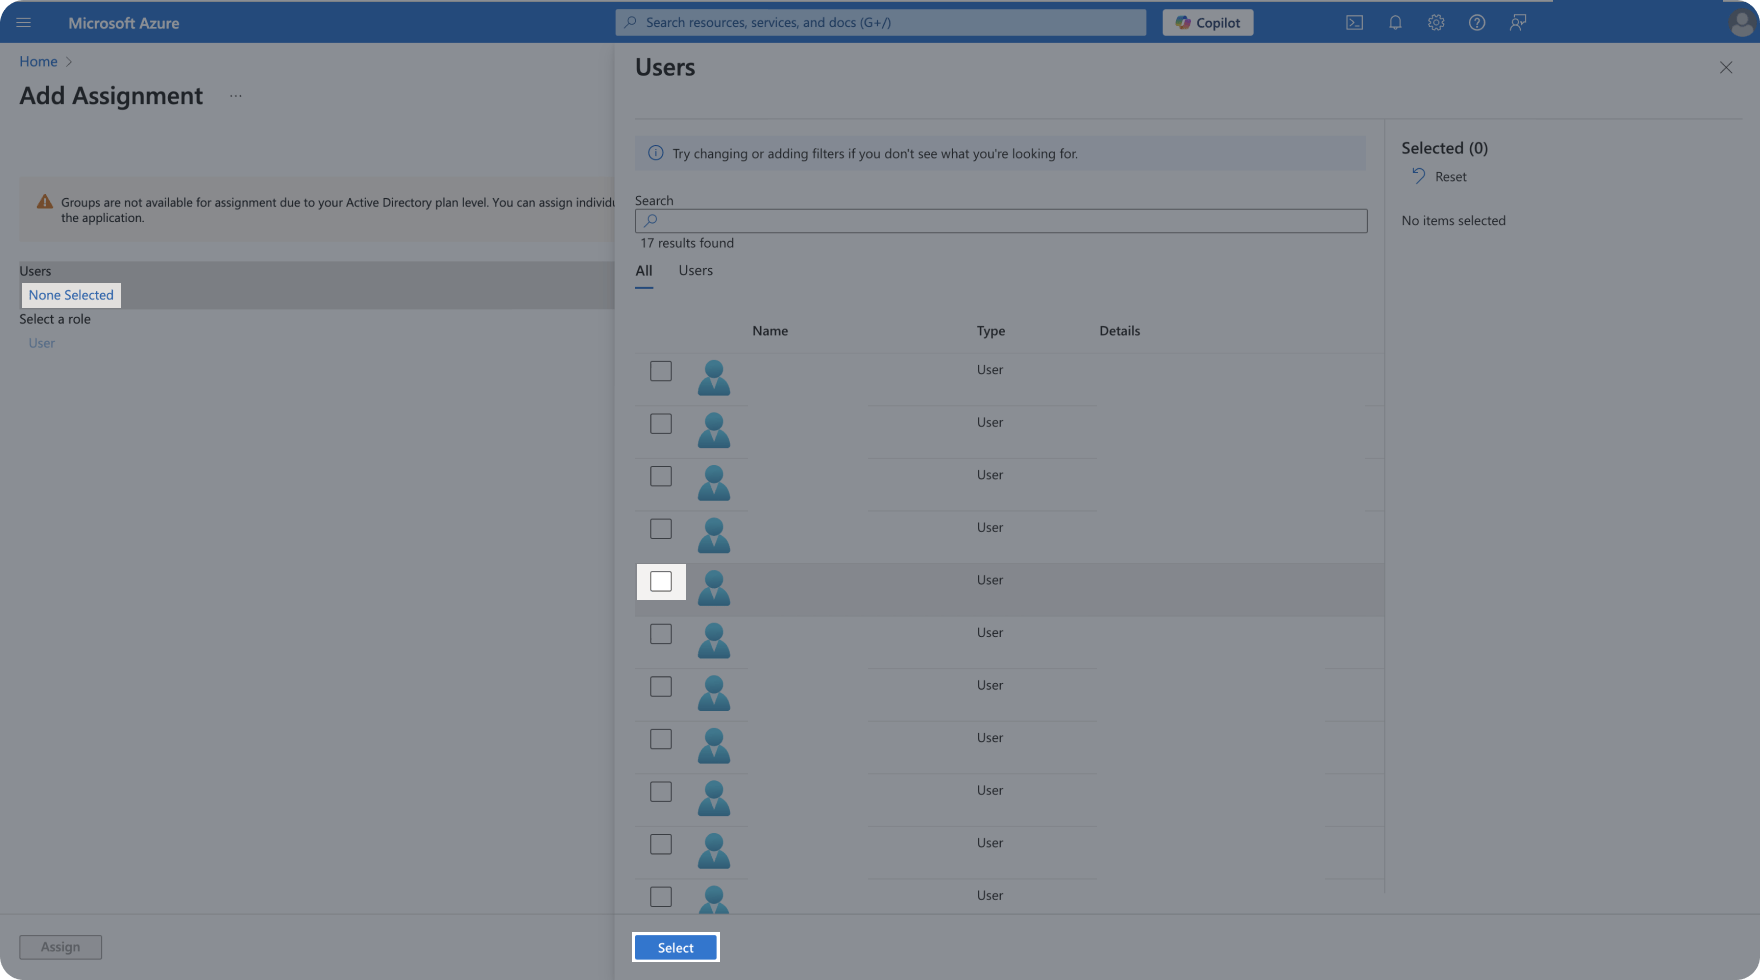
-
Click on
Assignat the bottom.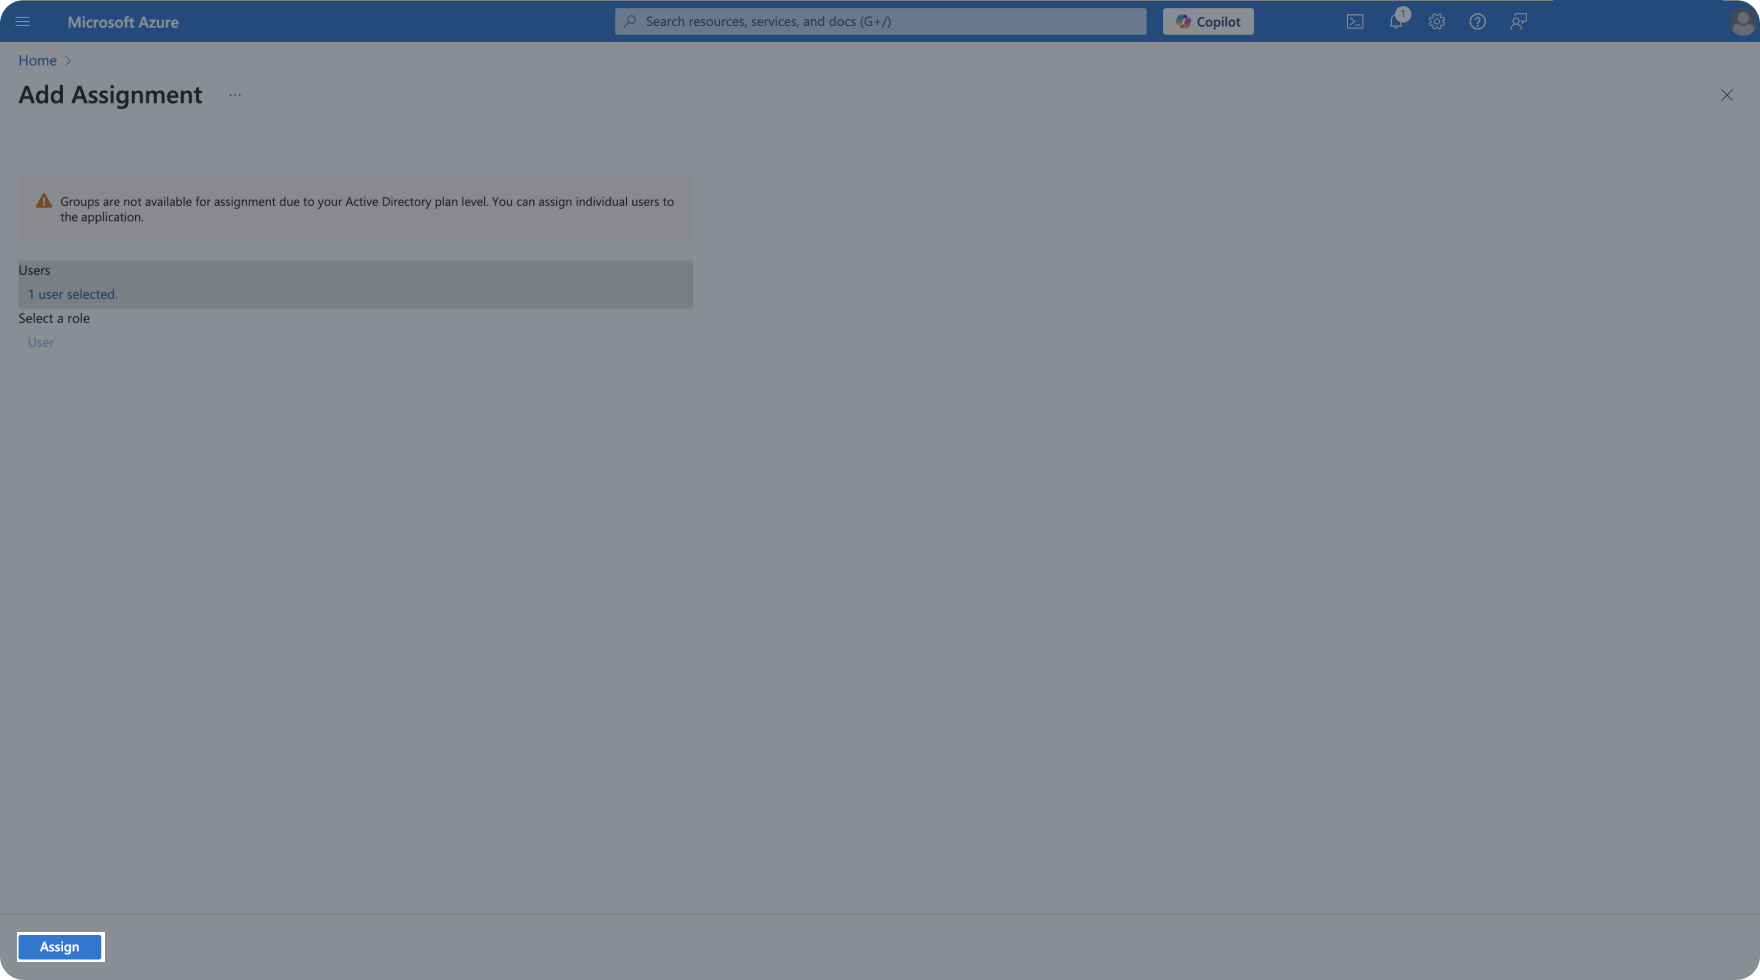
Identity Provider Information
In the SAML application properties page, follow these steps:
-
Select
Single sign-onfrom the left side panel and scroll down to section 3:SAML Certificates, and Download theCertificate (Base64)file.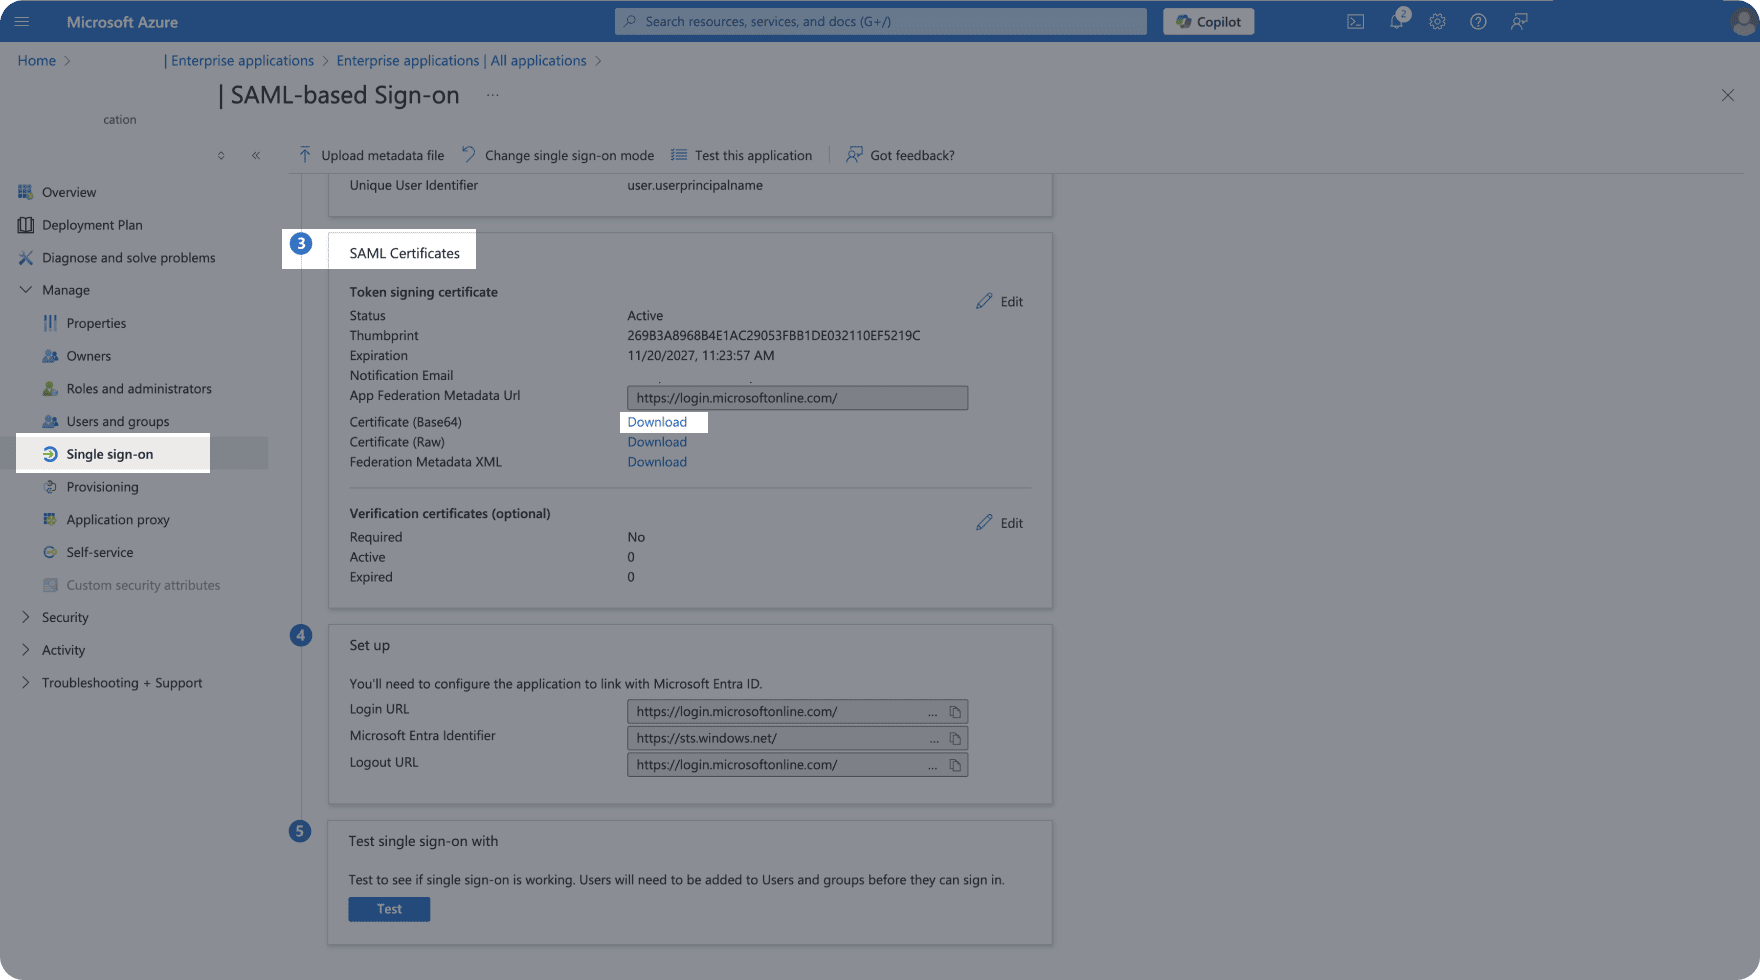
-
Open the file using a text editor, copy its contents, and paste it into the Certificate (Base64) field.
-
Scroll down to section 4:
Set up {App Name}. Copy the values forLogin URLandMicrosoft Entra Identifierinto the corresponding fields.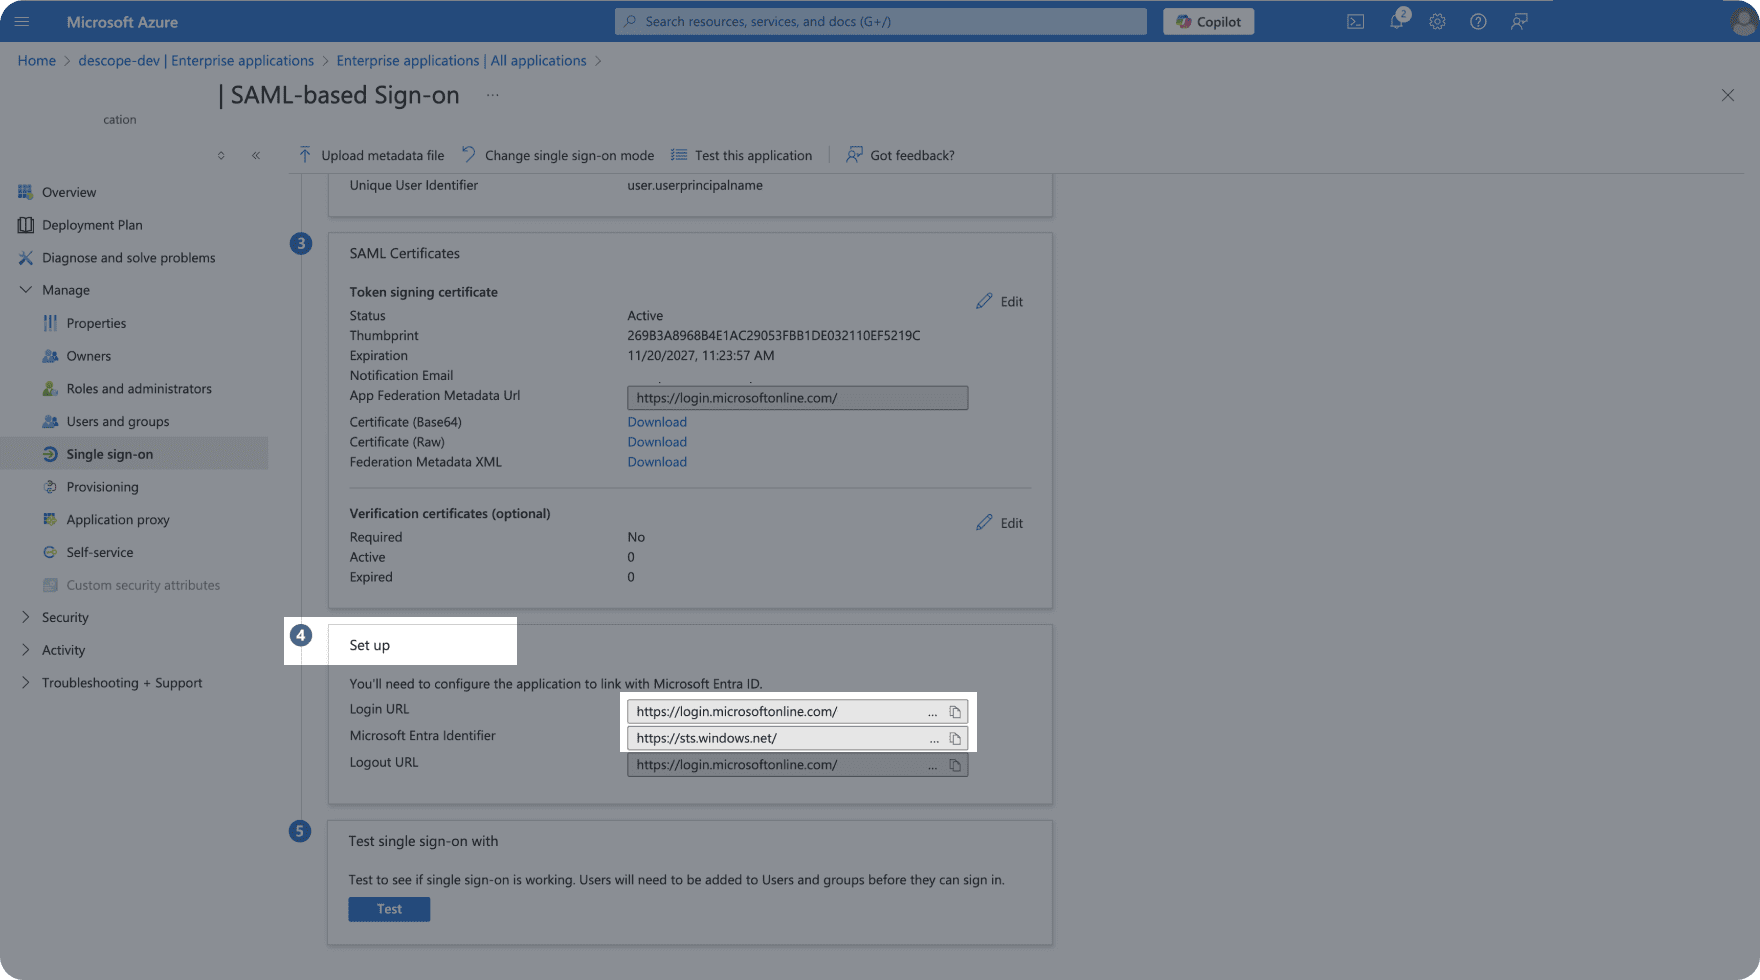
Note
The Login URL, Microsoft Entra Identifier, and Certificate (Base64) fields are required.
User Attribute Mapping
You can add attributes to the SAML response by clicking the edit button on the Attributes & Claims tab. The default attributes are shown, select Add new claim to add more user attributes. Map the attributes from Entra ID here:
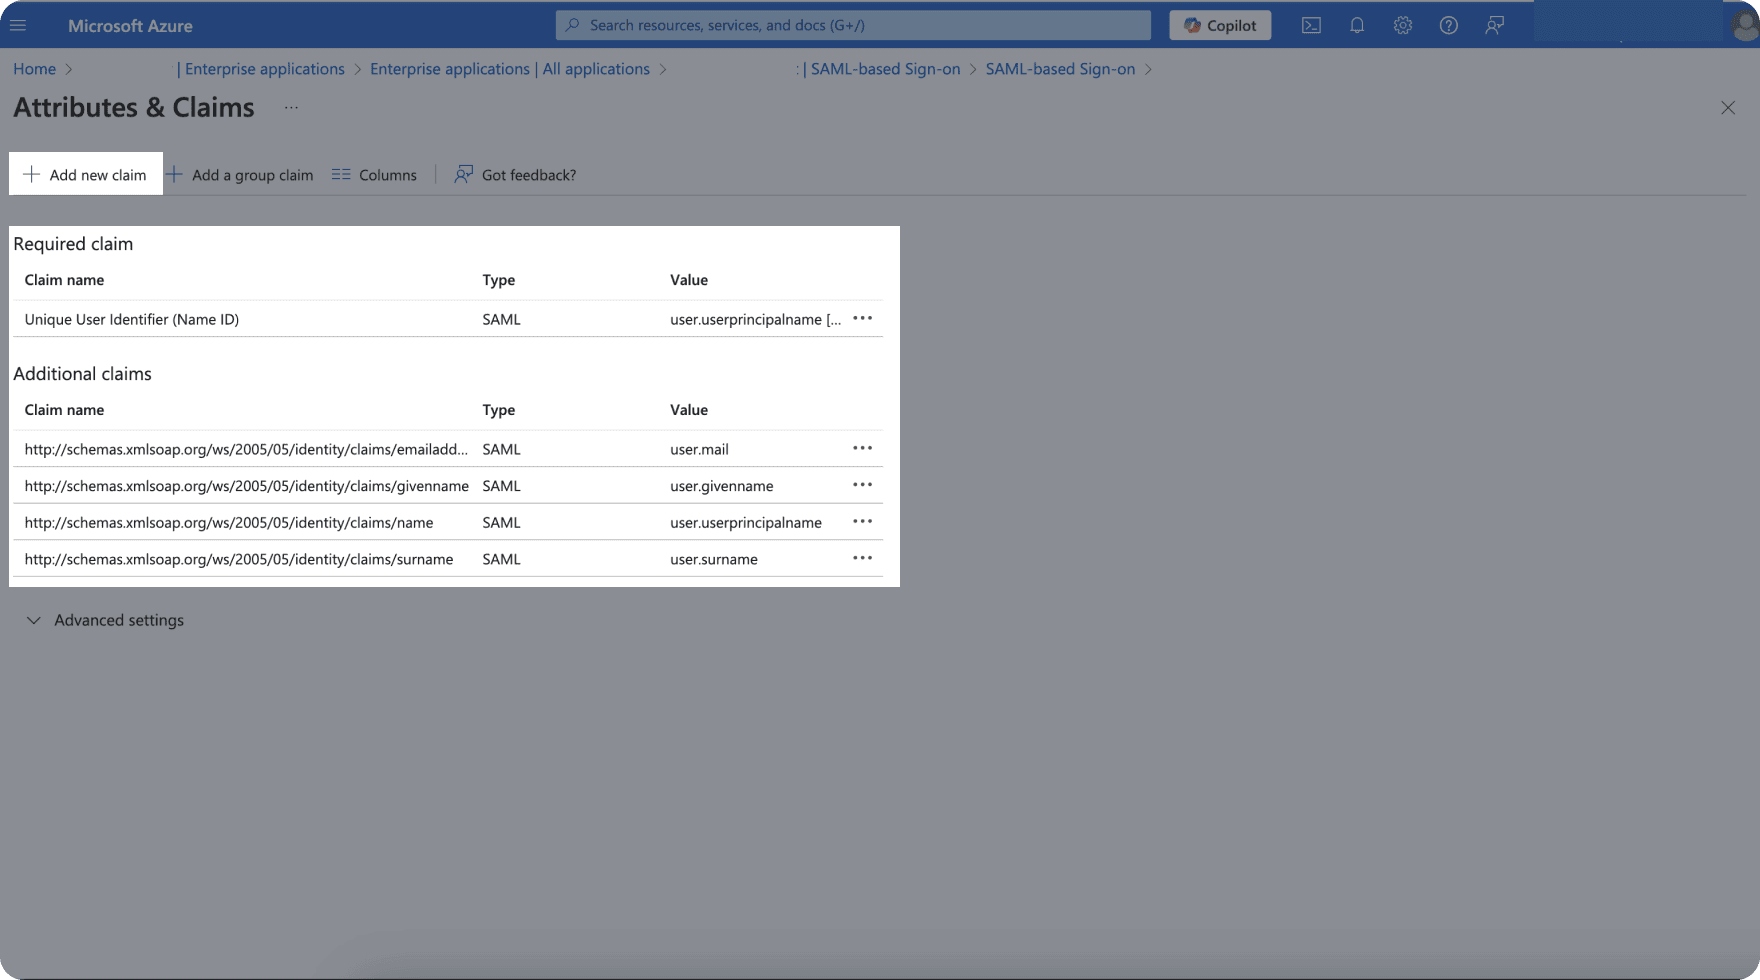
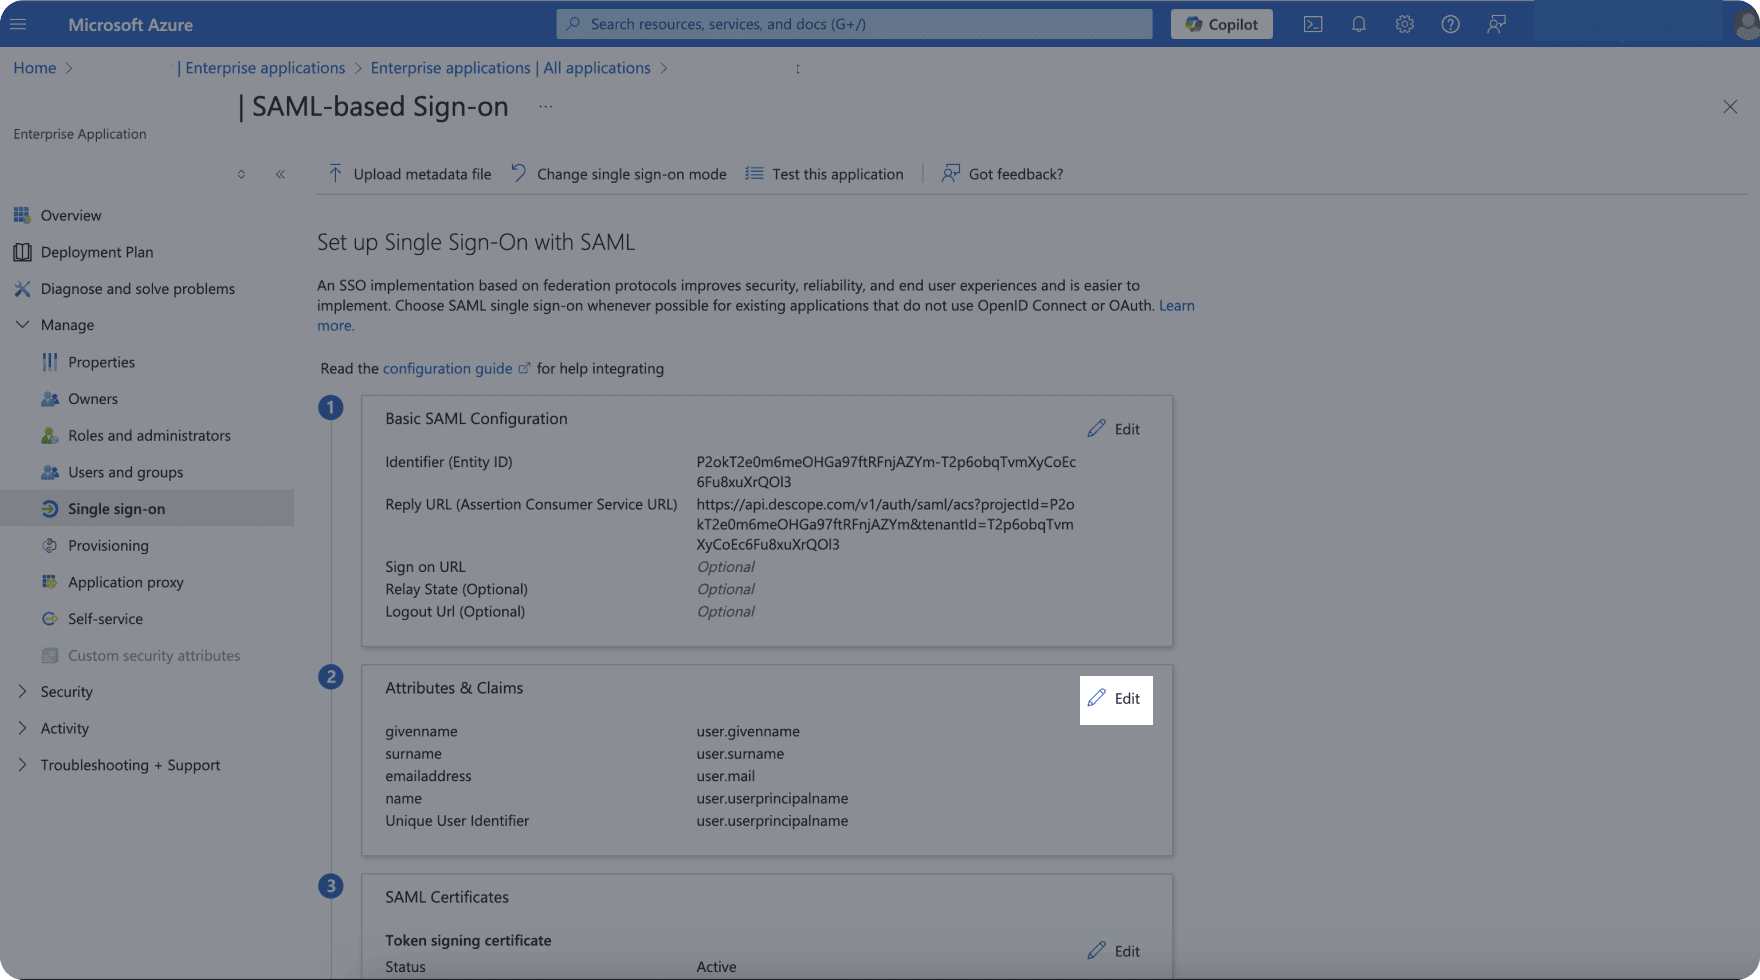
User Attribute Mapping
Map attribute names from Azure Entra ID to supported user attributes. This will sync on every user authentication.
Group Attribute Mapping
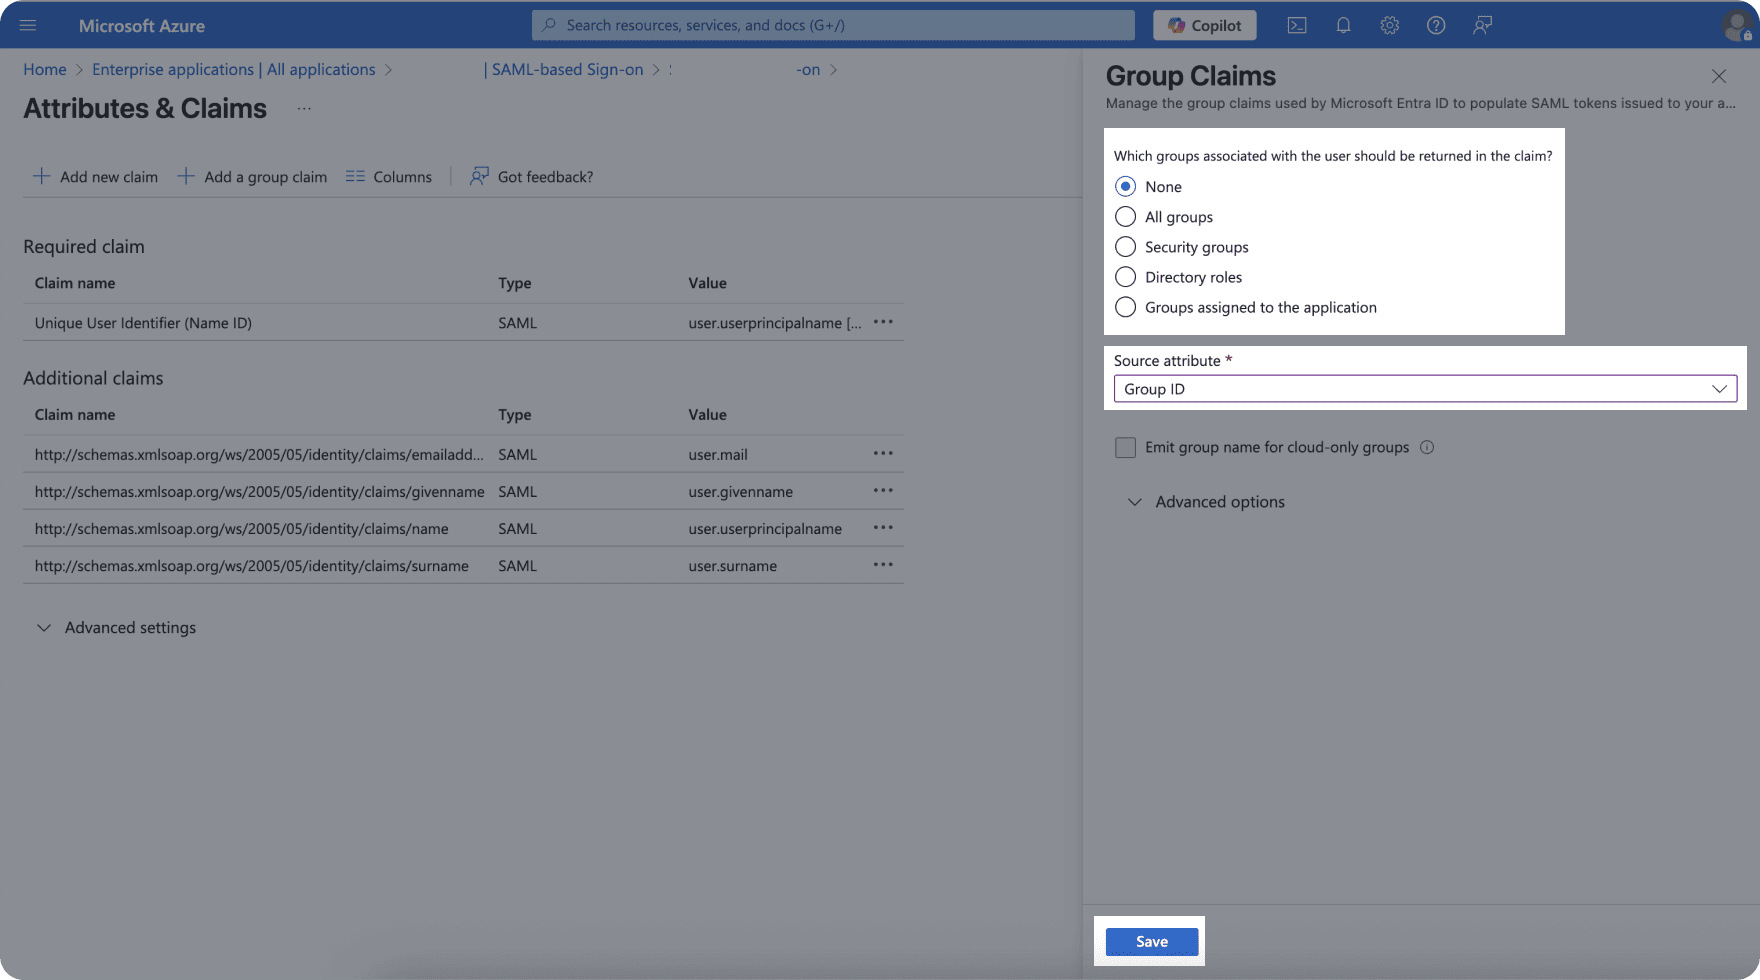
To add a group attribute, follow these steps:
-
Click on
Add a group claim.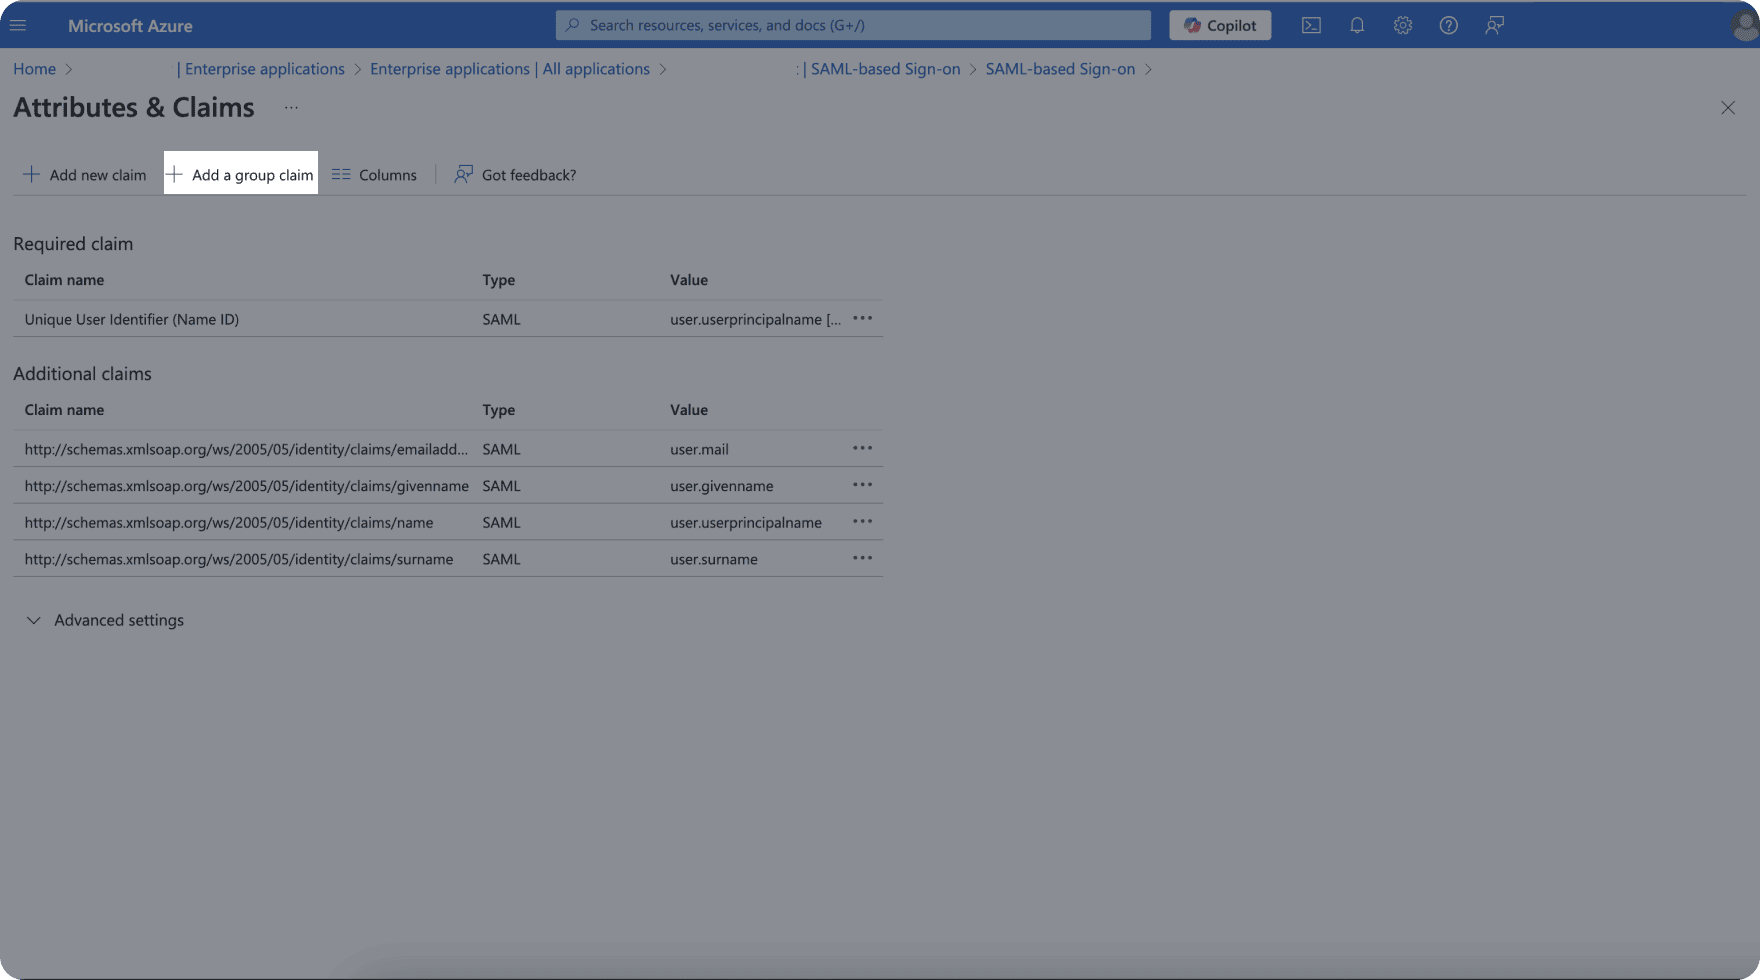
-
Select which groups associated with the user should be returned in the claim and the source format.
Group Mapping
Enter the name of the attribute used by Azure Entra ID for group associations. We will use it to retrieve group names that can later on be mapped to roles.
SSO Domains
Descope will provide you the domains that are used to determine which SSO configuration to load once a user chooses to authenticate using SSO.
Testing
Once all the details have been completed, test your current SSO configuration to make sure all parts are set properly.