Buildkite Onboarding
Configuration Steps
-
Sign in to Buildkite
-
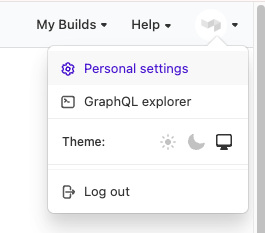
Select your profile avatar in the top-right corner.
-
Select Personal Settings.
-
-
Create an API Access Token
-
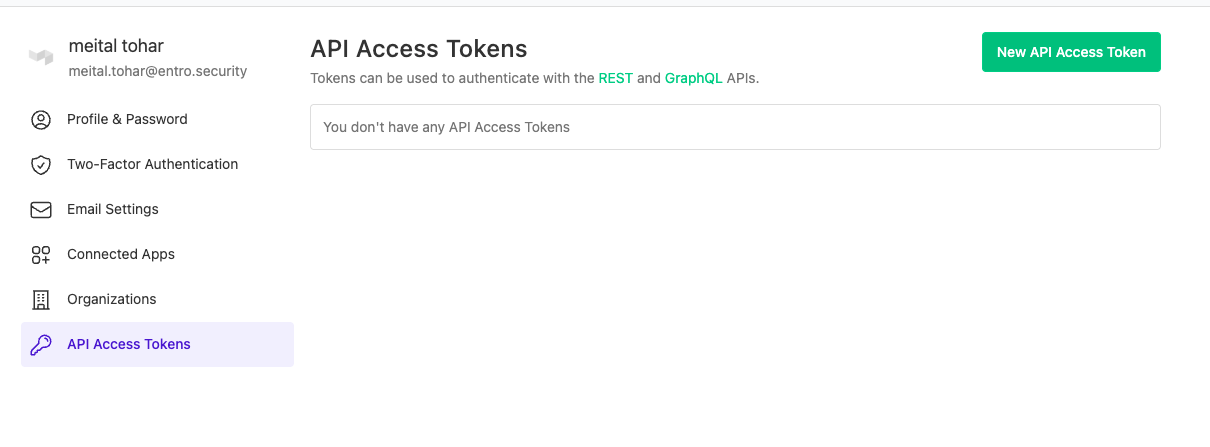
Go to API Access Tokens and select New API Access Token.
-
Under Description, add
Entro Integration. -
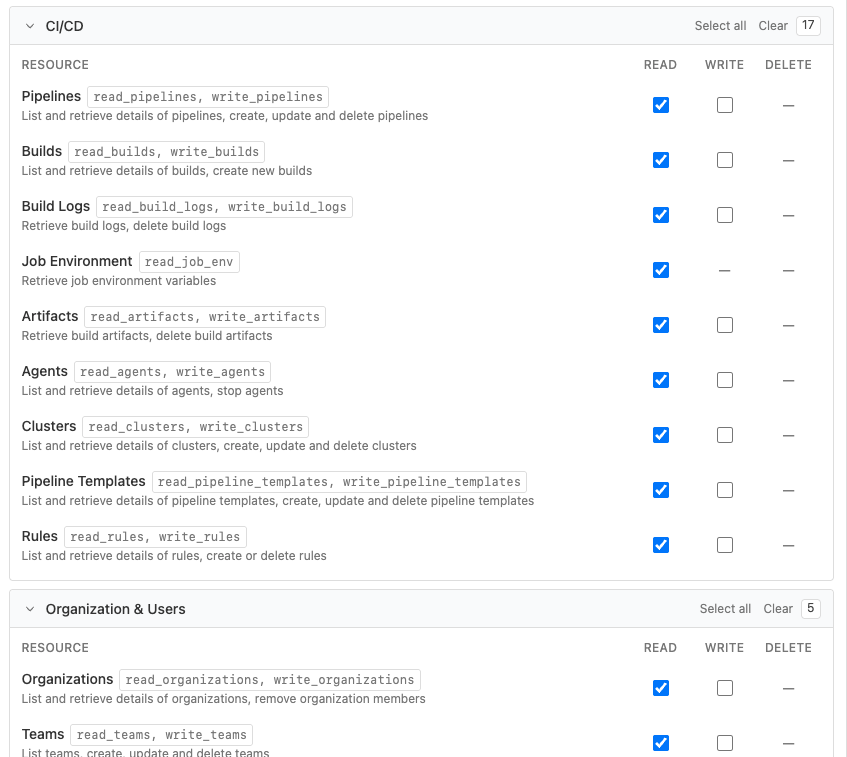
Choose the relevant Organization Access for token scope.
-
Choose a Token Expiry time, per your organization policy.
-
Under REST API Scopes, grant the token all Read permissions.
-
Select Create Token and copy the generated token immediately. Store it securely.
-
-
Complete SailPoint Entro Onboarding Form
-
In the SailPoint Entro Platform, go to Management > Accounts & Integrations > Add new account > BuildKite.
-
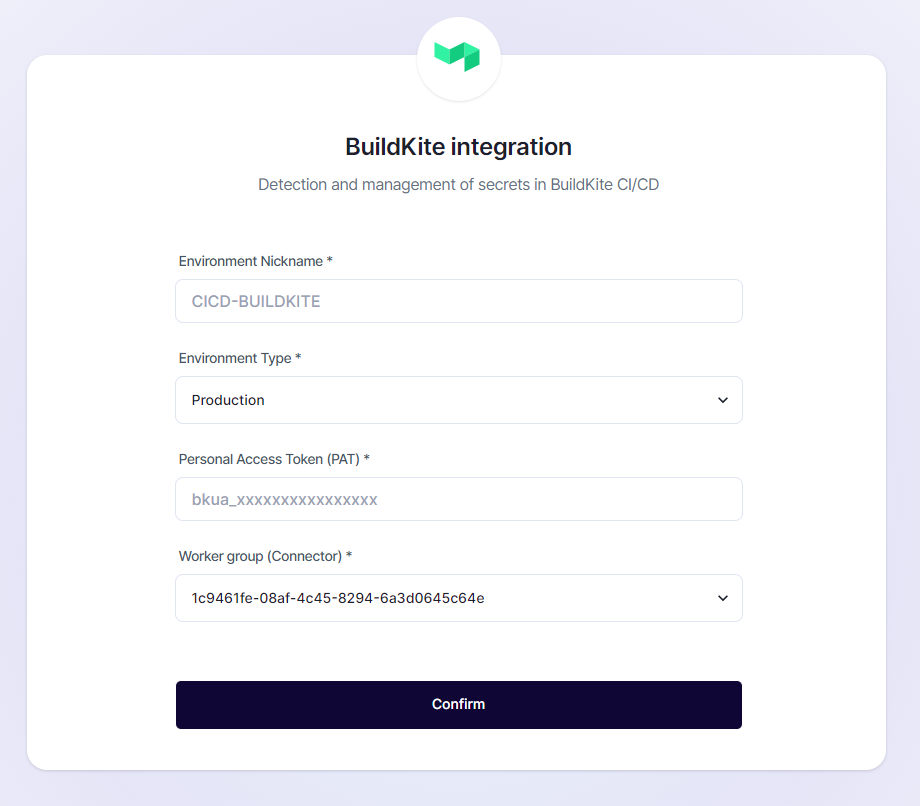
Fill in the connection form in SailPoint Entro with the following fields:
-
Environment Nickname - Enter a descriptive name (for example,
CICD-BUILDKITE). -
Environment Type - Select your environment type (for example, Production).
-
Personal Access Token (PAT) - Paste the token generated in Buildkite.
-
Worker Group (Connector) - Choose a SailPoint Entro worker.
-
-
Select Confirm to validate and establish the integration.
-