ServiceNow Onboarding
This guide outlines the steps required to connect your ServiceNow instance to SailPoint Entro. The integration operates in read-only mode, using a ServiceNow API Access Token to authenticate through the Table API and Attachment API.
Prerequisites
Before starting the onboarding process, ensure you have:
-
ServiceNow Admin permissions
-
Access to the System Web Services and User Administration modules
-
An active Worker Group (Connector) in SailPoint Entro
-
The ServiceNow domain URL (for example,
https://<yourDomain\>.service-now.com)
Configuration Steps
-
Create an Inbound Authentication Profile
In ServiceNow, go to All > System Web Services > API Access Policies > Inbound Authentication Profile.
-
Select New.
-
Choose Create API Key Authentication Profiles.
-
Enter a name for the profile (for example,
Entro Profile). -
Select the lock icon to open Auth Parameter selection.
-
Select the magnifying glass and select the parameter that corresponds to the Auth Header (for example,
x-sn-apikey). -
Select Submit.
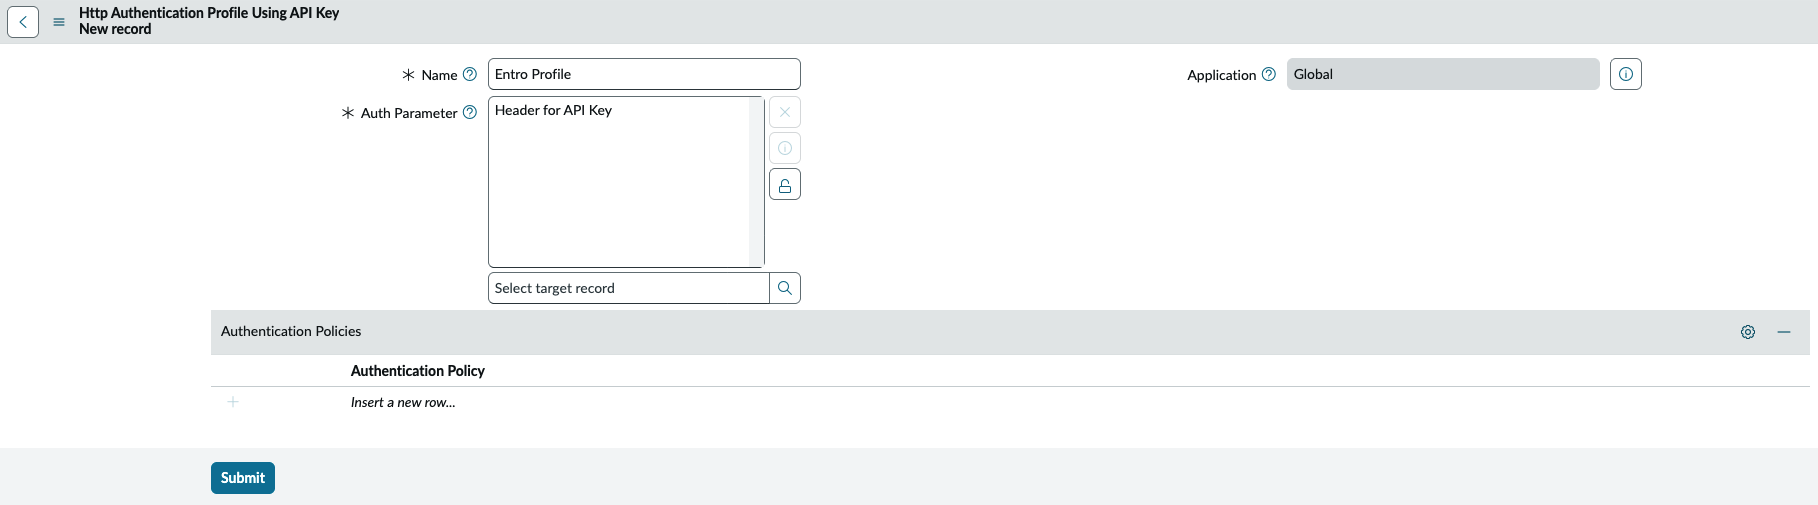
-
-
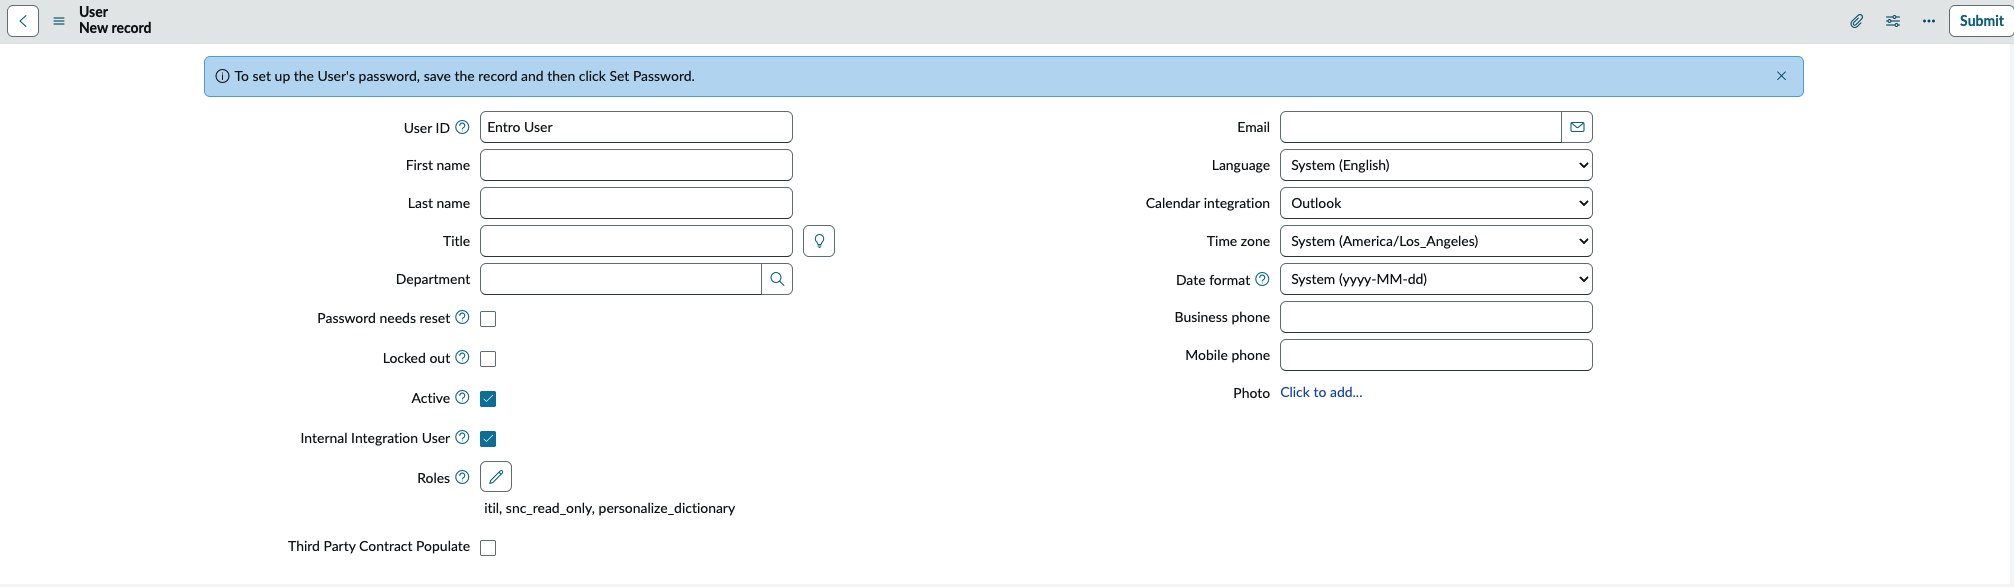
Create an Integration User
Go to All > User Administration > Users.
-
Select New.
-
Fill in User ID (for example,
Entro User) and optionally fill in the details. -
Mark the user as Active and Internal Integration User.
-
Select Submit.
-
Enter the user you just created.
-
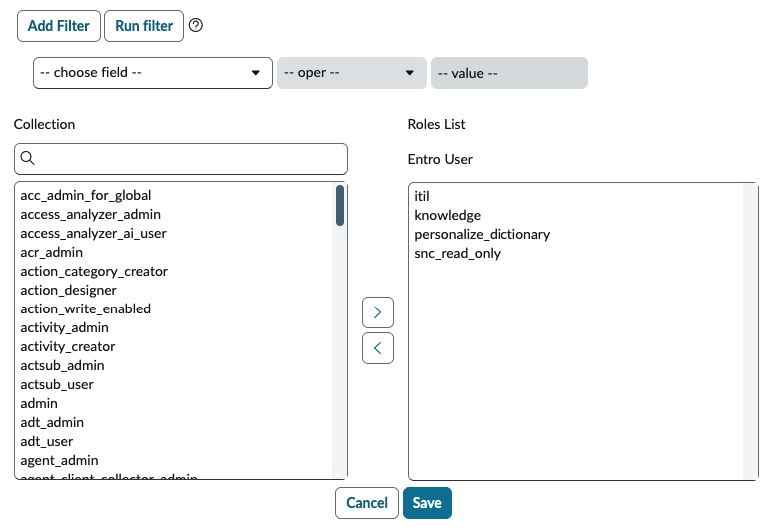
Below, in Roles, select Edit... and add the following roles:
-
itil- read access to incidents, problems, change requests, and CMDB records. -
snc_read_only- enforces read-only behavior across the user's assigned roles. -
knowledge- read access to knowledge articles, knowledge bases, and article feedback (kb_knowledge,kb_knowledge_base,kb_feedback). -
personalize_dictionary- optional, allows discovery and scanning of custom tables (sys_dictionary,sys_db_object).
-
-
Select Save.
-
In the user details screen, select Update.
Tip
Knowledge Base access also depends on User Criteria. The
knowledgerole grants table-level read, but ServiceNow additionally gates each article through the knowledge base's "Can Read" user criteria. To scan a knowledge base, the Integration User must be included in that base's Can Read criteria, either directly, via a group, or through a global Can Read criteria. Articles in bases where the user is not in the Can Read set will not be returned, even with theknowledgerole assigned.Tip
Scanning custom tables may require additional roles per table. Consult your ServiceNow admin or SailPoint Entro Support for further assistance.
-
-
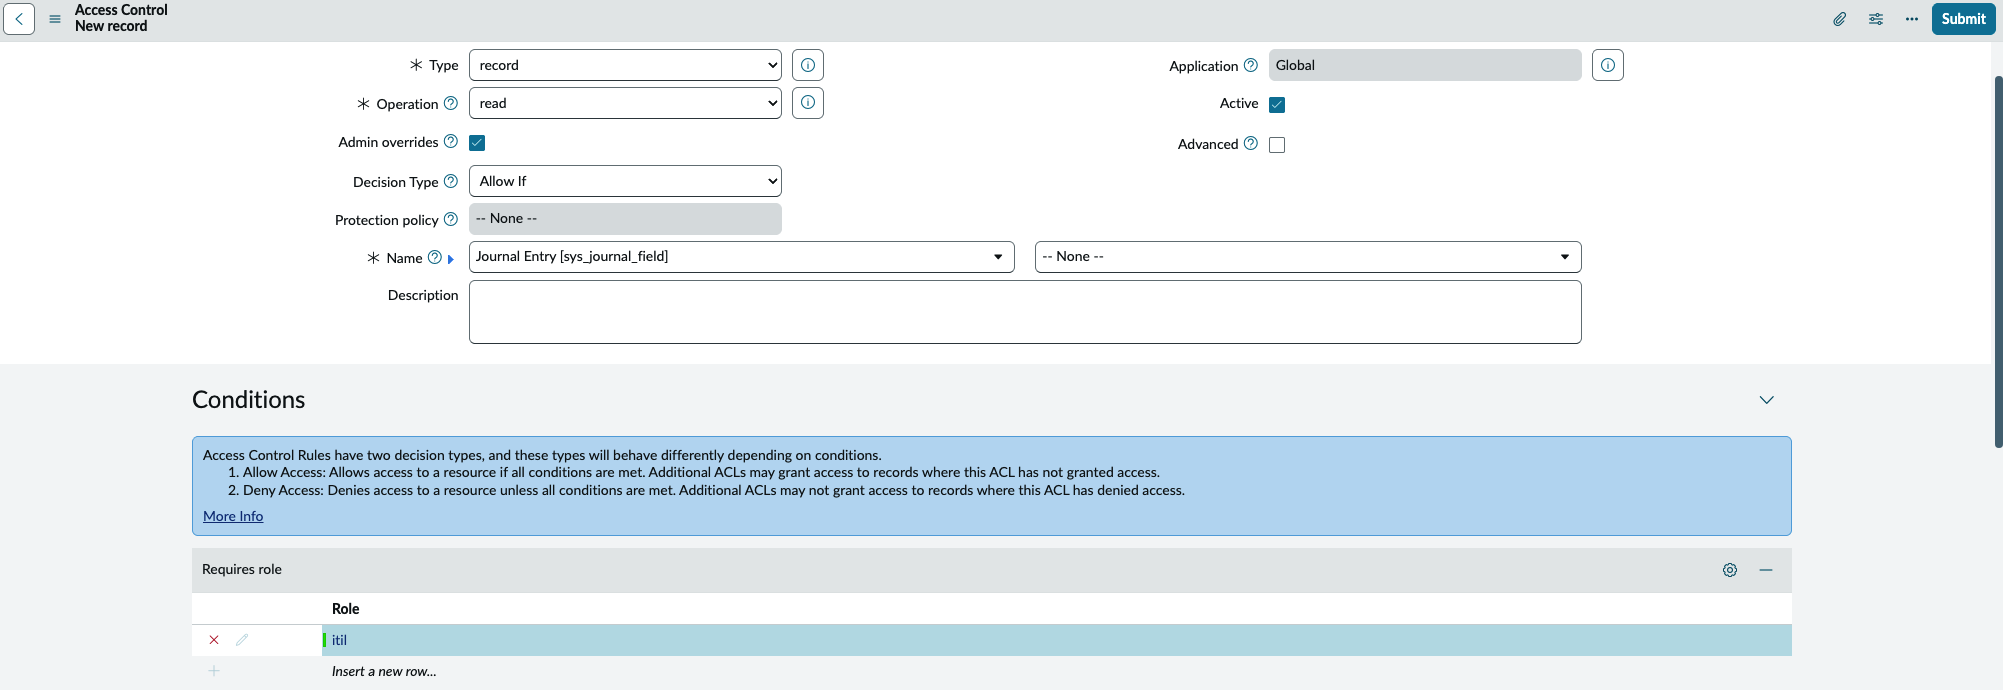
Create ACL for Journal Data Scanning
Scanning journal data (work notes and comments) requires an explicit ACL. Journal entries live in the
sys_journal_fieldtable, which ServiceNow keeps restricted by default. Theitilrole does not grant read access to it through the Table API. To scan journals, go to All > System Security > Access Control (ACL).-
Select New and create the Journal scanning ACL:
-
Type - Record
-
Operation - read
-
Name -
sys_journal_field(leave the field portion empty to cover the whole table) -
Under Requires role, add the role assigned to your Integration User (for example,
itil, or a dedicated role you create for the integration) -
Select Submit
-
If there is no New button on the Access Control (ACL) list, the security_admin role is not in use. Admins do not hold it by default - it has to be elevated for the session:
-
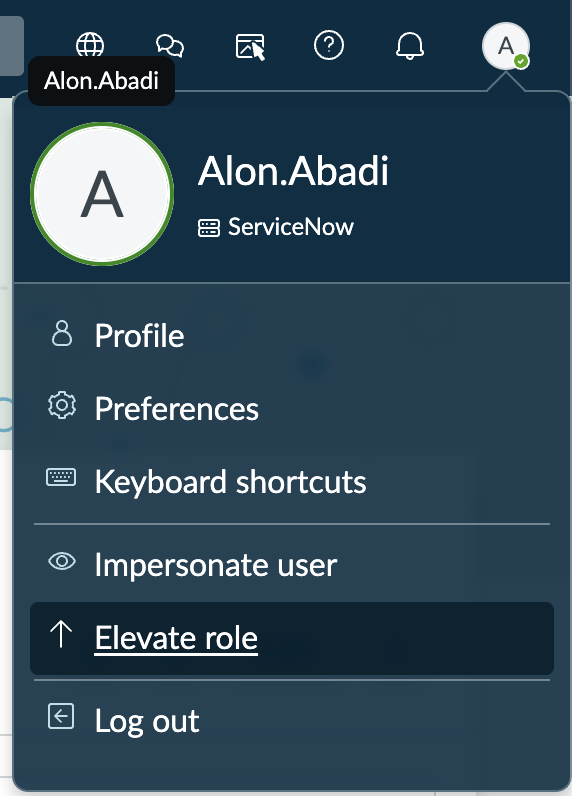
Select your profile icon in the top-right corner of ServiceNow.
-
Select Elevate role.
-
Check the security_admin option and select Update.
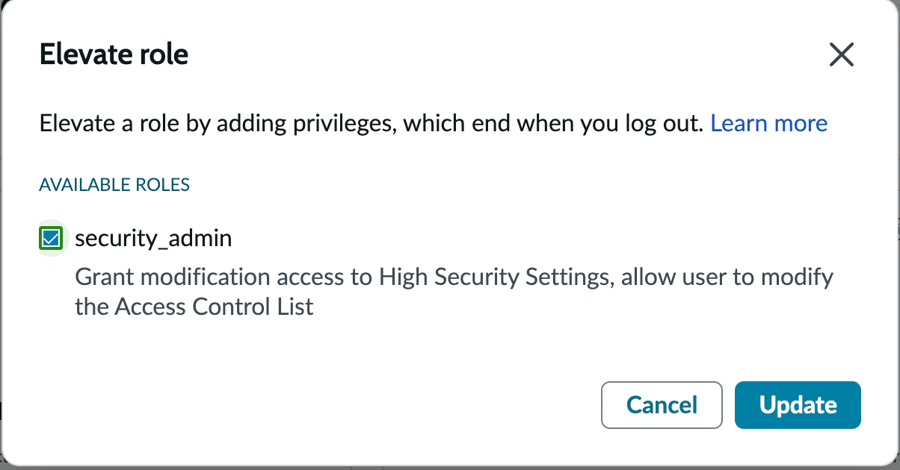
Elevated privileges end when you sign out. Refresh the Access Control (ACL) list and the New button will be available.
-
-
Create REST API Auth Scopes
Go to All > System Web Services > API Auth Scopes > REST API Auth Scope.
-
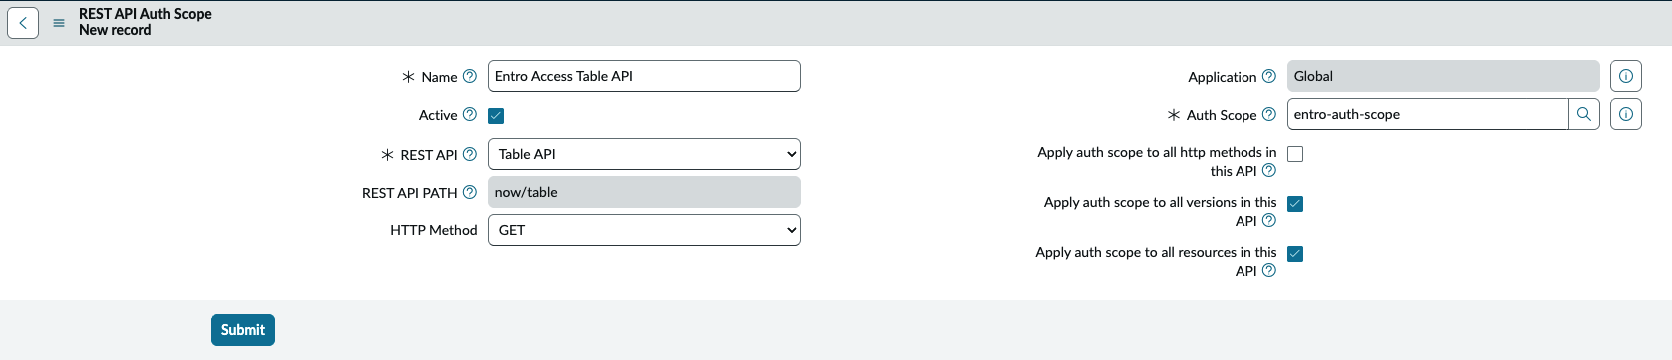
Select New and create the first scope for the Table API:
-
Name the API Auth Scope (for example,
Entro Access Table API) -
REST API - Table API
-
Auth Scope - create new
entro-auth-scope -
Uncheck Apply auth scope to all HTTP methods in this API
-
Select Submit
-
-
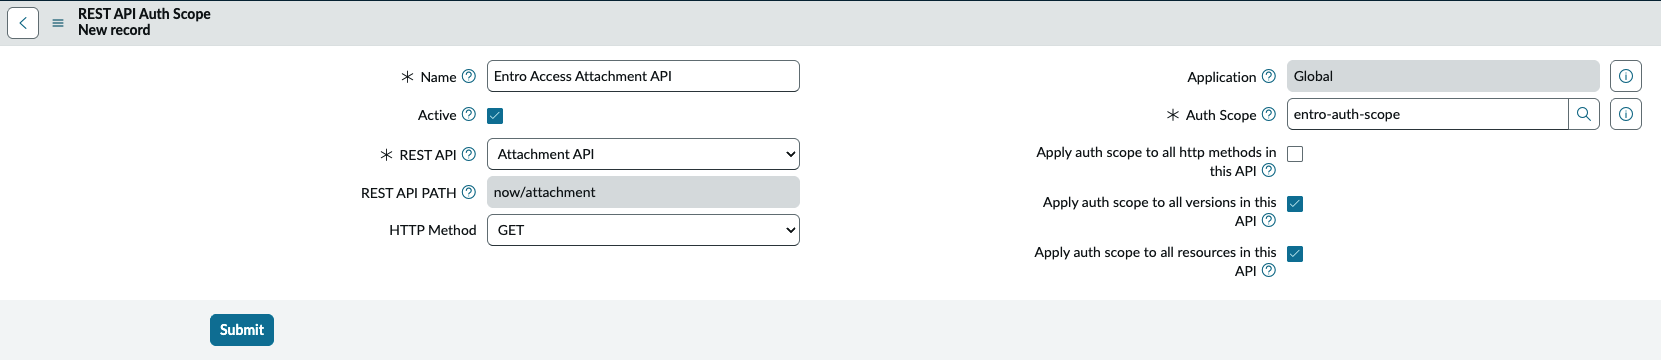
Repeat for the Attachment API:
-
Name the API Auth Scope (for example,
Entro Access Attachment API) -
REST API - Attachment API
-
Auth Scope - select
entro-auth-scopecreated earlier -
Uncheck Apply auth scope to all HTTP methods in this API
-
Select Submit
-
-
-
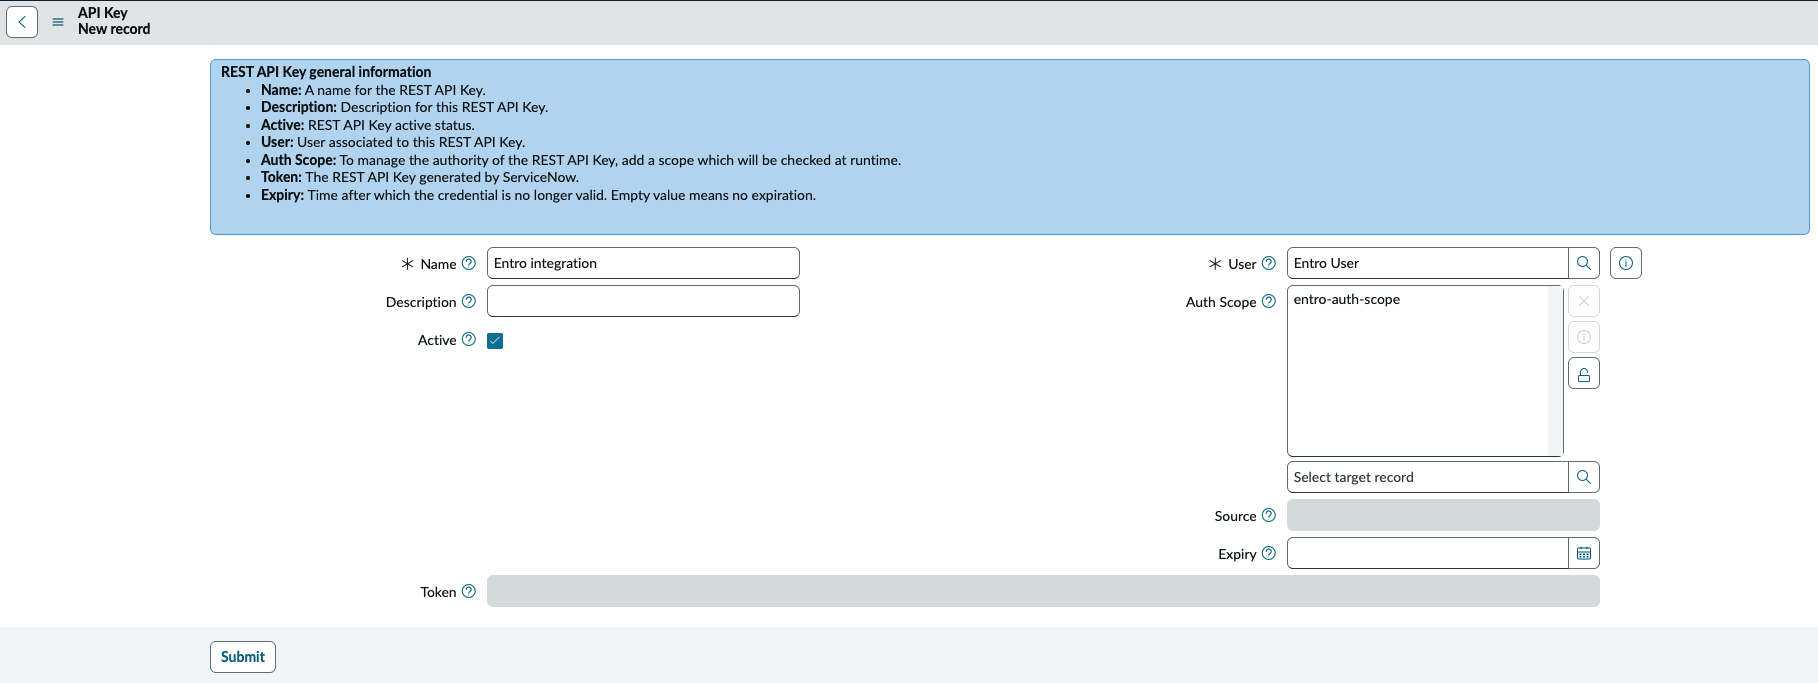
Create an API Access Token
Go to All > System Web Services > API Access Policies > REST API Key.
-
Select New.
-
Name - Enter a name for the API key (for example,
Entro integration). -
User - Assign the Integration User created earlier in step 2.
-
Auth Scope - Select the
entro-auth-scopefrom the previous step. -
Select Submit.
-
Reopen the created API Key and select the lock icon next to Token.
-
Copy the token and store it securely.
-
-
Create REST API Access Policies
Go to All > System Web Services > REST API Access Policies.
-
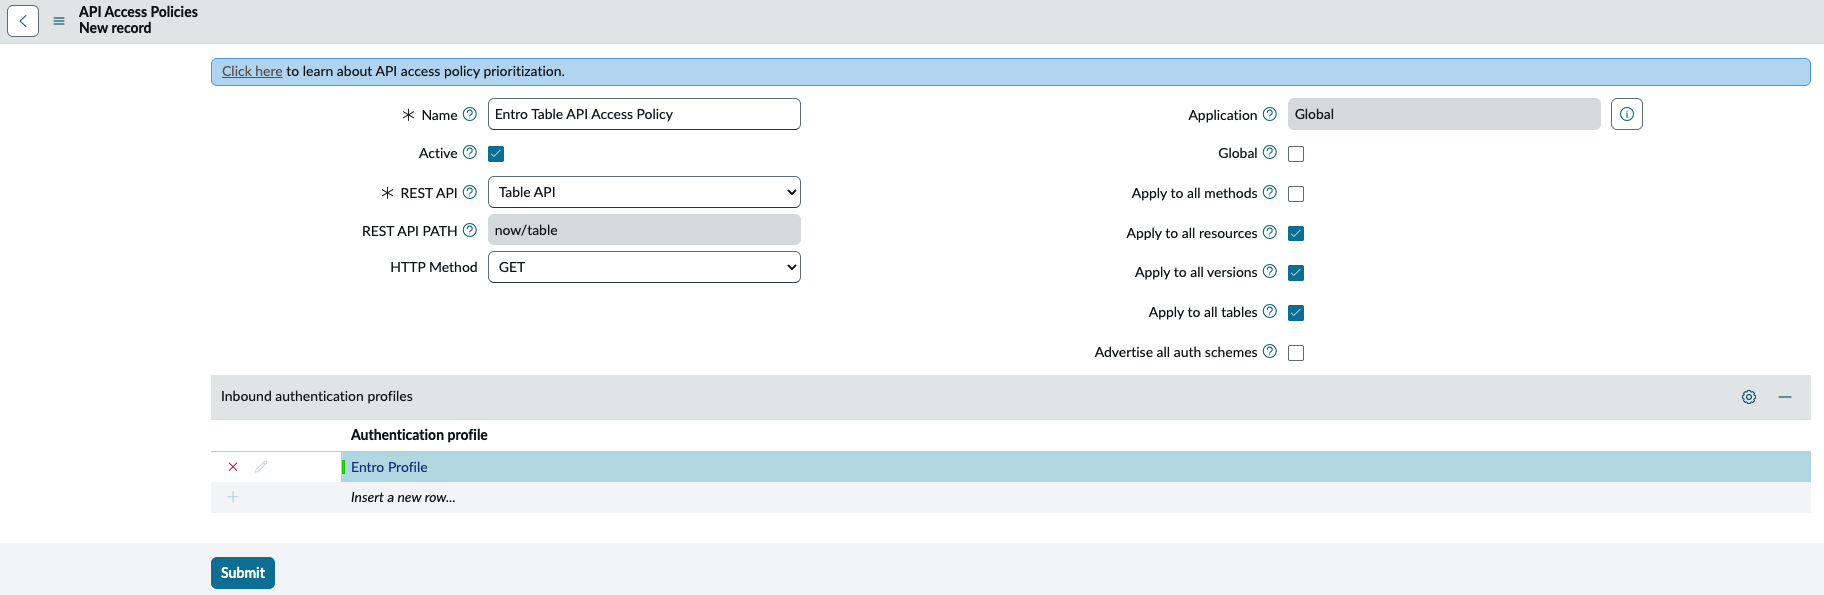
Create a new policy for the Table API:
-
Name the API Access Policy (for example,
Entro Table API Access Policy) -
REST API - Table API
-
Uncheck Apply to all methods
-
Under Inbound Authentication Profiles, select the profile from Step 1
-
Select Submit
-
-
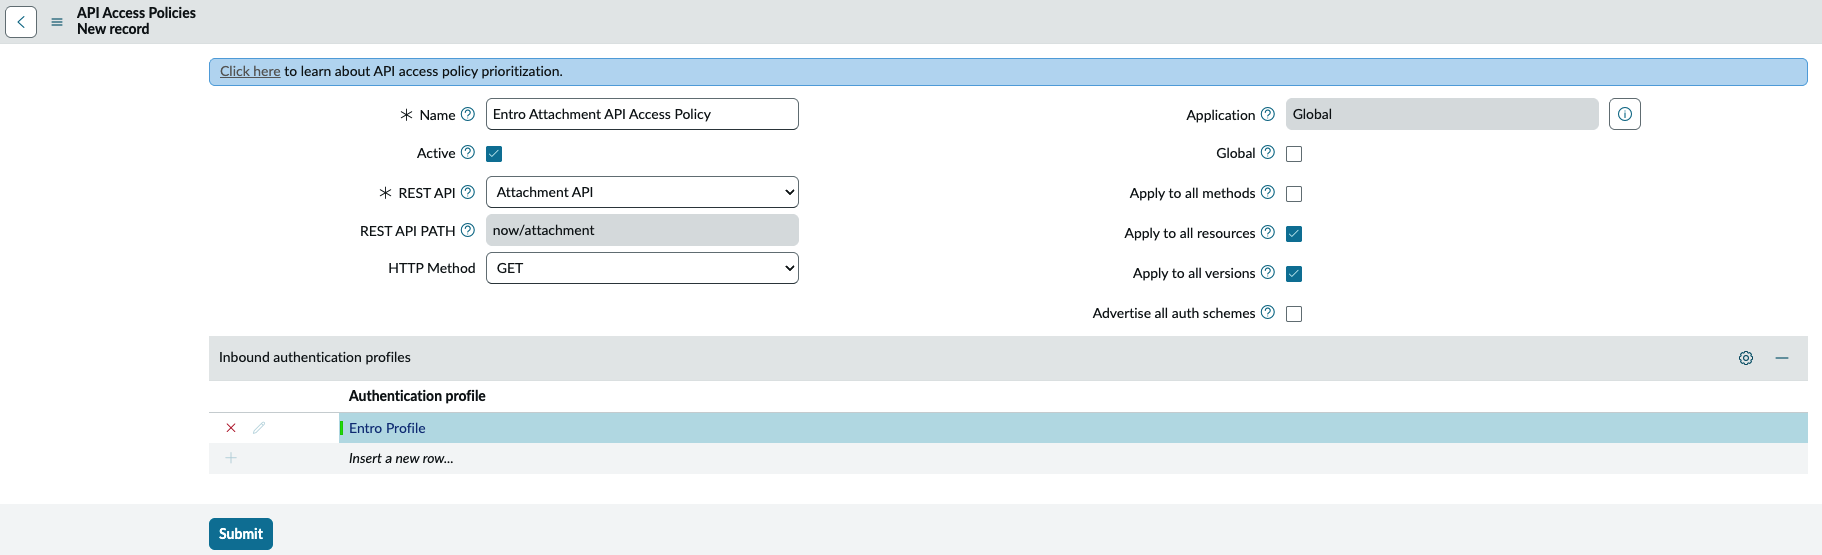
Repeat for the Attachment API:
-
Name the API Access Policy (for example,
Entro Attachment API Access Policy) -
REST API - Attachment API
-
Uncheck Apply to all methods
-
Under Inbound Authentication Profiles, select the profile from Step 1
-
Select Submit
-
-
Create a BasicAuth authentication profile:
-
Go to All > System Web Services > API Access Policies > Inbound Authentication Profiles.
-
Select New.
-
Select Create standard http authentication profiles.
-
Give the new profile a name (like BasicAuth) and make sure that Basic Auth is selected as the Type.
-
Select Submit.
-
-
Add the new profile to all the REST API Access Policies:
-
Go to All > System Web Services > REST API Access Policies.
-
Select the Table API policy.
-
In the Inbound authentication profiles at the bottom, add the new BasicAuth auth profile to the list (in addition to the SailPoint Entro auth profile).
-
Do the same for the Attachments API policy.
-
-
-
Connect ServiceNow to SailPoint Entro
In the SailPoint Entro Dashboard, go to Management > Accounts & Integrations > Add New Account (top right) > ServiceNow.
Fill in the integration form using the details from ServiceNow:
-
Environment - Integration's name
-
Display Name - Friendly display name for the integration (optional)
-
ServiceNow URL - for example,
https://<yourDomain\>.service-now.com -
Access Token - Paste the token copied from the API Access Token step
-
Worker Group - Select the connector to handle the integration
Select Connect.
-
-
Validation
After connecting, SailPoint Entro automatically:
-
Validates the token and API scope configuration
-
Confirms read access to Table and Attachment APIs
-
Begins secret scanning of records and attachments
When successful, the integration status will display Verified in the SailPoint Entro Console.
-