Salesforce Onboarding
Part 1 - Create an External Client App
-
Create new app
-
Sign in to your Salesforce instance as an admin
-
Go to Advanced Setup > Apps > External Client App Manager
-
In the top right corner, select New External Client App
-
-
Fill in Basic Information
-
External Client App Name:
entro -
API Name:
entro -
Contact Email: Enter a valid contact email
-
Distribution State: Select
Local
-
-
Configure API (Enable OAuth Settings)
-
Check the 'Enable OAuth' option
-
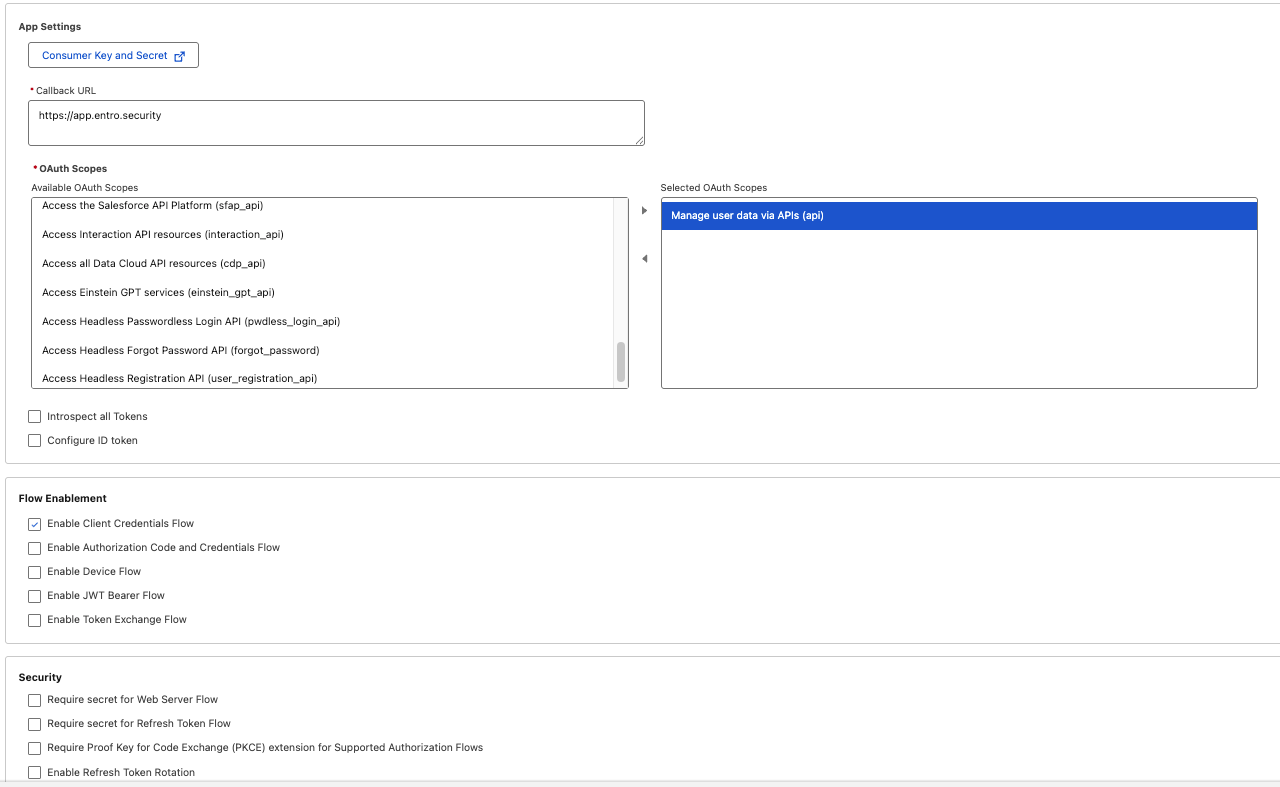
Under App Settings:
-
Callback URL: Enter
https://app.entro.security(This is a placeholder required by Salesforce but not used for this flow). -
Selected OAuth Scopes: Add
**Manage user data via APIs (api)**
-
-
Under Flow Enablement, check the
**Enable Client Credentials Flow**option -
Under Security uncheck all options.
-
-
Review and create
Click on Create to launch the app. &#xNAN;Note: Changes may take a few minutes to propagate in Salesforce.
Part 2 - Configure Policies
-
Edit Policies
-
In the Policies tab, Click Edit.
-
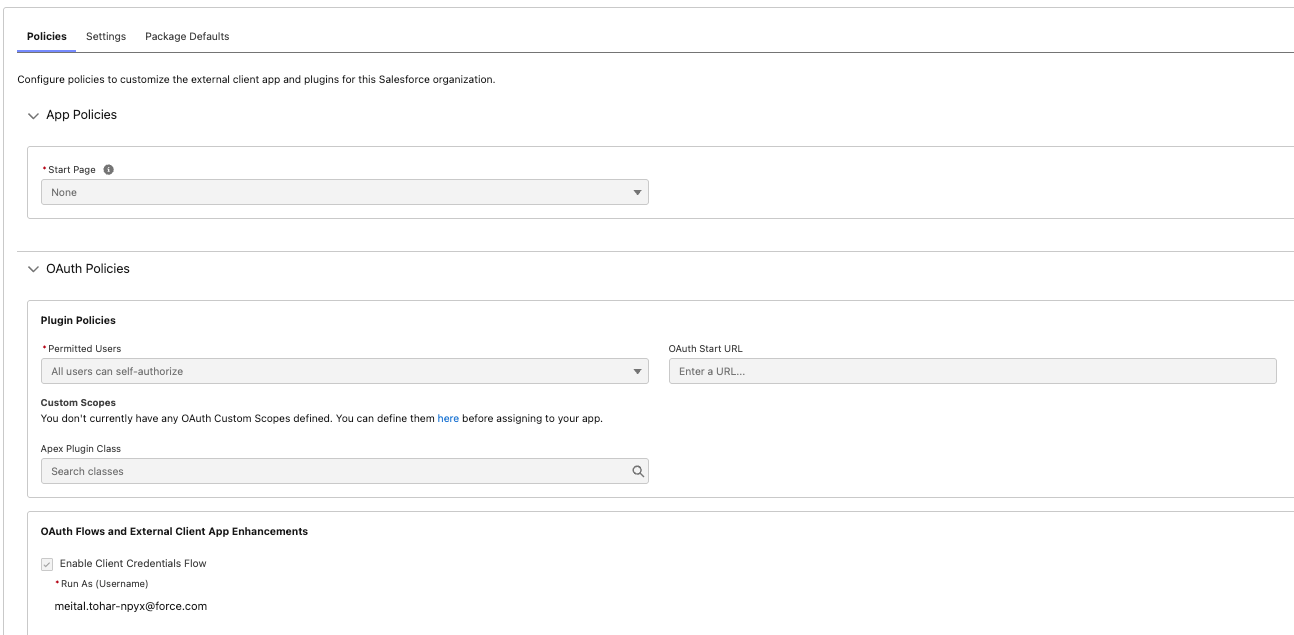
Under OAuth Policies:
- In Plugin Policies → Permitted Users: Select
All users can self-authorize.
- In Plugin Policies → Permitted Users: Select
-
Under Client Credentials Flow:
- In Run As User: Search for and select the user you would like to use for this integration.
Note
Note: You may use an existing user, or create a dedicated user with limited permissions for security hygiene.
Optional: Create dedicated user with required permissions
When using a dedicated user, with custom profile, make sure to assign the following permissions:
-
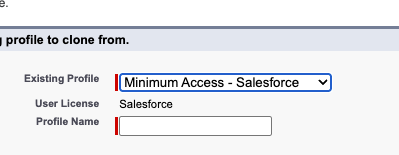
Navigate to Setup → Users → Profiles
-
Create a new profile, based on "Minimum Access - Salesforce"
-
After creation, edit default permissions:
-
Under 'Administrative Permissions', make sure to check:
-
API Enabled
-
Modify Metadata Through Metadata API Functions
-
-
Under 'Standard Object Permissions', make sure to check:
- Cases: Read, View All Fields
-
-
Create a new user and assign this custom profile to it
- Make sure to check the 'Service Cloud User' under role for this user.
Note
Note: Verify the 'Service Cloud User' is set to Active under Setup → Company Information
Click Save
-
Part 3 - Retrieve Credentials
-
On the same app page, navigate to the Settings tab.
-
Under OAuth Settings, click on 'Consumer Key and Secret' section.
-
You will be required to authenticate to Salesforce.
-
Copy the Consumer Key and Consumer Secret to be used for this integration.
Part 4 - Connect Salesforce to SailPoint Entro
-
In the SailPoint Entro platform, navigate to: Management → Accounts & Integrations → Add New Account (top right) → Salesforce
-
Fill in the following fields:
-
Name - A name for the integration to be used within SailPoint Entro (e.g.,
Salesforce-CRM). -
Salesforce URL - Your specific domain URL (e.g.,
https://<mycompany>.my.salesforce.com). -
Consumer Key - generated in previous step
-
Consumer Secret - generated in previous step
-
-
Click Connect
Validation
After connecting, SailPoint Entro automatically:
-
Validates the provided credentials.
-
Confirms read access to Table and Attachment APIs
-
Begins secret scanning of service cases.
When successful, the integration status will display Verified in the SailPoint Entro Console.