Jenkins Onboarding
Configuration Steps
Optional: create a dedication user
To ensure secure read-only access, it is recommended to generate the API token from a dedicated service user with read-only permissions, to ensure the integration has the minimum necessary access to your system.
-
Install the Role-Based Authorization Strategy plugin in your jenkins server
-
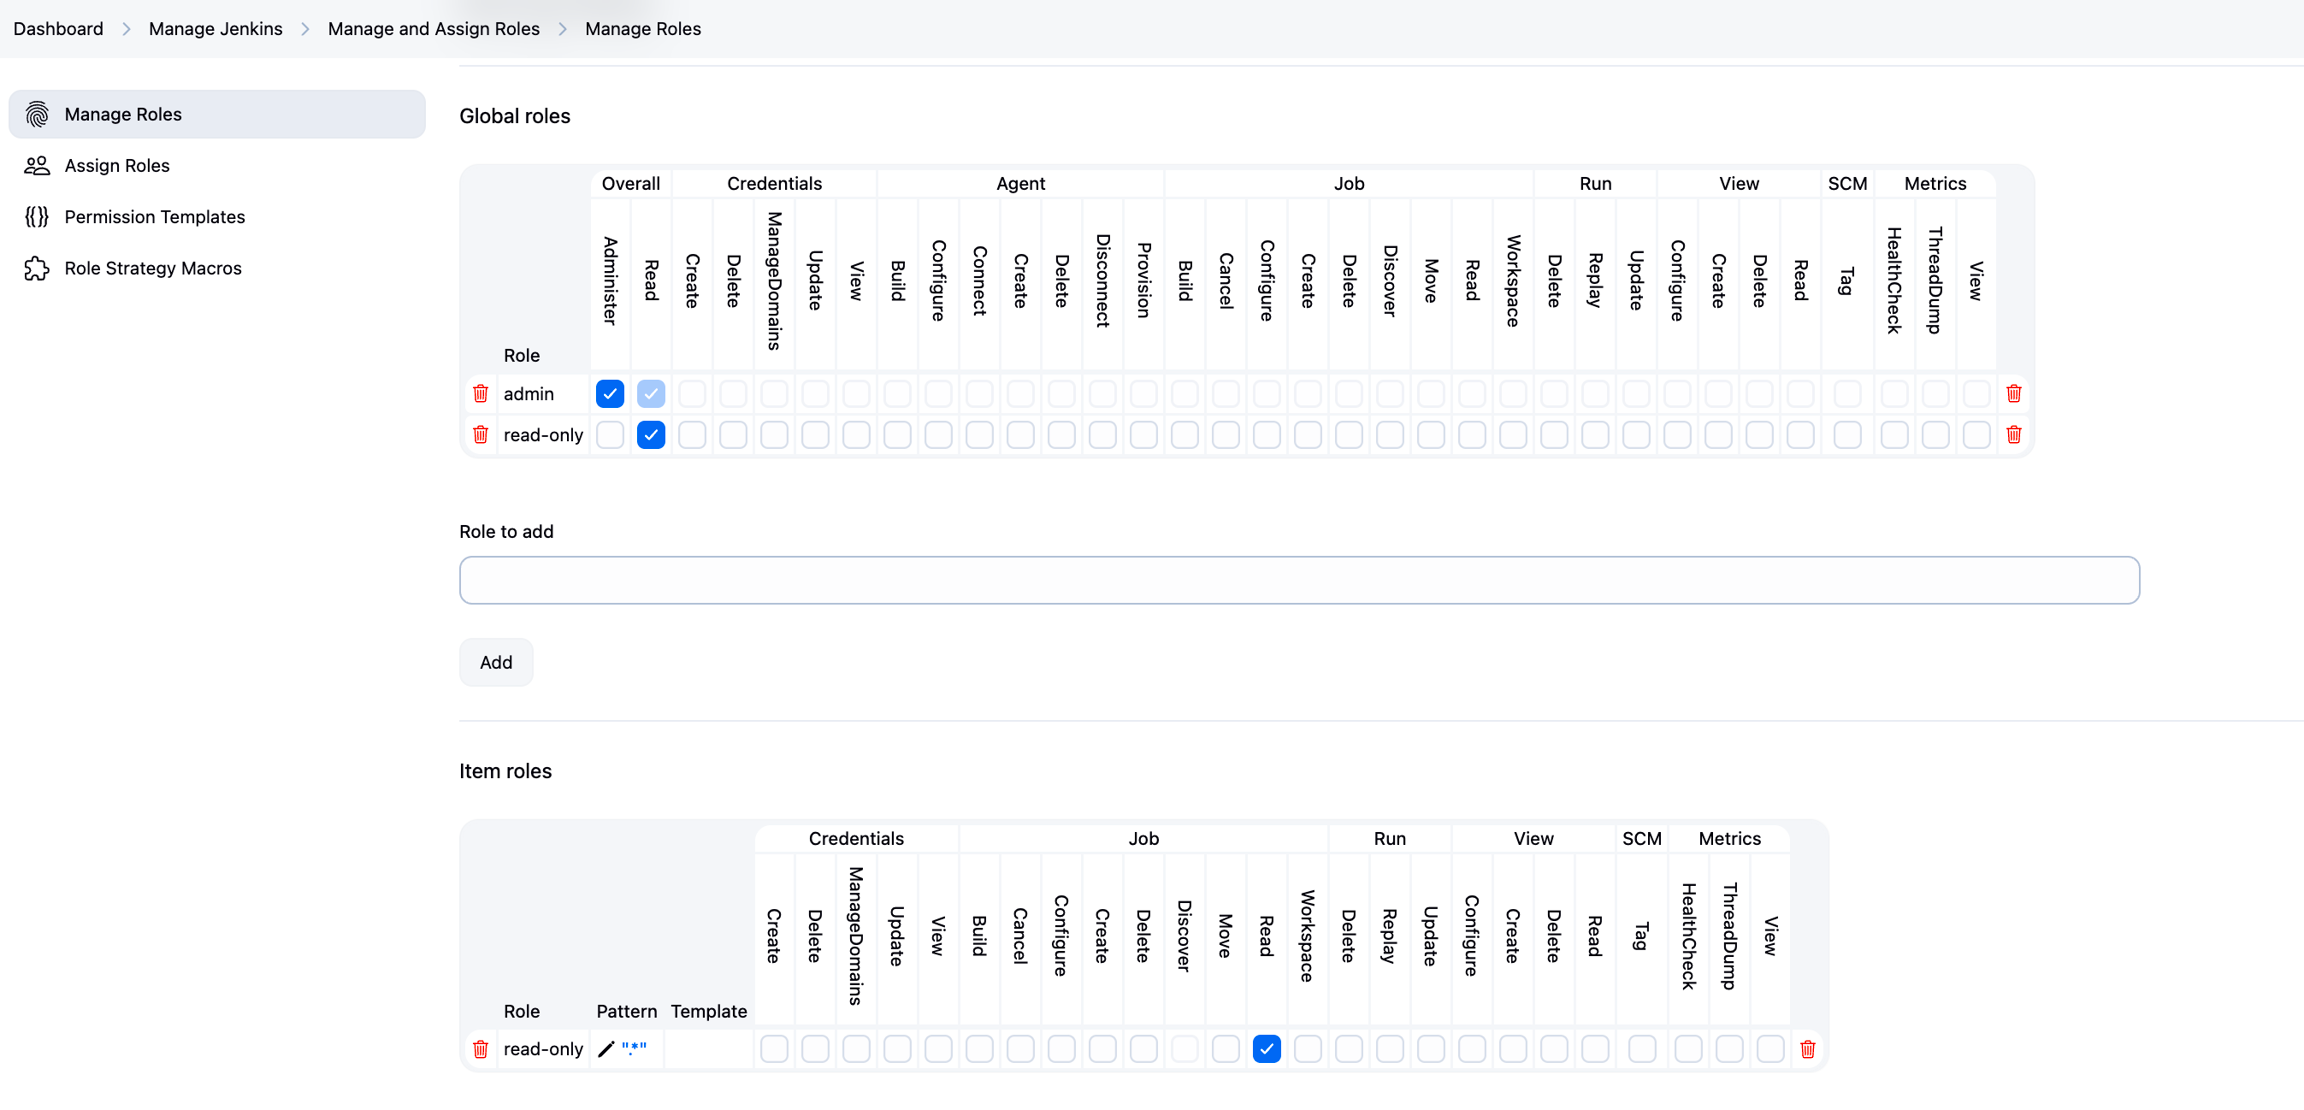
Navigate to Manage Jenkins > Manage and Assign Roles > Manage Roles
-
Create a role with following permissions:
-
Overall/Read
-
Job/Read
-
-
Create a new user for this role, to be used for this integration
2
Generate a Jenkins API Token
An API token is required for SailPoint Entro to securely connect to Jenkins.
-
Log in to the Jenkins account intended for integration.
-
Click your username in the top-right corner and select Security.
-
Under API Token, click Add new Token and provide a descriptive name (e.g.,
Entro_Integration). -
Copy the generated token immediately and store it securely — it cannot be viewed again later.
Step 2 - Connect Jenkins to SailPoint Entro
-
In the SailPoint Entro platform, navigate to: Management → Accounts & Integrations → Add New Account → Jenkins
-
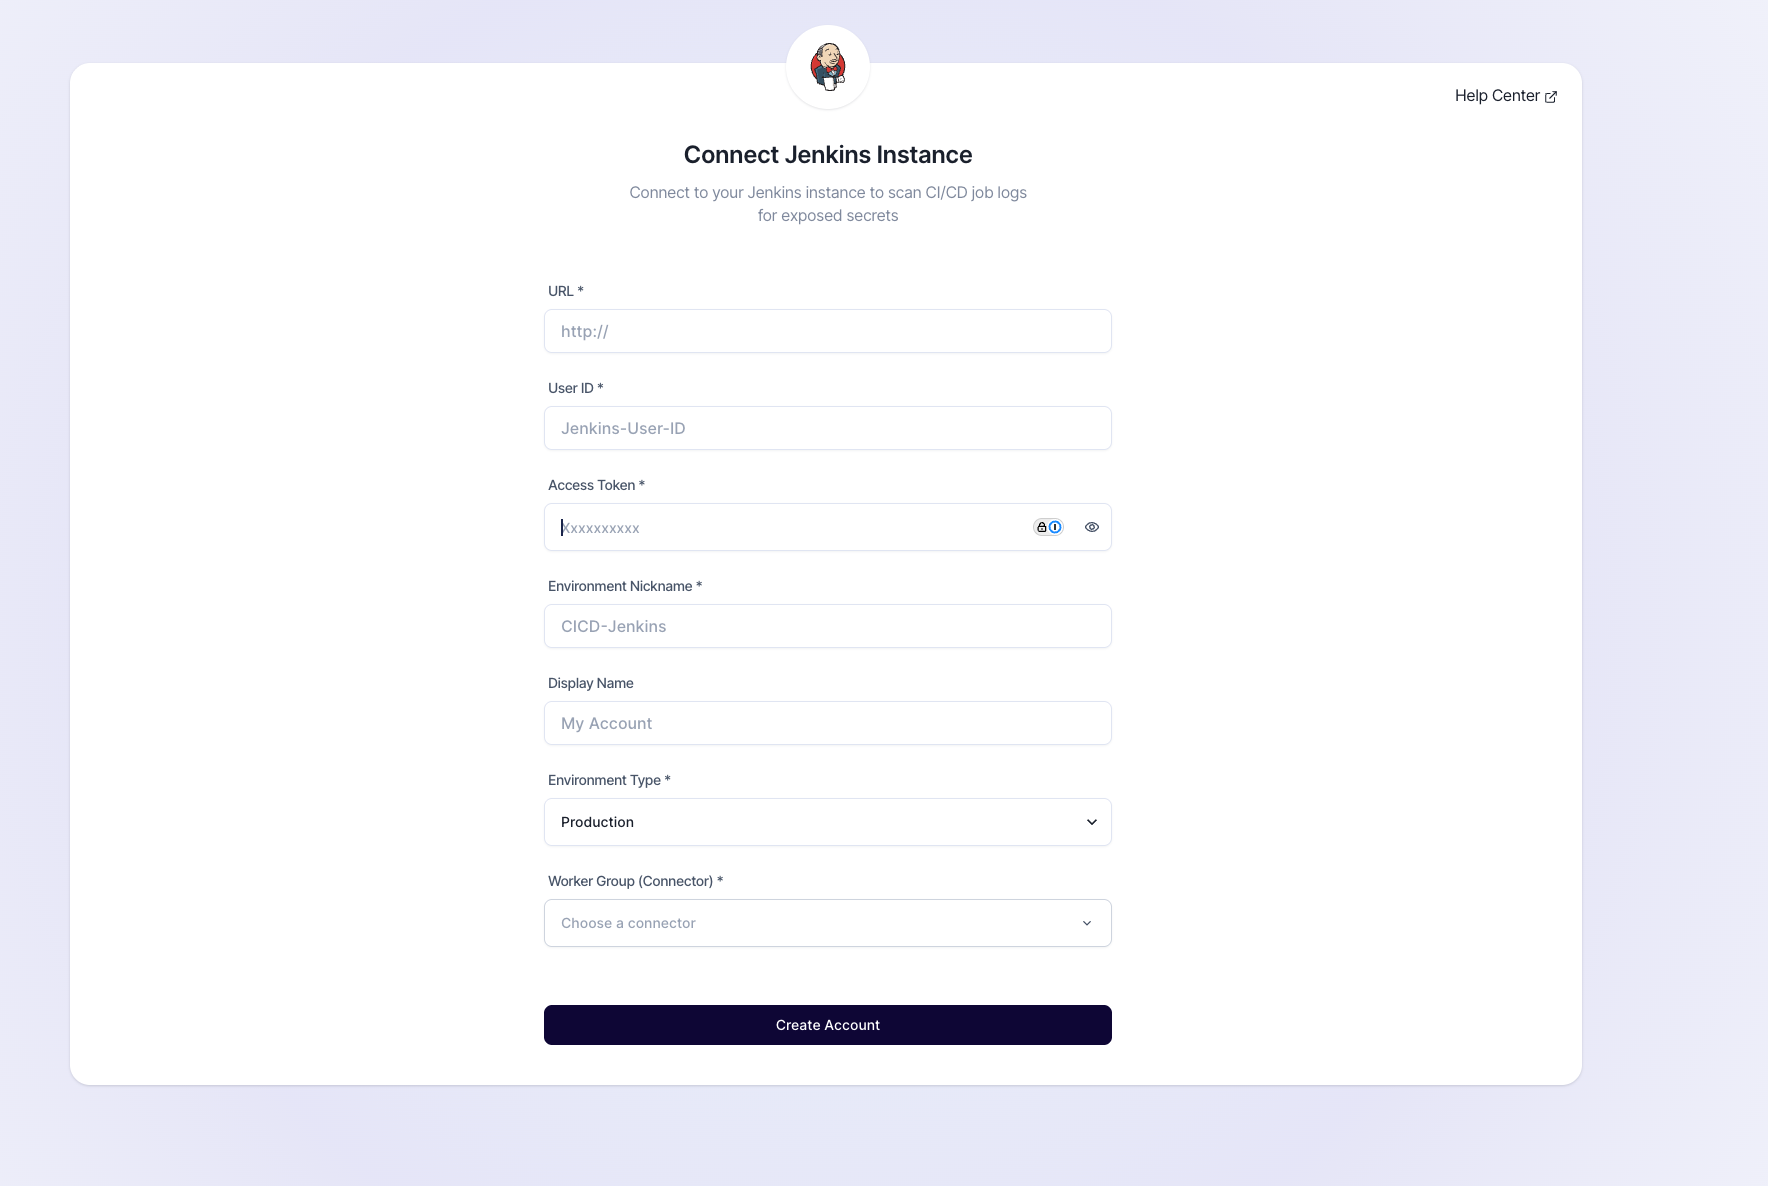
Complete the connection form using the following details:
-
URL: The base URL of your Jenkins instance
-
User ID: The Jenkins user ID associated with the API token
-
Access Token: Paste the API token generated in the previous step
-
Environment Nickname: Enter a descriptive name (e.g., CICD-Jenkins)
-
Environment Type: Select the relevant environment (e.g., Production)
-
Worker Group (Connector): Choose the SailPoint Entro Worker handling the scan
-
-
Click Create Account.
Step 3 - Validation and Scanning
Once connected:
-
SailPoint Entro validates the token against the Jenkins REST API, and verifies required permissions are granted.
-
Jenkins data is scanned for secret exposures across pipeline logs and configurations.
-
Findings appear in your SailPoint Entro Console with metadata and severity context.