Message Templates
The message templates are used to send alerts and messages to users in various scenarios. For example, if while creating an Access Certification template, an administrator checks the check box to send a reminder, the system will send the reminder automatically, according to the format and parameters of the Scheduled Reminders template. The templates use variables to be replaced by the actual relevant data when sending the message.
The available templates are listed above. Edit the templates to fit your company culture and language.
To edit a message template, perform the following steps:
-
Open the relevant template.
-
Go to Settings > Message Templates > [template submenu] (see list above).
-
Check Enable Message to toggle the checkbox and enable the subject and message input fields.
-
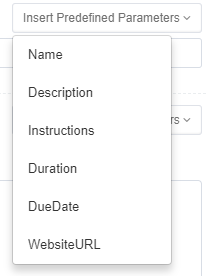
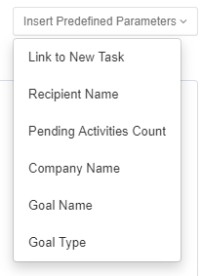
To add variables to the heading or message text, select Insert Predefined Parameters, and select one or more fields in the dropdown list. The values in the lists vary according to the context.
Note
The system will replace the values in the dynamic fields with real values when the messages are sent.
-
Select Send Test Mail to send a test Email to yourself to check that the information in the Message Template is correct.
-
For templates for scheduled reminders, set the weekday(s) and time for a scheduled reminder in the Send Weekly Reminders section at the bottom of the Scheduled Reminders screen. The default is Wednesday at 13:00.
-
Select Save or Discard to save (or discard) the template.
Note
The system saves this template to the web client server to create messages when required.
Access Certification
These are automated emails referring to the access certification process.
| Description | |
|---|---|
| Campaign Invitation | This message is global to all campaigns, but can be overridden for a specific campaign. It is sent to the reviewer with every new campaign pending that reviewer’s decision. |
| Schedule Reminders | This reminder is global to all campaigns, but can be overridden for a specific campaign. It is sent to all pending reviewers, per the weekly schedule. |
| Access Requests | This email is sent to a user who created an access request, when the request is finalized. In any of the stages: - Approved - Rejected - Fulfilled |
Data Owners Election
| Message | Description |
|---|---|
| Welcome Message | A Welcome email message is sent to users when they get their first task, explaining the need for data owners and owner election, and their part in the process. |
| New Task | A New Task message is sent to users whenever they receive a new task. |
| Pending Activities | A Pending Activities message is initiated (on-demand) by the administrator and is sent to users who do not fulfill their tasks. |
| Scheduled Reminder | A Scheduled Reminders message is sent, according to the set schedule, to all users with pending tasks. |
Review Task
A Review Task message is sent to relevant reviewers after a data owner’s election process has concluded.
To send a Review Task message, perform the following steps:
-
Go to Settings > Message Templates > Data Owners Election > Review Task.
-
Check Enable Message.
-
The checkbox it is ticked, and the fields under Subject and Message Template are enabled.
Note
The system sends this message to the Data Owners election reviewers in the goal Appointment portion of this process. The review task will appear in My Tasks > Owners Election.
-
Continue as described above.
Owner’s Appointment
Go to Settings > Message Templates > Data Owners Election > Owner’s Appointment.
An Owner’s Appointment message is sent once to each of the appointed owners of a resource.
The message is supposed to explain the data owner role as access request approver.
Something along the lines of:
Your colleagues have elected you as the Data Owner for the following resource under the $$APPLICATION\_NAME$$ application: $$RESOURCE\_PATH$$
As a Data Owner you are required to take an active role in protecting the sensitive information within your resource. The processes in which your participation is needed may include reviewing suspicious activity on your resource, reviewing new access requests, and certifying the currently granted permissions.
We will approach you once your input is required.
Note
The system sends this message to users who have been appointed as data owners.
Company Information
The Company Information template contains the name and logo to be included in every email message.
To set the details in a Company Information message (sent in emails), perform the following steps:
-
Go to Settings > Message Templates > Data Owners Election > Company Information.
-
Enter the company name.
-
Select Select File to select a logo image from your drive. The file size cannot exceed 300 x 140 pixels.
-
The logo displays in the Company Logo graphic box.
-
Select Remove to remove the logo.
-
Select Save to save the Company Information or Discard to discard it.
System Notifications
To see System Notification, go to Settings > Message Templates > System Notifications.
System notifications alert users when a service goes down.
While a default message can be used as a notification, users can also change the default message to conform to their company’s particular needs.
The following predefined parameters are available:
-
ServiceName
-
Server
-
ServiceType