Campaign Management
To manage existing campaigns
Go to Compliance > Access Certification > Campaign Management.
The campaigns display from left to right, row by row, sorted chronologically by date of campaign creation.
You can filter the display of campaigns for easier viewing.
Filtering Campaigns
-
Select Filters.
-
Under Filters, type or select the relevant data in the following fields to narrow your search of campaigns:
-
Campaign Name - Type the first letter or letters of the campaign name, and then select Search next to that field.
-
Owner - Type the first letter or letters of the owner (user), and then select Search next to that field.
-
Status - The dropdown list contains the following options:
-
Created
-
In Process
-
Completed
-
Pending Re-initialization
-
Pending Deletion
-
Pending Creation
-
Deletion Failed
-
Pending Review In Process
-
Pending Completion
-
Creation Failed
-
-
-
Type - Select All, Permissions, or Identities from the dropdown menu.
-
Due Date - Select All, Overdue, Due Today, Due in 7 Days, or Define Range from the dropdown menu.

-
-
If you select Define Range from the dropdown list, a calendar displays for you to select a date range.
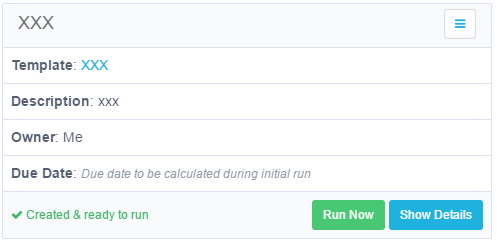
Each displayed campaign lists the following information:
-
Template - The template name displays as a link, which the user can select to edit the template. Any changes that the user makes to the template will only affect future campaigns. If the campaign was created without a template, “No Template” will display (but not as a link).
-
Description - The template description displays.
-
Owner - The template owner displays.
-
Due Date - The due date displays. If the status is Pending Creation (Creation in Progress) or Created (Created & ready to run), then “Due date to be calculated during initial run” displays.
-
Color Code
-
Yellow - Status is Pending Review in Progress, 0-7 days before the date.
-
Red - Status is Pending Review in Progress, due date has past.
-
Refresh - This button refreshes the current campaign status, and is located on the bottom left of the displayed campaign.
-
Run Now - This button only displays for a campaign whose status is Created (Created & ready to run). When you select this tab, it creates a task that:
-
Runs the campaign
-
Sets a campaign due date
-
Sets the campaign reviewers
-
Sends email notification to the reviewers, requesting them to approve or reject suggested user accesses.
-
-
-
-
Menu Options
The menu button, on the top right of each campaign display, contains various options, depending upon the campaign status. All options are available when the campaign status is Review in Progress, and include:
-
Edit - Edit the campaign.
-
Save as Template - Save the campaign as a template.
-
Refresh - Refresh the user’s view of the campaign status.
-
Reinitialize - Create a task that reinitializes the campaign.
-
Delete - Delete the campaign.
-
Send Reminders - Send reminder emails to reviewers to complete the campaign.
-
Generate Report - After you select this option, you can view the generated reports by navigating to Reports > My Reports.
Campaign Management Reports
A user can generate a report from the Campaign Management screen. This report contains a detailed list of all records, including their process levels and a summary of their statuses.
Campaign Details
The Show Details tab provides a variety of functions.
-
Select the Show Details tab to display campaign details, including the campaign name, template, owner, type, status, and other information.
-
Select End Campaign to end a campaign, or Hide Details to hide certain details.
-
End Campaign - Select this if you want to end a campaign in progress before all the reviewers have finished their tasks. The campaign will end automatically, and will remove all uncompleted tasks from the reviewers’ My Tasks lists. Once you end a campaign, all access requests that have not been rejected will be accepted, and the reviewers can no longer work on that campaign. In addition, it will create revoke requests for any records rejected during the campaign if the campaign was set to create those revoke requests.
-
Hide Details - Select this to hide the first three rows displayed.
-
Campaign Detail Options
-
Pending Records Per Reviewers - This tab is activated by default. It is displayed with white letters on a blue background, and lists only the relevant campaign’s pending records by reviewer.
-
Reassign Records - Reassign pending records to different reviewer(s).
-
Send Reminders - Send reminders to reviewers regarding actions on pending records.
-
Bulk Actions - Reassign records in bulk or to send reminders in bulk.
-
Filter - Filter pending records by Reviewer or Level Name.
-
All Records - Display all a campaign’s records.
You can reassign records, revert the review process, or show the review process if the campaign is in the In Progress status.
-
Reassign Records reassigns pending records to different reviewer(s).
-
Revert Review Process reverts the review process to a previous state.
-
Show Review Process shows all review process details at all levels.
There is no Show Details button for a campaign whose status is Creation in Progress.
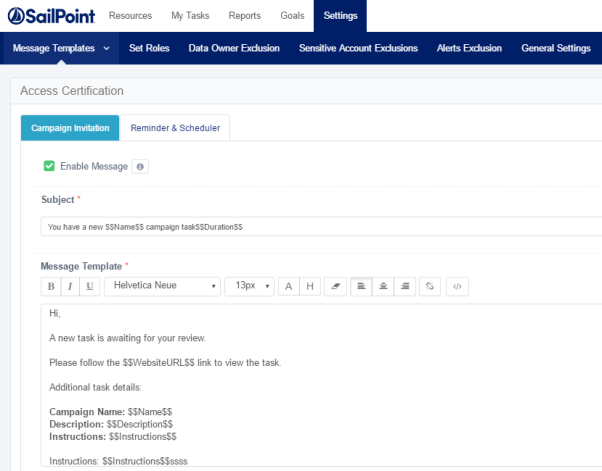
Campaign Invitation
This message is global to all campaigns but can be overridden for a specific campaign. It is sent to the reviewer with every new campaign pending that reviewer’s decision.
To send a Campaign Invitation message, perform the following steps:
-
In the web client, go to Settings > Message Templates > Access Certification > Campaign Invitation.
-
Check Enable Message.
-
The checkbox turns green with a white check mark in it, and the fields under Subject and Message Template are enabled.
Remove Direct Permissions in Campaigns
When campaign reviewers reject access, this generates an access requests for permission removal.
For additional information on access fulfillment and certification, see the Permissions chapter, and particularly Access Fulfillment.
-
Create and save a Permissions Query, as described in Creating and Editing a Forensics Query.
-
In the web client, go to Compliance> Access Certification:
-
Create a campaign using the Permission Query.
-
From Summary > Fulfillment Process, select Edit.
-
Select Fulfill Permissions Revoke Requests.
-
Select Save and Run the Campaign.
-
-
Once the review process for Access Requests is finished, the system removes all direct permissions on supported applications from the relevant BRs.
Monitoring the Progress of Permission Removal
Access Fulfillment is created for each direct permission marked for removal. To monitor progress, in the administrative client, go to Access Fulfillment in the administrative client and filter the Fulfillment Requests by Action “Remove Permission.”