Goals
Data Owners are responsible for protecting the data within a specific resource. Administrators use the Goals process so that those who are the most knowledgeable regarding the use of a specific resource can elect the most suitable data owners for a specific resource. This process uses a crowd sourcing process.
Note
In the default configuration, only administrators can access and view the Goals tab.
Activity
Each selection of a data owner for a particular resource in a crowd sourcing process.
Goal
A collection of all the selections of data owners for a particular resource in a crowd sourcing process. Therefore, a “goal” is a collection of activities.
For example, if the goal is to determine the identity of the data owners for five business resources in a file server application, that goal consists of five activities - one for each resource.
Goal Lifecycle Stages
Creation
First, an administrator creates goal activities, specifying the goal type, application, scope, and settings.
Pending for Execution
After goal creation, but before the system sends emails to participants, an administrator checks the goal status, including the goal participants selected and the data owner candidates selected, to validate successful goal creation.
Election
After goal execution, the participants who were decided upon in the creation process vote for data owners.
Appointment - reviewers review the selected data owners unless the administrator chooses the automatic selection of data owners.
Finished
A goal is completed when all the goal activities have been completed, for example, all data owners have been assigned.
Note
You can block users from being eligible for election as data owners using the Goals Exclusion setting. See Excluding Accounts from File Access Manager Processes.
Creating Goals
The Set New Goal process consists of the following steps:
-
Goal Type
-
Application
-
Scope
-
Settings
-
Summary
To set a new goal:
-
Go to Goals > Set New Goal.
-
Select the relevant goal type from the available types.

-
Select Next to select the application.
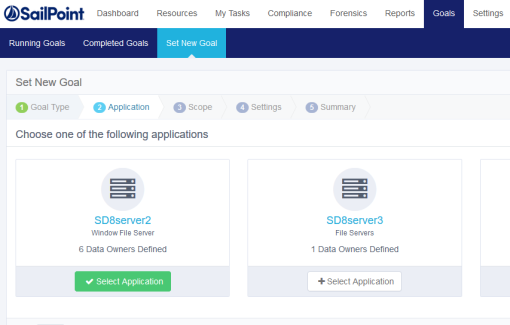
-
Select one of the applications displayed. The resources for this goal will be from the selected application.
-
Select Next to set the scope.
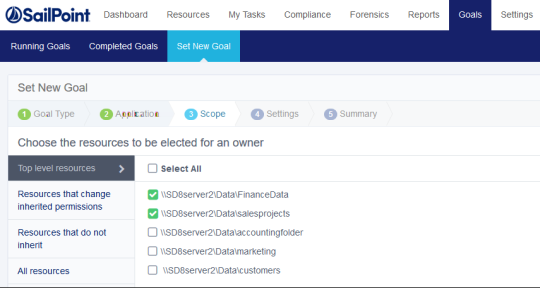
-
Select one or more resources from any of the categories, including:
- Top level resources - resources for a specific application from the top level of the resource tree.
- Resources that change inherited permissions - resources that inherit permissions, with permissions added to those inherited permissions.
- Resources that do not inherit - resources that break an inheritance.
- All resources - resources from the entire resource tree.
-
Select the checkbox next one or more resources to select that resource, then select Add under the resource list to add the resource as a new activity in the current goal.
Check the Select All checkbox to select all the resources listed under each category.
The number of resources selected displays in parentheses in Resources Added, and the added resources are unchecked in the original resource list.
-
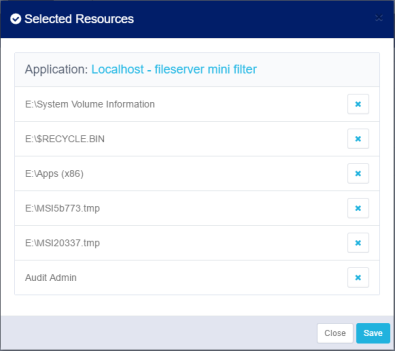
Select Resources Added to display a list of Selected Resources.
-
Select the blue X to the right of any selected resource in the list of resources to deselect that resource.
-
Select Save to save the revised selection of resources.
-
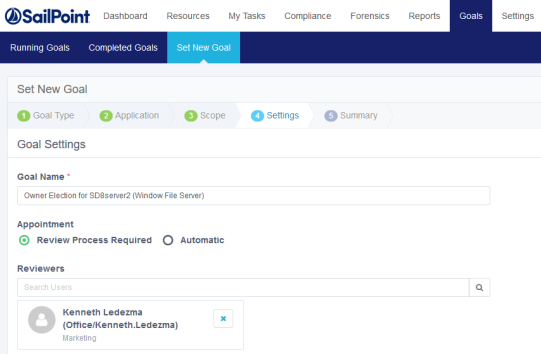
Select Next to open the Settings screen.
-
In the Goal Name text box, enter an appropriate name for the goal.
-
There are two methods of finalizing data owners:
-
Review Process Required - A reviewer has to either approve or reject the selected data owners who were voted for before their final appointment.
-
Automatic - Appoint selected data owners without a review based on the votes of the participants.
-
-
If you select Review Process Required:
-
Select a reviewer by starting to type in the Reviewers text box.
-
Select the blue X to the right of any selected reviewer in the reviewer list to deselect them.
-
-
Select Next to open the Summary screen.
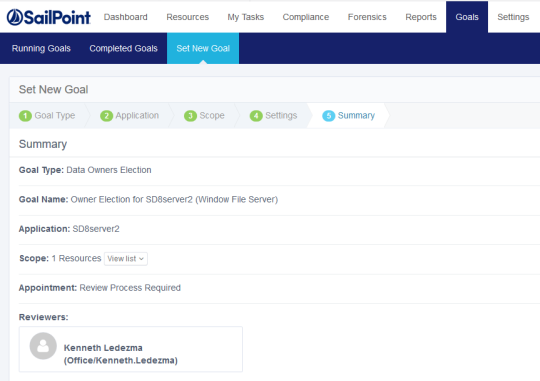
The goal Summary screen lists the following information:
-
Goal Type - The goal type, for example, Data Owners Election.
-
Goal Name - The name selected for the goal.
-
Application - The application for which a data owner is to be selected.
-
Scope - Number of resources.
-
Appointment Method - Either Review Process Required or Automatic.
-
Reviewers - Names of reviewers if the appointment method is Review Process Required.
-
-
Select View List in Scope to view the selected resources.
-
Select Create Goal at the bottom right of the Summary screen.
-
A success dialog displays, indicating that the goal was created successfully, and requesting that you execute the goal in Running Goals.
-
Select OK.
Goal Status
Administrators can manage goals more efficiently by viewing the status of the goals before executing them.
To view status details for a newly created goal, perform the following steps:
-
Go to Goals > Running Goals.
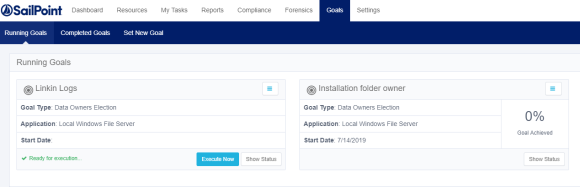
The Running Goals screen displays.
If the goal is ready for execution, “Ready for execution” displays in green at the bottom left of the New Goal box.
-
Select Show Status at the bottom right of the Running Goals box.
The status of the running goals displays, based on one of the following filtered statuses (the default is All):
-
All - displays all the resources in this goal.
-
Election - displays resources pending completion of voting.
-
Appointment - displays resources that are pending review.
-
Finished - displays all the resources for which the Election and Appointment processes have been completed.
If no candidates were selected as data owners for a given resource, the message “There were no eligible candidates for the selected resource” displays to the right of the list of resource statuses.
-
-
Select Menu on the right top of the Running Goals window to display a dropdown menu of status activities.
The Running Goals status actions include:
-
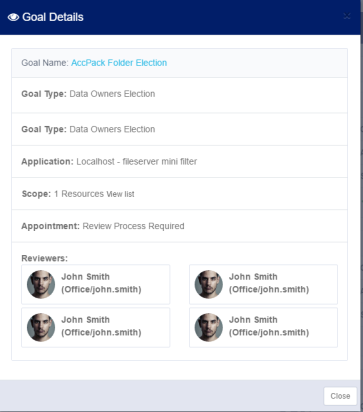
View Details - Displays all the goal details
-
Refresh - Updates the goal status
-
Reinitialize - Starts the goal creation process from the beginning. After reinitializing, the status will be Ready for Execution and the system will delete all votes. This action cannot be undone. A confirmation dialog displays. Select Yes to reinitialize or No to return to the Running Goals screen.
-
Delete - Deletes the goal. This action cannot be undone. A confirmation dialog displays. Select Yes to delete or No to return to the Running Goals screen.
-
-
Select Execute Now at the bottom of the Running Goals box to execute. pending running goals.
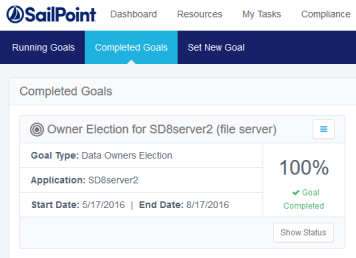
Completed Goals
Several actions are available for managing completed goals.
-
Select Completed Goals.
A summary of the completed goals displays, including the following information:
-
Goal Type
-
Application
-
Start Date
-
End Date
-
Percentage of Goal Completed
-
-
Select Menu on the right top of the Completed Goals window to display a dropdown menu of status activities.
The Completed Goals status actions include:
-
View Details - Displays all the goal details.
-
Reinitialize - Starts the goal creation process from the beginning. After reinitializing, the status will be Ready for Execution and the system will delete all votes. This action cannot be undone. A confirmation dialog displays reminding you that proceeding will result in the permanent loss of all the data for that goal. Select Yes to reinitialize or No to return to the Running Goals screen.
-
Delete - Deletes the goal. This action cannot be undone.
-
-
Select Show Status at the bottom right of the Completed Goals box.
After a user for whom a review process was required has voted, the system adds a review task to the reviewer’s task list. One user can be both a final candidate and a reviewer.
If a goal is ready for execution, it is possible to see the status of that goal before executing it by selecting Show Status to the right of Execute Now at the bottom right of each goal marked Ready for Execution.
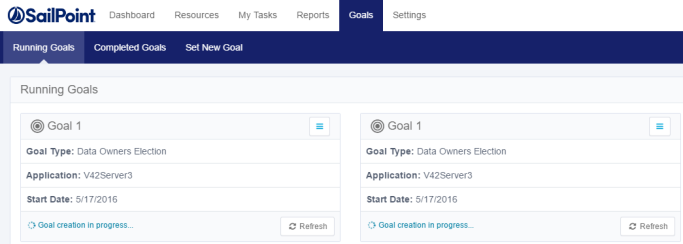
If goal creation is in progress, Execute Now and Show Status are not available. The only available option is Refresh.
To view status details for a newly created goal, select Show Status.
![]()
The Resources section on the left side of the Show Status screen displays the total number of activities (resources) that have been finished for the goal.
In the Status dropdown menu under Resources, the following options are available:
-
All - displays all the resources in this goal.
-
Election - displays activities pending completion of voting.
-
Appointment - displays resources pending review.
-
Finished - displays all the resources for which the Election and Appointment processes have been completed.
The bottom right side of the Resources section displays the previous or next screen, and the number of the total number of screens displayed; for example, ½ indicates the first of two screens.
The Election section of the Show Status screen displays the current results, which are the number of participants who have voted. Up to five data owner candidates may be displayed, with their names, place, and percentage of votes received. However, the first and second place data owner candidates are given prominence.
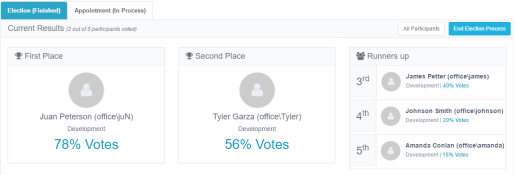
To view the Election Section of the Show Status screen:
-
Select All Participants in the top right of the Election Participants section.
-
A summary of the election participants displays.
-
The viewing options are:
-
All Participants
-
Voted - number of all participants who have already voted.
-
Pending - number of all participants whose vote is still pending.
-
Navigation in the All Participants view of Election section of the Show Status screen is the same as in the Resources section of the Show Status screen.
-
Select Remind next to a user who has not yet voted to remind the user to vote.
-
Select Votes next to a user who has voted to see a list of the people for whom that use voted.
-
Select See Summary in the top right of the Election section to return to the Summary view.
-
Select End Election Process in the top right of the Election section to end the election process even if it does not include 100% of the votes.
-
A confirmation dialog displays, asking whether you want to end the election process.
-
Select Yes to end the election process or No to return to the previous screen.