PingOne SSO
With our PingOne SSO integration, you can view usage data for all your PingOne-integrated SaaS applications, allowing you to identify unused licenses and optimize your SaaS usage.
SaaS Management’s PingOne SSO integration connects to PingOne SSO REST APIs using OAuth2 with Client Credentials grant type.
Integrating with PingOne SSO
To integrate SaaS Management with PingOne SSO, you must create a new OAuth2 Client in PingOne and generate a Client ID and Secret that you’ll later enter into SaaS Management to connect the applications.
You must be an administrator in PingOne to complete this integration.
Note
Before you integrate the applications, make sure you have signed out of your individual account within your organization and are signed in to the appropriate service account with the required permissions.
Creating an OAuth2 Client in PingOne
- From the Ping Identity admin console, select Connections > Applications.
- Select Add (
 ) to create a new application.
 -
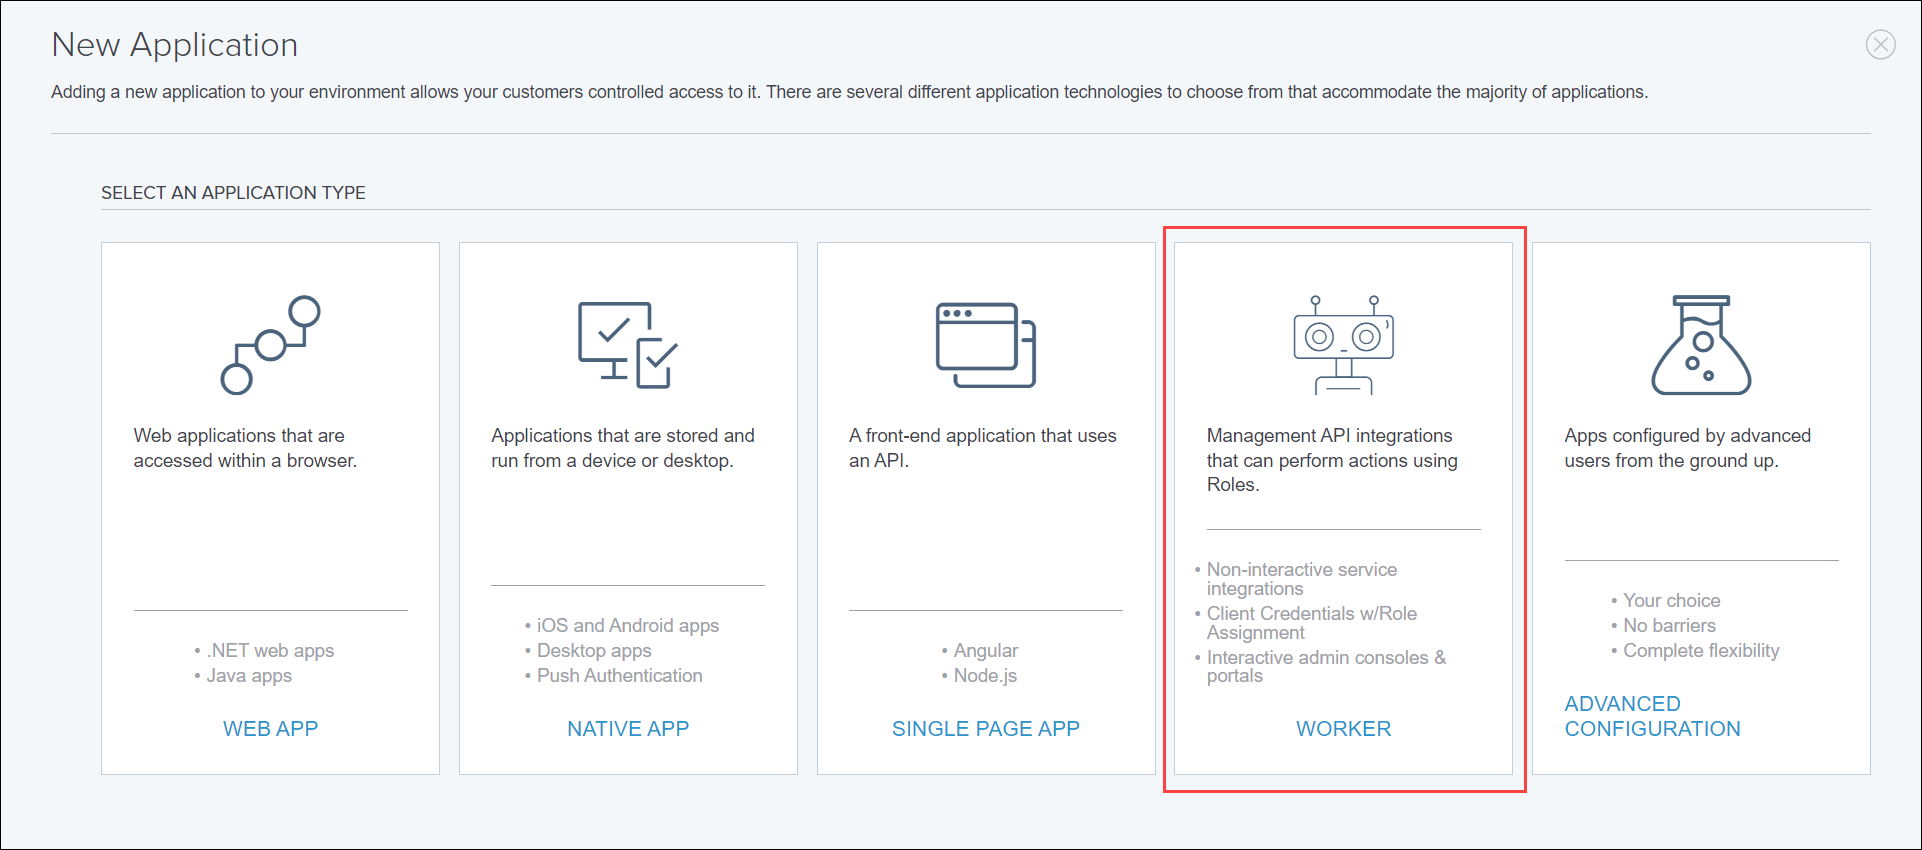
Select the Worker tile.
-
For the Connection Type, select Configure next to the Worker App to configure the application.

-
In the Create App Profile window, complete the following:
- Enter a name for your app. For example, you can use "SailPoint SaaS Management".
- (Optional) Enter a description of the app. For example, you can use the following description: "App for SailPoint SaaS Management to measure usage, permissions, and federated applications."
- (Optional) Upload an icon for the application.
-
Select Save and Continue.
- On the Attribute Mapping page, select Save and Close. The integration requires no mappings.
- On the Applications page, select the Enable toggle (
 ) to enable the application you created.
 - From the Options menu (
 ), select View.
 - In the Configuration tab, go to the General section.
- Copy your Client ID and select the Show icon (
 ) to view and copy your Client Secret. You’ll need this information to connect PingOne SSO to SaaS Management.
 - Select the Edit icon (
 ).
). - Under Grant Type, select the Client Credentials checkbox.
- Under Token Endpoint Authentication Method, select Client Secret Post.
- Select Save to save these changes.
- In the Roles tab, confirm the new application has the following roles:
- Client Application Developer
- Environment Admin
- Identity Data Admin
You can now use your Client ID and Secret to connect PingOne SSO to SaaS Management.
Connecting PingOne SSO to SaaS Management
- From the SaaS Management navigation menu, select Integrations.
- Select the PingOne tile.
- Select Add Integration.
-
Enter the following information in the appropriate fields:
- Your PingOne Client ID — Your Client ID from PingOne.
- Your PingOne API Client Secret — Your Client Secret from PingOne.
-
Your Region — Enter your PingOne region code. You can enter one of the following options:
comfor the North America regioncafor the Canada regioneufor the European Union regionasiafor Asia-Pacific region
Important
Your Region is case-sensitive and must be entered in lowercase letters.
- Your PingOne Environment ID — To find your Environment ID, select Administrator > Environment. Select the Copy to Clipboard icon (
 ) next to your Environment ID to copy the ID.
-
Select Submit to complete the integration.
It can take up to 24 hours for your PingOne data to sync.
Required Permissions
You must be an administrator in PingOne to complete this integration.
User Metadata
SaaS Management pulls the following user metadata from PingOne. You can filter your usage data by these fields:
| Field | Description |
|---|---|
| Can Authenticate | Indicates whether the user can authenticate. |
| Locality | The user's city or locality. |
| MFA Enabled | Indicates whether the user has multifactor authentication enabled. |
| Region | The user's state or region. |
| Status | The account's state. |
| Type | The type of user. |
| Verify Status | Indicates whether ID verification can be completed for the user. |
Documentation Feedback
Feedback is provided as an informational resource only and does not form part of SailPoint’s official product documentation. SailPoint does not warrant or make any guarantees about the feedback (including without limitation as to its accuracy, relevance, or reliability). All feedback is subject to the terms set forth at https://developer.sailpoint.com/discuss/tos.