ServiceNow
SaaS Management integrates directly with ServiceNow, so you can view all user activity within the application. The integration gives you the usage data you need to make informed decisions on inactive licenses and any renewal or purchasing options. User engagement data, such as the numbers of times users interact with tickets, can help you determine if their licenses are active or needed.
SaaS Management’s ServiceNow integration connects to ServiceNow REST APIs using OAuth2 with the password grant type.
Creating an OAuth2 Client in ServiceNow
To create an OAuth2 client to connect to ServiceNow REST APIs, log in to the ServiceNow Service Management console as an administrator.
-
Log in to your ServiceNow tenant’s Service Management console as an Administrator.
-
Enter
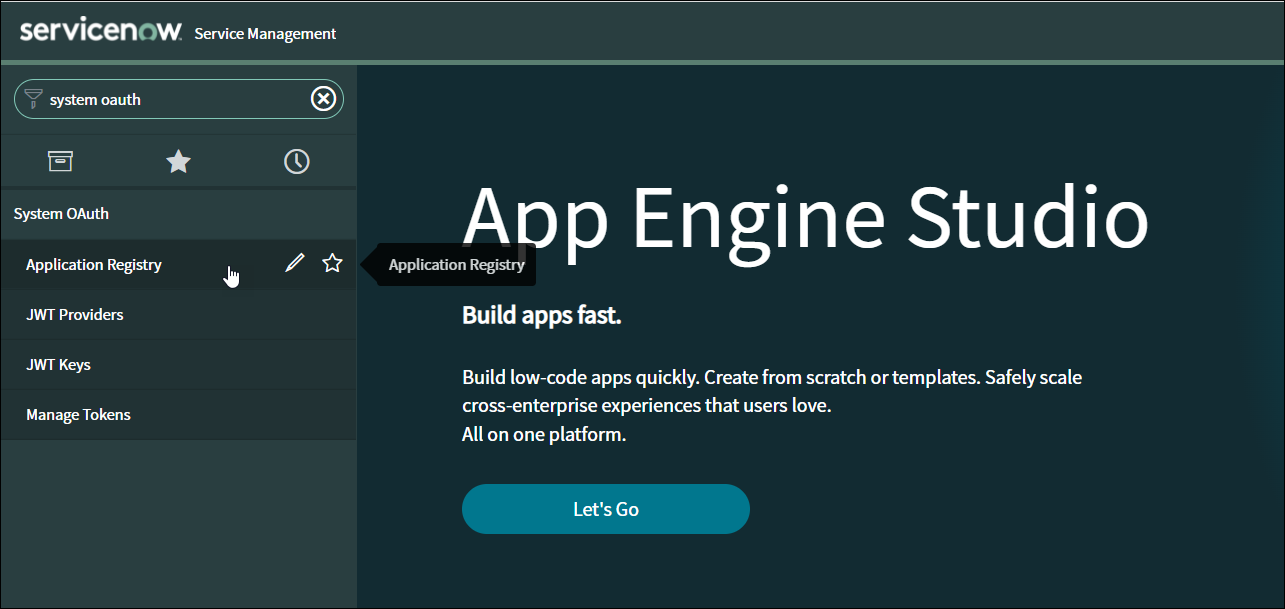
System OAuthin the search bar on the left panel.

-
Under System OAuth, select Application Registry.
-
Select New to create a new OAuth2 application.
-
Select Create an OAuth API endpoint for external clients.
-
Enter the following OAuth2 client application details in the appropriate fields:
- Name - A unique name for the client, such as SailPoint SaaS Management.
- Application - The application scope for the OAuth2 client, such as Global.
- Client ID - The Client ID that is automatically generated by ServiceNow.
- Client Secret - The Client Secret for the OAuth2 client. If you leave the field blank, ServiceNow will automatically generate a Client Secret.
- Redirect URL - (Optional) The redirect URL that the authorization server redirects to.
- Refresh Token Lifespan - The number of seconds that the refresh token is valid. This value should be a large number. For example, the default validity is 8,640,000.
- Access Token Lifespan - The number of seconds that the access token is valid. The default access token validity is 1,800 seconds.
-
Select Submit to create the OAuth2 client. If you left the Client Secret field empty, a client secret will be generated.
- On the Application Registries page, select the OAuth2 client you created.
- Copy the Client ID and select the Padlock icon to display and copy the Client Secret.
Now you can enter your Client ID and Client Secret in to SaaS Management to connect the applications.
Connecting ServiceNow to SaaS Management
- Select Integrations from the SaaS Management navigation menu.
- Select the ServiceNow tile.
-
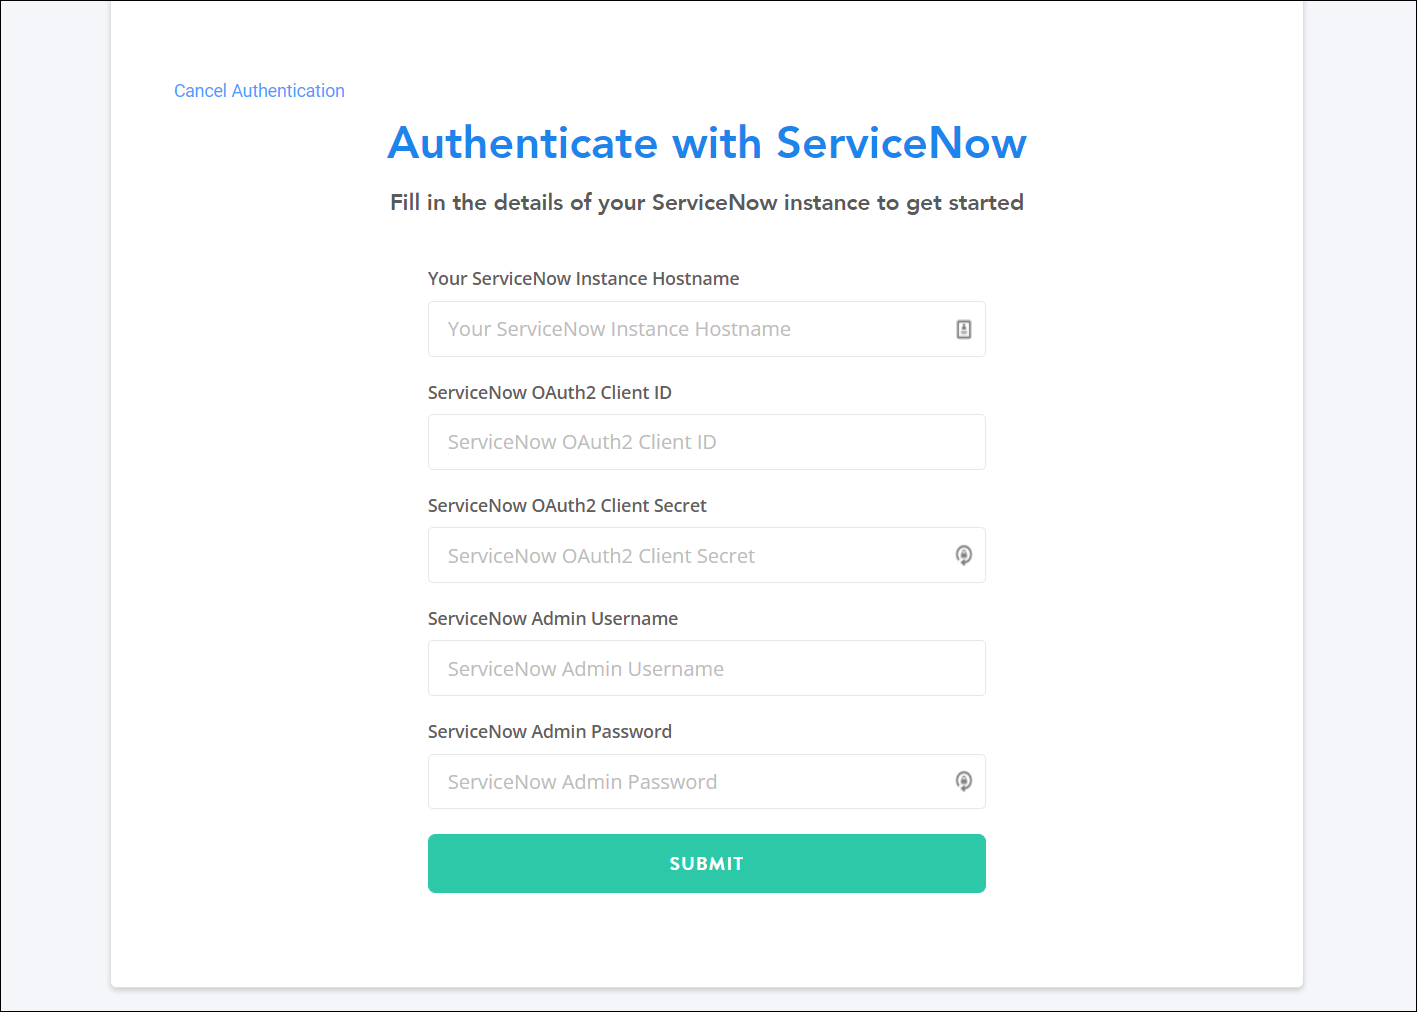
Select Add Integration to open the Authenticate with ServiceNow window:
-
Enter the following information in the appropriate fields:
- Your ServiceNow Instance Hostname — Your hostname is your ServiceNow instance's URL without the
https://. - ServiceNow OAuth2 Client ID
- ServiceNow OAuth2 Client Secret
- ServiceNow Admin Username
- ServiceNow Admin Password
- Your ServiceNow Instance Hostname — Your hostname is your ServiceNow instance's URL without the
-
Select Submit to complete the integration.
It can take up to 24 hours for your ServiceNow usage data to sync.
After your data syncs, you can filter and view your ServiceNow users by the following fields:
- Country
- Web Service Access Only
- Cost Center
- Title
- Enabled Multi-factor Authentication
- Locked Out
- Internal Integration User
- Password Needs Reset
- VIP
For more information on these fields, refer to the ServiceNow product documentation.
Documentation Feedback
Feedback is provided as an informational resource only and does not form part of SailPoint’s official product documentation. SailPoint does not warrant or make any guarantees about the feedback (including without limitation as to its accuracy, relevance, or reliability). All feedback is subject to the terms set forth at https://developer.sailpoint.com/discuss/tos.