Setup
The Cloud Access Management integration feature will have to be installed and then configured to integrate with IdentityIQ.
For more information, see:
Installation
Use the following information to activate your Cloud Access Management installation.
-
Log on to your instance of IdentityIQ as an administrator.
-
Click on gear menu > Global Settings and select Import from File Page.
-
Click Browse and browse to the following directory:
identityiq_home\WEB-INF\config where identityiq_homeis the directory in which you extracted the identityiq.war file during the IdentityIQ installation procedure. -
Select the init-cam.xml file and click Import.
-
When the import is complete, click Done.
Note
A restart of currently running application servers is required after init-cam.xml is installed.
Configuration
Use the Cloud Access Management configuration page to connect IdentityIQ to Cloud Access Management Services. To access this page, click gear menu > Global Settings > Cloud Access Management Configuration.
Enter your connection and configuration settings. Be sure to Save your changes.
Connection Information for Cloud Access Management Services
CAM Hostname
The hostname of the Cloud Access Management website for your organization. For example, https://<org>.cam.sailpoint.com.
OAuth Token Hostname
The hostname of your Identity Security Cloud tenant, which is used to create the Cloud Access Management access token using the Client ID/Secret. For example, https://<org>.api.identitynow.com
Client ID / Client Secret
The Client ID is the identifier associated with the Cloud Access Management API service. The Client Secret is the OAuth secret associated with the Cloud Access Management API service.
To obtain a personal access token from Identity Security Cloud, see Managing Personal Access Tokens. To obtain a personal access token from the API, see the API docs for details.
Advanced
Read Timeout
The maximum time in seconds to wait for a response from Cloud Access Management APIs before failing.
Connect Timeout
The maximum time in seconds to wait for a connection to succeed to Cloud Access Management APIs before failing.
Testing the Connection
Once your configuration details have been entered, you can click Test Connection to verify that the connection information is valid and that IdentityIQ can successfully connect to Cloud Access Management.
If you are using an HTTP or HTTPS proxy for IdentityIQ's communications, and you want to make an exception for connecting to Cloud Access Management Services, you can configure your Cloud Access Management connection to bypass the proxy connection by adding this key to the CAMConfiguration object:
<entry key="ignoreProxyProperties" value="true" />
Event Properties
After Cloud Access Management has been installed and configured, it can start receiving events. By clicking this button, Cloud Access Management is notified to start sending data. After the data has initially been received, Initiate Events can be clicked again to request all data.
Operating Verification
To verify Cloud Access Management was installed and configured correctly, complete the following steps:
-
Navigate to the gear menu and click on Administrator Console.
-
Select Environment.
-
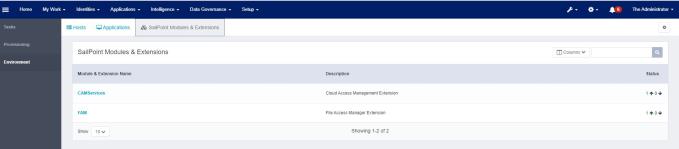
Click SailPoint Modules & Extensions.
Here, all the integrated modules can be viewed along with their status, host name, and last ping to their server.
Note
The default interval for the monitoring is five minutes.