Adding an EMC-Isilon Application
In order to integrate with EMC-Isilon, we must first create an application entry in File Access Manager. This entry includes the identification, connection details, and other parameters necessary to create the link.
To add an application, use the New Application Wizard.
-
Navigate to Admin > Applications.
-
Select Add New to open the New Application Wizard.
-
Select Standard Application for the wizard type.
-
Select Next to open the General Details page.
General Details
-
Application Type - EMC-Isilon
-
Application Name - Logical name of the application.
-
Description - Description of the application.
-
Tags - Select tags for the application from the dropdown menu, and / or type a new name, and select Enter to create a new tag. The dropdown list of tags filters out matching tags as you type and displays up to 50 tags.
Note
The tags replace the Logical container field that was used when creating applications in releases before 8.2.
-
Event Manager Server - This option is available if there are more than one event manager servers configured in the system. Select an event manager from the drop down menu.
-
Identity Collector - Select from the Identity Collector dropdown menu.
-
You can create identity collectors in the administrative client on the Applications > Configuration > Permissions Management > Identity Collectors page.
Refer to section OOTB Identity Collection in the Collector Installation Manager File Access Manager Administrator Guide for further details.
-
If adding a new identity collector, select the Refresh button to update the Identity Collector dropdown list.
-
Select Next to open the Connection Details page.
Connection Details
-
Host Name - The real name used when connecting to the CIFS server. This will be used by the SMB (CIFS) protocol.
-
Domain Name, Username, Password - Credentials for the user defined in the prerequisites.
-
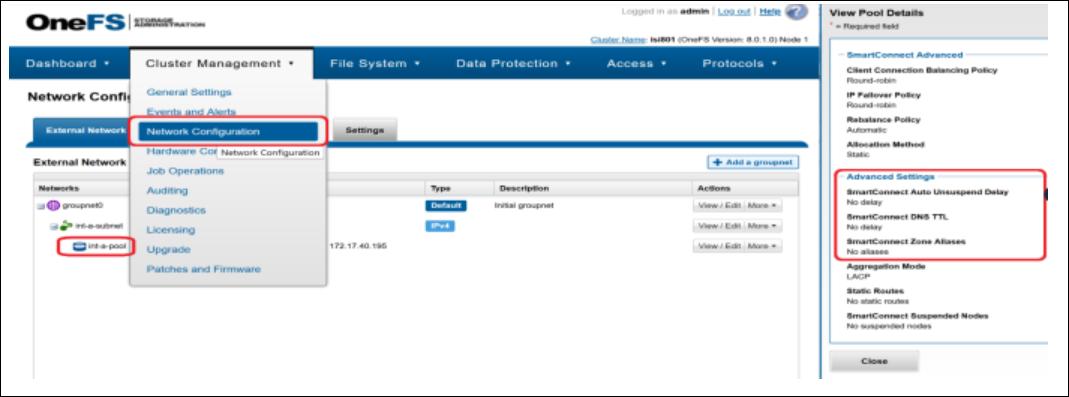
Storage Cluster Name - The name configured in the Auditing section of the Isilon OneFS Admin Console under the Cluster Management > Auditing settings tab. If this is not configured, the name of the Isilon cluster itself, under Cluster Management > General Settings.
-
Access Zone - (Optional) Use this field if configuring a separate application per access zone. Refer to Configuring Clusters with Multiple Access Zones for further details. The name of the access zone as it is configured in the Isilon cluster configuration, in the Access section of the Isilon OneFS Admin Console, under Access > Access Zones.
-
Use OneFS API - Select this checkbox to enables / disable access to the OneFS API, and reversely, disable / enable tenant Isolation.
OneFS API is located only on the System zone and is used by the permission collection and activity monitor components of the Isilon connector to fetch Share Information as well as local users and roles for each individual access zone.
Unchecking this will disable the activity monitor access to the API and the information will be collected solely using the SMB protocol, and access only the managed Access Zone. Access to the Management API is no longer required for activity monitoring, and is skipped by default, using native SMB Access to the managed Access Zone instead.
However, you can choose to keep the old configuration and keep access the Management API on the System zone, to retrieve Share and Local Identities information.
-
Management IP - This field specifies the location of the Management API (System access zone). This field accepts IP addresses and / or any resolvable DNS name (FQDN or otherwise).
Valid only If access to the OneFS API is enabled, by checking the Use OneFS API checkbox above.
-
Aliases - SmartConnect Zone Aliases used as alternative DNS Names for the CIFS Server. All aliases must be provided to ensure that all activities performed on that server, through all access paths, are monitored by File Access Manager.
These are available under the IP Pool Settings, in the Network Configuration section of the Isilon OneFS Admin Console, under the Cluster Management >> Network Configuration tab.
-
Type in an alias, and select the + icon to add it to the list.
-
Select the delete icon on any item to remove it from the list.
-