Configure Okta as a SSO Identity Provider
You can configure Identity Risk as an App Integration with Okta to enable SSO. This configuration supports the following features:
- Service Provider Initiated (SP-initiated) SSO.
- Just-In-Time (JIT) provisioning.
For more information on the listed features, refer to the Okta Glossary.
Prerequisites
To get started, you will need the following:
Okta:
- Tenant for your organization.
- User with administrator privilege to allow configuration of a new custom app integration for Identity Risk.
Identity Risk:
- Tenant for your organization.
- User with appropriate administrator privilege to allow role assignment to new users.
Configure SSO Integration
You must first initiate SSO integration with Okta in Identity Risk. This provides the necessary configuration required to register Identity Security with Okta.
- In Identity Risk select
 .
. - Select SSO.
-
In SSO Integration, select Okta as the SSO provider.
-
Copy the Okta
Single sign-on URLandAudience URI (SP Identity ID)and save it somewhere accessible, as you'll need this information to register Identity Risk in Okta.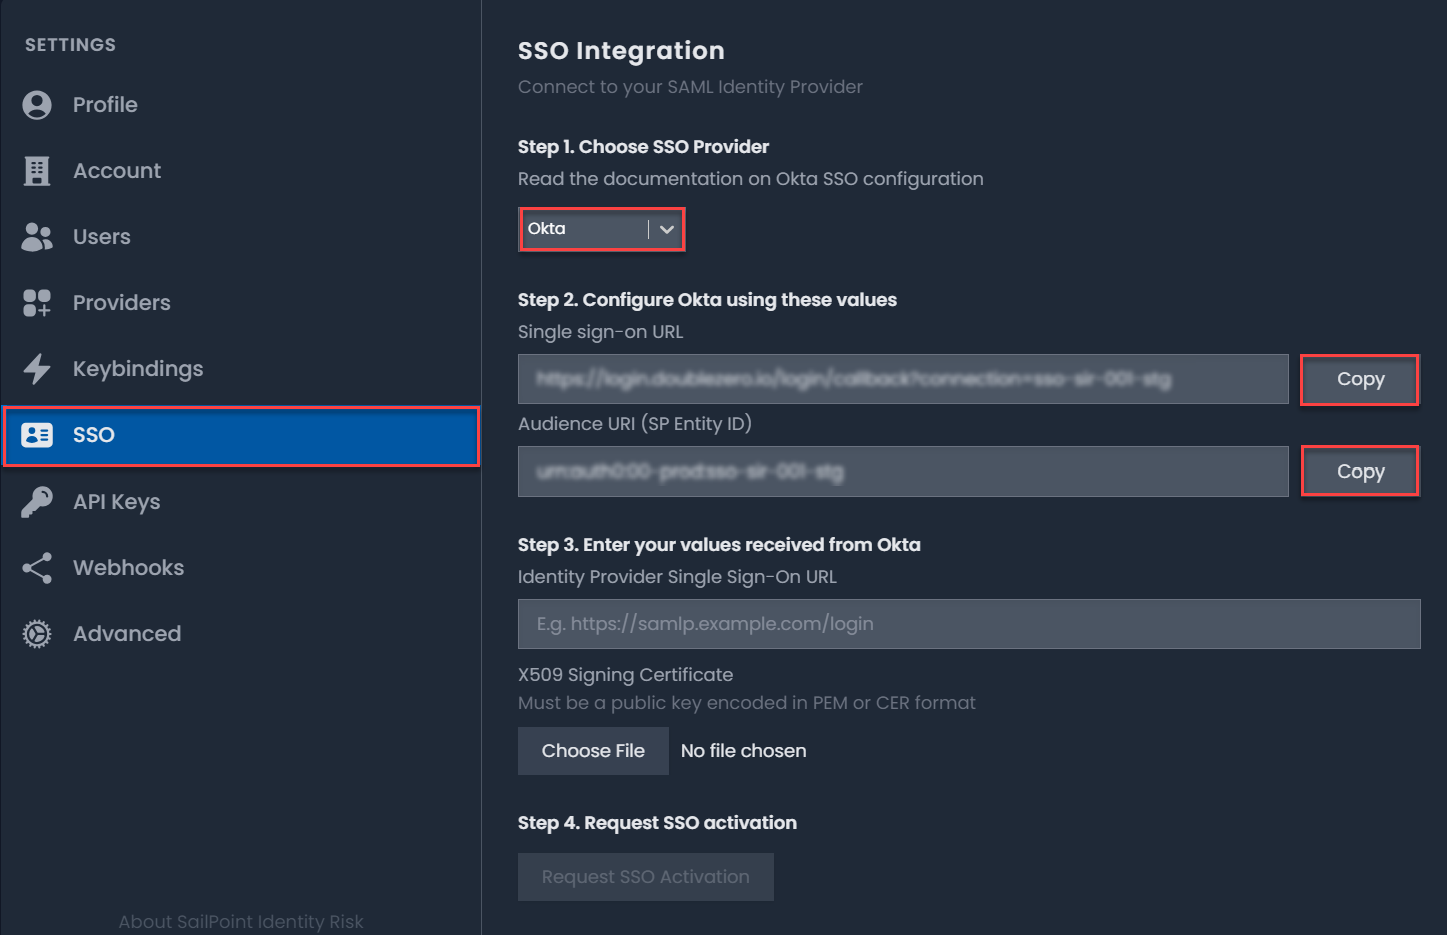
-
Leave the SSO Integration page open, you will return here to complete the configuration.
Registering Identity Risk with Okta
You now need to register the Identity Risk as an Application with Okta.
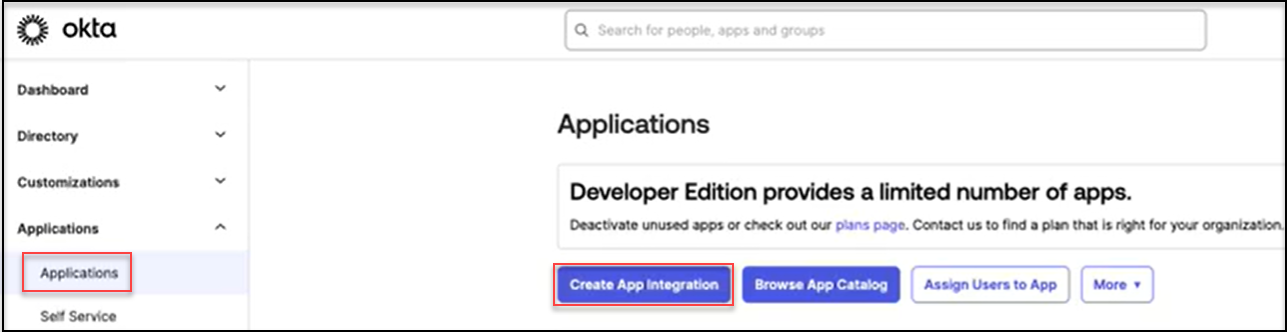
- Sign in to the Okta Admin Console.
- On the left, select Applications > Applications.
-
Under Applications select Create New Integration.
-
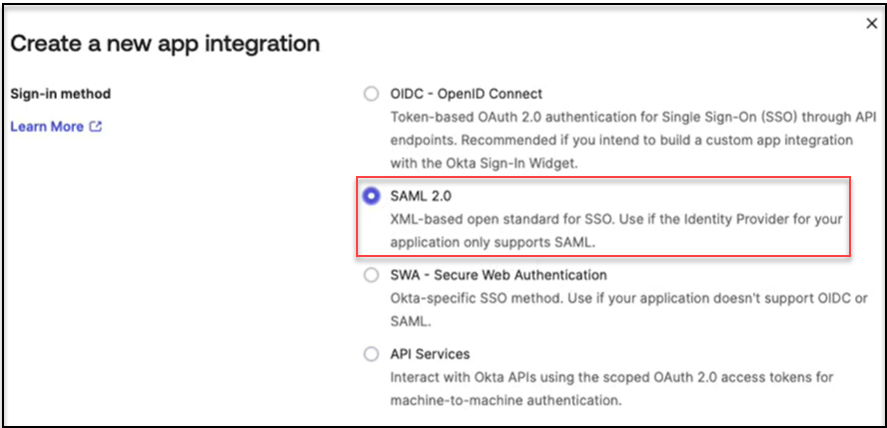
In Create a new app integration, select SAML 2.0 as the sign-in method.
-
Select Next.
- In Create SAML Integration > General Settings go to App name.
-
Enter a name for your Identity Risk application.
Note
You may optionally upload an Identity Risk logo as the App Logo for the integration.
-
Select Next.
- In Create SAML Integration > Configure SAML go to Single sign-on URL, copy the
Single sign-on URLvalue from Identity Risk > Settings > SSO and paste into the Single sign-on URL field. - Go to Audience URI, copy the
Audience URI (SP Identity ID)value from Identity Risk > Settings > SSO and paste into the Audience URI field. - Go to Application username, select Email from the dropdown list.
-
Go to Attribute Statements, enter the following values:
Name Name format Value email Unspecified user.emailname Unspecified user.firstName + “ “ + user.lastName -
Select Next.
- In Create SAML Integration > Feedback, select This is an internal app that we have created.
- Select Finish.
-
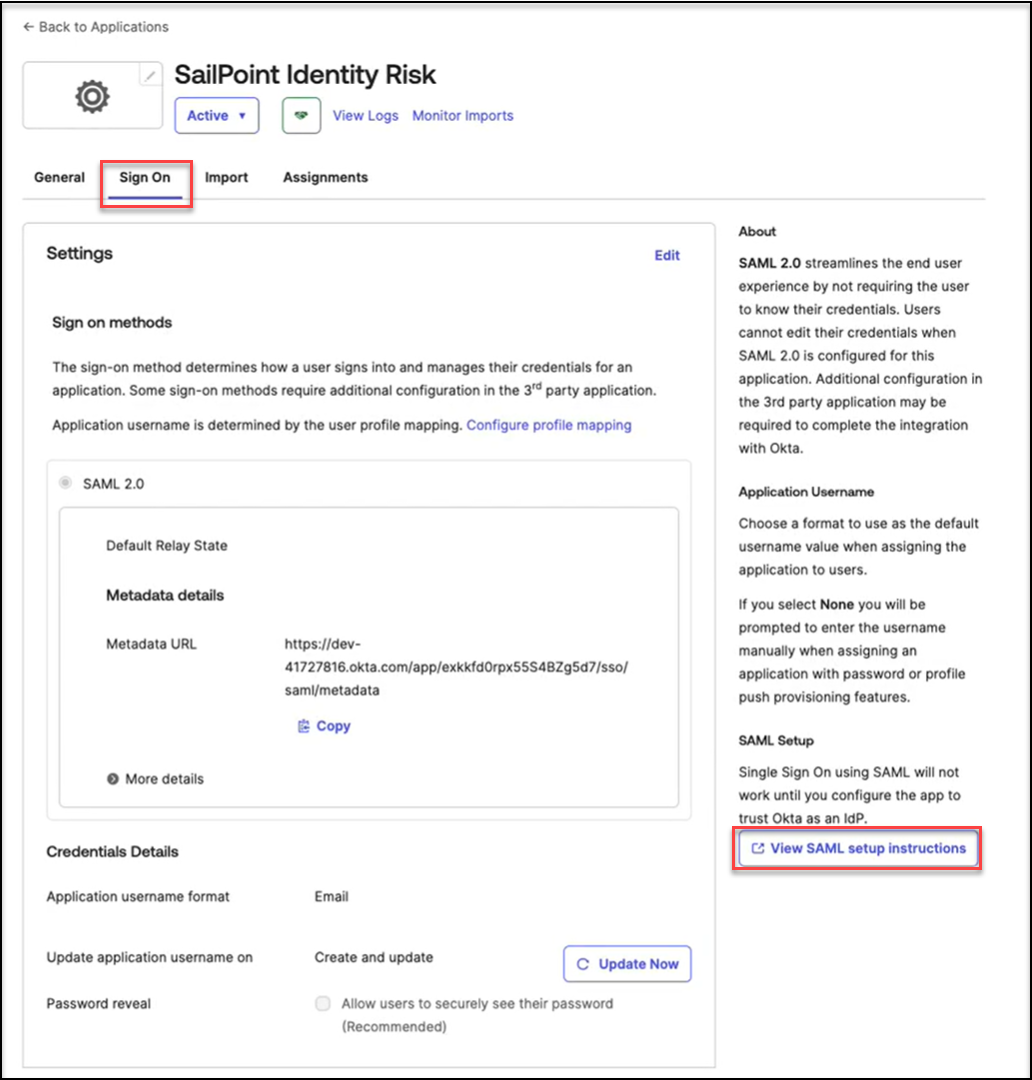
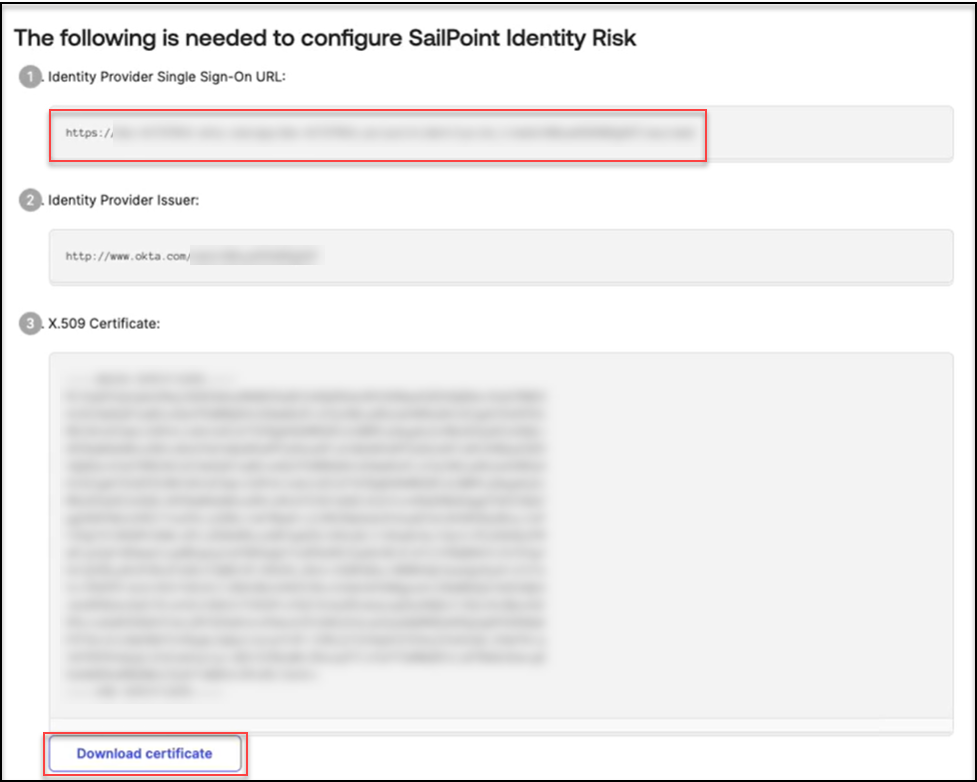
In Sign On tab for the Identity Risk Application, select View SAML Setup Instructions.
-
In How to Configure SAML 2.0, copy the Identity Provider Single Sign-On URL.
-
In X.509 Certificate, select Download certificate.
Completing Okta SSO Integration
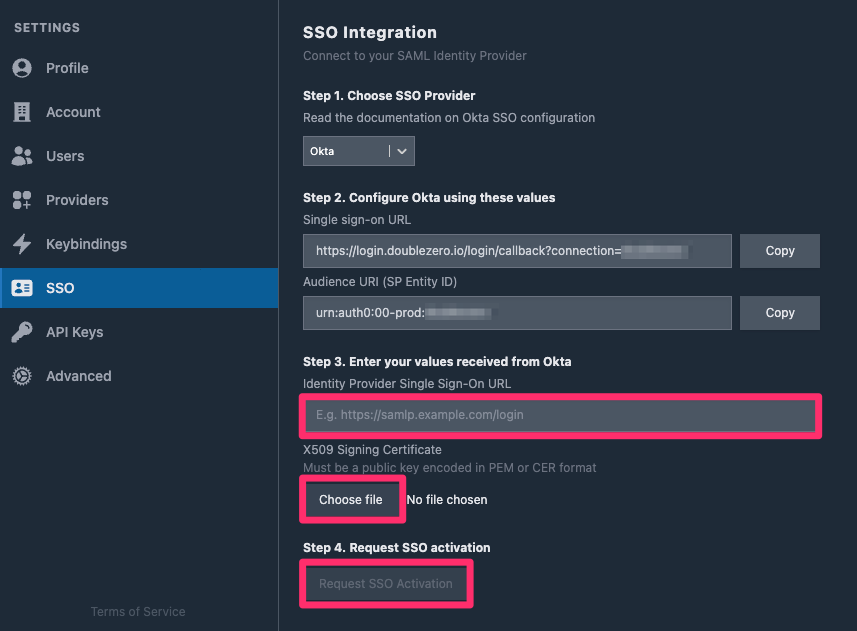
- In Identity Risk > SSO Integration, paste the Identity Provider Single Sign-On URL, copied from the Okta Admin Console, into the Login URL field.
- In X509 Signing Certificate, select Choose file.
- Upload the X.509 Signing Certificate downloaded from the Okta Admin Console.
-
Select Request SSO activation, a support ticket will be submitted to Identity Risk. Once provisioning is successfully completed, you will receive a notification to confirm SSO is available for your tenant.
Congratulations! You have configured SSO integration with Okta!
Onboard Okta SSO User
Once your SSO Integration with Okta is enabled, test the SSO connection for an initial user. This process can be followed to enable new users assigned access through Okta can access Identity Risk.
Each new user will be Just-In-Time provisioned in Identity Risk on first login via SSO, however a role must be assigned to the user by an Identity Risk administrator before the user can complete the login.
To onboard a new Okta SSO user:
- Sign in to the Okta Admin Console, assign users/group to enable access to the Identity Risk application.
-
User navigates to Identity Risk Login page, select Continue with Okta SSO login option.
Note
User needs to be provided with either the Identity Risk application URL or told to access it via the Okta End-User Dashboard.
-
Users first login and successful authentication through Okta, triggers:
-
A welcome email to be sent to the user to notify them that they have successfully authenticated to Identity Risk but no roles have been assigned to their account. The user must contact an administrator to assign roles before they can continue.
Note
Identity Risk administrator is not automatically notified so the user is required to contact an administrator.
-
Automatic creation of the user account in Identity Risk.
-
-
Identity Risk administrator assigns a role to the new user via the Identity Risk > Settings > Users > Users and Roles page.
Note
Users automatically created from an SSO Integration will have a tick in the SSO column.
-
User clicks the Try Again button to successfully complete their login.

Onboard an Entra ID SSO User through Entitlements
An entitlement can be created and delegated to a user by an administrator or requested from the request center by a user.
To allow users to request an entitlement:
- Assign a group to the Okta application created when Configuring SSO Integration in Identity Risk.
- Configure Identity Risk as a source in Identity Security Cloud.
- Identity Risk Okta SSO entitlement granted by an Identity Security Cloud administrator or requested from the request centre by a user.
Troubleshooting
When a user logging in using Okta SSO is presented with the following message, the Identity Risk user account was not configured correctly.
Welcome to Identity Risk
You have successfully authenticated to Identity Risk, however there are no roles assigned to your account.
Please contact your Identity Risk administrator to assign a role before proceeding.
The Identity Risk administrator needs to assign an appropriate role to the newly created user via the Settings > Users > Users and Roles page before the user can successfully log in.
Notes
Local account access may be disabled for pre-existing users once testing is complete and the necessary role assignments are in place.