Configuring Jamf Pro as a Provider
Integrating SailPoint Identity Risk with Jamf Pro provides detailed device inventory and security information including:
- General - Device Name, Serial Number, Mac Address, Managed Status, IP Addresses
- Hardware - Make, Model, Apple/Intel Silicon
- Operating System - OS Version, AD Status, Disk Encryption Status
- Security - Secure Boot Level, Firewall Enabled, System Integrity Protection Status
Prerequisites
To get started, you will need the following:
Jamf Pro provider:
- Appropriate account with administrative privilege to log onto to:
https://[companyname].jamfcloud.com/api
Note
Identity Risk supports Jamf Pro environments hosted in Jamf Cloud. If your Jamf Pro environment is not hosted in Jamf Cloud, contact SailPoint to discuss your requirements.
Configuring a New Jamf Provider in Identity Risk
In Identity Risk:
- Select
 , and select Providers.
 - Select Jamf Pro.
- Enter a unique name for your Jamf Pro provider.
-
Enter the Jamf Pro API URL. The Jamf Pro API is available at the API URL based on your Jamf Pro server URL with an /api suffix in the format:
https://[companyname].jamfcloud.com/api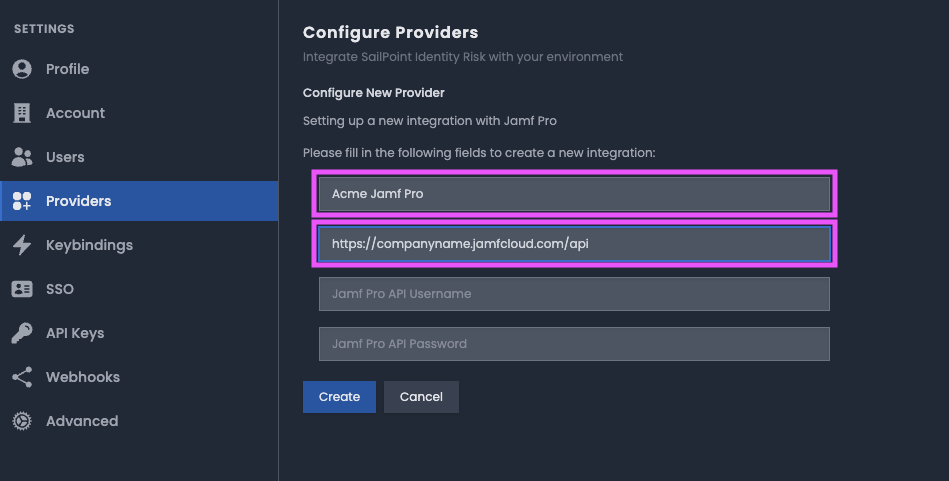
-
Leave the Configure Providers page open, you will return here to complete the configuration.
In Jamf Pro Dashboard:
To allow Identity Risk to communicate with the Jamf Pro API, a service account with read-only privileges is required.
- Select Settings > System > User accounts and groups.
- In User accounts and groups, select + New.
- Select Create Standard Account as the action.
- Select Next.
-
In New Account, enter the following details:
- Username - enter the username for this account
- Privilege Set - set to Custom
- Access Status - set to Enabled
- Full Name - enter a full name for the account
- Password - enter a password for the account
Note
Do not select the "Force user to change password at next login" option.
-
Select Privileges tab.
-
In Jamf Pro Server Objects, select
READfor the following objects:- Computers
- Mobile Devices
Note
Support for Mobile Devices will be added in a future release.
-
Select Save to complete the configuration of the new account.
- Go back to User accounts and groups.
- Copy the Jamf Pro service account
Username. - In Identity Risk, paste the
Usernamevalue of the configured service account into Jamf Pro API Username. - Copy the Jamf Pro service account
Password. - In Identity Risk, paste the
Passwordof the configured service account Jamf Pro API Password. - Select Create.
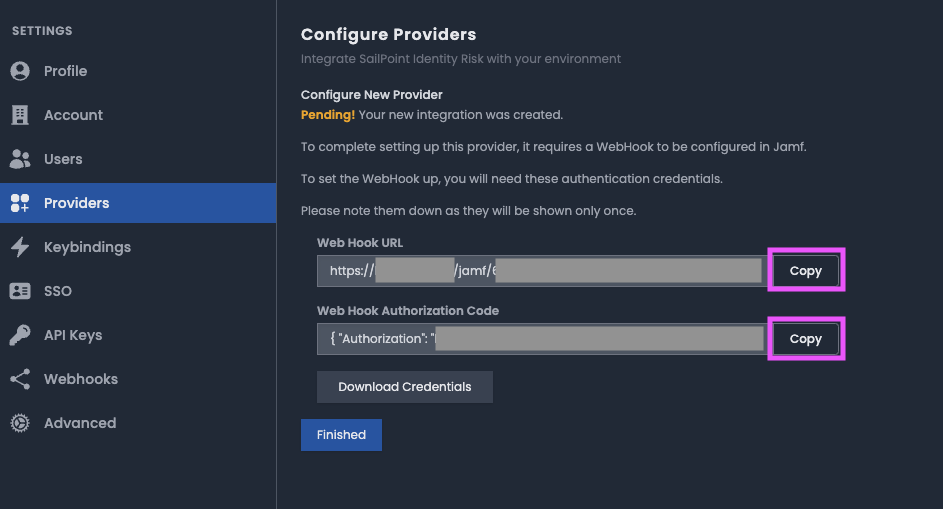
- After successful creation of the Jamf Pro provider you'll be promoted to configure a Webhook required to complete the configuration.
-
Copy or download the
Web Hook URLandWeb Hook Authorization Code.Caution
The WebHook configuration details are provided only once. Ensure that you either copy or downloaded for future reference.
In Jamf Pro Dashboard:
- Select Settings > Global > Webhooks.
- In Webhooks select + New.
-
Enter a Display Name that identifies both Identity Risk and the Webhook event in the name.
Example Webhook for Computer Checkin event named SailPoint Computer Checkin.
-
Select Enabled to enable the Webhook.
- Paste the Identity Risk provider
Web Hook URLconfiguration into Webhook URL. - In Authentication Type dropdown select Header Authentication.
- Paste the Identity Risk provider
Web Hook Authorization Codeconfiguration into Header Authentication. - In Content Type select JSON.
- In Webhook Event dropdown select the ComputerCheckin event.
- Select Save to complete webhook configuration.
-
Repeat the Webhook steps for the ComputerInventoryCompleted event.
Note
The same Webhook URL and Header Authentication is used for all events.
-
Once the webhook configuration is complete, Jamf Pro will notify Identity Risk when one of the events is triggered. Identity Risk will query the API to ingest the data.
In Identity Risk:
- Select Finished. The Jamf Pro provider is created, and you are directed to a success screen, after which you may return to Providers to view the status of your newly created provider.
-
To test the webhook, trigger a ComputerCheckin event on a device using the command:
sudo jamf policy -
Locate the device in the Identity Map, select the device profile.
- Select Attributes to view all existing data and data ingested from Jamf Pro.
Deleting Providers
To remove a Jamf Pro provider from Identity Risk:
- In Jamf Pro Dashboard, delete the Identity Risk service account. Once the service account has been deleted, it will no longer be accessible to Identity Risk.
- In Identity Risk, select > Providers.
- In Enabled Integrations, select Show Details next to Jamf Pro.
- Select Delete.
-
Select Yes to confirm. The provider is deleted.
Note
Ingested historical data is still available. No new data is ingested.