Configuring Microsoft Entra ID as a Provider
You can integrate Identity Risk with Microsoft Entra ID (previously Azure AD) to view:
- Detailed user information, including the user's name, email address, and additional role data.
- Access logs that provide information on which resources were accessed.
- Access outcomes, including whether access was allowed or denied and the reasoning behind those decisions.
Prerequisites
To get started, you'll need the following:
Microsoft Entra
- A user with the appropriate administrator privilege
- Microsoft Entra ID license level of Microsoft Entra ID P1 or Microsoft Entra ID P2
- The
Tenant IDfor your organization. - An App Registration
Client IDandClient Secret. - API permissions
- The appropriate App Registration permissions assigned.
The Microsoft Entra ID provider configuration requires a minimum of one application registration and optionally supports a second application registration to distribute load for enhanced scale and greater protection against API rate-limiting.
Note
Provider configuration with two application registrations is recommended for environments with more than 5,000 users.
Configuring a Microsoft Entra ID Provider
- Select the Settings icon
 in Identity Risk.
 - From the left panel, select Providers.
- Select Entra ID.
-
Enter a unique name for your provider.
You'll now access the Microsoft Azure Portal to gather data that you'll enter into the required fields. Leave the Configure Providers page open as you'll return here to complete the configuration.
-
In the Microsoft Azure Portal, select Overview.
- Verify the active license displays Microsoft Entra ID P1 or Microsoft Entra ID P2. For more information, refer to Feature comparison based on licenses.
- Locate the
Tenant IDand copy the value. - In Identity Risk, paste the
Tenant IDvalue into the Entra ID Tenant ID field. - In the Microsoft Azure Portal, select Applications > App registration.
- Select New registration.
- In Register an application, enter a name for your new registration.
- Under Supported account types, select Accounts in this organization directory only.
- Select Register.
- In the registered application, locate the
Application (client) IDand copy the value. - In Identity Risk, paste the
Application (client) IDvalue into the Entra ID Client ID field. - In the Microsoft Azure Portal, select Certificates & secrets.
- In Client secrets, select the + New client secrets tab.
- In Add a client secret, enter a description and expiration time and then select Add.
- In the Client secrets column, copy the
Valueof the client secret added. -
In Identity Risk, paste the
Valueinto the Entra ID Client Secret field. The value field will only be visible immediately after creation.Note
To add an additional application registration, refer to Additional App Registration Configuration
-
Select an Entra ID cloud instance. In addition to the global cloud, Microsoft also offers national cloud instances to meet the needs of national government entities.
Select the appropriate cloud instance for your environment.
-
To enable access to Microsoft Graph, apply API permissions. Refer to Application Permissions.
-
Select Create. The Entra ID provider is created, and you are directed to a success screen. You may return to the Configure Providers page to view the status of the provider.
When the provider is successfully created, data is ingested, processed, and correlated within Identity Risk. Data can then be viewed and explored through the Identity Map and Insights.
Application Permissions
To enable access to Microsoft Graph, apply the following permissions:
| API | Application Permissions |
|---|---|
| Microsoft Graph | - AuditLog.Read.All - Directory.Read.All - Application.Read.All - Policy.Read.All - User.Read.All |
Note
Application permissions are the same for one and two application registrations.
To apply permissions:
- In Microsoft Azure Portal, select API Permissions.
- Select + Add a Permission.
- In Request API permissions, select Microsoft Graph.
- In Microsoft Graph, select Application permissions.
- Search for and add each of the required permissions. Select Add permissions to add all required permissions. Permissions differ for a one or two app registration for all provider capabilities.
- Verify that the required permissions have been added.
-
Select Grant admin consent for [your organization] to grant admin consent to the permissions configured for the application.
Note
Only administrators can perform this step.
-
Select Yes to confirm the consent. Once successfully authorized, the permissions Admin consent required column will confirm the consent.
- In Identity Risk, complete the creation of the provider.
Additional App Registration Configuration
- In the Microsoft Azure Portal, select Applications > App registration.
- Select New registration.
- In Register an application, enter a name for your new registration.
- Under Supported account types, select Accounts in this organization directory only.
- Select Register.
- In the registered application, locate the
Application (client) IDand copy the value. - In Identity Risk, paste the
Application (client) IDvalue into the Entra ID Client ID for MetaData (Optional) field. - In Microsoft Azure Portal, select Certificates & secrets.
- In Client secrets, select the + New client secrets tab.
- In Add a client secret, enter a description and expiration time and select Add.
- In the Client secrets column, copy the
Valueof the client secret added. - In Identity Risk, paste the
Valueinto the Entra ID Client Secret for MetaData field. -
Select an Entra ID cloud instance. In addition to the global cloud, Microsoft also offer national cloud instances to meet the needs of national government entities.
Select the appropriate cloud instance for your environment.
-
To enable access to Microsoft Graph API, apply API permissions. Refer to Application Permissions.
-
In Identity Risk select Create. The Entra ID provider is created and you are directed to a success screen, after which you may return to Providers to view the status of your newly created provider.
When the provider is successfully created, data is ingested, processed, and correlated within Identity Risk. Data can then be viewed and explored through the Identity Map and Insights.
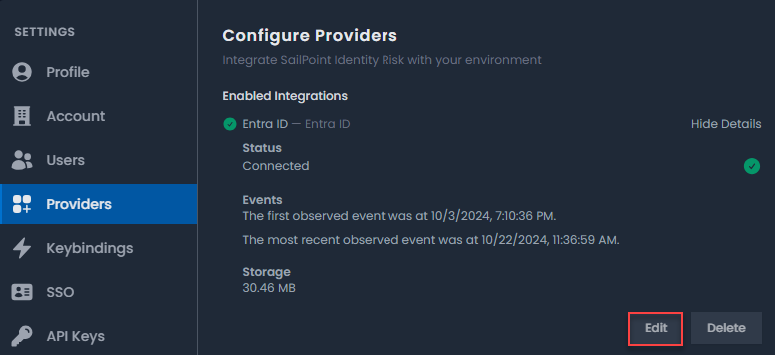
Editing Providers
Provider configuration can be edited to allow for updates to the client secret when it is due to expire. Client secret expiration should be tracked and updated before the expiration date to avoid provider failure.
- In Identity Risk, select the Settings icon .
- From the left panel, select Providers.
- Select Entra ID.
- In Enabled Integrations, select Show Details next to Entra ID.
-
Select Edit to update the configurations for the provider.
-
Update the
Entra ID Client Secretfield. - If you have configured an additional app registration, update the
Entra ID Client Secret for MetaData (Optional)field. - Select Save. The Entra ID provider will establish connection using the updated client secret and continue to process data.
Deleting Providers
- In Microsoft Azure Portal, delete the client secret associated with the app registration. Once the client secret has been revoked in Entra ID, it will no longer be accessible to Identity Risk.
- In Identity Risk, select the Settings icon .
- From the left panel, select Providers.
- In the list of Enabled Integrations, select Show Details next to Entra ID.
-
Select Delete and then confirm the deletion. The provider is deleted, and data will no longer be ingested.
Note
Ingested historical data will still be available.