Configuring Azure Cloud
To display your Azure Cloud resources and the access tied to them, you must first create policies and permissions in your cloud environment to allow Cloud Access Management to report on cloud access data.
Use an Azure account with administrative privileges to:
-
Register Cloud Access Management as a new application with Azure AD.
-
Grant permissions allowing Cloud Access Management to read your Azure Cloud policies and resources inventory.
-
Create a client secret to use when registering your source with Cloud Access Management.
Registering Cloud Access Management with Azure Cloud
You must first register Cloud Access Management with Azure.
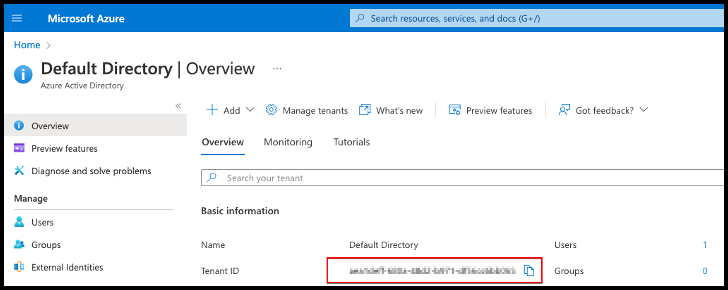
- Sign in to the Azure Cloud portal and select Azure Active Directory.
-
Copy the tenant ID and save it somewhere accessible, as you'll need this information to register the cloud source with Cloud Access Management.
-
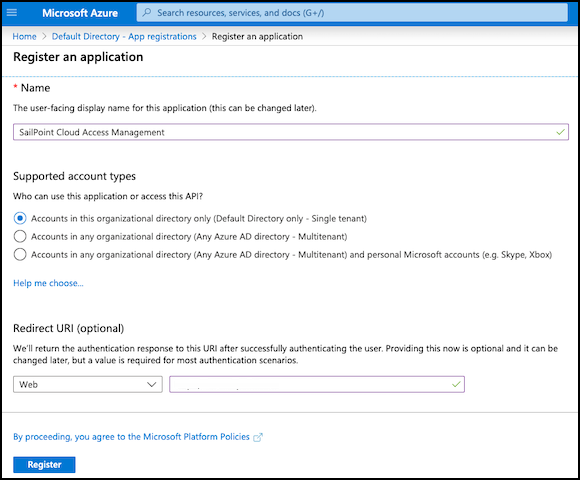
Select App registrations in the left sidebar and select New registration.
-
Enter a name for the new application, such as "SailPoint Cloud Access Management".
-
Under Supported account types, keep the default of allowing a single tenant to ensure that only accounts in the organizational directory can access this application.
- Select Register to register Cloud Access Management with Azure AD.
- Copy the Application (client) ID that's generated, as you'll need this information to register the cloud source with Cloud Access Management.
Granting Read Permissions to Cloud Access Management
After you’ve registered Cloud Access Management with Azure Cloud, you must grant it the permissions required to read the security policies configured for the Azure source and the resources inventory.
Setting Up the Global Admin Role
You must create a global admin role that can manage access at the root management group level. All subscriptions will inherit the custom role from their management group.
To set up the global admin role:
- Select Properties in Azure Active Directory.
- Set the toggle for Access management for Azure resources to Yes.
- Select Save.
This will allow you to manage access to all Azure subscriptions and management groups in the tenant.
Enabling Read Access to Microsoft Azure
You will need to enable the Directory.Read.All setting so that Cloud Access Management can read the Microsoft Azure inventory.
- Select App registrations in Azure Active Directory.
- Select the Cloud Access Management app you registered earlier.
- Select API permissions in the left sidebar and choose Add a permission.
- Select Microsoft Graph.
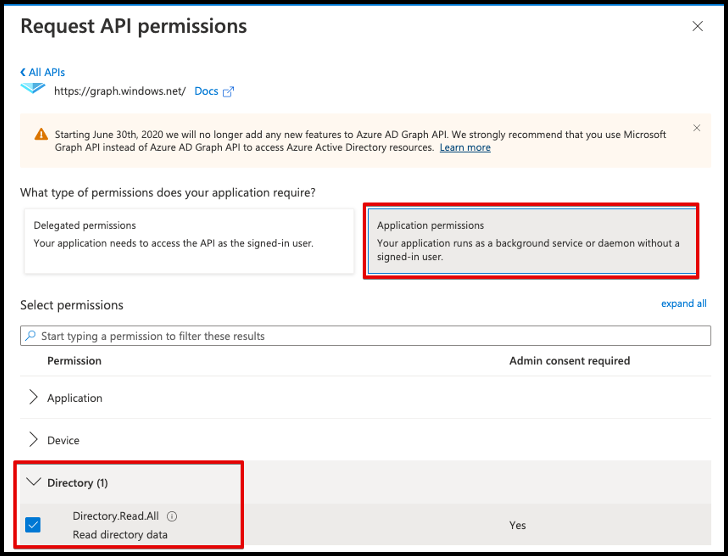
- Select Application permissions and expand the Directory category.
-
Select Directory.Read.All to allow Cloud Access Management to read directory data on your Microsoft Azure source.
 7. Expand the Role Management category and select RoleManagement.Read.Directory to allow Cloud Access Management to read all directory role-based access control settings for the source.
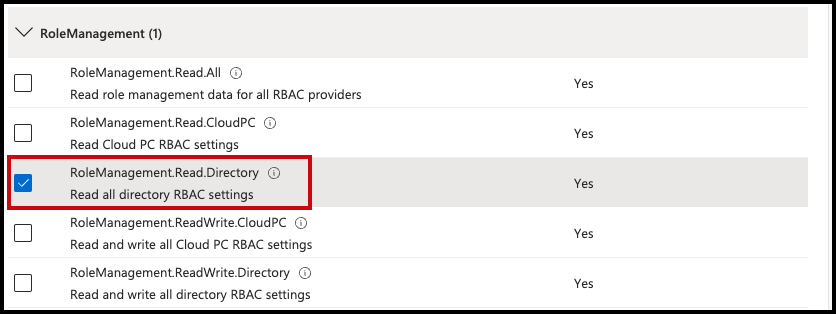
-
Select Add permissions and Grant admin consent to specify what the SailPoint app can request and to confirm the app is approved to make requests.
Creating Strict Custom Roles
Next, you will create custom roles with the minimum permissions required to allow Cloud Access Management to read your Azure Cloud data.
- Select Management groups in Azure Active Directory.
- Select the root management group to add the role to. The role will inherit the group’s subscriptions.
- In the sidebar, select Access control (IAM).
- Select Add and choose Add custom role from the dropdown menu.
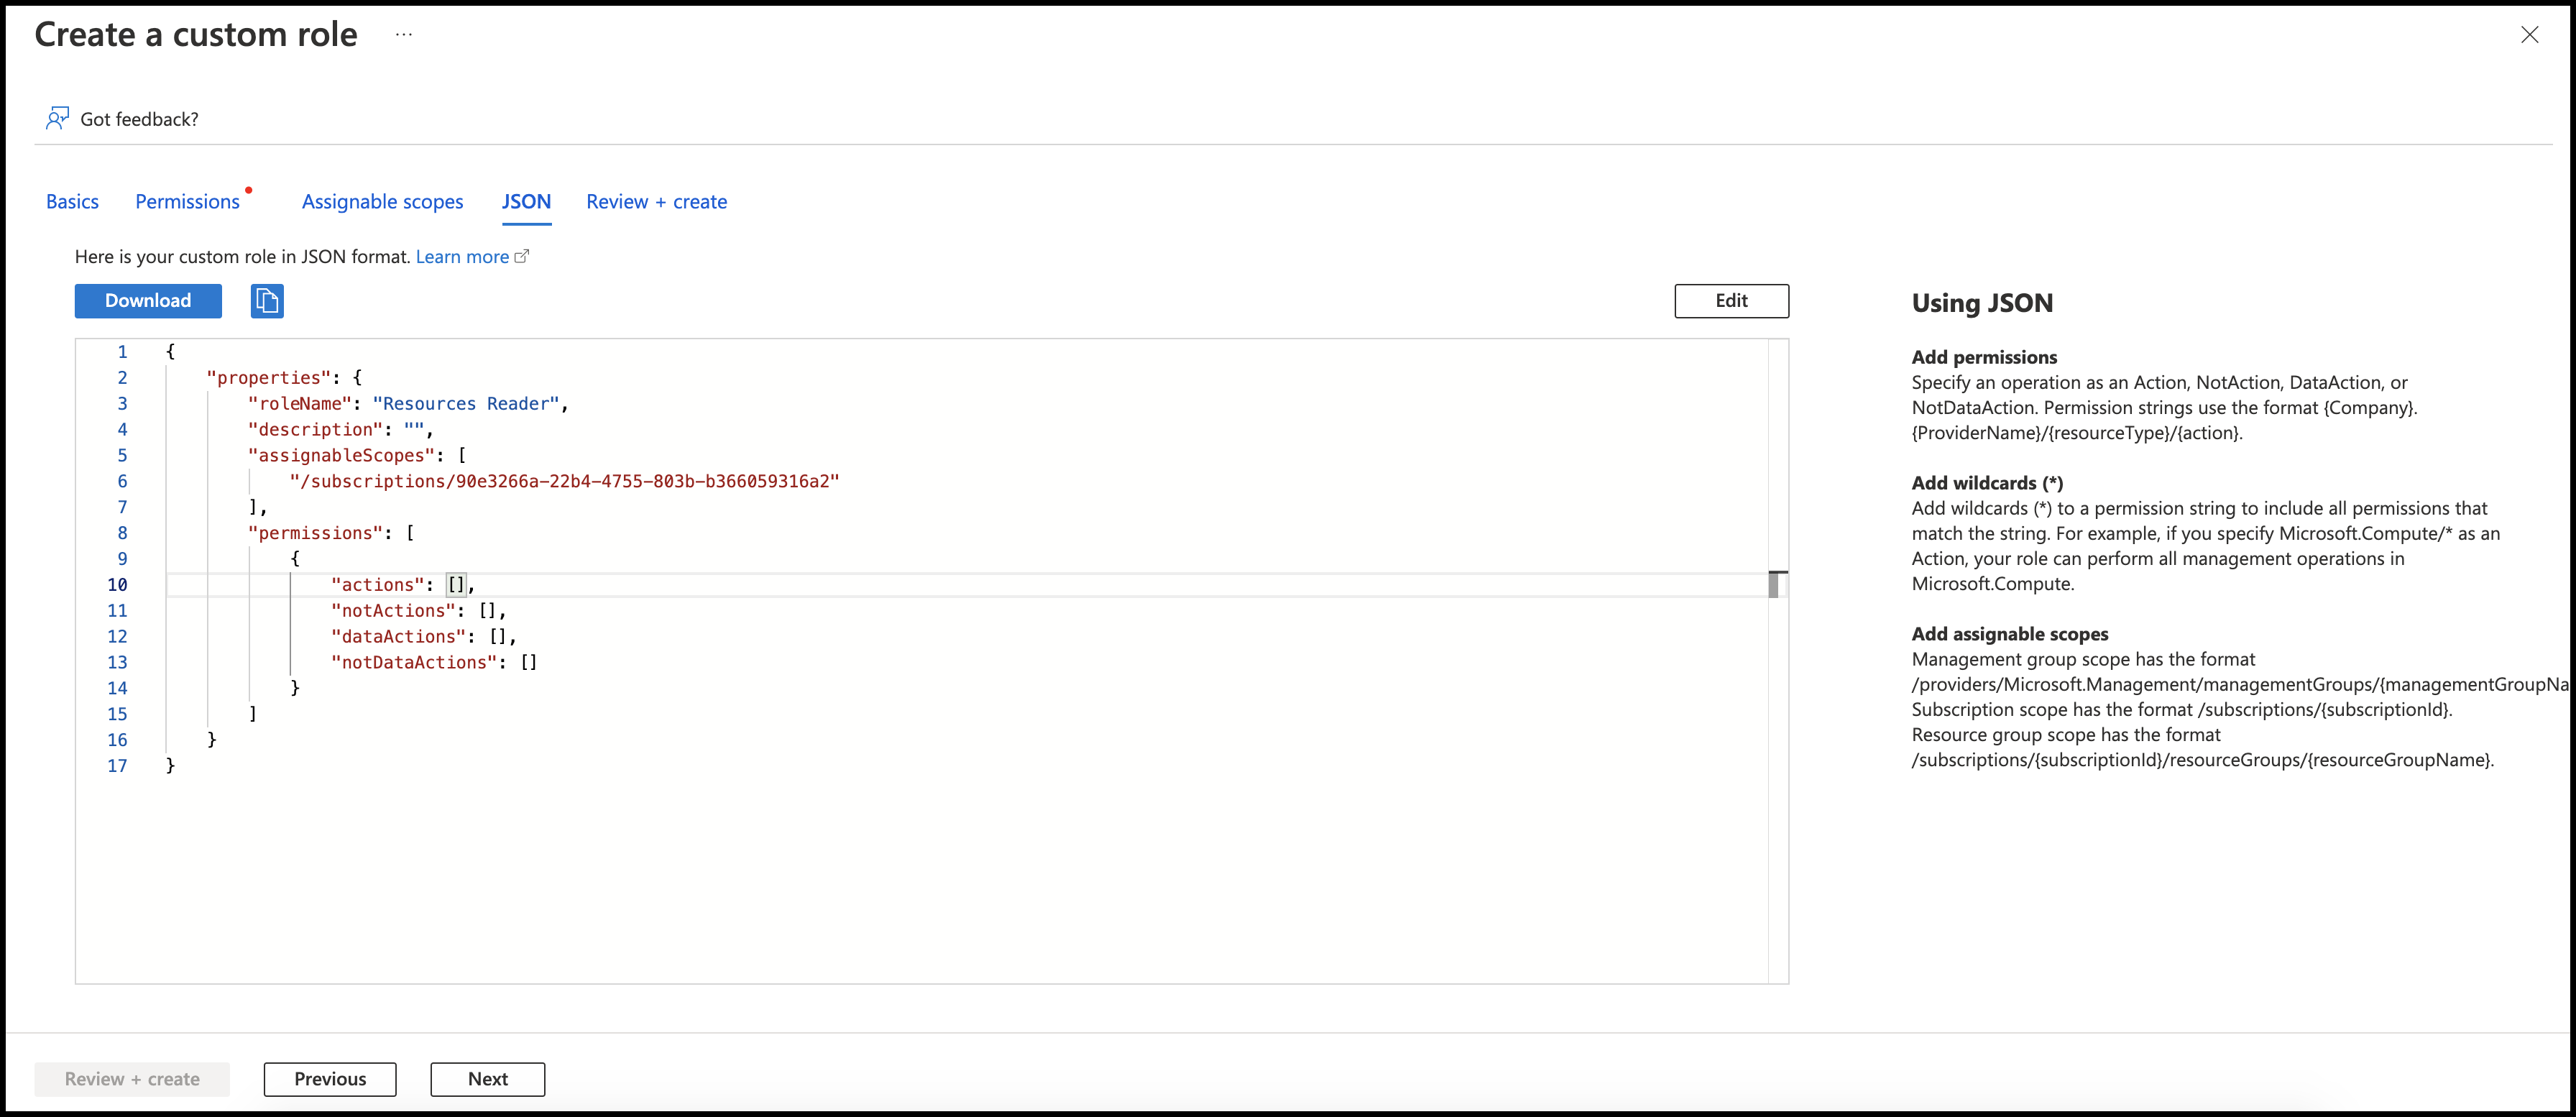
- On the Basics tab, enter a custom role name, such as Resource Reader.
-
Select the JSON tab.
-
Select the Edit button. Enter the following JSON schema, replacing the
managementGroupsID with your own.Display required permissions
-
Select Save to update the JSON schema and Review + create to create the custom role.
-
In the Select field, search for the application you registered.
-
Select Save to assign the custom role to Cloud Access Management.
You will use this role to grant access to the management groups tree.
Privileged Identity Management
If you have an Azure AD Privileged Identity Management Premium P2 license, Cloud Access Management will display access users have to Azure resources from their PIM eligible assignments.
Granting Access to the Management Groups Tree
Once you have the correct permissions, you must grant access to the entire management groups tree.
-
Select Management groups in the Azure Cloud portal.
-
Select the root group name and select Access control (IAM) from the left sidebar.
-
Select Add and select Add role assignment from the dropdown menu.
-
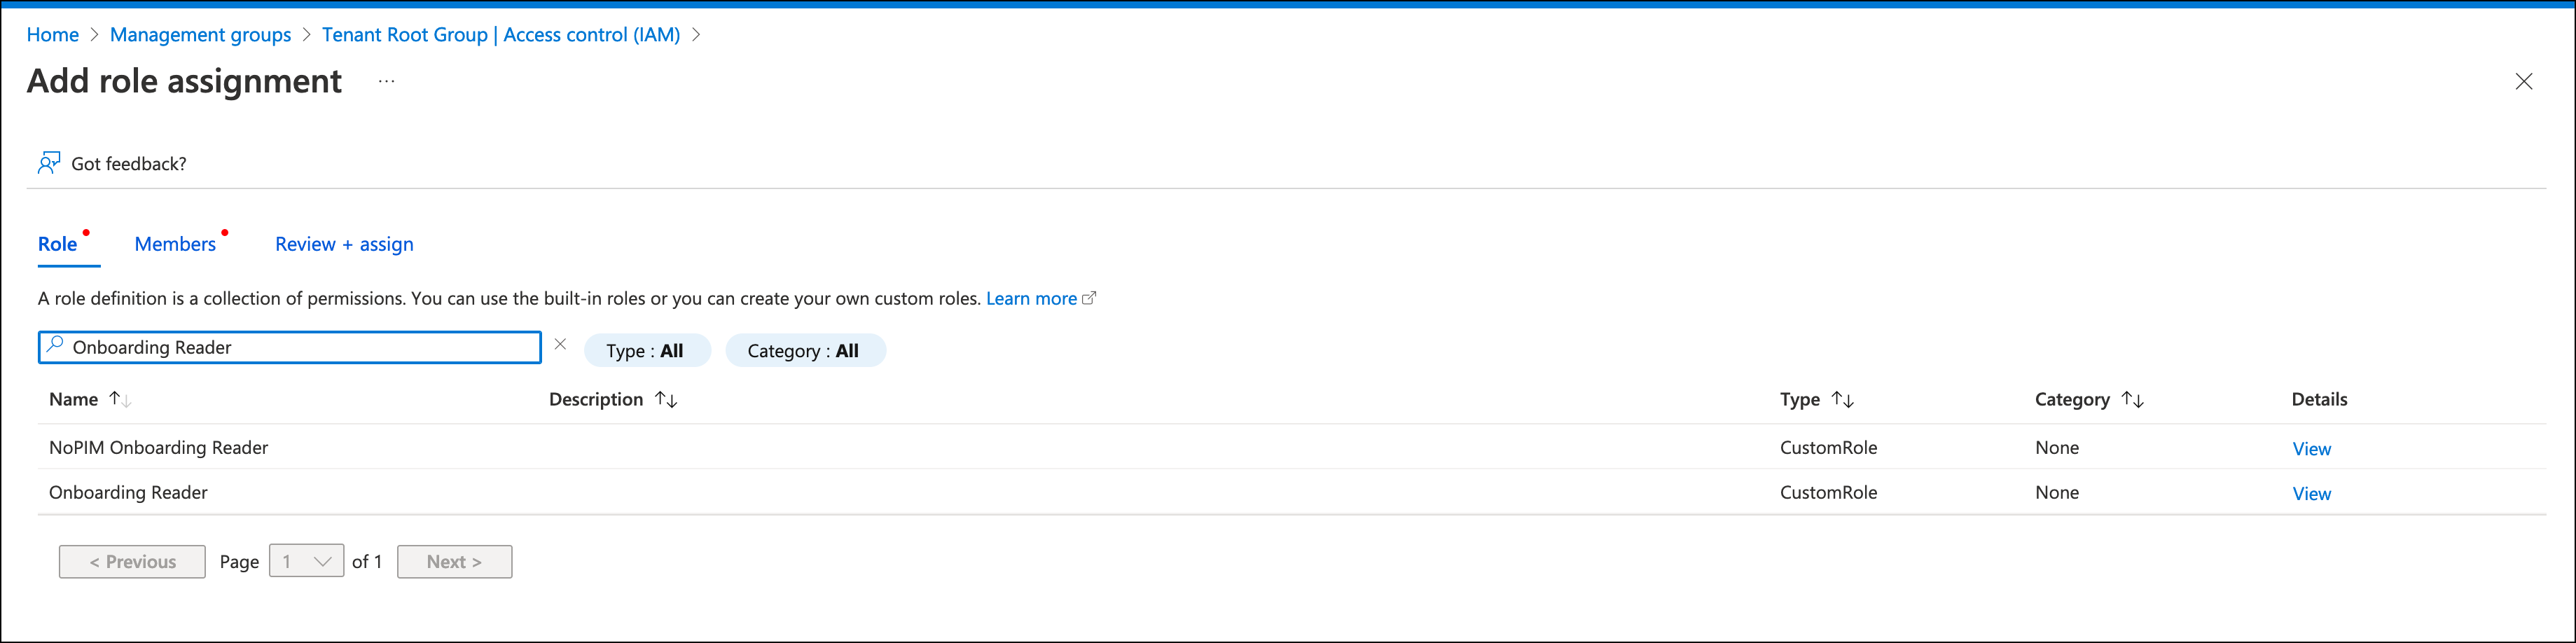
In the role section, search for and select the custom role you created earlier. Select Next.
-
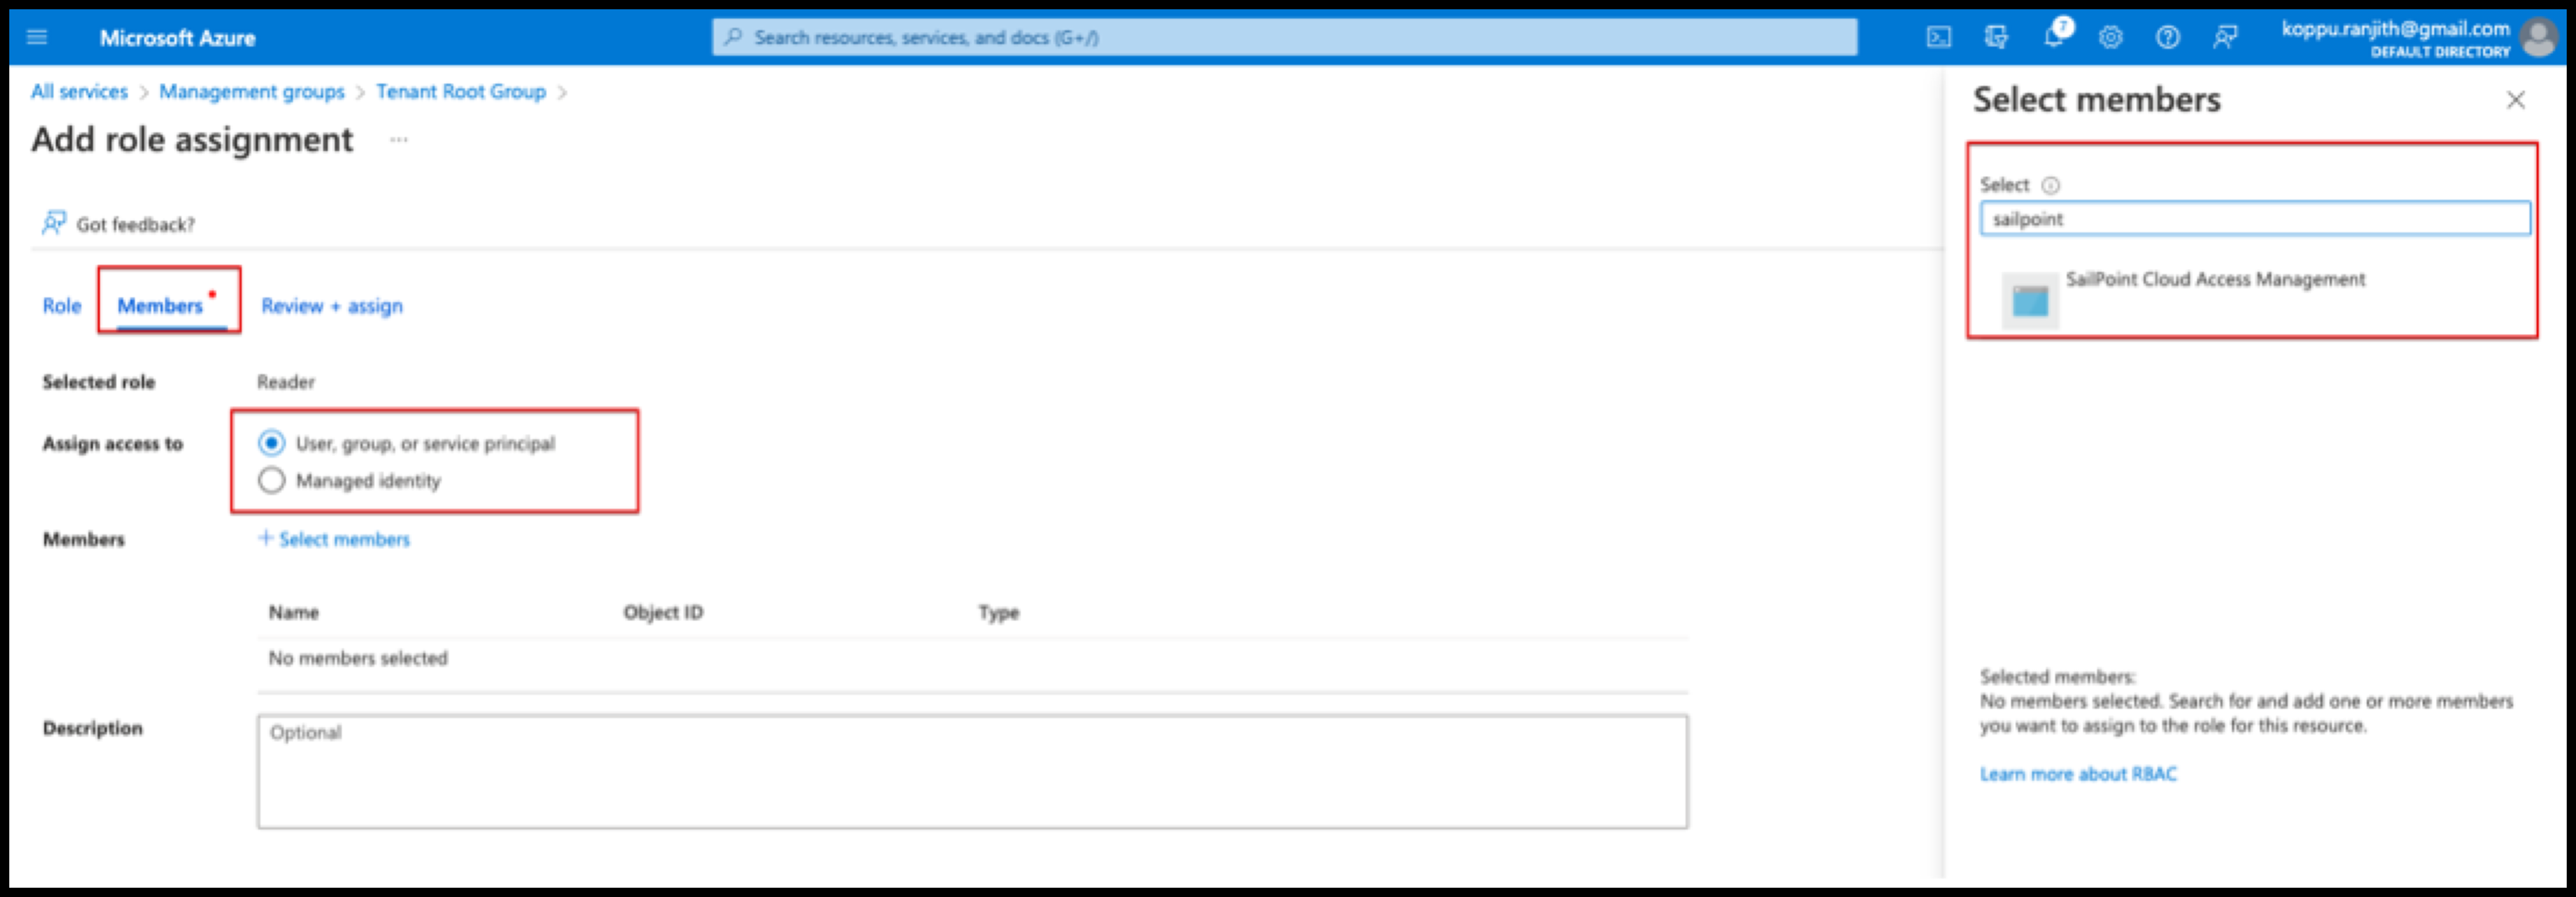
In the Members tab, select the radio button next to User, group, or service principal.
-
Select Select members. Search for and select the application you registered.
-
Confirm your selection using the Select button.
- Select Review + Assign to assign the role to Cloud Access Management.
Creating a Client Secret for Cloud Access Management
To finish registering your Azure Cloud accounts, you'll need to create a client secret for Cloud Access Management.
- Select App registrations in Azure Active Directory and choose the application you named earlier.
- Select Certificates & secrets.
-
Under Client secrets, select + New client secret and add a description and expiration date.
Best Practice
Set an expiration date of 6 months.
-
Select Add.
- Save the Value and Secret ID in a safe place. You will enter the client secret in the Application Secret field when you register the cloud source with Cloud Access Management.
Documentation Feedback
Feedback is provided as an informational resource only and does not form part of SailPoint’s official product documentation. SailPoint does not warrant or make any guarantees about the feedback (including without limitation as to its accuracy, relevance, or reliability). All feedback is subject to the terms set forth at https://developer.sailpoint.com/discuss/tos.