Configuring Amazon Web Services Cloud
Cloud Access Management collects data on access paths and how networks, objects, and identities could gain access to your organization's Amazon Web Services cloud resources.
To configure Cloud Access Management with your Amazon Web Services source, you'll need to give it read-only access to your Amazon Web Services infrastructure to create an inventory and read the usage data in your CloudTrail bucket.
You can add all AWS accounts in your organization or connect a single account using the provided CloudFormation templates. You can also manually connect AWS accounts.
Note
SailPoint strongly recommends adding all organization accounts, as opposed to single accounts, to allow Cloud Access Management to display the hierarchy of your AWS cloud.
When you have completed your configuration, you should verify it before registering your AWS account with Cloud Access Management.
Configuring a Central CloudTrail Bucket
Cloud Access Management uses CloudTrail logs to track the actions taken by a user, role, or AWS service in your AWS account. You must create or use a bucket owned by a central management account to send CloudTrail logs to Cloud Access Management.
You will set up CloudFormation in the accounts falling under the Management Logging Account and add a policy to the bucket owned by that account:
-
In the AWS Console, search for or select S3.
-
Search for and select the Management Logging Account bucket you want the CloudTrails to be sent to.
-
In the bucket menu, select Permissions and Bucket Policy.
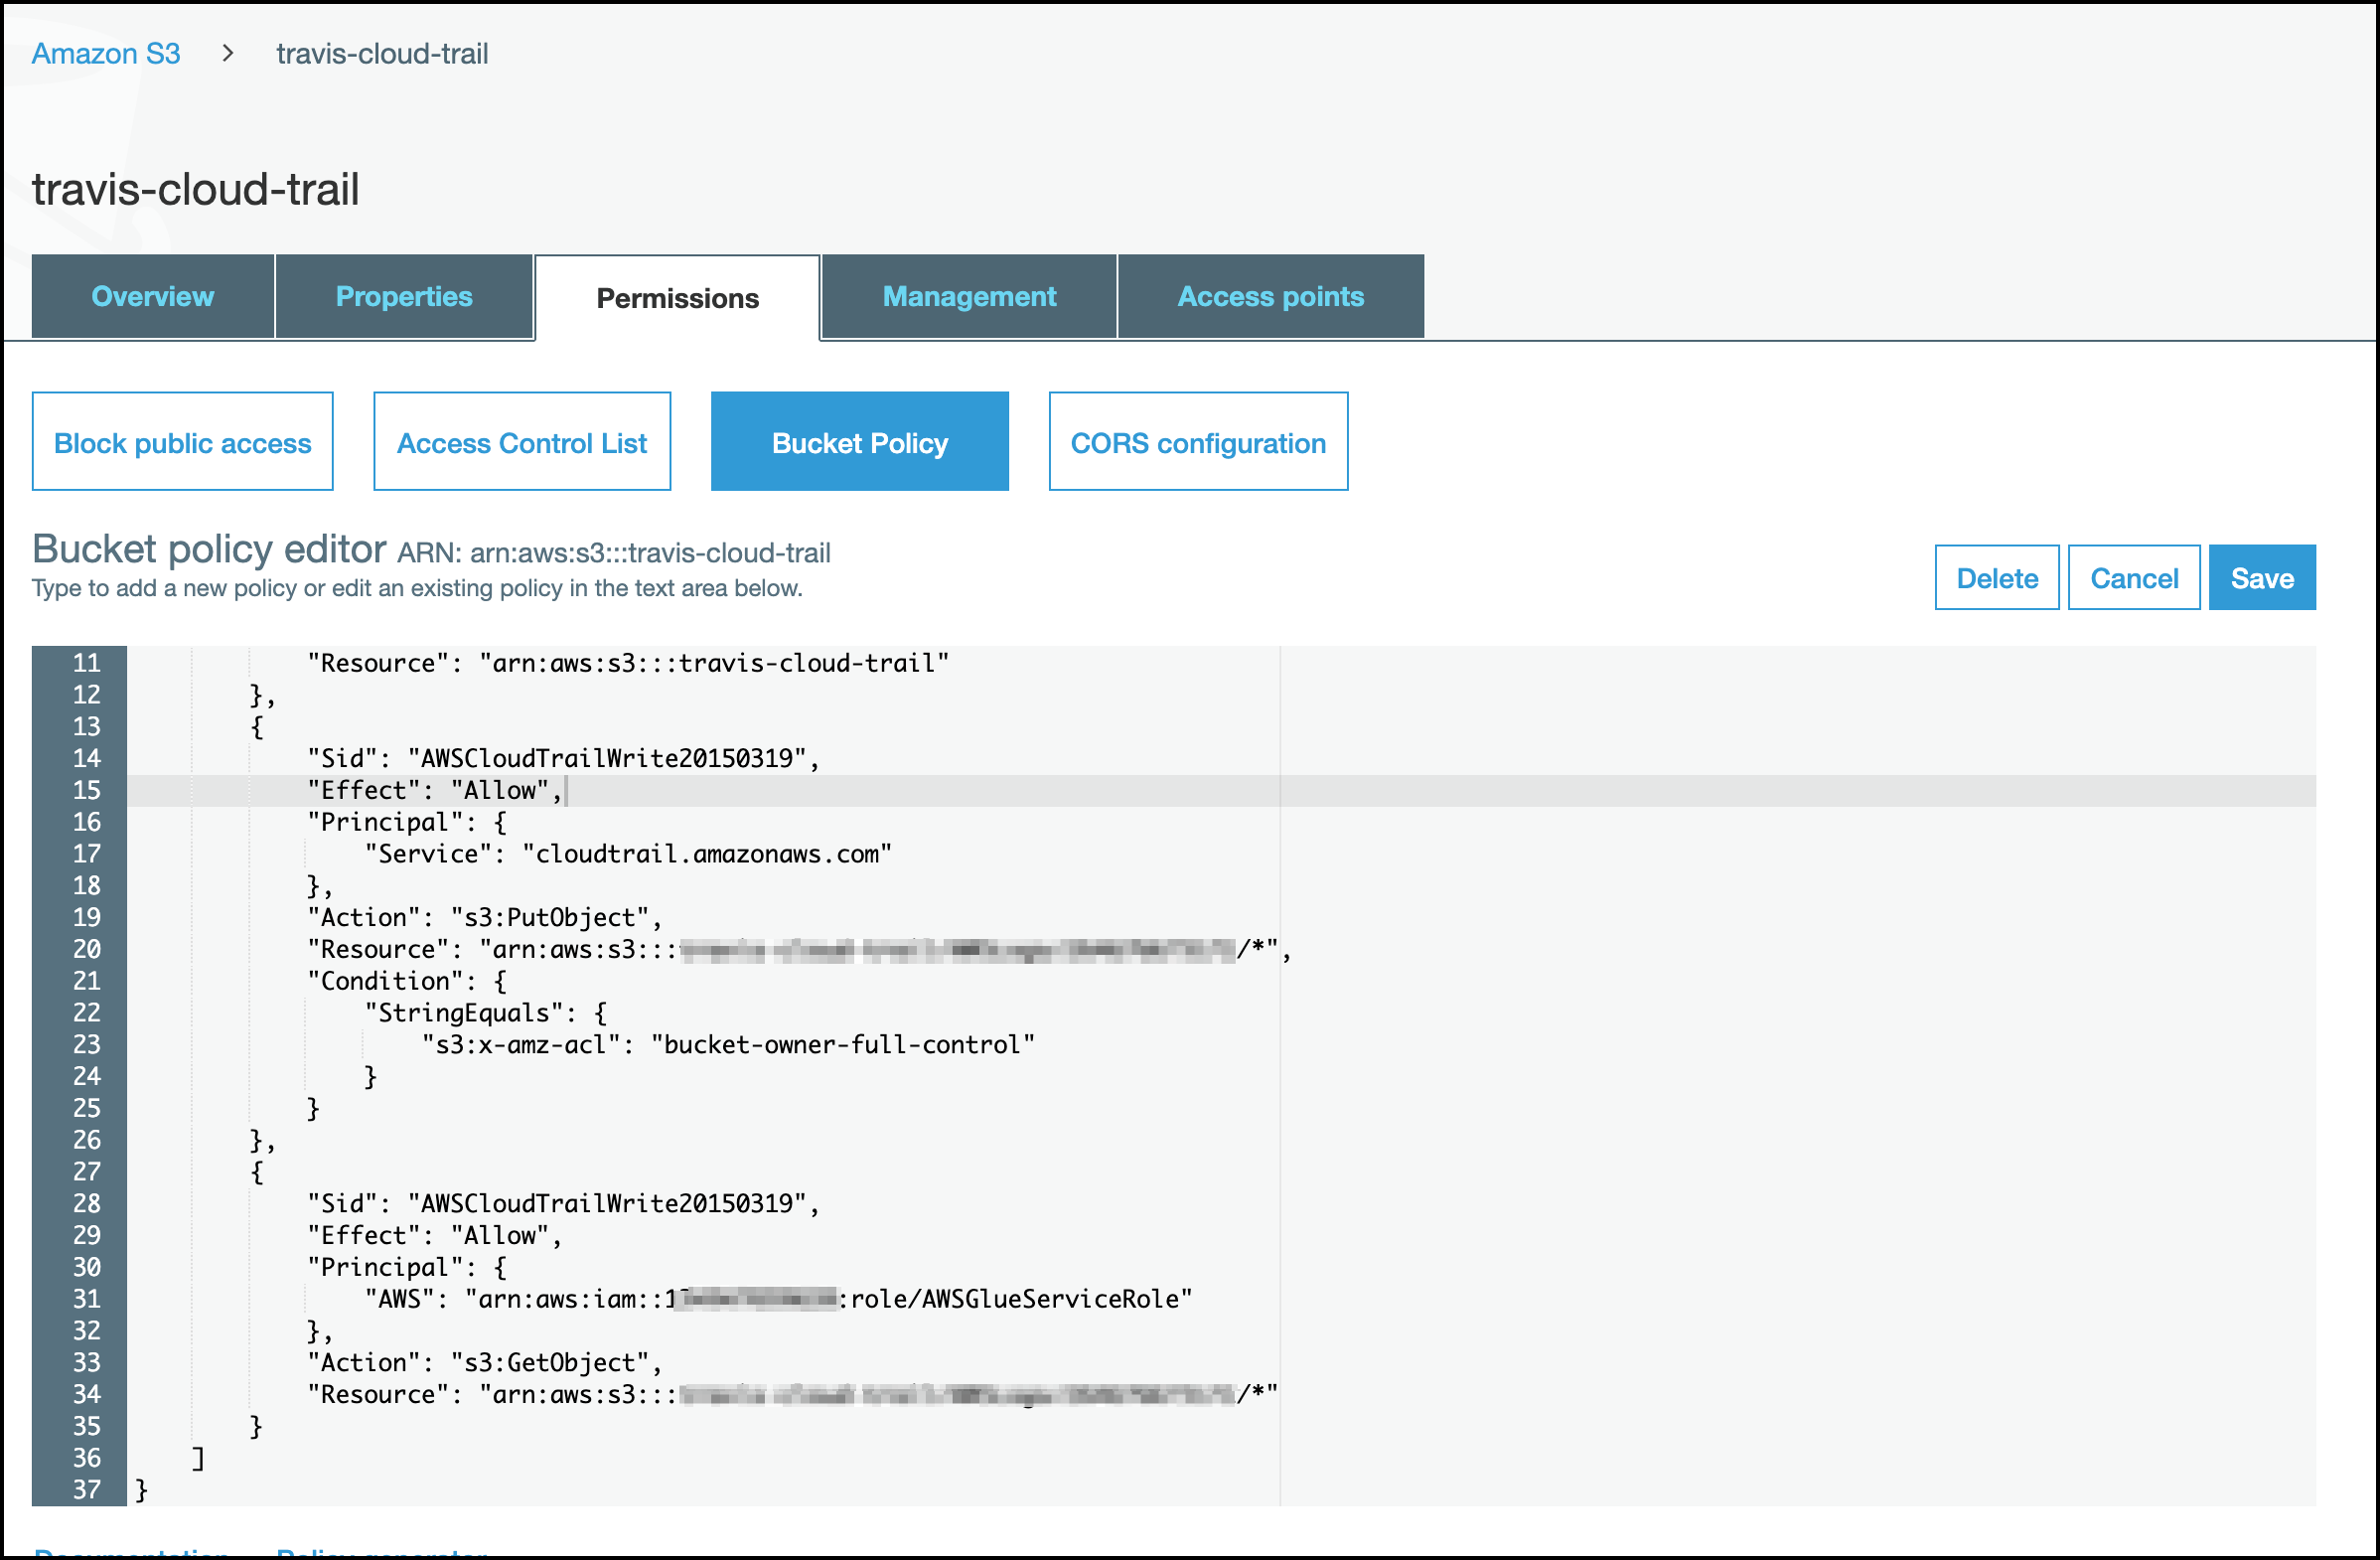
-
In the bucket policy editor, copy and paste the following JSON text and append it to the existing policy:
- Replace
<sailpoint-accountid>withSailPoint account number for Cloud Access Management. - Replace
<sailpoint-accountid>withSailPoint account number for Cloud Access Management. - Replace
<central-cloud-trail-bucket>with your bucket name. - Replace
<central-cloud-trail-bucket>with your bucket name.
- Replace
-
Edit the following 4 areas in the JSON file:
-
Replace the 2 instances of
<sailpoint-accountid>withSailPoint account number for Cloud Access Management. -
Replace the 2 instances of
central-cloud-trail-bucketwith your bucket name. In this example that would betravis-cloud-trail.
-
Once you have configured a central CloudTrail policy bucket, SailPoint recommends connecting all accounts simultaneously using AWS Organizations.
Connecting AWS Organizations
SailPoint provides CloudFormation templates to grant the permissions required to onboard all accounts using the AWS Organizations service.
-
Follow the AWS directions to create a stack set with service-managed permissions.
- Select Template is ready and upload stackset.json. This creates a role and policy with sufficient privileges to read data from your AWS cloud.
-
Follow the AWS directions to create a stack on the root management account.
- Select Template is ready and upload stacks.json. This describes the resources AWS CloudFormation will include in your stack.
-
Follow the AWS directions to create an organizational CloudTrail, or use an existing CloudTrail Amazon Resource Name (ARN).
-
Enable SNS notification delivery to an existing SNS topic.
-
Enable Management events.
Warning
To avoid Amazon Web Services costs, ensure that you enable only management events in your organization's CloudTrail. If you enable all events or create a new organization CloudTrail, you will incur costs. Refer to the CloudTrail pricing for more details.
-
You should verify your configuration before registering your source.
Policy Requirements
If you want to use a custom IAM policy, it must contain the minimum permissions Cloud Access Management needs to read your AWS accounts.
Display required permissions
1 2 3 4 5 6 7 8 9 10 11 12 13 14 15 16 17 18 19 20 21 22 23 24 25 26 27 28 29 30 31 32 33 34 35 36 37 38 39 40 41 42 43 44 45 46 47 48 49 50 51 52 53 54 55 56 57 58 59 60 61 62 63 64 65 66 67 68 69 70 71 72 73 74 75 76 77 78 79 80 81 82 83 84 85 86 87 88 89 90 91 92 93 94 95 96 97 98 99 100 101 102 103 104 105 106 107 108 109 110 111 112 113 114 115 116 117 118 119 120 121 122 123 124 125 126 127 128 129 | |
Connecting Single AWS Source Accounts
If you do not want to add all accounts in your organization, you can add individual accounts. SailPoint provides a CloudFormation template to create a role and CloudTrail allowing access to the objects in your Amazon S3 bucket.
To connect a single account using CloudFormation:
-
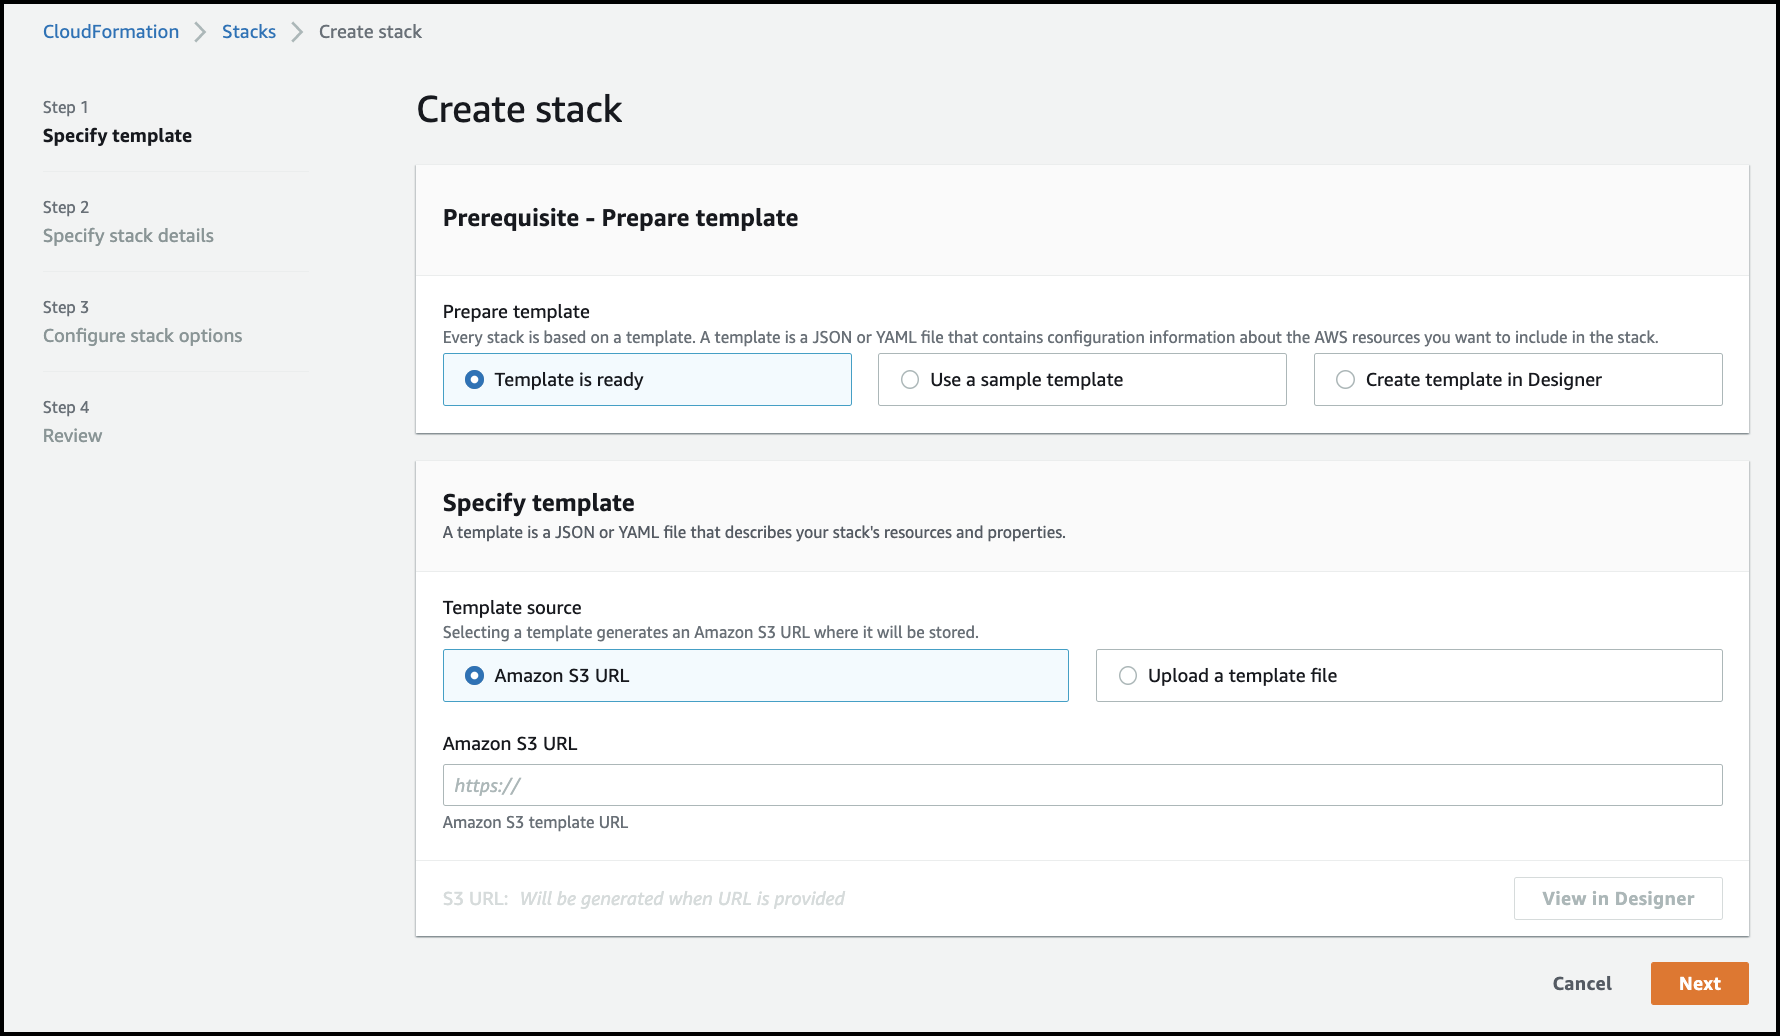
In the AWS console, select CloudFormation > Stacks.
-
In Stacks, select the Create stack dropdown menu and choose With new resources (standard).
-
Select Template is ready and Upload a template file.
-
Based on your organization configuration, select the appropriate template:
Use Case Template Use an existing CloudTrail with an existing S3 bucket aws-onboarding-existing-cloudtrail.json Create a CloudTrail to use with an existing S3 Bucket aws-onboarding-nobucket.json Create a CloudTrail and an S3 bucket aws-onboarding.json Caution
If you create an S3 bucket for CloudTrail, Cloud Access Management will not have historical usage data, and some of the capabilities will not work.
-
Name your bucket.
-
If you are using an existing S3 bucket, enter the name in the BucketName field. This can be found in the S3 bucket column of your Trails.
-
If you are creating an S3 bucket, name the bucket for collecting CloudTrail logs.
-
-
Enter a unique ExternalId. Keep this information secret.
-
The template populates the other fields. Continue using the stack wizard, setting the Stack failure option to Roll back all stack resources.
-
Complete the setup and select Create stack.
You should verify your configuration before registering your source.
Connecting AWS Manually
If you do not have access to CloudFormation, you can manually add AWS accounts within your organization.
Caution
Connecting AWS manually can leave gaps in your data. SailPoint strongly recommends using CloudFormation templates with AWS Organizations or single AWS source accounts.
Creating an IAM Role
You must create an identity and access management role on your Amazon Web Services source account where you will attach the policy defining what data Cloud Access Management can read.
-
Sign in to the Amazon Web Services Management console.
-
Search for "IAM".
-
On the left, select Roles and choose Create role.
-
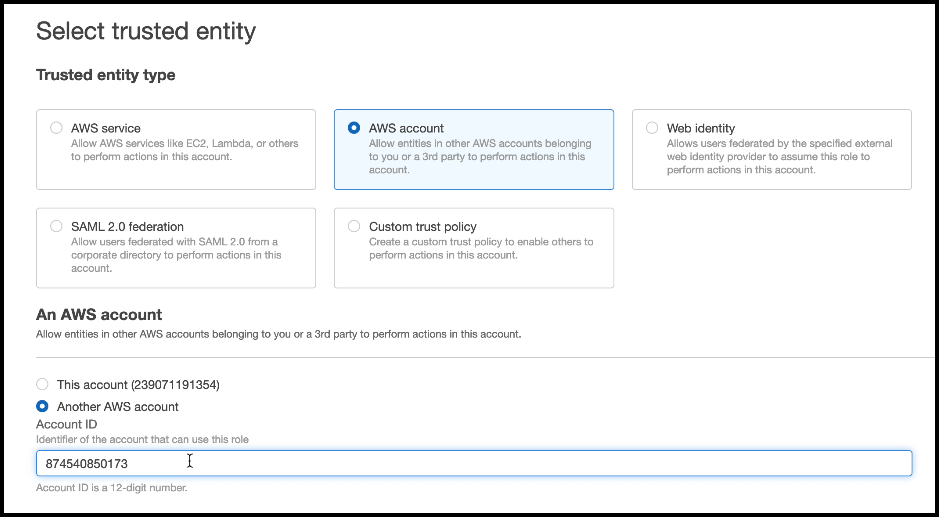
Select AWS account and choose the Another AWS account option.
-
In the Account ID field, enter the SailPoint account number for Cloud Access Management:
874540850173. -
Select the Require external ID option and enter any string in the External ID field. You will need this later to connect your AWS source account with Cloud Access Management.
-
Select Next. You will be taken to the Add Permissions section.
- Select Create policy and choose the JSON tab.
-
Replace the JSON text with the required permissions.
-
Select Next: Tags. Tags are optional.
-
Select Next: Review. Enter an appropriate name and description for the role.
-
Select Create policy. The new policy will be displayed in the list of IAM policies.
-
Select the checkbox next to the new policy and select Next.
-
Enter a role name and details. Review the information and select Create Role. You will be redirected to the Roles page.
-
Search for and select the new role to view its summary. You will need the following information from the summary page to register your AWS source accounts with Cloud Access Management:
- Role ARN
- Select Trust relationships, and under
Condition, locate the KeyExternalIdgenerated for the role.
Creating a Managed IAM Policy
In order to grant Cloud Access Management access to your CloudTrail events, you must create a managed IAM policy.
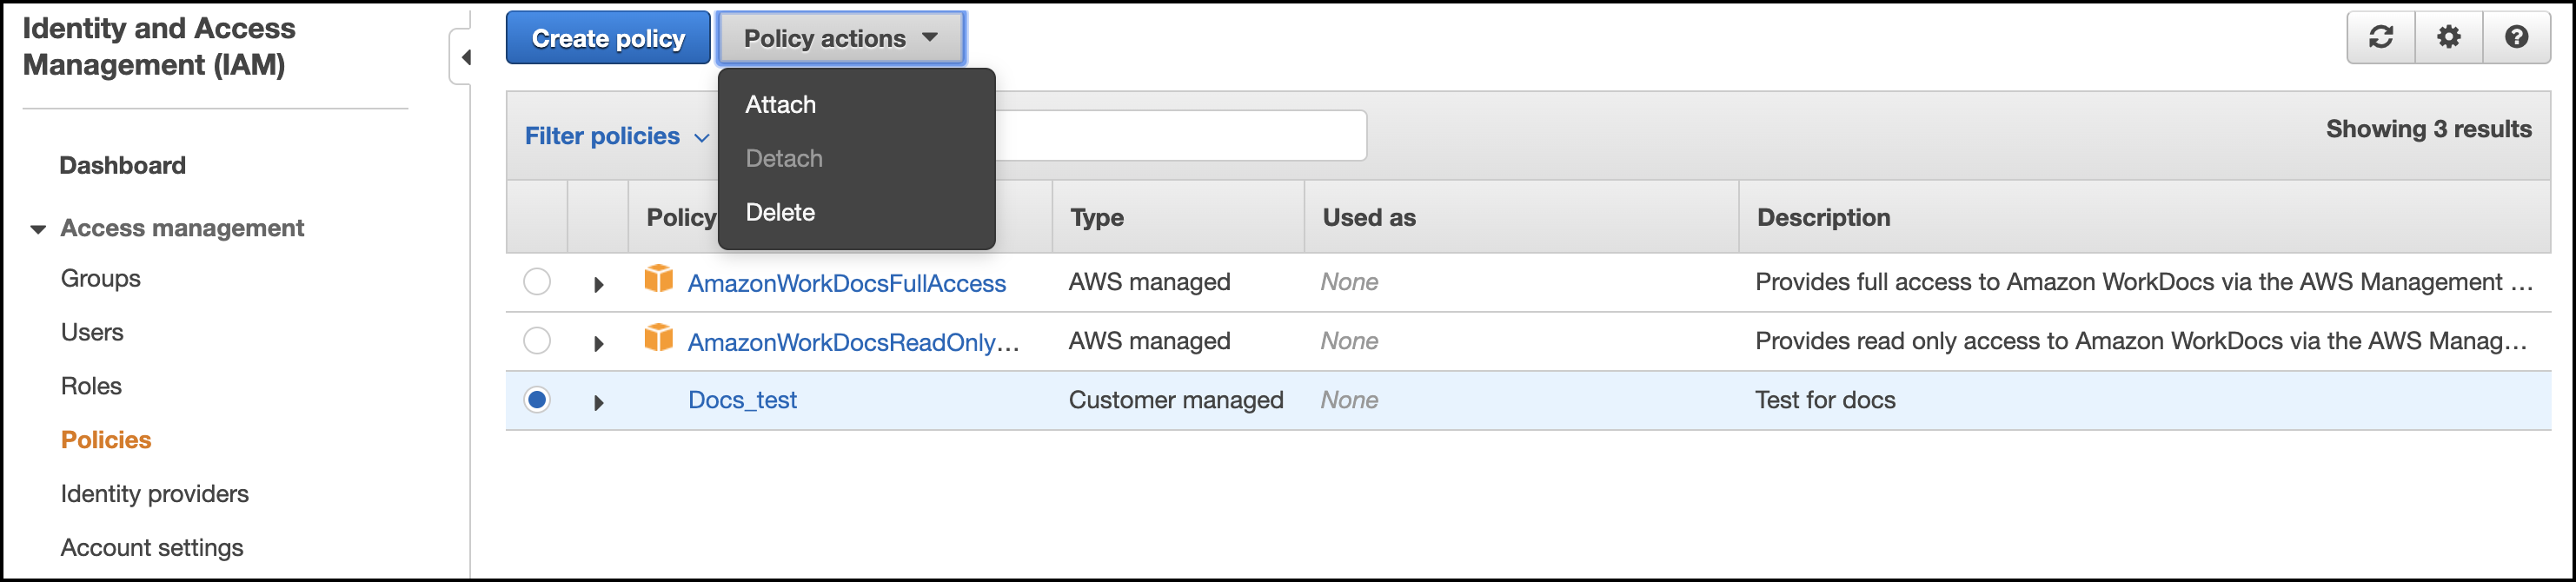
- In IAM, expand Access management in the left menu and select Policies.
- Select Create policy to create a managed policy.
-
Add the following permissions to the JSON file, replacing
YourCloudtrailBucketNamewith the name of your CloudTrail bucket:- Replace
YourCloudtrailBucketNamewith the name of your CloudTrail bucket. - Replace
YourCloudtrailBucketNamewith the name of your CloudTrail bucket.
- Replace
-
Select Review policy. Enter a name and optional description.
- Select Create policy. This directs you to the policy overview page.
- Select the radio button next to the policy name.
- Select the Policy actions dropdown menu and choose Attach to attach the policy to users, groups, or roles in your accounts.
- Select Attach policy to assign the new managed policy to the role you created previously.
Enabling CloudTrail Logging and SNS Notifications
After you've created a role with sufficient permissions, you'll need to enable CloudTrail event processing and log delivery. You can use an existing S3 bucket to store the CloudTrail logs or create a new one.
-
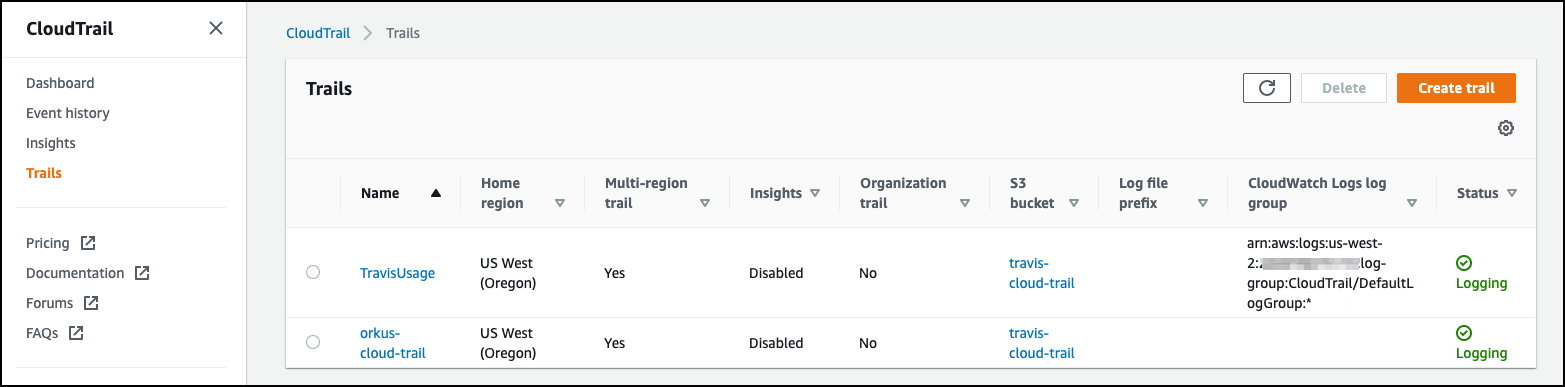
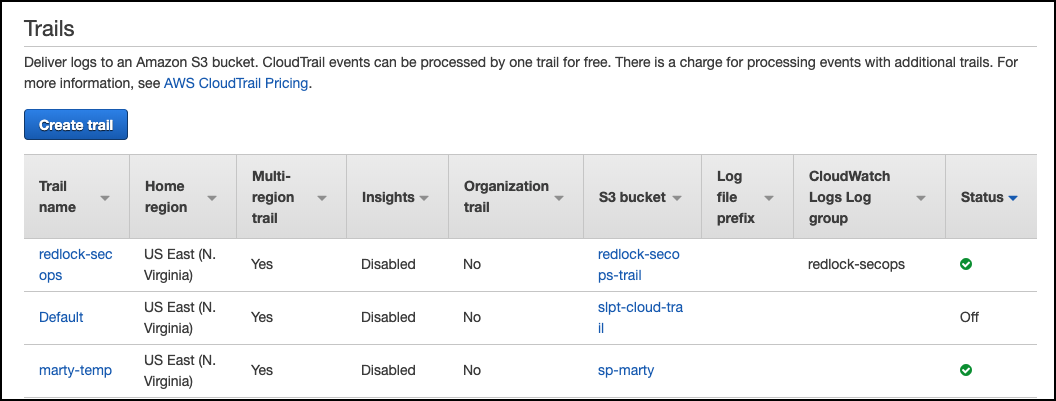
In the Amazon Web Services Management console, select Services and search for "CloudTrail". Select Trails to access the CloudTrail service page.
-
Select the trail name you want to use or select Create trail to create a new S3 bucket for your CloudTrail logs.
-
Under Storage location, select Create new S3 bucket.

Note
Save your CloudTrail name as you'll need it to register your AWS source cloud accounts.
-
To configure the Simple Notification Service (SNS) for log file delivery, expand Additional settings and complete the following:
a. SNS notification delivery - Select Enabled to send an SNS notification for every log file delivery.
b. Create a new SNS topic - Select New.
c. SNS topic - Enter an appropriate name and select Next.
d. Create an access policy - Set up your access policy to allow Cloud Access Management to subscribe to the CloudTrail logs.
-
Verify that the status of the CloudTrail subscription is healthy by looking for the green check mark in the Status column.
-
Copy the Amazon Resource Name (ARN) of the SNS topic that's created and store it somewhere easily accessible.
-
To allow Cloud Access Management to subscribe to the CloudTrail logs, you will need to create an access policy.
- In the AWS Console, select Services and search for "SNS".
- Select Topics from the left menu.
- Select the topic you created for Cloud Access Management and select Edit.
-
Expand Access policy to show the JSON editor. Append the following code into the editor:
- Replace with your SNS Topic ARN
Verifying Your Configuration
When you have finished connecting your AWS accounts, you should verify the configuration was successful:
-
In the AWS Console IAM service, select Roles.
-
Search for the IAM role created by CloudFormation. Select the role and save its name and ARN. For example,
arn:aws:iam::443361460944:role/SailPointCAMAuditRoleStack. -
Select the Trust relationships tab and confirm the principal displays
874540850173. -
Select Policies and search for the IAM role created by CloudFormation. For example, "SailPointCAMAuditPolicy".
-
Select Permissions and verify the bucket name in the JSON. This policy should allow
s3:GetBucketLocationands3:ListBucketactions on the CloudTrail bucket. It should also allows3:GetObjectaction on the S3 bucket contents. -
Browse to the SNS service. Confirm the topic was created for you to subscribe to and note the ARN of the SNS topic. For example,
arn:aws:sns:us-east-2:443361460944:sailpoint-cam-topic.
You need the following details to register your AWS source with Cloud Access Management:
-
Role ARN
-
External ID
-
CloudTrail ARN
-
CloudTrail Bucket Account ID, if different from the management account
Documentation Feedback
Feedback is provided as an informational resource only and does not form part of SailPoint’s official product documentation. SailPoint does not warrant or make any guarantees about the feedback (including without limitation as to its accuracy, relevance, or reliability). All feedback is subject to the terms set forth at https://developer.sailpoint.com/discuss/tos.