Managing Reports
Within the Lifecycle application users can create, manage, and run reports.
Creating and Exporting a New Report
In the Dashboard Left Navigation:
-
Select the reports link.
-
Select the
 button.
 -
Complete the following fields:
-
Name: Enter a unique name for this report.
-
Filters: A default filter is displayed that can be edited. To remove a filter, select the
 delete icon. Additional filters can be added by selecting the + Add Filter button.
 -
Select Next.
-
Define Content: 3 default fields are displayed. Users can choose to hide these or make them visible in the report by selecting the visibility icon to toggle on
 or off
  .
.- uid
- status
- risk score
-
Add Attributes: Select additional attributes to display in the report (optional). Use the search field to search across the existing attributes to add to the report. Once added to the Define Content section, users can remove the added attributes by selecting the
delete icon or drag attributes up or down to change the order the columns in the report. -
Select Next.
-
Sharing: (optional) Search and add the User Roles who can access this report. Once a role is selected it appears above and users can remove the added roles by selecting the delete
icon. -
Generate Reports: This page provides the user a summary of the report to be created and the ability to generate and export the report, by selecting the Generate CSV button.
-
Once the report finishes generating, the report is available under the Exports header. Users are presented with a
 button and a delete
  icon.
icon. -
Select the download button to download the report to a location of your choice or select the delete icon to delete this generated version of the report. Users are prompted to confirm deletion if they selected the delete icon.
-
Viewing and Exporting Existing Reports
Users can view existing reports that have been previously generated.
To edit an existing report:
In the Dashboard Left Navigation:
-
Select the Reports link.
-
Select the report to edit or download from the My Reports or Shared tab.
-
By default, the Generate Reports page is displayed if the report has been previously generated. Users can either:
- Select the Generate CSV to regenerate and export a new report. Once selected the report will appear on top of any previously generated reports under the Export header.
- Under the Export header, choose from a listing of previously generated reports to download by selecting the Download button.
- Under the Export header, delete a previous report generation by selecting the Delete icon.
-
Users also can modify the parameters of a previously generated report by selecting the filters tab on the tool bar.
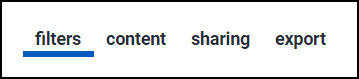
- filters: On the Define Filters page, users can choose to edit the Name of the report, edit the existing filter parameters, remove existing filters, and/or add new filters. To keep the same Filters, simply select Next.
- content: On Define Content page, users can choose to add new columns, remove columns, and/or reorder columns. To keep the same columns, simply select Next.
- sharing: On Sharing page, users can choose to remove user roles, add user roles to change who the report is shared with.
- export: On the Export page, users can generate and download the report.
All tab
The All tab is the default view of the reports page. This view lists all reports generated within the application whether the logged in user has access to the report or not.
If a user selects a report they do not have access to, an error message is briefly displayed, and the user will have to navigate back to the reports page.
My Reports
The My Reports tab lists the reports the current user previously defined.
Shared
The Shared tab lists the reports another user has shared with the current user. Only items which the current user has permission to will appear here.
Documentation Feedback
Feedback is provided as an informational resource only and does not form part of SailPoint’s official product documentation. SailPoint does not warrant or make any guarantees about the feedback (including without limitation as to its accuracy, relevance, or reliability). All feedback is subject to the terms set forth at https://developer.sailpoint.com/discuss/tos.