Managing Profiles
A profile is any individual, organization, or other object you can manage. This includes non-employees, the organizations they come from, or the assignments they work on, and additional data related to non-employees in your organization.
Creating Profiles
You can create profiles within your organization so that they can be managed.
Creating an Individual Profile
To create an individual profile:
-
On your Home page, in the Create Profiles section, select the button corresponding to the type of profile you want to create.
This begins a workflow designed by your administrator to create a new profile of the selected profile type.
-
If applicable, complete the form as configured by your administrator.
-
Select Submit.
Depending on the configurations your administrator made to this workflow, the profile might be created immediately or it might need to be approved by a reviewer before it can be created.
Go to the Requests page to review your submitted requests, or go to Needs Action to review the requests other users have submitted that require your attention.
Uploading Profiles in Bulk
You can also upload a CSV file containing details about a list of profiles you would like to add to Non-Employee Risk Management.
-
Select Lifecycle > Profiles from the left sidebar.
-
Select Import.
-
In the Action section, select Create.
-
Select the workflow that should be used to create these profiles.
The workflow you should select usually depends on the type of profile being created.
-
If your CSV file does not contain headers, move the Use CSV file first row as column headers toggle switch to Off.
-
Under File Upload, select a CSV file containing a list of profiles.
Note
This file must contain no more than 1,000 profiles. Each column in this file is expected to correspond to one attribute of a profile, and each row is used as one profile. Your file can include up to 500 columns. The values in each column will be used as the values for the attributes you select in the next step.
-
In the Column Attribute Recommendations & File Preview section, select the attribute that best corresponds to the data in each column. If you do not select an attribute for a column, the values in that column will not be uploaded or assigned to profiles.
If your file included column headers, attributes are recommended based on the column headers.
Use the horizontal scroll bar to find all of the columns you uploaded with the CSV file.
-
Select Import.
The workflow you selected is started for each row in the CSV file. Depending on the workflow's actions, the profiles are created.
Editing Profiles
If you have edit access to a profile, you can edit it after it has been created.
Editing an Individual Profile
To edit an individual profile:
-
Go to Home > Lifecycle > Profiles.
-
In the dropdown list, select the profile type of the profile you want to edit.
-
Select the profile you want to edit.
-
Select the Edit button.
-
Update the applicable fields on the profile. These fields vary based on your organization's configurations.
-
Select Save.
In some cases, you can also make certain types of changes by selecting the workflows at the top of the page, depending on the workflows your administrator has configured.
Updating Profiles in Bulk
You can upload a CSV file of profiles to update multiple profiles at once.
To upload a list of profiles to edit:
-
Select Lifecycle > Profiles from the left sidebar.
-
Select Import.
-
In the Action section, select Update.
-
Select the workflow that should be used to update these profiles.
The workflow you select usually depends on the type of profile you're updating.
-
If your CSV file does not contain headers, move the Use CSV file first row as column headers toggle switch to Off.
-
Under File Upload, select a CSV file containing a list of profiles.
Note
This file must contain no more than 1,000 profiles. Each column in this file is expected to correspond to one attribute of a profile, and each row is used as one profile. Your file can include up to 500 columns. The values in each column will be used as the values for the attributes you select in the next step.
-
In the Column Attribute Recommendations & File Preview section, select the attribute that best corresponds to the data in each column. If you do not select an attribute for a column, those columns will not be added to attributes on your profiles.
If your file included column headers, attributes are recommended based on the column headers.
Use the horizontal scroll bar to find all of the columns you uploaded with the CSV file.
-
In the Unique Identifier Attribute field underneath the table, select the attribute used as a unique identifier for profiles in this profile type. This attribute must be selected for one of the columns in the file preview.
-
Select Import.
The workflow you selected is started for each row in the CSV file. Depending on the workflow's actions, the profiles are updated.
Viewing Profiles and Profile Types
To view profiles and profile types:
In the Dashboard Left Navigation:
-
Select the Profiles link.
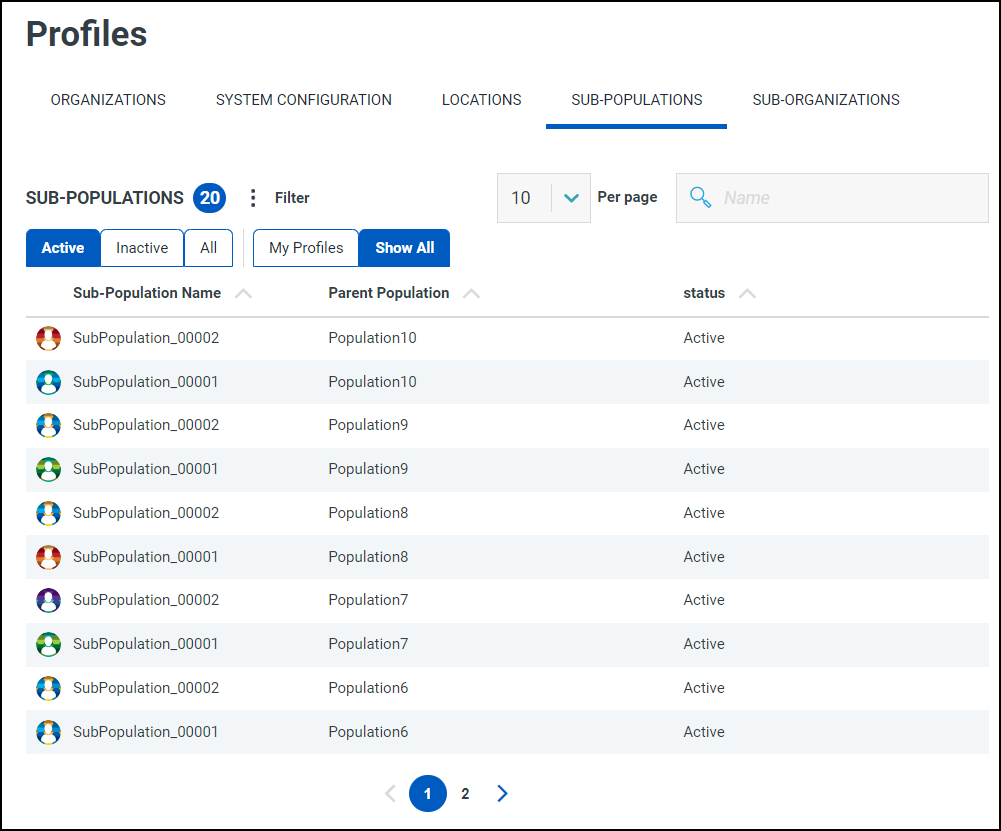
On this page users are presented with variety of options for viewing the profiles associated with a profile type.
All the available profile types are displayed on the top of the page.
Selecting a profile type link displays the associated profiles on the bottom of the page.
The total number of profiles the current user has access to is displayed next to the profile type header.
Users also can apply filters to limit the number of profiles that appear on the table. Refer to Filters to learn more about applying filters.
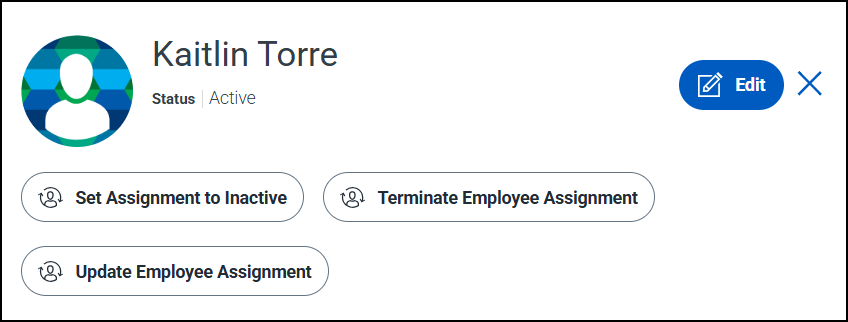
Within a profile, there may be workflows present that can be initiated by the current user. Workflows vary widely and are completely dependent on the actions defined by the Lifecycle Administrator.
To initiate the action, select the workflow button. Depending on the workflow, additional actions may be required.
Refer to workflows to learn more about the types of workflows.
Active tab
The Active tab is the default view of the specific profile type selected in the left navigation. This view lists the profiles associated with the selected profile type that are in an active status. Only items that the user has permission to will appear here.
Inactive tab
The Inactive tab lists the profiles associated with the selected profile type that have been marked inactive or terminated. Only items that the user has access to will appear here.
All tab
The All tab lists all profiles associated with the selected profile type, regardless of status, that the user has access to.
Users can also apply an additional layer of filtering, further refining the results by My Profiles or Show All.
My Profiles
The My Profiles tab lists the only the profiles the current user is responsible for managing. This occurs when the user is an owner or a contributor to a profile, or if a user role they have grants them those permissions.
Show All
The Show All tab lists the all the profiles the current user has access to whether they manage them or not. Only profiles that the user has access to will appear here.
Viewing Risk on Profiles
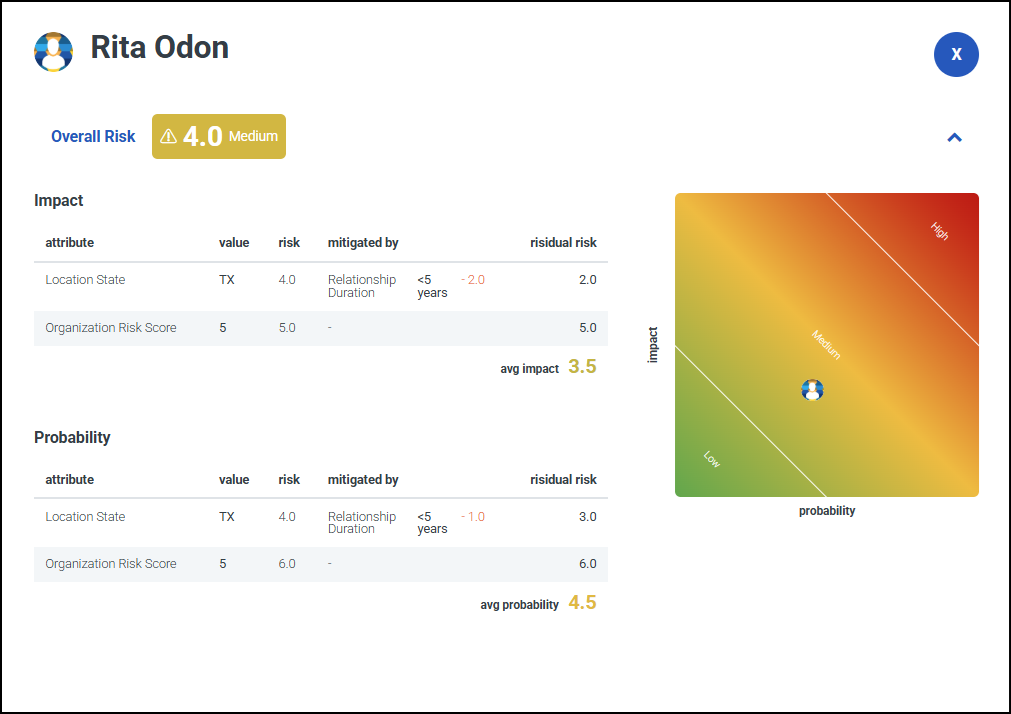
Profiles assigned risk display an overall risk score and level that you can use to identify risks and help assess the threat they pose. Selecting the overall risk score on the profile table and profile detail page displays the profiles risk breakdown. Details of all risk elements assigned to the profile are displayed.
Risk elements include:
- Overall Risk - The overall risk score and risk level assigned to the profile.
- Impact or Probability - Attributes assigned to the profile with the impact or probability risk type.
- Attribute - The attribute assigned to the profile.
- value - The chosen option for the attribute.
- risk - The risk score assigned to the chosen option.
- mitigated by - The name of the mitigation attribute, its chosen option, and the assigned mitigated risk score. If there is no mitigation assigned this will be blank.
- residual risk - The attribute's risk score after mitigation is applied.
- avg impact/probability - The averaged value of all impact or probability attributes residual risk scores.
Notes
- If the profile inherits risk from another profile, the overall risk score includes an asterisk, and details of the inherited profile are displayed at the top of the breakdown chart.
- If the profile includes a subcategory, details of the subcategory are displayed at the bottom of the breakdown chart. Subcategories provide an additional risk score for profiles to help identify additional risk. For example subcategories may have been created for departments that have different risk factors.
- Subcategories do not affect the profiles overall risk score.
Dashboard Search Functionality
Search results are limited to the Profiles that the user is permitted to view.
Search Bar
The search bar on the home page on the Dashboard enables a user to search for profiles by their profile name. This name is the title of the profile as it appears at the top of the profile's page and it depends on your administrator's configuration.
You can also find this search bar on the list of profiles.
In addition to plain text queries, the search bar supports regular expressions.
For example:
John D[a-z]* Smithreturns all profiles containing John, any word beginning with D, and then Smith.Contractor.+2025returns all profiles containing the word "Contractor," one or more of any other character, and then 2025.\(Administrator\)returns all profiles containing the string, "(Administrator)". Note that the parentheses are escaped by backslashes.
The profiles that are returned reflect profiles you are allowed to view that match the results of your search query.
Advanced Search
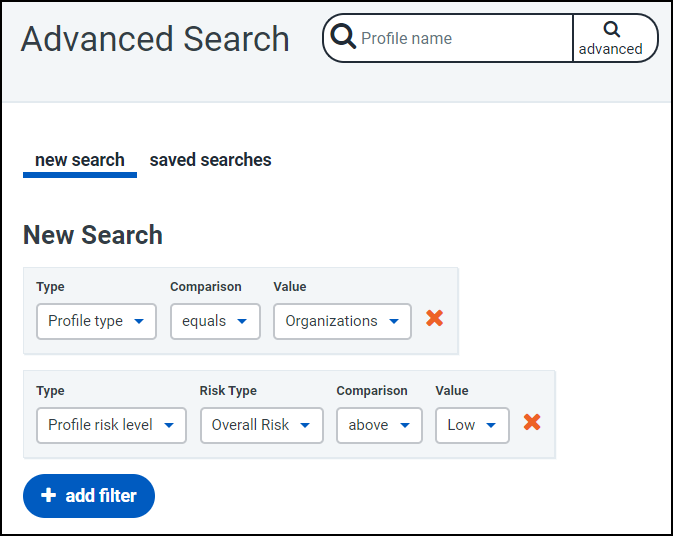
Selecting the advanced button  directs users to the advanced search page, allowing users to refine the search criteria using filters. When multiple filters are added, each filter value is treated as an ‘AND’ condition. Advanced searches can be saved and once saved will appear on the saved searches tab.
Creating a New Advanced Search
To create a new advanced search, from the Dashboard:
-
Select the advanced button in the search bar.
Users land on the new search page and are presented with a default filter by profile type. Users can either modify this default filter or select the
 delete icon to remove the filter.
 -
Adding filters
-
Select the + add filter button.
-
Select the appropriate value from the Type dropdown to filter: Profile ID, Profile attribute, Profile risk level, Profile status and Profile type.
-
Complete the related filter criteria for the Type selected. Various filtering selections are available based on the Type selected.
-
Select Search.
-
The search results will appear in the Results section.
-
-
Saving Searches
-
Select Save.
-
In the dialogue box, enter a unique label for the search.
-
Select Save.
-
Viewing Saved Advanced Searches
To view a previously saved search, from the Dashboard:
-
Select the advanced search button.
-
Select the saved searches tab. A list of previously saved advanced searches is displayed.
Documentation Feedback
Feedback is provided as an informational resource only and does not form part of SailPoint’s official product documentation. SailPoint does not warrant or make any guarantees about the feedback (including without limitation as to its accuracy, relevance, or reliability). All feedback is subject to the terms set forth at https://developer.sailpoint.com/discuss/tos.


