HTTP Operations
In HTTP Operations, you can add, edit, delete, and reorder HTTP operations.
The connector supports the following operations:
- Test Connection
- Account Aggregation
- Account Delta Aggregation
-
Group Aggregation
-
Resource Aggregation - {resourceName}
-
Get Object
- Get Object-Group
- Create Account
-
Update Account
-
Delete Account
-
Enable Account
- Disable Account
- Unlock Account
- Change Password
- Add Entitlement
-
Remove Entitlement
-
Custom Authentication
- Pass-Through Authentication
Notes
- For Entitlement Aggregation, you need to configure the schema manually using the REST APIs. Contact SailPoint Support for assistance.
- For the Web Services source, you can configure the native identity in the provisioning plan using a placeholder such as
$plan.planNativeIdentity$. - Access to ExternalDTD is disabled during XML parsing.
Support for Cookies
The Web Services source supports cookies for HTTP requests.
The Web Services source supports cookies for multiple endpoints configuration. The source manages the cookies internally for the endpoints configured for the same operation. Cookies from the previous endpoints can be used in all the subsequent endpoints of the same operation type.
The Web Services source supports the JSON array as a top element in the HTTP requests.
By default, the Web Services source supports cookies. Cookies can be disabled by adding the disableCookies attribute key with true as a value. This is not applicable for the authentication API call operation.
Add Operations
Configure one or more HTTP operations to manage your source data. The options available to configure the operation vary, depending on your selected Operation Type. To add a new HTTP operation, select Add Operation.
Screenshot
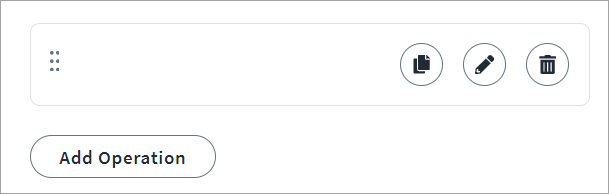
The following topics describe the different configuration tabs that may appear when configuring an operation.
General Information
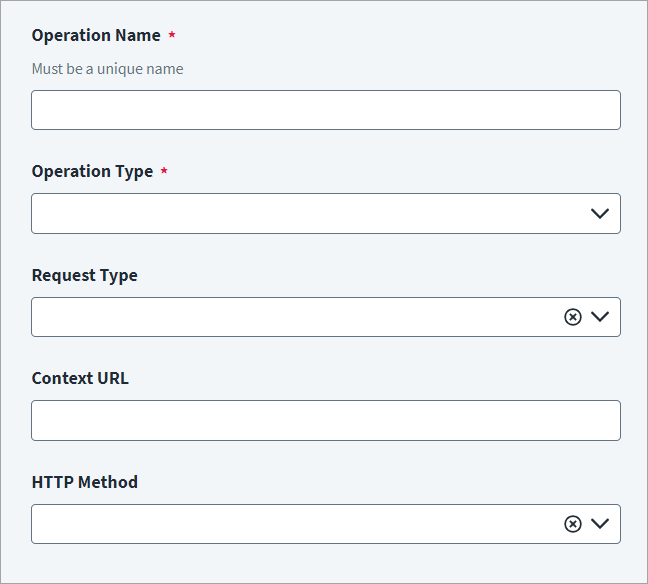
Enter basic configuration information for the HTTP operation.
Screenshot
-
In the Operation Name field, enter a unique name for the operation that you want to execute. You can change the name of an operation later if needed.
Note
SailPoint recommends that you create a unique name for the operation to help you distinguish it from other operations. For example, if you have two account aggregation endpoints for your source, you can name them "Account Aggregation-1" and "Account Aggregation-2".
-
In the Operation Type dropdown list, select the name of the operation that you want to execute.
Note
You must configure a Partitioned Account Aggregation operation to support partitioning for static and dynamic. Additionally, to support dynamic partitioning you must also configure a Get Partition operation.
-
Select the Request Type from the dropdown.
If your configuration requires cURL, refer to Add an Operation with cURL.
If your configuration requires GraphQL, refer to Add an Operation with GraphQL.
-
In the Context URL field, enter the authentication (Context) URL specific to your operation. The connector appends the context URL to the source's Base URL. This can be empty depending on the endpoint of the managed system. For example:
/2/team/members/listThe following are a few keywords that are used in the Context URL along with the placeholder
$:planresponseapplicationgetobjectauthenticate
-
In the HTTP Method field, select the appropriate method from the dropdown list. HTTP method is supported by the respective operation. For example, you can select GET, PUT, POST, DELETE, or PATCH.
- Select Save.
Add an Operation with cURL
The endpoint cURL command for an operation which contains the complete request URL, HTTP Method, Header, and Body is provided in the following example:
curl --location --request POST 'https://api.dropbox.com/2/team/members/list' \
--header 'Authorization: $application.accesstoken$' \
--header 'Content-Type: application/json' \
--data-raw '{"limit":1}'
In this example, consider the following:
-
Complete request URL:
https://api.dropbox.com/2/team/members/listNote
The URL must be in
http://orhttps://format. You can add a placeholder URL, but it must havehttp://orhttps://at the beginning of the URL string. You can't use a placeholder URL on its own. -
HTTP Method:
-
Header
-
Body:
Add an Operation with GraphQL
If you select GraphQL as the Request Type, the options for Context URL and HTTP Method are removed, and you only need to provide the Query and GraphQL Variables.
Note
The connector only supports velocity and placeholder expressions for GraphQL variables.
Screenshot
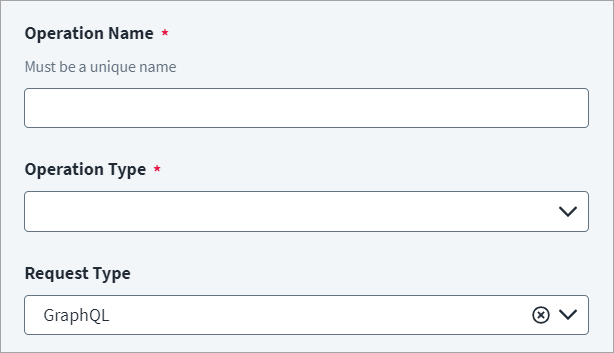
The GraphQL for an operation which contains a query and variables is provided in the following example.
Query
query ListOrganizationMembers($org: String!, $cursor: String, $first: Int = 100) {
    viewer {
        organization(login: $org) {
            viewerIsAMember
            viewerCanCreateTeams
            membersWithRole(after: $cursor, first: $first) {
                totalCount
                edges {
                    node {
                        login
                        name
                        id
                        email
                        databaseId
                    }
                }
            }
        }
    }
}
Variables
In this example, consider the following:
- The URL is constant throughout the system.
- The HTTP Method is always POST.
- GraphQL supports cursor-based pagination.
Header
The header holds the key and value for a given HTTP operation that you want to execute. The connector sends these key-value pairs as part of the header in HTTP requests.
Screenshot
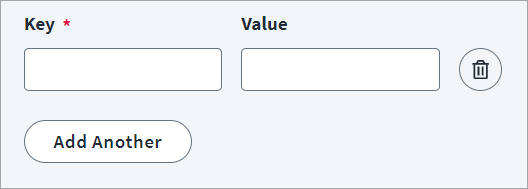
The following example displays a sample key-value pair, where Authorization is the header Key and $application.accesstoken$ is the Value.
Notes
- If you don't provide the content type in the Header, the source sets Content-Type as
application/json. - If you wish to exclude the default Content-Type header from the requests, add
removeDefaultHeaderFromRequest:truein the connectionParameter object of those requests using the put-source SailPoint Developer Community API.
- Enter the header Key and Value used for the operation.
- Select Save.
Content Types
- JSON request, JSON response:
Content-Type= application/json (optional), Accept (optional)
Body
This is the standard HTTP body used for posting the data with a request. The Body can be configured as one of two types, Form Data or Raw. Either of these is used for a specific operation.
Screenshot
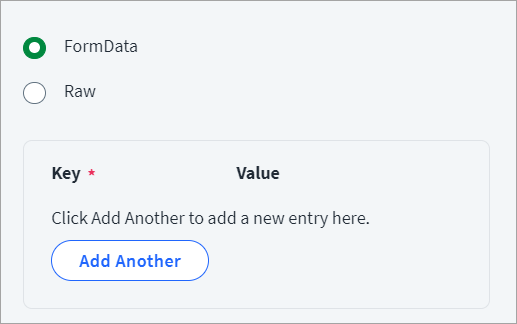
Form Data
- Select Form Data.
- Add the respective data Key and Value. The Web Services source will not display an error when an endpoint's body type is selected as Form Data and the form entries are empty. The key-value pairs are sent as part of the Body in JSON format. XML does not support form data.
Raw
- Select Raw.
-
Enter the data in the Body field. Select Save.
Additional Information for Body
The following keywords are used in the Body along with the placeholder $:
planresponseapplicationgetobjectauthenticate
Handling the "$" Character in the URL and Body
The Web Services source correctly extracts and handles the $ character in the URL and Body, along with the placeholders.
Placeholder Details
The JSON Request with the Placeholder in the Body/Payload
If the body contains a placeholder that is not present in the provisioning plan, response, or source, the source removes the key value from the JSON payload. For example:
{
    "type": "$plan.type$",
    "id": "$plan.nativeIdentity$",
    "title": "$plan.title$",
    "externalid": "12345"
}
If the plan does not contain the title attribute request, the source removes the title key and value. For example:
URL
If the URL contains a placeholder that is not present in the provisioning plan, response, or source, the source removes the value from the Request URL.
Header
If the header contains a value that is not present in the provisioning plan, response, or source, the source removes the key value from the Request Header.
Handling the "$$" Character in the URL and Body
The Web Services connector correctly extracts and handles $$ as a singular velocity operations character in the URL, Body, and Pagination operations.
Velocity Details
The JSON Request with the Velocity Operations in the Body/Payload
{
    "type": "$$plan.type$$",
    "id": "$$plan.nativeIdentity$$",
    "title": "$$plan.title$$",
    "externalid": "12345"
}
Note
Velocity operations can't be configured in XML format.
Response Information
Response Information has a Root Path and a Success Code.
Screenshot
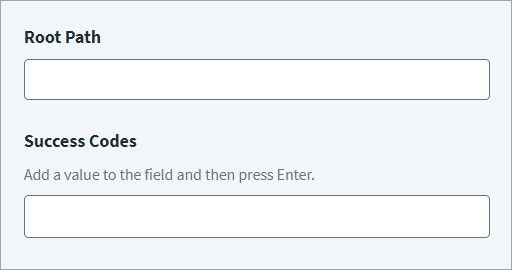
The Root Path must be common for all the attributes mentioned in the Response Attribute Mapping for a particular operation.
The Success Code is the successful HTTP response code expected by respective Web Service operations. The Success Code field accepts HTTP status codes in CSV format.
For example, consider the HTTP response code 200, 201, 203. If the list does not contain any value, the status codes from 200 to 299 are checked. Successful status codes start with 2.
You can provide 2** as a Success Code. The Web Services source supports a null HTTP response body with custom error messages. For Web Services SaaS, the pagination with a null Root Path in Response Mapping works correctly. The default value for root path is $.
-
Enter the Root Path. This is the common path present in the JSON response. For example:
- JSON -
$.members.profile
- JSON -
-
Enter the Success Code. This is the HTTP success code that serves as a response to the request.
- Select Save.
Response Mapping
Response Mapping is a response attribute returned in JSON/XML format from the managed system for specific operations like create user, update user, or account aggregation.
Screenshot
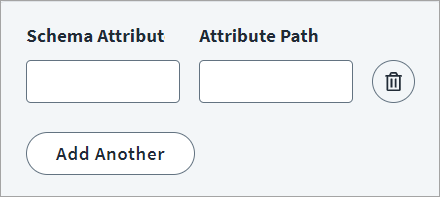
- Enter the Schema Attribute expected in the JSON response from the URL as a part of the schema.
-
Enter the JSON Attribute Path of the particular attribute in the returned response. The Root Path is prefixed with this path. For example:
- JSON -
members[*].profile.member_id
- JSON -
-
Select Save.
In the Web Services source, you have to add the schema attributes manually for the respective Web Services-based target system. The source accurately handles any incorrect JSON attribute paths in the endpoint's response mapping configuration.
XPath Namespace Mapping
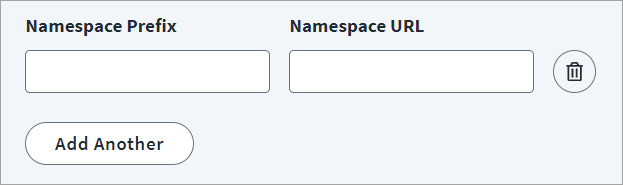
Configure the XML Namespace Prefix and its corresponding Namespace URL, which identify uniquely named elements and attributes in XML requests and responses.
Screenshot
Notes
- Absence of non-standard XML Namespaces results in errors while response parsing.
- If any non-standard XML Namespace exists in the response, configure the same in the XML Namespace mapping where the Key is the Namespace Prefix and the Value is the Namespace URL.
- If a default Namespace is present, add a temporary Namespace Prefix with the default Namespace URL in the XML Namespace mappings. Use this temporary prefix in the XPath elements within the scope of the default Namespace.
- Add the Namespace Prefix and Namespace URL pair to be used in the XML operation. Use the Add Another and Recycle Bin options, as needed.
- Select Save.
Update Considerations
For existing sources, go to the General Information tab, select cURL from the Request Type dropdown if you have configured the cURL Command, otherwise select API and then Save.
Documentation Feedback
Feedback is provided as an informational resource only and does not form part of SailPoint’s official product documentation. SailPoint does not warrant or make any guarantees about the feedback (including without limitation as to its accuracy, relevance, or reliability). All feedback is subject to the terms set forth at https://developer.sailpoint.com/discuss/tos.