Configuring Web Services SaaS for Integration
Warning
When configuring the source, do not hard code sensitive data. If sensitive data is hard coded, it can lead to that data being exposed when moving to a production environment. SailPoint recommends putting sensitive information in the encrypted attribute value list in the application XML and then using the encrypted variable name when configuring the source. For example, if you want to add the custom variable Custom_Variable in the encrypted list, append the variable name in the following list: <entry key="encrypted" value="accesstoken, refresh_token, Custom_Variable"/>
This section describes the various configurations to be performed to support the following features.
Pass-Through Authentication
Configure Pass-Through Authentication on existing Web Services.
-
On the Additional Settings page, select the Get Object Required for Pass-Through Authentication checkbox.
Notes
- When selected, it executes the Get Object operation to verify if the entered Username (considered an identity attribute) is present on the managed system or not.
- When deselected, it skips the Get Object operation and the Pass-Through Authentication operation must have response mapping with account object schema attributes.
-
(Optional) If you need to configure error messages for Pass-Through Authentication, use the following entry keys:
objectNotFoundErrorMsgauthenticationFailedErrorMsgexpiredPasswordErrorMsg
The following process is an example to configure Pass-Through Configuration.
Pass-Through Authentication General Information
- In the Operation Name field, enter
Pass-Through Authenticationas the operation name. - From the Operation Type dropdown list, select Pass-Through Authentication.
- In the Authentication URL field, enter the URL specific to the Pass-Through Authentication.
- In the HTTP Method dropdown list, select POST.
Pass-Through Authentication Header and Body
The HTTP body is used to post data with a request. The Header has the data keys and their corresponding values. These key-value pairs are sent as part of the Header in the HTTP Request.
-
Under the Header tab, enter the following Key/Value pairs:
- Key =
SOAPAction, Value =urn:partner.soap.sforce.com/Soap/queryReq - Key =
Content-Type, Value =text/xml
Refer to Header for more information.
- Key =
-
Under the Body tab, select the Raw radio button.
-
In the Body field, enter the XML payload for the Pass-Through Authentication.
Note
The Body has two types: Form Data and Raw. XML format does not support Form Data.
XML Payload Example
<soapenv:Envelope xmlns:soapenv="http://schemas.xmlsoap.org/soap/envelope/"
xmlns:urn=urn:partner.soap.sforce.com">
    <soapenv:Header>
        <urn:LoginScopeHeader>
            <urn:organizationId></urn:organizationId>
            <urn:portalId></urn:portalId>
        </urn:loginScopeHeader>
    </soapenv:Header>
    <soapenv:Body>
        <urn:login>
            <urn:username>$authenticate.username$</urn:username>
            <urn:password>$authenticate.password$</urn:password>
        </urn:login>
    </soapenv:Body>
</soapenv:Envelope>
Refer to Body for more information.
Pass-Through Authentication Response Information
Refer to Response Information for more information.
The Root Path is the common path present in the JSON response. The Success Code is the successful HTTP response code expected by the respective Web Service operation. By default, the success code is 2**.
- In the Root Path field, enter
//ns:userInfo. - In the Success Code field, enter
2**.
Pass-Through Authentication Response Mapping
Refer to Response Mapping for more information.
Enter the following Schema Attribute and Attribute Path pairs:
- Schema Attribute =
Username, Attribute Path =ns:userName - Schema Attribute =
email, Attribute Path =ns:userEmail - Schema Attribute =
firstName, Attribute Path =ns:firstName
Pass-Through Authentication XPath Namespace Mapping
Refer to XPath Namespace Mapping for more information.
Enter the following Namespace Prefix and Namespace URI pairs:
- Namespace Prefix =
soapenv, Namespace URI =http://schemas.xmlsoap.org/soap/envelope/ - Namespace Prefix =
ns, Namespace URI =urn:partner.soap.sforce.com - Namespace Prefix =
xsi, Namespace URI =http://www.w3.org/2001/XMLSchema-instance
Multiple Independent Endpoints
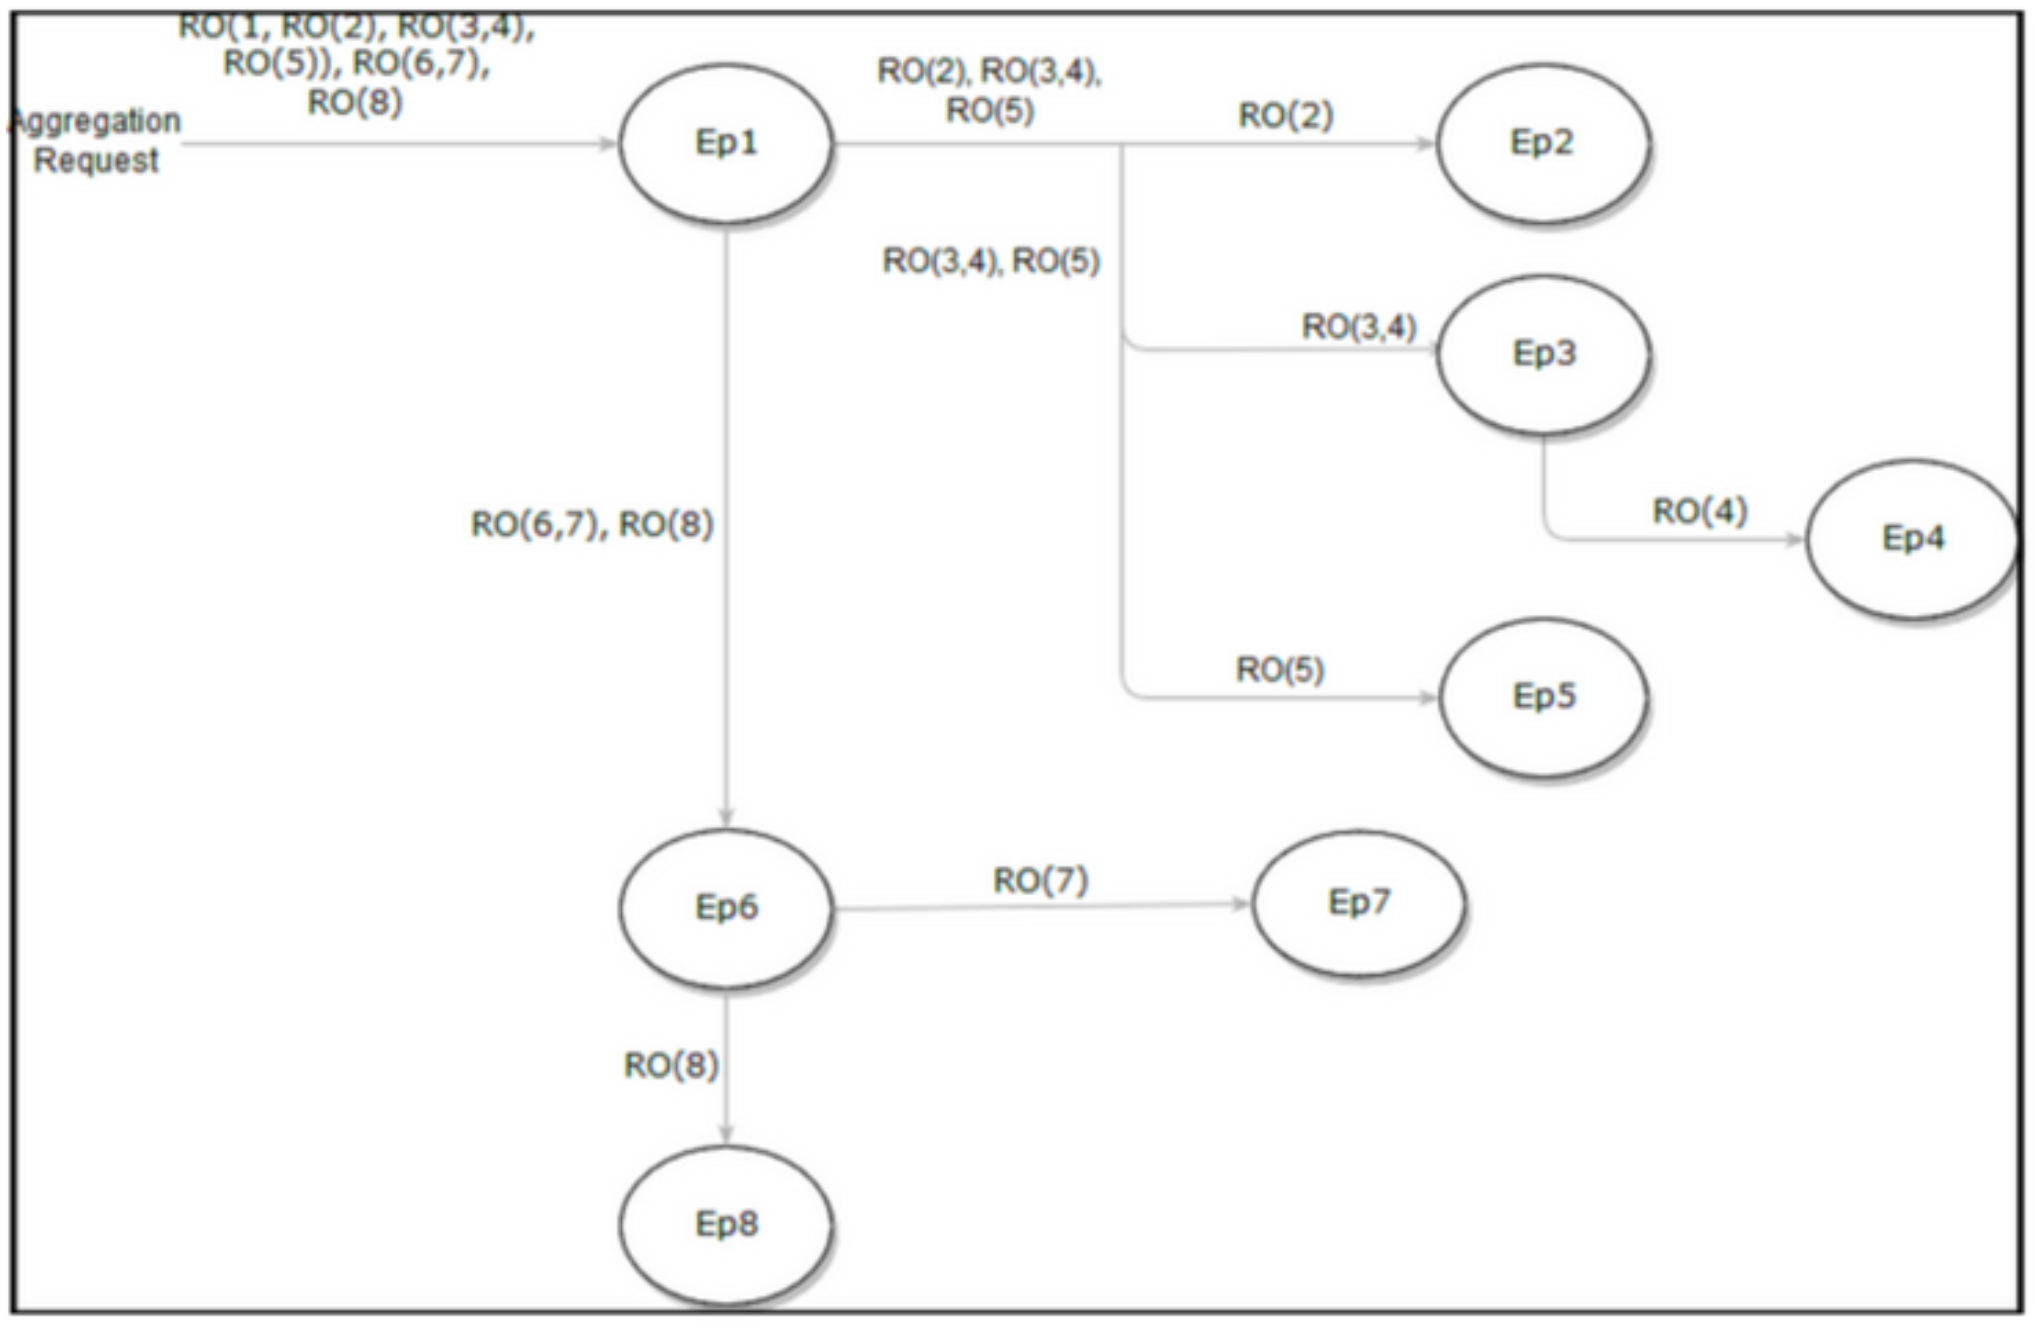
Web Services allows aggregation from multiple independent endpoints. The Web Service depends upon the Operation Type and the Parent Endpoint configuration to determine whether the endpoints of type Aggregation or Get Object must be executed independently.
- When Aggregation and Get Object endpoints need to aggregate attributes from multiple endpoints in a chained manner, the administrator must configure the parent endpoint name in every child endpoint. There has to be a dependency between the first and subsequent endpoints. The parent endpoint must be explicitly configured using the Parent Endpoint configuration tab.
-
If multiple child endpoints are configured for any given endpoint, then the sequence of execution of child endpoints is determined by the sequence in which they have been configured in the application. For example, if account aggregation requires attributes from four different endpoints (EP1, EP2, EP3, and EP4), then:
- EP1 aggregates userId and primary email.
- EP2 aggregates personal information using userId.
- EP3 aggregates skill ID information using primary email.
- EP4 aggregates skill name using skill ID from EP3.
Where EP = Endpoint and RO = Resource Object/Account object.
Configuring Multiple Independent Endpoints for Aggregation
- For a target system where accounts are aggregated from multiple endpoints and there is no relationship between such endpoints, you can configure Web Services to aggregate information from independent endpoints.
- Each endpoint can be configured independently using the same Operation Type. No parent endpoint configuration is required.
- Every independent endpoint can have a paging of its own, if applicable.
-
Every endpoint collects resource objects from the configured Web Service. Upon completion of collecting all information, the next independent endpoint is triggered for collecting resource objects. For example, if there are two endpoints EP1 and EP2, then EP1 aggregates accounts from a certain geographic location and EP2 aggregates from another.
Endpoint Name Child Endpoint(s) Returns EP1 EP2, EP3, EP5 RO(1, RO(2), RO(3,4), RO(5)), RO(6,7), RO(8) Independent EP2 - RO(2) Child of EP1 EP3 EP4 RO(3,4) Child of EP1 EP4 RO(4) Child of EP3 EP5 RO(5) Child of EP1 EP6 EP7 RO(6,7), RO(8) Independent EP7 RO(7) Child of EP6 EP8 RO(8) Independent
Screenshot
Note
The Parent Endpoint configuration tab displays for existing Web Services SaaS sources. However, any changes to the parent configuration have no effect on such applications and the operations behave per the previous endpoint chaining rules: the first endpoint of the specific operation type is the parent and subsequent endpoints of the same operation type are its child endpoints.
Parent Endpoint
The Parent Endpoint tab displays for aggregation operations. Refer to Aggregation for more information.
Screenshot
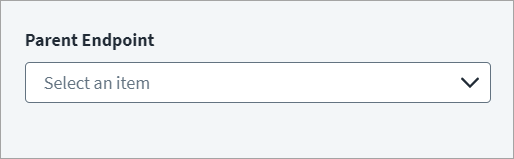
- Select the Parent Endpoint from the dropdown list.
- Select Save.
Enabling Single API Calls
The Web Services connector supports sending data for multiple users in a single API call. If the managed system supports sending data for multiple users in a single call, the single API call can be enabled or configured by adding the evalPattern.
Add the following evaluation pattern function to the Body or URL to send attributes in the request:
The following table describes the terminology used in the above evaluation pattern (evalPattern) function, which is used to specify the repeated pattern of attributes data to be resolved:
| Attributes | Description |
|---|---|
pattern |
Repeated pattern for a set of users in the request. |
delimiter |
Delimiter for the repeated patterns. |
count |
(Optional) Specifies the number of users' data to be sent with the request endpoint. The default value is 10 for query parameters and 50 for Body parameters. |
For example, consider the Get Users data API:
-
Required URL:
-
Modified URL - The following modified URL used to get users data API has an
evalPatternplaceholder which is replaced with resolved information. The placeholder string is replaced by five repeated patterns ofuserNameplaceholders and a separator.
Notes
- This functionality is not applicable for the first aggregation endpoint.
- If the API supports sending limited user data, then it must be specified in
evalPattern(count)to avoid failures.
Merging of resources is done based on the ID for each endpoint which are provided as placeholders in the pattern. For example:
Refer to Customizers and Dataset Management for more information on other SaaS-only configuration capabilities.
Documentation Feedback
Feedback is provided as an informational resource only and does not form part of SailPoint’s official product documentation. SailPoint does not warrant or make any guarantees about the feedback (including without limitation as to its accuracy, relevance, or reliability). All feedback is subject to the terms set forth at https://developer.sailpoint.com/discuss/tos.