Feature Management
This section describes the various features that you can enable or disable for your configuration. Feature management enables you to select or deselect features on demand as your need for their services arises.
This page is broken into different functional areas. Configure each area per your requirements.
Manage Microsoft 365 Groups and Microsoft Teams
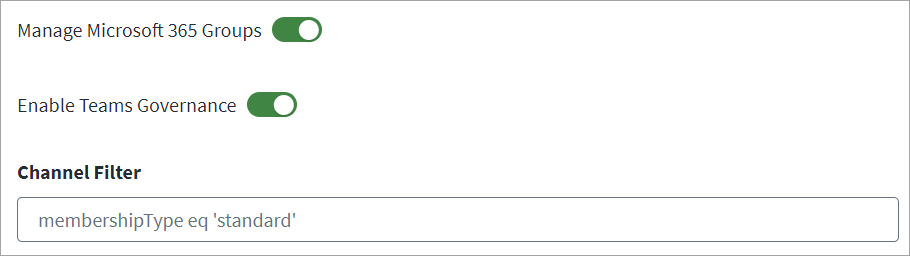
Configure these settings if you want to manage Microsoft 365 groups and enable aggregation and provisioning of Microsoft Teams channels.
Screenshot
-
Go to Feature Management.
-
Select Manage Microsoft 365 Groups if you want to manage Office 365 Groups.
Important
If you are utilizing Data Access Services (DAS) to manage access to cloud applications like Microsoft 365, you must enable the Manage Microsoft 365 Groups. This ensures that DAS can properly synchronize and manage Microsoft 365 groups, which control access to various collaborative resources within the Microsoft 365 ecosystem.
-
Select Enable Teams Governance if you want to enable aggregation and provisioning of channels.
-
In the Channel Filter field, enter any filter statements used to define the scope for channels. For example if you want to add standard channels and private channels the filter would be,
membershipType eq 'standard' or membershipType eq 'private' -
Select Save.
Cloud Resource Management
Configure this feature if your application is intended to manage Azure Management Objects. This includes Management Groups, Subscriptions, Resource Groups, Role assignments, and User-Assigned Managed Identities. For additional permissions, refer to Required Permissions.
Important
You must have a SailPoint Cloud Infrastructure Entitlement Management (CIEM) license to enable cloud governance features. Contact your SailPoint Customer Success Manager to request access.
To display cloud resource data through SailPoint CIEM, you must also configure the SailPoint CIEM Azure source. Refer to Connecting Azure and SailPoint CIEM to learn more.
Screenshot
-
Go to Feature Management.
-
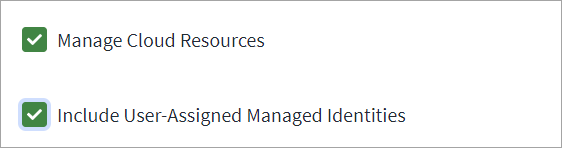
Select the Manage Cloud Resources checkbox if you want to manage Azure Role Assignments (RBAC) for user-assigned managed identities.
-
Select the Include User-Assigned Managed Identities checkbox to manage user-assigned identities. For more information, refer to User-Assigned Managed Identities Management.
Note
To automate the process of adding user-assigned managed identities account attributes to the account schema during Account Schema configuration, select Include Attributes in Schema for managing user-assigned managed identities . For more information, refer to User-Assigned Managed Identity Attributes.
-
In the Azure Privileged Identity Management Setting section, select the Enable Privileged Identity Management checkbox if you want to manage PIM roles (only Azure Active Roles) for user-assigned managed identities.
-
Select Save.
Manage Microsoft Entra Service Principals As Accounts
Screenshot
-
Go to Feature Management.
-
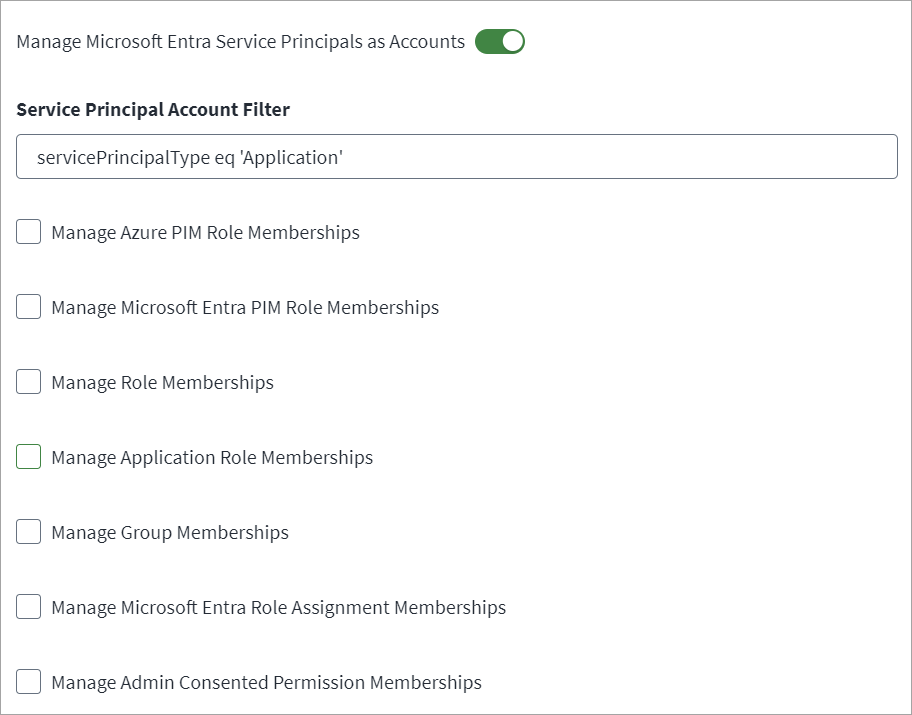
Select Manage Microsoft Entra Service Principals as Accounts to aggregate Azure Service Principals along with Users during the account aggregation process. By default, when this is enabled, entitlements are not fetched. You must select the entitlements you want to fetch from the available list. When this is turned off, you see a black X. If it is turned on, you see a blue ✔.
Note
To automate the process of adding Service Principal account attributes to the account schema during Account Schema configuration, select Include Attributes in Schema for managing azure Service Principal as account . For more information, refer to Service Principal as Accounts Attributes.
-
In the Service Principal Account Filter field, enter filter statements to ensure only the correct Azure Service Principals are included in the aggregation process. The default filter is
servicePrincipalType eq 'Application'Note
Advanced queries are not supported.
Example filters:
-
For a filter to match the Enterprise Application default view on the Azure portal use the following:
tags/Any(x: x eq 'WindowsAzureActiveDirectoryIntegratedApp')
-
-
Select the Manage Azure PIM Role Memberships checkbox to manage Azure PIM Active Role memberships for Service Principal.
-
Select the Manage Microsoft Entra PIM Role Memberships checkbox to manage Microsoft Entra ID PIM Active Role memberships for Service Principal.
-
Select the Manage Role Memberships checkbox to manage Directory Role memberships for Service Principal.
-
Select the Manage Application Role Memberships checkbox to manage Azure Application Role memberships for Service Principal.
-
Select the Manage Group Memberships checkbox to manage Microsoft Entra Group memberships for Service Principal.
-
Select the Manage Microsoft Entra Role Assignment Memberships checkbox to manage Azure Cloud Group memberships for Service Principals.
-
Select the Manage Admin Consented Permission Memberships checkbox to manage Azure admin consented permissions for Service Principals.
Note
This is for delegated permissions.
-
Select Save.
Manage Exchange Online
-
Go to Feature Management.
-
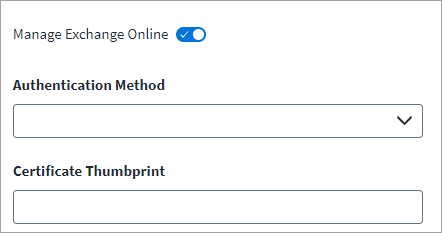
Select Manage Exchange Online to enable aggregation and provisioning of Exchange mailbox attributes. This includes Shared Mailboxes, User Mailbox properties, Distribution Lists, and Mail-Enabled Security Groups. When this is turned off, you see a black X. If it is turned on, you see a blue ✔.
-
Select one of the following from the Authentication Method dropdown list:
-
Basic Authentication
Screenshot
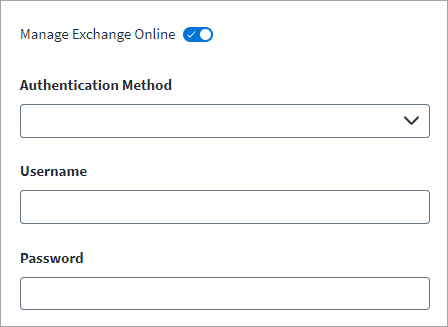
- Select Basic Authentication from the dropdown list.
- Enter the Username (UserPricipalName) of a user that has the Exchange Administrator role.
- Enter the Password associated with the username.
- Select Save.
-
Certificate Based Authentication
Screenshot
Note
IQService configuration is mandatory to support this feature.
- Select Certificate Based Authentication from the drop dropdown list.
- Enter the Certificate Thumbprint of the certificate that is installed on the IQService machine used for Exchange Online operation that is also uploaded on the respective Microsoft Entra ID application.
- Select Save.
-
-
Select Mail Contact Governance to manage mail contacts as accounts. When this is turned off, you see a black X. If it is turned on, you see a blue ✔. For more information, refer to Azure Mail Contact Management.
-
In the Mail Contact Filter field, enter any filter statements used to define the scope of mail contacts for aggregation. For example,
startswith(displayName,'MailContact1')
Manage Azure Privileged Identity Management
Privileged Identity Management (PIM) enables you to manage, control, and monitor access to important resources in your organization. These resources include resources in Microsoft Entra ID, Azure, and other Microsoft Online Services such as Microsoft 365 or Microsoft Intune.
For more information, refer to Azure Privileged Identity Management (PIM).
Screenshot
-
Go to Feature Management.
-
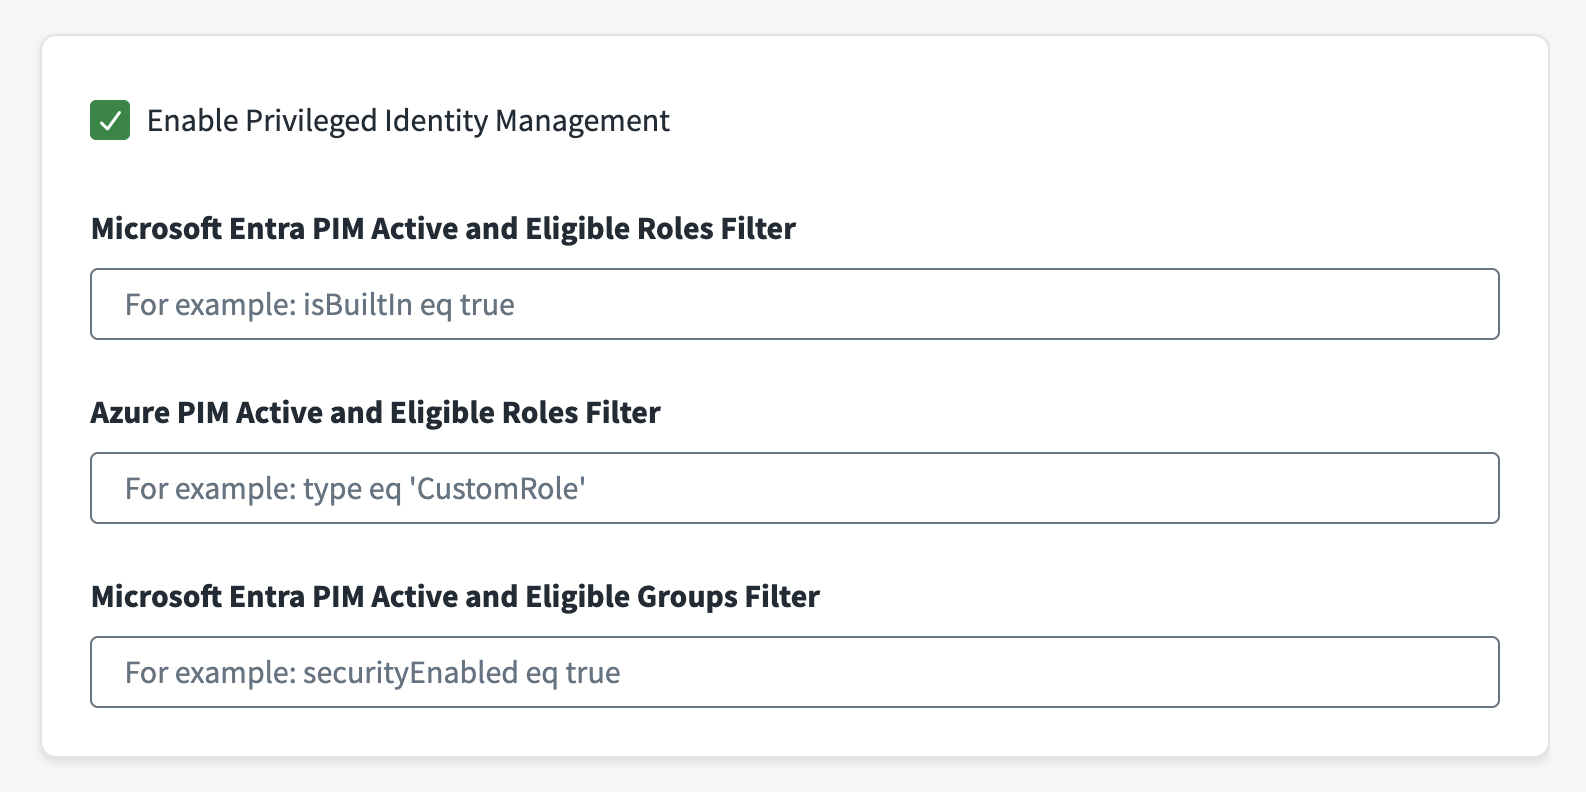
Select the Enable Privileged Identity Management checkbox to define the scope of the Microsoft Entra PIM roles (Microsoft Entra as well as Azure). For more information on privileged identity management, refer to the Microsoft documentation.
-
In the Microsoft Entra PIM Active and Eligible Roles Filter field, enter a filter to define the scope of the Microsoft Entra PIM roles aggregated during entitlement aggregation. For example,
isBuiltIn eq trueFor more information on filtering conditions and values, refer to the Microsoft Documentation.
-
In the Azure PIM Active and Eligible Roles Filter field, enter a filter to define the scope of the Azure PIM roles aggregated during entitlement aggregation. For example,
type eq 'CustomRole'For more information on filtering conditions and values, refer to the Microsoft Documentation.
-
In the Microsoft Entra PIM Active and Eligible Groups Filter field, enter a filter to define the scope of the Azure PIM groups aggregated during entitlement aggregation. For example,
securityEnabled eq trueImportant
User-defined filter expressions in this field cannot be combined with the connector's internal group type filter, which restricts groups to Office 365 and Security types. The internal filter is always applied. Any value you enter in this field functions as an additional standalone filter on the PIM group catalog and does not combine with the internal filter.
For more information on filtering conditions and values, refer to the Microsoft Documentation.
-
Select Save.
Access Package Management Settings
An access package is a bundle of all the resources with the access a user needs to work on a project or perform their task. Access packages are used to govern access for your internal employees, and also users outside your organization. For more information, refer to Access Package Management.
Screenshot
- Go to Feature Management.
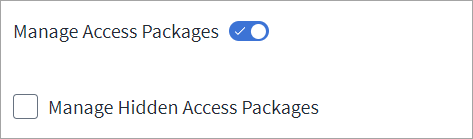
- Select Manage Access Packages to turn this feature on or off. When this is turned off, you see a black X. If it is turned on, you see a blue ✔. The default is off.
- Select the Manage Hidden Access Packages checkbox to manage access packages hidden from end users in the My Access portal.
- Select Save.
Administrative Unit Management Settings
Screenshot

- Go to Feature Management.
- Select Manage Administrative Units to manage administrative units.
- Select Save.
Account Disable Settings
To configure Account Disable Settings:
Screenshot

- Go to Feature Management.
- Under Account Disable Settings, select Revoke Session after Disabling User Account to sign the user out of all existing sessions when their account is disabled.
- Select Save.
Note
- For existing sources, this is disabled by default. When required, ensure to enable this option.
For more information about this feature, including the required permissions, refer to Revoke Session After Disabling User Account.
Documentation Feedback
Feedback is provided as an informational resource only and does not form part of SailPoint’s official product documentation. SailPoint does not warrant or make any guarantees about the feedback (including without limitation as to its accuracy, relevance, or reliability). All feedback is subject to the terms set forth at https://developer.sailpoint.com/discuss/tos.