Configuring SailPoint for BMC Helix ITSM Service Desk
In SailPoint, configure the following items for your BMC Helix ITSM Service Desk integration:
On the Summary page you can review the general settings and parameters for the connectivity and authentication.
Ticket Creation
The information provided in this section is used to create a ticket on the managed BMC Helix ITSM system. You can customize this information by adding fields as required.
These tickets contain information that can be used by IT, compliance auditors, and executive management.
Supported Ticket Types:
- Incident
- Change Request
- Service Request
- DWP Service Request (Supported only for BMC Helix ITSM version 21.3)
Incident
Screenshot
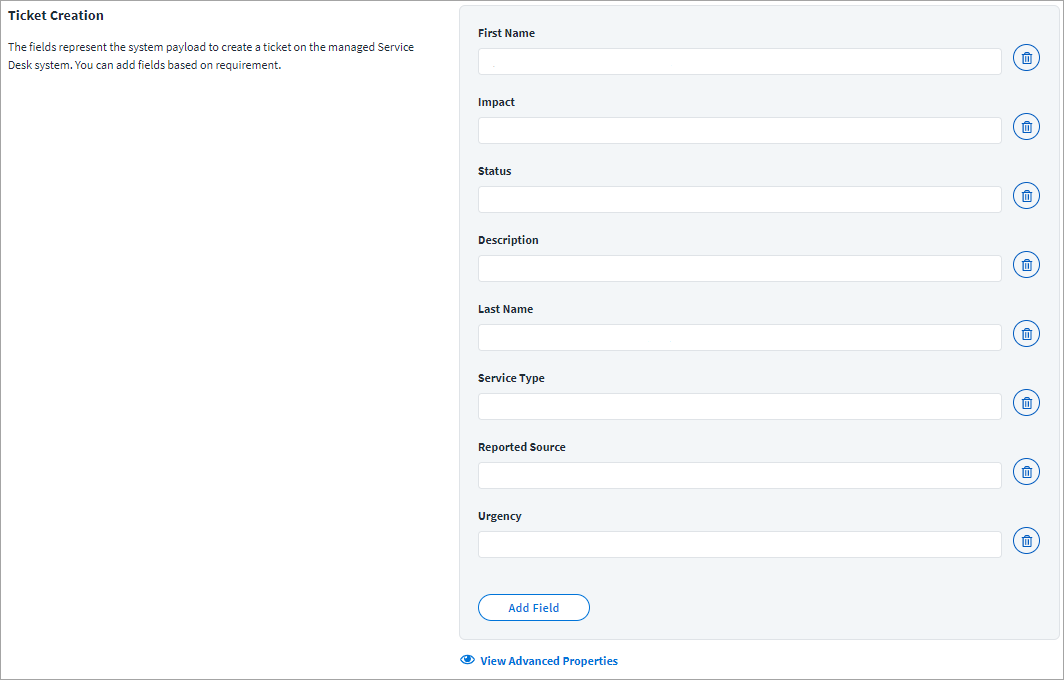
Incident Ticket creation requires the following attributes:
- Enter the Impact of the ticket being created. For example:
3-Moderate/Limited. - Provide the default Status for the newly created ticket. For example:
New. -
Provide the Description of the requirement that generated the ticket. For example:
#if($request.operation == 'Create') Create Account on application $request.resource #else For $request.id in application $request.resource #end #if ($request.items) $newline #foreach ($item in $request.items) #if ($item.name == 'disabled' && $item.value == 'true') Disable Account. $newline #elseif ($item.name == 'disabled' && $item.value == 'false') Enable Account. $newline #elseif ($item.name == 'locked' && $item.value == 'false') Unlock Account. $newline #else $!item.Operation $item.name: $item.value $newline #end #end #else $newline $!request.Operation Account #end -
Enter the First Name and Last Name of the user to whom the ticket is assigned.
- Enter the Value of Incident type that generated the ticket. For example:
User Service Request. - Enter the type of source through which this ticket is reported. For example:
Direct Input. - Specify the Urgency of this ticket. For example:
3-Medium. - To add a field, select Add Field. Select the field type and enter the required information based on the type. Options are Single Value, Multi Valued Field, or Grouped Key-Value Pairs.
Incident Advanced Properties
To add advanced properties to the details of the ticket, select View Advanced Properties.
Screenshot
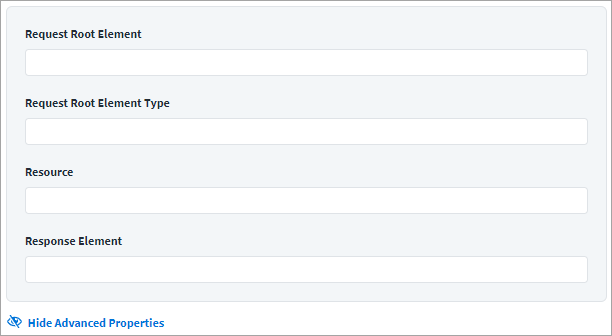
- Enter the basic JSON root element of the request ticket in the Request Root Element field. For example:
values. - Enter the type Request Root Element. For example:
JSONObject. - Enter the resource used for the request ticket in the Resource field. Do not include the base URL for the instance in the value. Provide only the remaining directories for the endpoint. For example:
/api/arsys/v1/entry/HPD:IncidentInterface_Create?fields=values(Incident+Number). - Enter the JSON path expression that indicates the location of the ticket number in the Response Element field. For example:
$.values.['Incident Number'].
Change Request
Screenshot
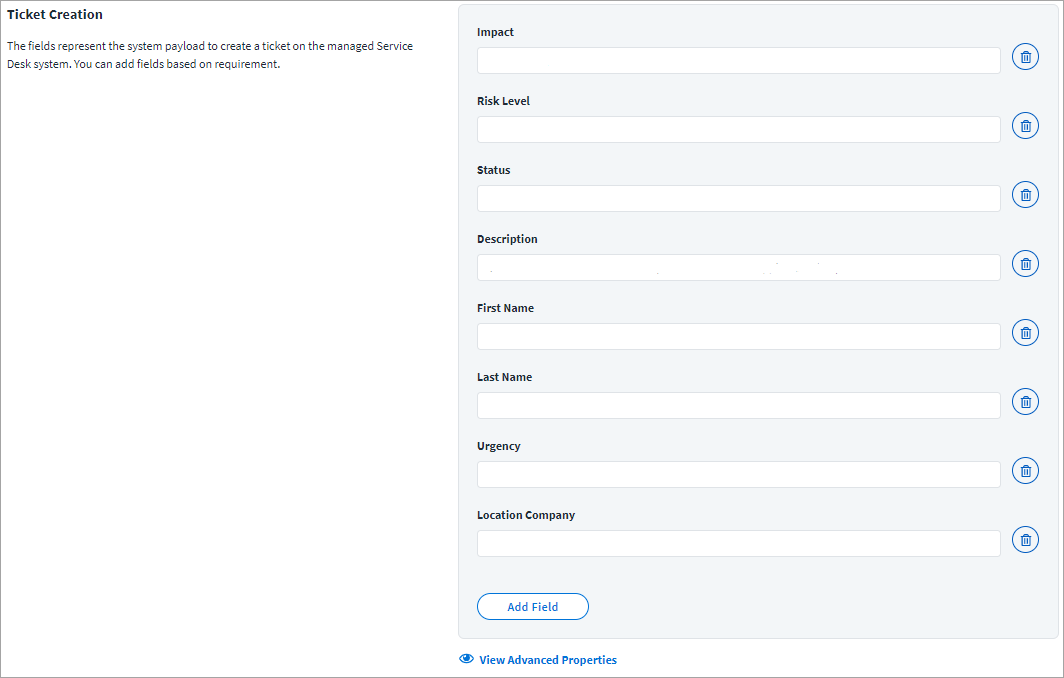
Change Request Ticket Creation requires the following fields:
- The First Name and Last Name of the user to whom the ticket is assigned.
- Enter the Impact of the ticket being created. For example:
3-Moderate/Limited. - Enter the Risk Level of the ticket. For example:
Risk Level 1. - Provide the default Status for the newly created ticket. For example:
Draft. -
Provide the Description of the request that generated the ticket. For example:
#if($request.operation == 'Create') Create Account on application $request.resource #else For $request.id in application $request.resource #end #if ($request.items) $newline #foreach ($item in $request.items) #if ($item.name == '*disabled*' && $item.value == 'true') Disable Account. $newline #elseif ($item.name == '*disabled*' && $item.value == 'false') Enable Account. $newline #elseif ($item.name == '*locked*' && $item.value == 'false') Unlock Account. $newline #else $!item.Operation $item.name: $item.value $newline #end #end #else $newline $!request.Operation Account #end -
Specify the Urgency of this ticket. For example:
3-Medium. -
Enter the Location Company as the company name listed on the BMC Helix ITSM portal. For example:
Calbro Services.Note
This field is required for Change Request tickets.
Change Request Advanced Properties
To add advanced properties to the details of the ticket, select View Advanced Properties.
Screenshot
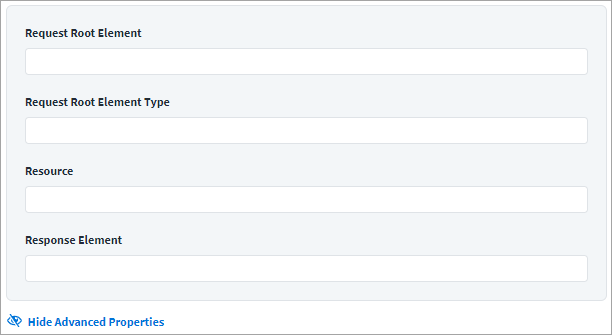
- Enter the basic JSON root element of the request ticket in the Request Root Element field. For example:
values. - Enter the type Request Root Element. For example:
JSONObject. - Enter the resource used for the request ticket in the Resource field. Do not include the base URL for the instance in the value. Provide only the remaining directories for the endpoint. For example:
/api/arsys/v1/entry/CHG:ChangeInterface_Create?fields=values(Infrastructure+Change+Id). - Enter the JSON path expression that indicates the location of the ticket number in the Response Element field. For example:
$.values.['Infrastructure Change Id'].
Service Request
Screenshot
Note
For more information on Service Request tickets and the Sr Type fields, refer to Service Requests.
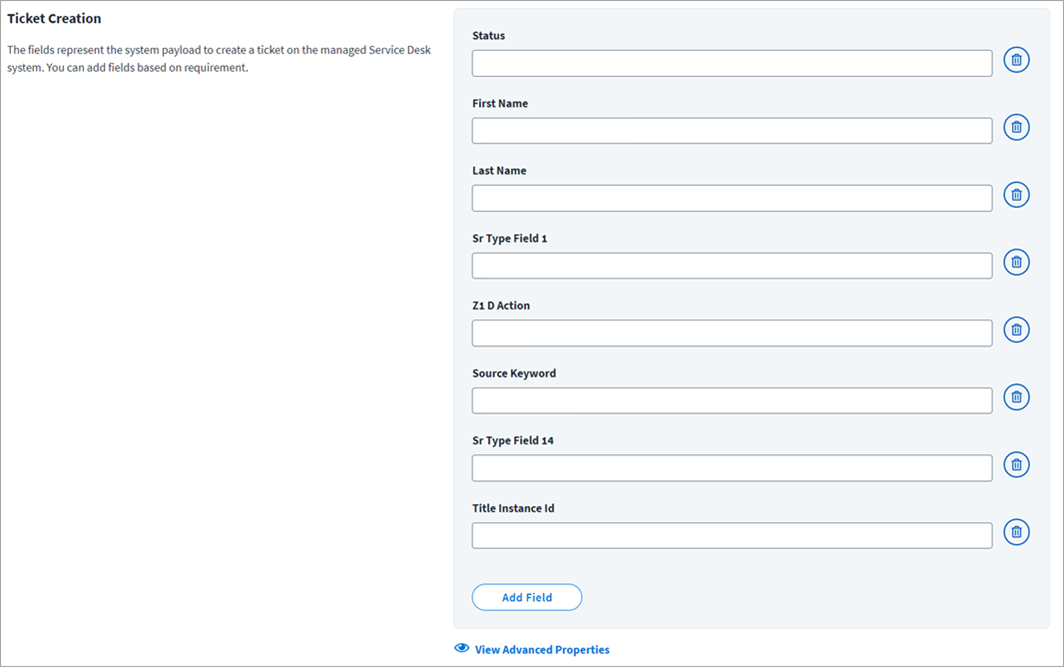
Service Request Ticket creation requires the following attributes:
- Provide the default Status for the newly created ticket. For example:
In Review. - Enter the First Name of the user to whom the ticket is assigned.
- Enter the Last Name of the user to whom the ticket is assigned.
- Specify the service attributes that are used in the fulfillment process.
- Z1 D Action defines what action is performed by the SRM Request Interface REST API.
CREATEis the only supported option. - Source Keyword defines the type of ticket that is created by the SRM Request Interface REST API.
Service Requestis the only supported option. - Specify the service attributes that are used in the fulfillment process.
- Provide a value for the Title Instance Id for the Service Request Definition. You must also provide different Service Request Fields as entry key parameters into the service desk application, so that those can be passed on to populate the service attributes defined in the Sr Type Field 1 and Sr Type Field 14 fields.
- To add a field, select Add Field. Select the field type and enter the required information based on the type. Options are Single Value, Multi Valued, or Grouped Key-Value Pairs.
Service Request Advanced Properties
To add advanced properties to the details of the ticket, select View Advanced Properties.
Screenshot

- Enter the basic JSON root element of the request ticket in the Request Root Element field. For example:
values. - Enter the type Request Root Element. For example:
JSONObject. - Enter the resource used for the request ticket in the Resource field. Do not include the base URL for the instance in the value. Provide only the remaining directories for the endpoint. For example:
/api/arsys/v1/entry/SRM:RequestInterface_Create?fields=values(Request+Number). - Enter the JSON path expression that indicates the location of the ticket number in the Response Element field. For example:
$.values.['Request Number'].
Digital Workplace (DWP) Service Requests
Screenshot

Note
For more information on DWP Service Request tickets and other fields, refer to Digital Workplace (DWP) Service Requests.
DWP Service Request Ticket creation requires the following attributes:
- Enter the login ID of the user for whom the ticket is created. For example:
$!plan.arguments.loginId. -
Provide the payload of all the required input Questions defined in the Service Definition. Values can be provided for Description and Summary Given from the Service Catalog. You need to add the Question-input IDs based on the Questionnaire Defined in the Service Catalog. To add input values for the question-answer pair, add another
{}entry to the Questions list. For example:[ { "questionId": "QUESTIONAIRE INPUT ID", "answers": [ "#foreach($req in $plan.requests) #if($req.operation == 'Create') Create Account on application $req.resource #else For $req.id in application $req.resource #end #if($req.items) $newline #foreach($item in $req.items) #if ($item.name == '*disabled*' && $item.value == 'true') Disable Account. $newline #elseif ($item.name == '*disabled*' && $item.value == 'false') Enable Account. $newline #elseif ($item.name == '*locked*' && $item.value == 'false') Unlock Account. $newline #else $!item.Operation $item.name: $item.value $newline #end #end #else $newline $!req.Operation Account #end #end" ] }, { "questionId": "QUESTIONAIRE INPUT ID", "answers": [ "SailPoint Access Request $!plan.arguments.identityRequestId #if($plan.arguments.identityName) for the user $plan.arguments.identityName #end" ] } ] -
Enter the ID of the Service Definition.
- If required, select Add Field to add more fields. Select the field type and enter the required information based on the type. Options are Single Value, Multi Valued, or Grouped Key-Value Pairs.
DWP Service Request Advanced Properties
To add advanced properties to the details of the ticket, select View Advanced Properties.
Screenshot

- Enter the basic JSON root element of the request ticket in the Request Root Element. For example,
JSONObject. - Enter the resource used for the request ticket in the Resource. Do not include the base URL for the instance in the value. Provide only the remaining directories for the endpoint. For example,
/api/myit-sb/requests. - Enter the JSON path expression that indicates the location of the ticket number in the Response Element. For example,
$.requests[0].['requestId']. - Enter the URL required to submit the DWP Service Request to the BMC Helix ITSM System in the Submit Order Resource. For example,
/api/myit-sb/orders.
Note
The ticket number generated on the Service Desk system for the corresponding provisioning action can be seen under Search > Account Activity details of the identity. For more information, refer to Account Activity Using Search.
Status Mapping
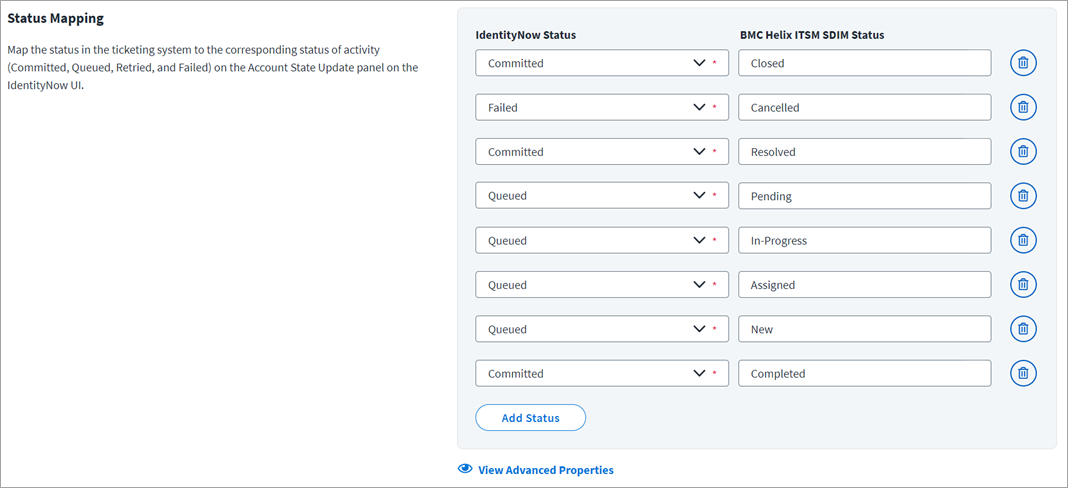
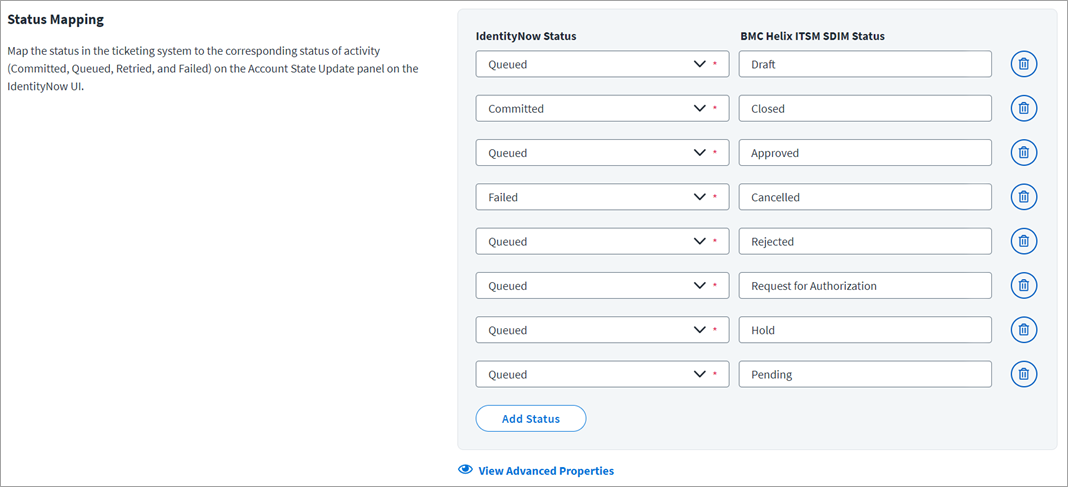
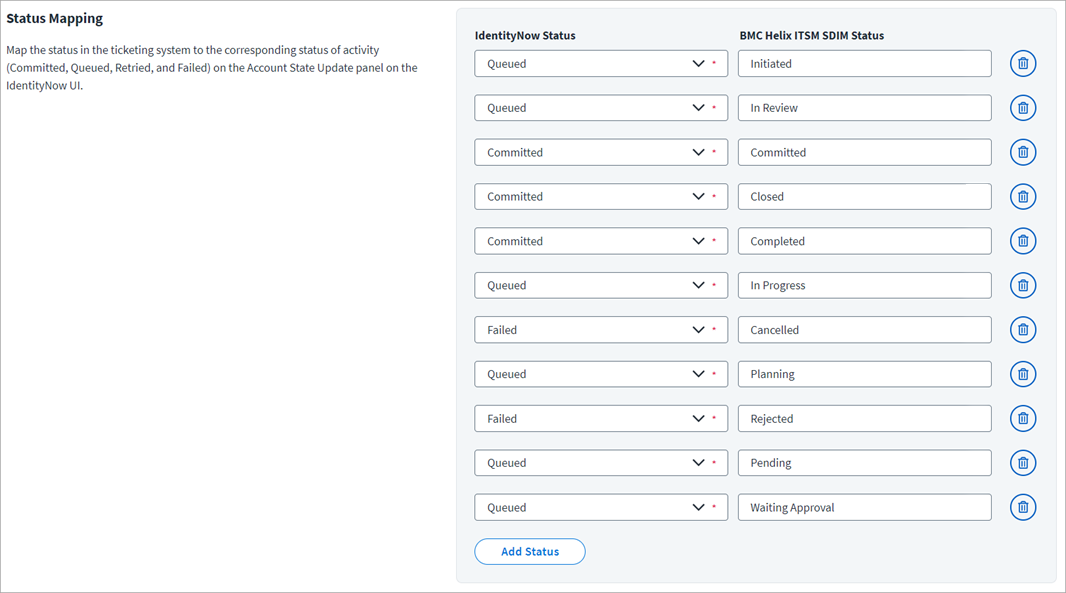
Map the status of the tickets in SailPoint to the corresponding BMC Helix ITSM status. Customize the status map to meet your needs by adding or deleting as needed.
Select Add Status to add new rows, or the trash can icon to remove those that are no longer needed. For the Identity Security Cloud Status, select from the drop-down list, Failed, Committed, or Queued. The BMC Helix SDIM Status can be whatever is required.
Note
The Status Keys vary by Ticket Type selected.
Incident Status Keys
Screenshot
Incident Advanced Properties
To add more details to the status mapping, select View Advanced Properties.
Screenshot
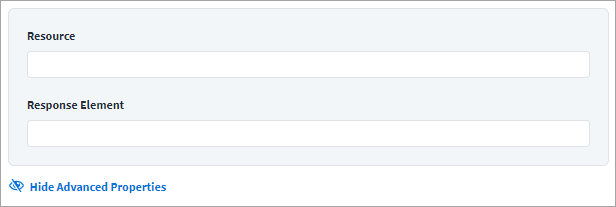
Resource: REST endpoint used to read the ticket. Do not provide the base URL in the value, the base URL is appended to this endpoint value. BMC Helix ITSM Service Desk:
Response Element: A JSON path expression that identifies the ticket number in the response from the REST endpoint. For example:
Change Request Status Keys
Screenshot
Change Request Advanced Properties
To add more details to the status mapping, select View Advanced Properties.
Screenshot
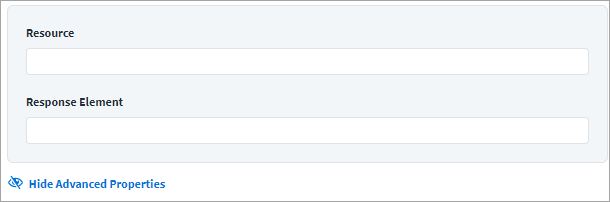
Resource: REST endpoint used to read the ticket. Do not provide the base URL in the value, the base URL is appended to this endpoint value. BMC Helix ITSM Service Desk:
Response Element: A JSON path expression that identifies the ticket number in the response from the REST endpoint. For example:
Service Request Status Keys
Screenshot
Service Request Advanced Properties
To add more details to the status mapping, select View Advanced Properties.
Screenshot
Resource: REST endpoint used to read the ticket. Do not provide the base URL in the value, the base URL is appended to this endpoint value. BMC Helix ITSM Service Desk:
Response Element: A JSON path expression that identifies the ticket number in the response from the REST endpoint. For example:
DWP Service Request Status Keys
Screenshot

DWP Service Request Advanced Properties
Screenshot
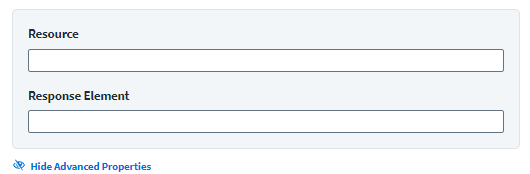
Resource: REST endpoint used to read the ticket. Do not provide the base URL in the value, the base URL is appended to this endpoint value. For example:
Response Element: A JSON path expression that identifies the ticket number in the response from the REST endpoint. For example:
Requester Source
Screenshot

In the Requester Source dropdown, select the source name through which BMC Helix ITSM Service Desk system's users are aggregated.
Documentation Feedback
Feedback is provided as an informational resource only and does not form part of SailPoint’s official product documentation. SailPoint does not warrant or make any guarantees about the feedback (including without limitation as to its accuracy, relevance, or reliability). All feedback is subject to the terms set forth at https://developer.sailpoint.com/discuss/tos.