Connecting SailPoint and SCIM 2.0 SaaS
To connect SailPoint with SCIM 2.0, perform the following tasks:
Adding the Source in SailPoint
To connect to SailPoint, perform the following steps. Once the connection is made, you can configure it to meet your company's needs.
Important
By default, the provisioning feature is disabled, and the connector only supports read-only operations. To support provisioning operations, you must manually enable the feature in the source configuration.
To configure a new source:
- Sign in to SailPoint.
- Go to Admin > Connections > Sources.
- Select Create New.
- Search for the connector by entering the name in the search box, and then select Configure.
- In the Source Name field, enter a unique and descriptive name for your source. Source names cannot exceed 128 characters.
- In the Description field, provide additional details about the source to help distinguish it from similar sources. This field allows a maximum of 2,000 characters.
- In the Source Owner field, begin typing the name of an owner. Matches appear after you type two or more letters. For more information, refer to Assigning a Source Owner.
- (Optional) Select a governance group to grant its members source or role sub-admin level oversight of the source and its access. For more information, refer to Creating and Managing Governance Groups.
- If this source represents a primary system containing your organization's personnel records, select the Authoritative Source checkbox. For more information, refer to Creating Identity Profiles.
- Select Continue. The source is created, and you are navigated to the Source Setup > Base Configuration page. Continue to configure your connected source there.
Base Configuration
Provide the base configuration parameters. Information you entered in the Create New Source dialog is automatically entered into the fields in the Base Configuration page. You can edit this information if necessary.
- Enter a unique name and description for the source.
-
In the Source Owner dropdown list, select the identity that owns this source.
- To find a source owner, begin entering their name.
-
(Optional) If enabled for your organization, select the Use a Credential Provider checkbox to manage the source's authentication using a credential provider.
Note
To add a credential provider, go to Admin > Connections > Credential Providers. For more information about credential providers, refer to Credential Providers.
-
Configure the authentication to allow SailPoint to connect to the source. Refer to Connection Settings for more information.
-
(Optional) In the Governance Group for Source Management dropdown list, select a governance group to associate with this source. For more information about governance groups, refer to Associating Governance Groups with a Source.
-
(Optional) Choose whether to enable or disable provisioning for the source. Provisioning is disabled by default.
-
Enable Provisioning - Set the toggle to Enabled to allow the source to create, update, and deactivate accounts in the connected source system.
-
Disable Provisioning - Set the toggle to Disabled to disable provisioning for the source. Disabling provisioning will prevent the creation, updating, or deactivating of accounts on this source.
-
-
Select Save.
Connection Settings
The following information is required for SailPoint to connect and interact with a SCIM 2.0 compliant managed system.
Screenshot
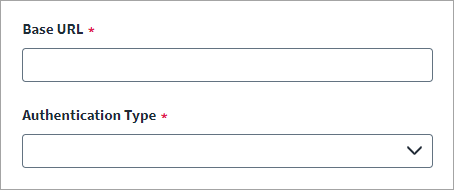
- Select Connection Settings from the menu.
- Enter the Base URL of the SCIM 2.0 compliant managed system.
- From the Authentication Type dropdown, select one of the following:
Basic Authentication
Screenshot
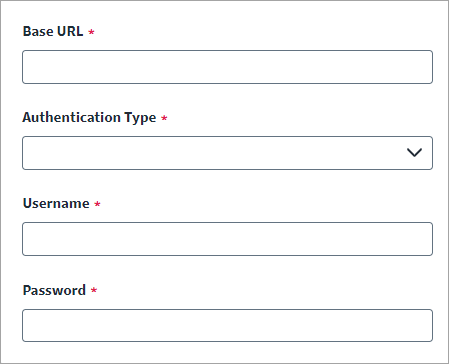
- Enter the Username for basic authentication.
- Enter the corresponding Password.
- Select Save.
API Token
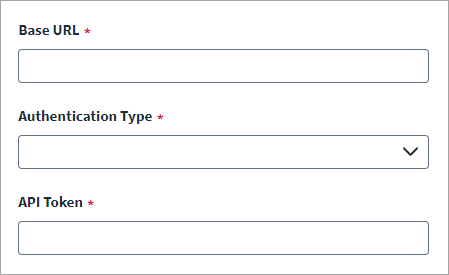
You can use an API Token for authentication on the SCIM 2.0 source. Only bearer tokens are supported, and they either come with a long validity period or do not expire.
Screenshot
-
Enter the API Token.
Note
By default, the API Token authentication supports the bearer token type. If you want to change the token type you can add the
tokenTypekey and the value that is supported by your SCIM Server. Use the Update Source Partial REST API to update the token type. For more information, refer to REST API - Update Source (Partial). -
Select Save.
OAuth 2.0
OAuth 2.0 authentication uses an access token for a connection. An access token is generated based on the selected grant type, which then allows the generated token to be used.
- From the Grant Type dropdown, select one of the following:
Password
Screenshot
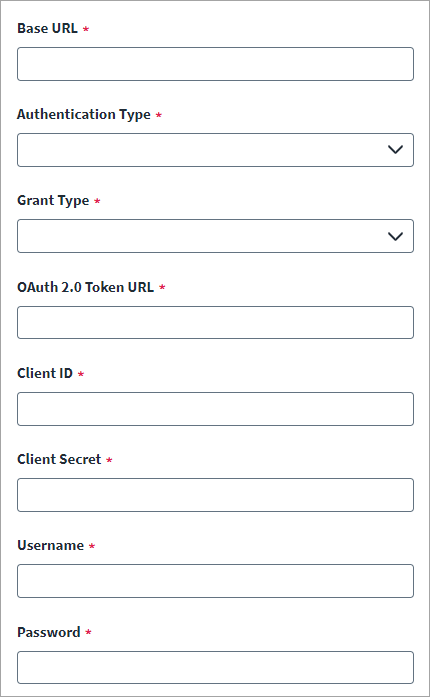
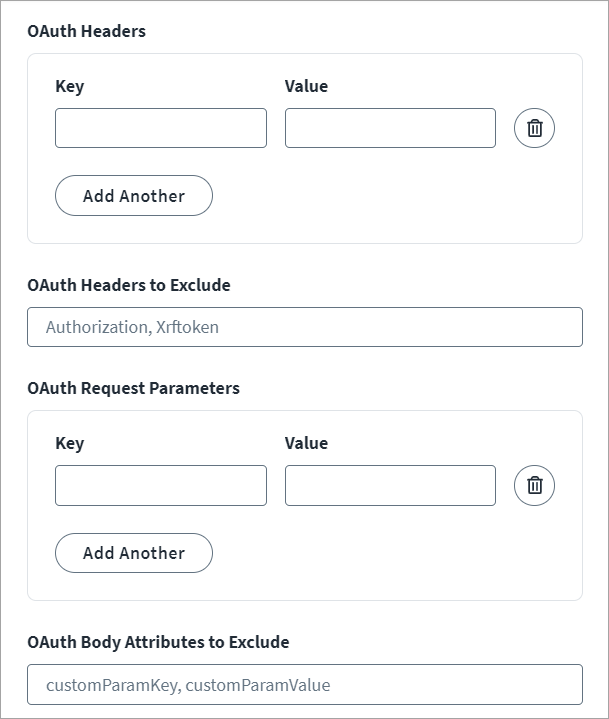
- In the OAuth 2.0 Token URL field, enter the OAuth 2.0 Token URL for generating the access token.
- Enter the Client ID and accompanying Client Secret created in the SCIM 2.0 source.
- Enter the Username and Password the connector needs to authenticate with the SCIM 2.0 source.
- For OAuth Headers add the Key and Value pairs to set up the custom headers for the access token. The SCIM 2.0 SaaS source adheres to the generalized specifications of the OAuth 2.0 grant types. For some managed target systems, however, custom headers may be required to be part of the access token generation request. You can add the custom headers as an attribute. Use the Add Another and Trash Bin buttons to add or remove fields.
- Enter the OAuth Headers to Exclude. By default, an Authorization BASIC header with Base64-encoded client ID and client secret are a part of the access token generation request. Some managed target systems do not support this header. If there is no Authorization BASIC header required for such managed target systems, it can be excluded from the request.
- Set the custom OAuth Request Parameters for the access token. For some managed target systems, custom request parameters may be required to be part of the access token generation request. You can add the custom request parameter as an attribute. For example, some managed target systems require explicit
scopeattributes in request parameters. In that case, add thescopeas the key and value in OAuth Request Parameters. Use the Add Another and Trash Bin buttons to add or remove fields. - Enter the OAuth Body Attributes to Exclude. To remove any of the standard request parameters that are not supported by managed systems access token generation requests, you must configure the request parameters to exclude them from the access token request.
- Select Save.
Refresh Token
Screenshot
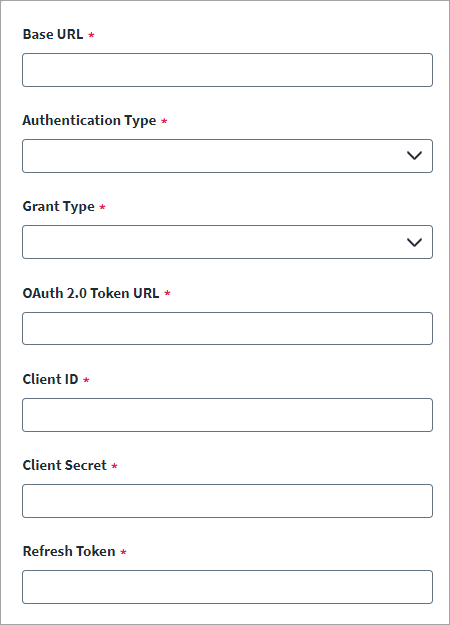
- Enter the OAuth 2.0 Token URL for generating the access token.
- Enter the Client ID and accompanying Client Secret created in the SCIM 2.0 source.
- Enter the Refresh Token used to generate an access token.
- For OAuth Headers add the Key and Value pairs to set up the custom headers as part of the access token. The SCIM 2.0 SaaS source adheres to the generalized specifications of the OAuth 2.0 grant types. For some managed target systems, however, custom headers may be required to be part of the access token generation request. You can add the custom headers as an attribute. Use the Add Another and Trash Bin buttons to add or remove fields.
- Enter the OAuth Headers to Exclude. By default, an Authorization BASIC header with Base64-encoded client ID and client secret are a part of the access token generation request. Some managed target systems do not support this header. If there is no Authorization BASIC header required for such managed target systems, it can be excluded from the request.
- Set the custom OAuth Request Parameters for the access token. For some managed target systems, custom request parameters may be required to be part of the access token generation request. You can add the custom request parameter as an attribute. For example, some managed target systems require explicit
scopeattributes in request parameters. In that case, add thescopeas the key and value in OAuth Request Parameters. Use the Add Another and Trash Bin buttons to add or remove fields. - Enter the OAuth Body Attributes to Exclude. To remove any of the standard request parameters that are not supported by managed systems access token generation requests, you must configure the request parameters to exclude them from the access token request.
- Select Save.
Client Credentials
Screenshot
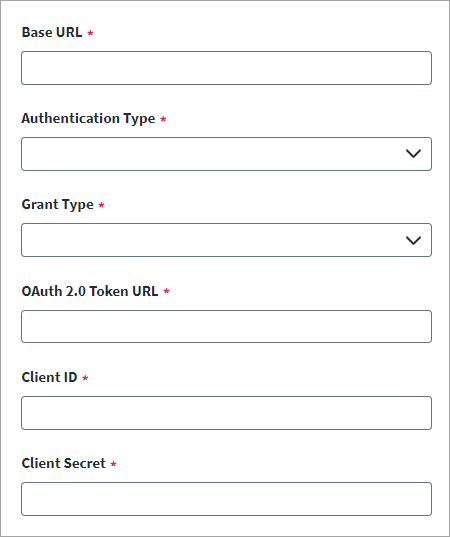
- Enter the OAuth 2.0 Token URL for generating the access token.
- Enter the Client ID and accompanying Client Secret created in the SCIM 2.0 source.
- For OAuth Headers add the Key and Value pairs to set up the custom headers as part of the access token. The SCIM 2.0 SaaS source adheres to the generalized specifications of the OAuth 2.0 grant types. For some managed target systems, however, custom headers may be required to be part of the access token generation request. You can add the custom headers as an attribute. Use the Add Another and Trash Bin buttons to add or remove fields.
- Enter the OAuth Headers to Exclude. By default, an Authorization BASIC header with Base64-encoded client ID and client secret are a part of the access token generation request. Some managed target systems do not support this header. If there is no Authorization BASIC header required for such managed target systems, it can be excluded from the request.
- Set the custom OAuth Request Parameters for the access token. For some managed target systems, custom request parameters may be required to be part of the access token generation request. You can add the custom request parameter as an attribute. For example, some managed target systems require explicit
scopeattributes in request parameters. In that case, add thescopeas the key and value in OAuth Request Parameters. Use the Add Another and Trash Bin buttons to add or remove fields. - Enter the OAuth Body Attributes to Exclude. To remove any of the standard request parameters that are not supported by managed systems access token generation requests, you must configure the request parameters to exclude them from the access token request.
- Select Save.
JWT Grant
Screenshot
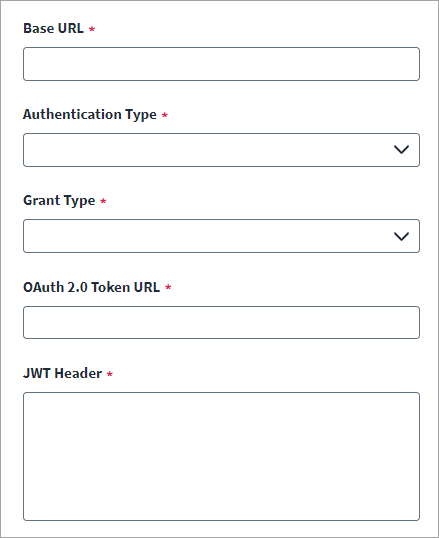
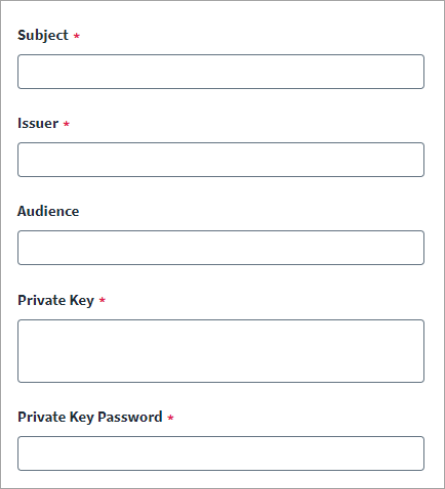
- Enter the OAuth 2.0 Token URL for generating the access token.
-
Enter the JWT Header. You can add additional headers in JSON format if required. The header consists of the type of the token (JWT) and the signing algorithm being used.
For example, you can use:
-
Enter the Subject.
- Enter the Issuer.
- Enter the Audience for authorization. This is the recipient for which the JWT is intended.
- Enter the Private Key and the Private Key Password.
- For OAuth Headers add the Key and Value pairs to set up the custom headers as part of the access token. The SCIM 2.0 SaaS source adheres to the generalized specifications of the OAuth 2.0 grant types. For some managed target systems, however, custom headers may be required to be part of the access token generation request. You can add the custom headers as an attribute. Use the Add Another and Trash Bin buttons to add or remove fields.
- Enter the OAuth Headers to Exclude. By default, an Authorization BASIC header with Base64-encoded client ID and client secret are a part of the access token generation request. Some managed target systems do not support this header. If there is no Authorization BASIC header required for such managed target systems, it can be excluded from the request.
- Set the custom OAuth Request Parameters for the access token. For some managed target systems, custom request parameters may be required to be part of the access token generation request. You can add the custom request parameter as an attribute. For example, some managed target systems require explicit
scopeattributes in request parameters. In that case, add thescopeas the key and value in OAuth Request Parameters. Use the Add Another and Trash Bin buttons to add or remove fields. - Enter the OAuth Body Attributes to Exclude. To remove any of the standard request parameters that are not supported by managed systems access token generation requests, you must configure the request parameters to exclude them from the access token request.
- Select Save.
Custom Authentication
Screenshot
-
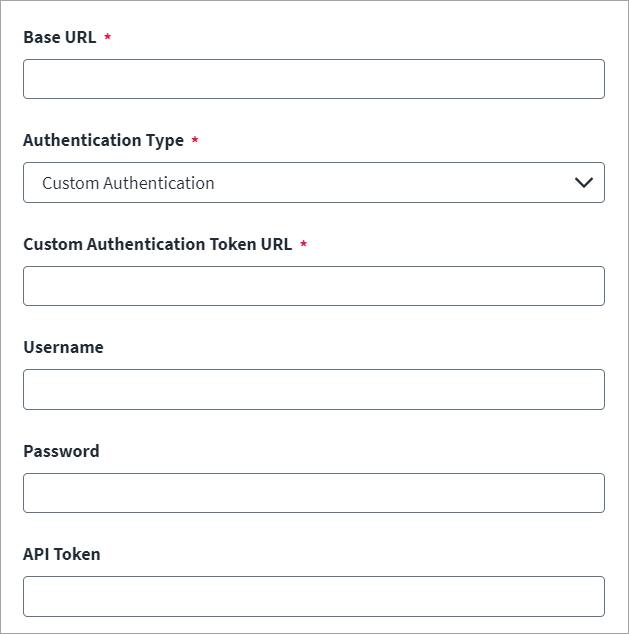
Enter the Base URL to connect to the managed system. For example:
-
Select Custom Authentication as the Authentication Type.
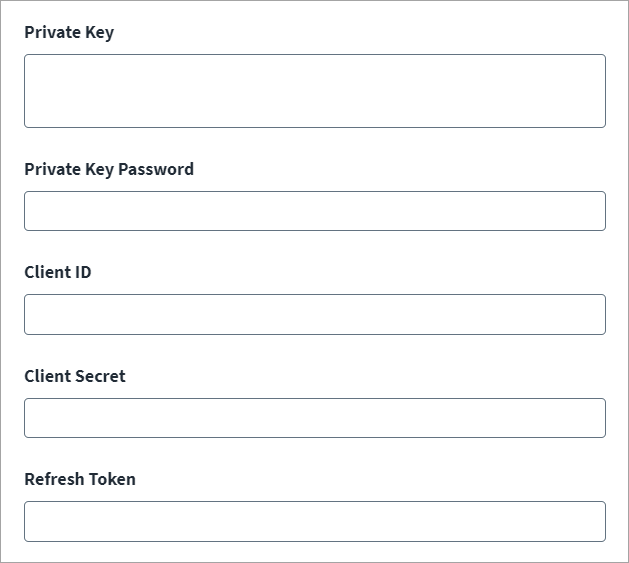
- (Optional) fields display that you can configure as your authentication configuration requires:
- Username
- Password
- API Token
- Resource Owner Username
- Resource Owner Password
- Private Key
- Private Key Password
- Client ID
- Client Secret
- Refresh Token
-
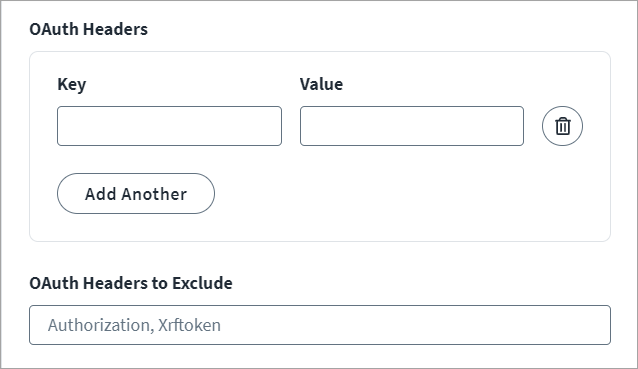
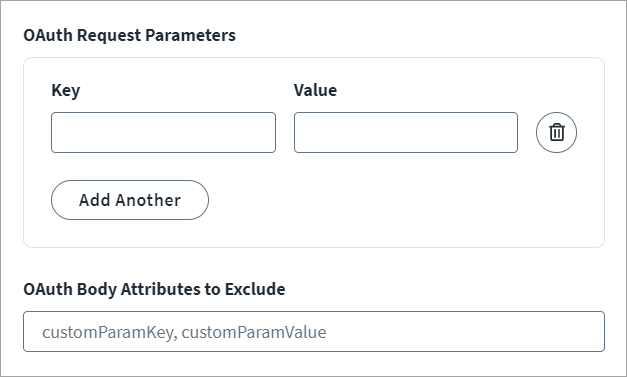
Configure OAuth Headers and OAuth Request Parameters by entering the Key and Value parameters for the token generation. Use Add Another and the Recycle bin to add and remove fields as needed.
Example 2
-
Enter the OAuth Headers to Exclude. By default, an Authorization BASIC header with Base64-encoded client ID and client secret are a part of the access token generation request. Some managed target systems do not support this header. If there is no Authorization BASIC header required for such managed target systems, it can be excluded from the request.
- Enter the OAuth Body Attributes to Exclude. Remove any of the standard request parameters that are not supported by the managed systems access token generation requests to exclude them from the access token request.
Aggregation Settings
Configure settings related to account and group aggregation processes.
For more information about aggregation, refer to Loading Account Data.
Configure Aggregation Filters
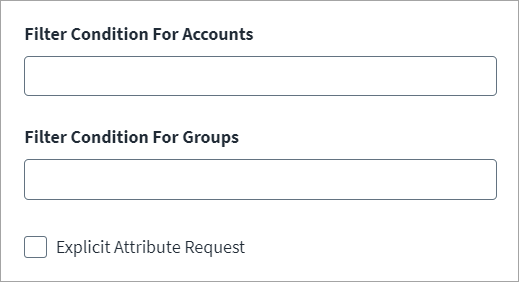
Configure the scope of the records aggregated for accounts and groups. You can also enable and configure explicit attribute requests.
Screenshot
-
Enter the Filter Condition For Accounts to aggregate the SCIM User resources.
For example,
userName sw "Admin" -
Enter the Filter Conditions For Groups to aggregate the SCIM Group resources.
For example,
displayName sw "SecGroup" -
(Optional) Enable Explicit Attribute Request to get the required schema attributes in a request. In certain instances the SCIM server, by default, does not return all attributes. To ensure you aggregate all attributes, select this option to add the requested schema attributes into the URL. For example, the
organizationIdattribute is present in the schema but it is not returned by default. If you request it, the URL will be as follows:{host}/Users?attributes=firstName,organizationId. If you do not request it, the URL is:{host}/Users. -
Select Save.
Configure Delta Aggregation Settings
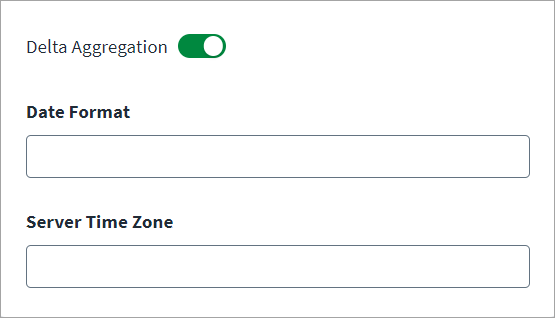
Enable and configure delta aggregation.
Screenshot
-
Enable Delta Aggregation to speed up the aggregation process and only aggregate accounts that have received updates since the last aggregation process.
Note
Delta Aggregation does not fetch accounts that are deleted on the SCIM system. Delta Aggregation is applicable only for those SCIM 2.0 systems that support the
lastModifiedattribute and filter for it.How to update existing sources to enable delta support
Use the REST APIs for the source that needs to be updated. For example:
curl -L -X PATCH 'https://sailpoint.api.identitynow.com/v3/sources/:id' \
-H 'Content-Type: application/json-patch+json' \
-H 'Accept: application/json' \
-H 'Authorization: Bearer <TOKEN>' \
--data-raw '[
{
"op": "add",
"path": "/connectorAttributes/supportsDeltaAgg",
"value": true
},
{
"op": "add",
"path": "/connectorAttributes/deltaAggregationEnabled",
"value": true
}
]'
Note
For more information on SailPoint's REST APIs, refer to Best Practices: REST API Authentication and REST API - Update Source (Partial) in the SailPoint Developer Community.
-
Enter the Date Format. It is the date and time format supported by the SCIM server. By default the date format is:
YYYY-MM-DDTHH:mm:ss[Z] - Enter a valid Server Time Zone in which the SCIM 2.0 system server is configured. For example, you can use GMT or PST. This time zone is used for performing delta aggregation. If a time zone value is not provided the default value will be UTC.
- Select Save.
Configure Page Size Settings
Configure how many account or group records the connector gets when iterating over large datasets.
Screenshot
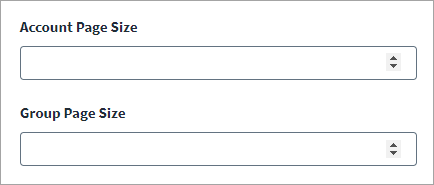
- Enter the Account Page Size as the number of records that you can get in one request.
- Enter the Group Page Size as the number of records that you can get in one request.
- Select Save.
Configure Partitioning Settings
Configure partitioning aggregation to enable parallel data processing across multiple threads, enhancing the performance of aggregation tasks. The connector uses a User Partitioning Scheme made up of partitioning values to determine how it partitions accounts during aggregation processes. For more information, refer to Filtering in the System for Cross-domain Identity Management: Protocol document.
Note
The linked document is not maintained by SailPoint and is subject to change without notice.
Screenshot
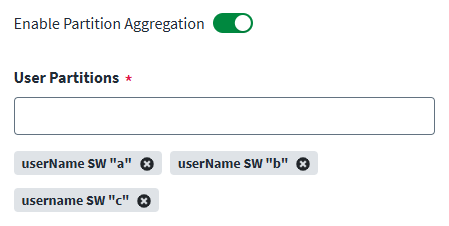
To configure partitioning:
-
Select Enable Partitioning to enable the feature.
The User Partitions field displays.
-
In the User Partitions field, enter a filter which makes up the User Partitioning Scheme. Press Enter to add it to a growing list.
The following are examples of filters you can use for partitioning:
userName sw "a"userName eq "bjensen"meta.lastModified gt "2025-05-13T04:42:34Z"title pr and userType eq "Employee"userType eq "Employee"
-
Select Save.
Additional Aggregation Information
Accounts
After you create and test the connection and save the source, you can load accounts.
You must first discover the schema and identify attributes to use for required identity data before you load the accounts.
Important
SCIM 2.0 compliant server supports the schema and ResourceType endpoint according to the SCIM 2.0 specification.
Discovering the Schema
Discover the schema by performing the following steps:
- Select Import Data.
- Select Account Schema in the menu.
- Select Discover.
- Identify the attributes to be used for Account Name and Account ID. Mark them in the respective columns.
Caution
If this source is going to be used as an authoritative source for an identity profile, both the Account Name and Account ID must be unique. If not, source accounts could correlate to the first Identity that includes that ID or Name instead of creating an additional Identity.
Loading Accounts
After you have discovered the schema and identified required attributes, you can load accounts by performing the following steps:
- Select Import Data.
- Select Start to start a manual aggregation.
- Review the results in the Aggregation Activity log.
Additional Settings
Screenshot
- Select Additional Settings from the menu.
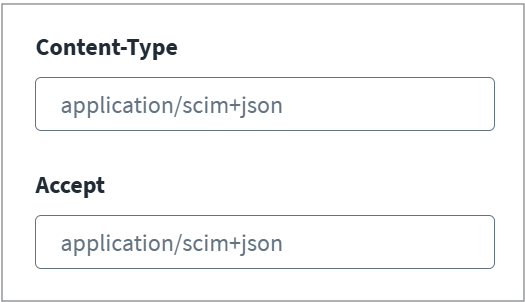
- You have several options to configure HTTP Request Headers as needed for your organization. Enter the HTTP Content-Type header value to use for the SCIM requests. The default value is
application/scim+json. -
Enter the HTTP Accept header value to use for the SCIM requests. The default value is
application/scim+json.Note
The SCIM 2.0 SaaS source does not include the read-only attributes in HTTP PATCH requests.
-
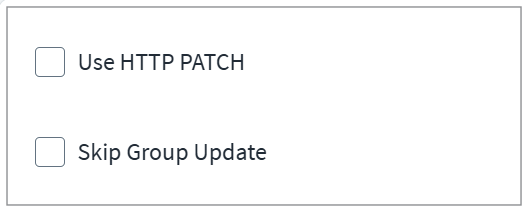
Select the Use HTTP PATCH checkbox if the SCIM server supports it for provisioning processes.
- Select the Skip Group Update checkbox if the SCIM server supports modification of group information using the user's endpoint.
-
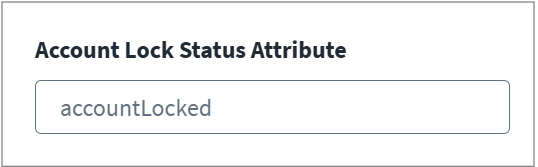
Enter the key for the Account Lock Status Attribute. For example,
accountLocked.Note
The Account Lock Status Attribute must be from the extension schema.
-
Select Save.
Non-Compliant Settings
The SCIM 2.0 SaaS source supports the configuration of a non-compliant SCIM server.
Screenshot

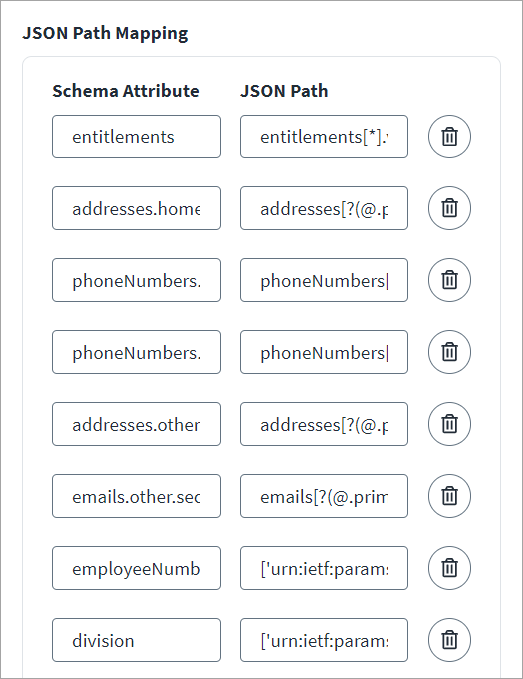
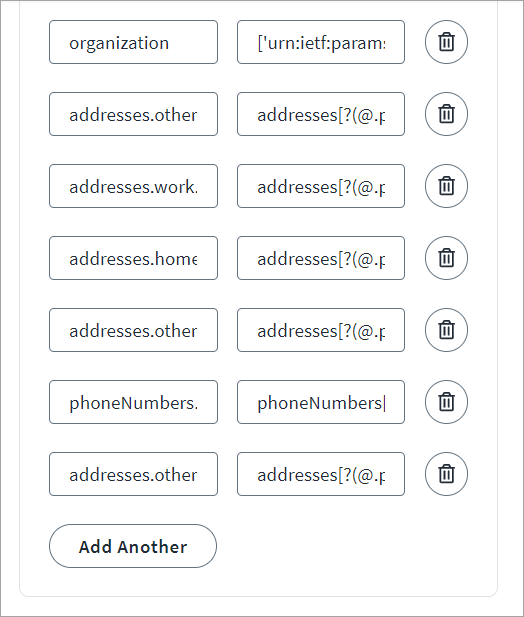
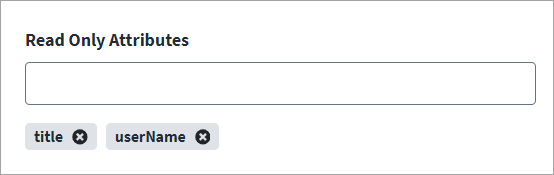
- Select Non-Compliant Settings from the menu.
-
Enable the Non-Compliant Server option to skip SCIM 2.0 validation for each response from this server. Use this if your SCIM 2.0 Server is not fully compliant with SCIM 2.0 specifications.
Note
The SCIM 2.0 SaaS source will not use the schema response; it will use the populated core or extended schema mentioned in the SCIM 2.0 specifications. For more information, refer to Schema Reference.
-
Enter the Schema Attribute and JSON Path. For any new attribute, you must add it in the schema and add its JSON Path to the JSON Path Mapping. Use Add Another and the Recycle bin to add and remove fields as needed.
Note
For any other object type other than offered by default, such as Account, Group, Role, and Entitlement, you must manually add the schema and JSON path mapping in the source. Refer to Best Practices: REST API Authentication, REST API - Update Source (Partial), and Adding Attributes to a Source Schema.
-
If any attribute is Read Only and does not need to be included in the create/update payload, add it to the Read Only Attributes list. Attributes listed here will not go on the JSON body.
- Select Save.
Connector Parameters
Configure parameters related to connector operations. Update the parameters to the connector using the SailPoint REST API.
Note
For more information on SailPoint's REST APIs, refer to Best Practices: REST API Authentication and REST API - Update Source (Partial) in the SailPoint Developer Community.
accessTokenBufferTime
Define a span of time in minutes ahead of access token expiration, at which point the connector generates a new access token. This setting is applicable when the access token expiry is less than 10 minutes. Ensure the value you set is not higher than the expiry time.
Integer (Value should not be in quotes)
Example configuration:
Review and Test
Perform a test to confirm the connection to SailPoint.
- Go to Review and Test.
-
Confirm that the entries in each field are correct.
If you note any mistakes, return to the section and make corrections.
-
Select Test Connection.
SailPoint Application Onboarding
SailPoint application onboarding enables you to easily onboard new applications and create sources following the successful onboarding of a discovery source. To use this feature, continue to Discovered Applications in the SailPoint user interface.
For more information, refer to Application Onboarding in the SailPoint SaaS documentation.
Documentation Feedback
Feedback is provided as an informational resource only and does not form part of SailPoint’s official product documentation. SailPoint does not warrant or make any guarantees about the feedback (including without limitation as to its accuracy, relevance, or reliability). All feedback is subject to the terms set forth at https://developer.sailpoint.com/discuss/tos.