Integrating SailPoint with Microsoft Dynamics 365 Business Central Online
Microsoft Dynamics 365 Business Central Online is an ERP system offered by Microsoft. It includes sales, services, finance, and operations teams within a single cloud business management solution.
Connecting SailPoint to your Business Central allows you to manage identity and access management use cases related to reading and provisioning various Dynamics 365 Business Central Native IAM Objects as follows:
- Users: Business Central licensed users synchronized from Microsoft Entra ID.
- User Groups: Group object which is used to assign set of permission sets to set of users
- Permission Sets: It is a container of permissions. Permissions define granular access on the Business Central objects.
Note
To view the latest features, enhancements, and fixes for all SaaS connectors, refer to the SaaS Release Notes page.
Supported Features
The Microsoft Dynamics 365 Business Central Online connector supports the following features:
- Account Management
- Account-Group Management
Account Management
The following table describes the supported operations on various objects for the Microsoft Dynamics 365 Business Central Online connector:
| Operations | Licensed User |
|---|---|
| Aggregation | Yes |
| Get Account | Yes |
| Enable/Disable Users | Yes |
| Add/Remove Entitlements • Add/Remove Permission Set • (Applicable only for Refresh Token authentication) Add/Remove Groups |
Yes |
Note
Licensed Users are synchronized from Microsoft Entra ID.
Important
The Dynamics 365 Business Central Online connector does not directly support Create users. Instead, licensed users are synchronized from the Entra ID source, so they must be created in that managed system, then imported into the Dynamics 365 Business Central Online source.
Entitlement Management
| Operations | Permission Sets | Groups |
|---|---|---|
| Aggregation | Yes | Yes |
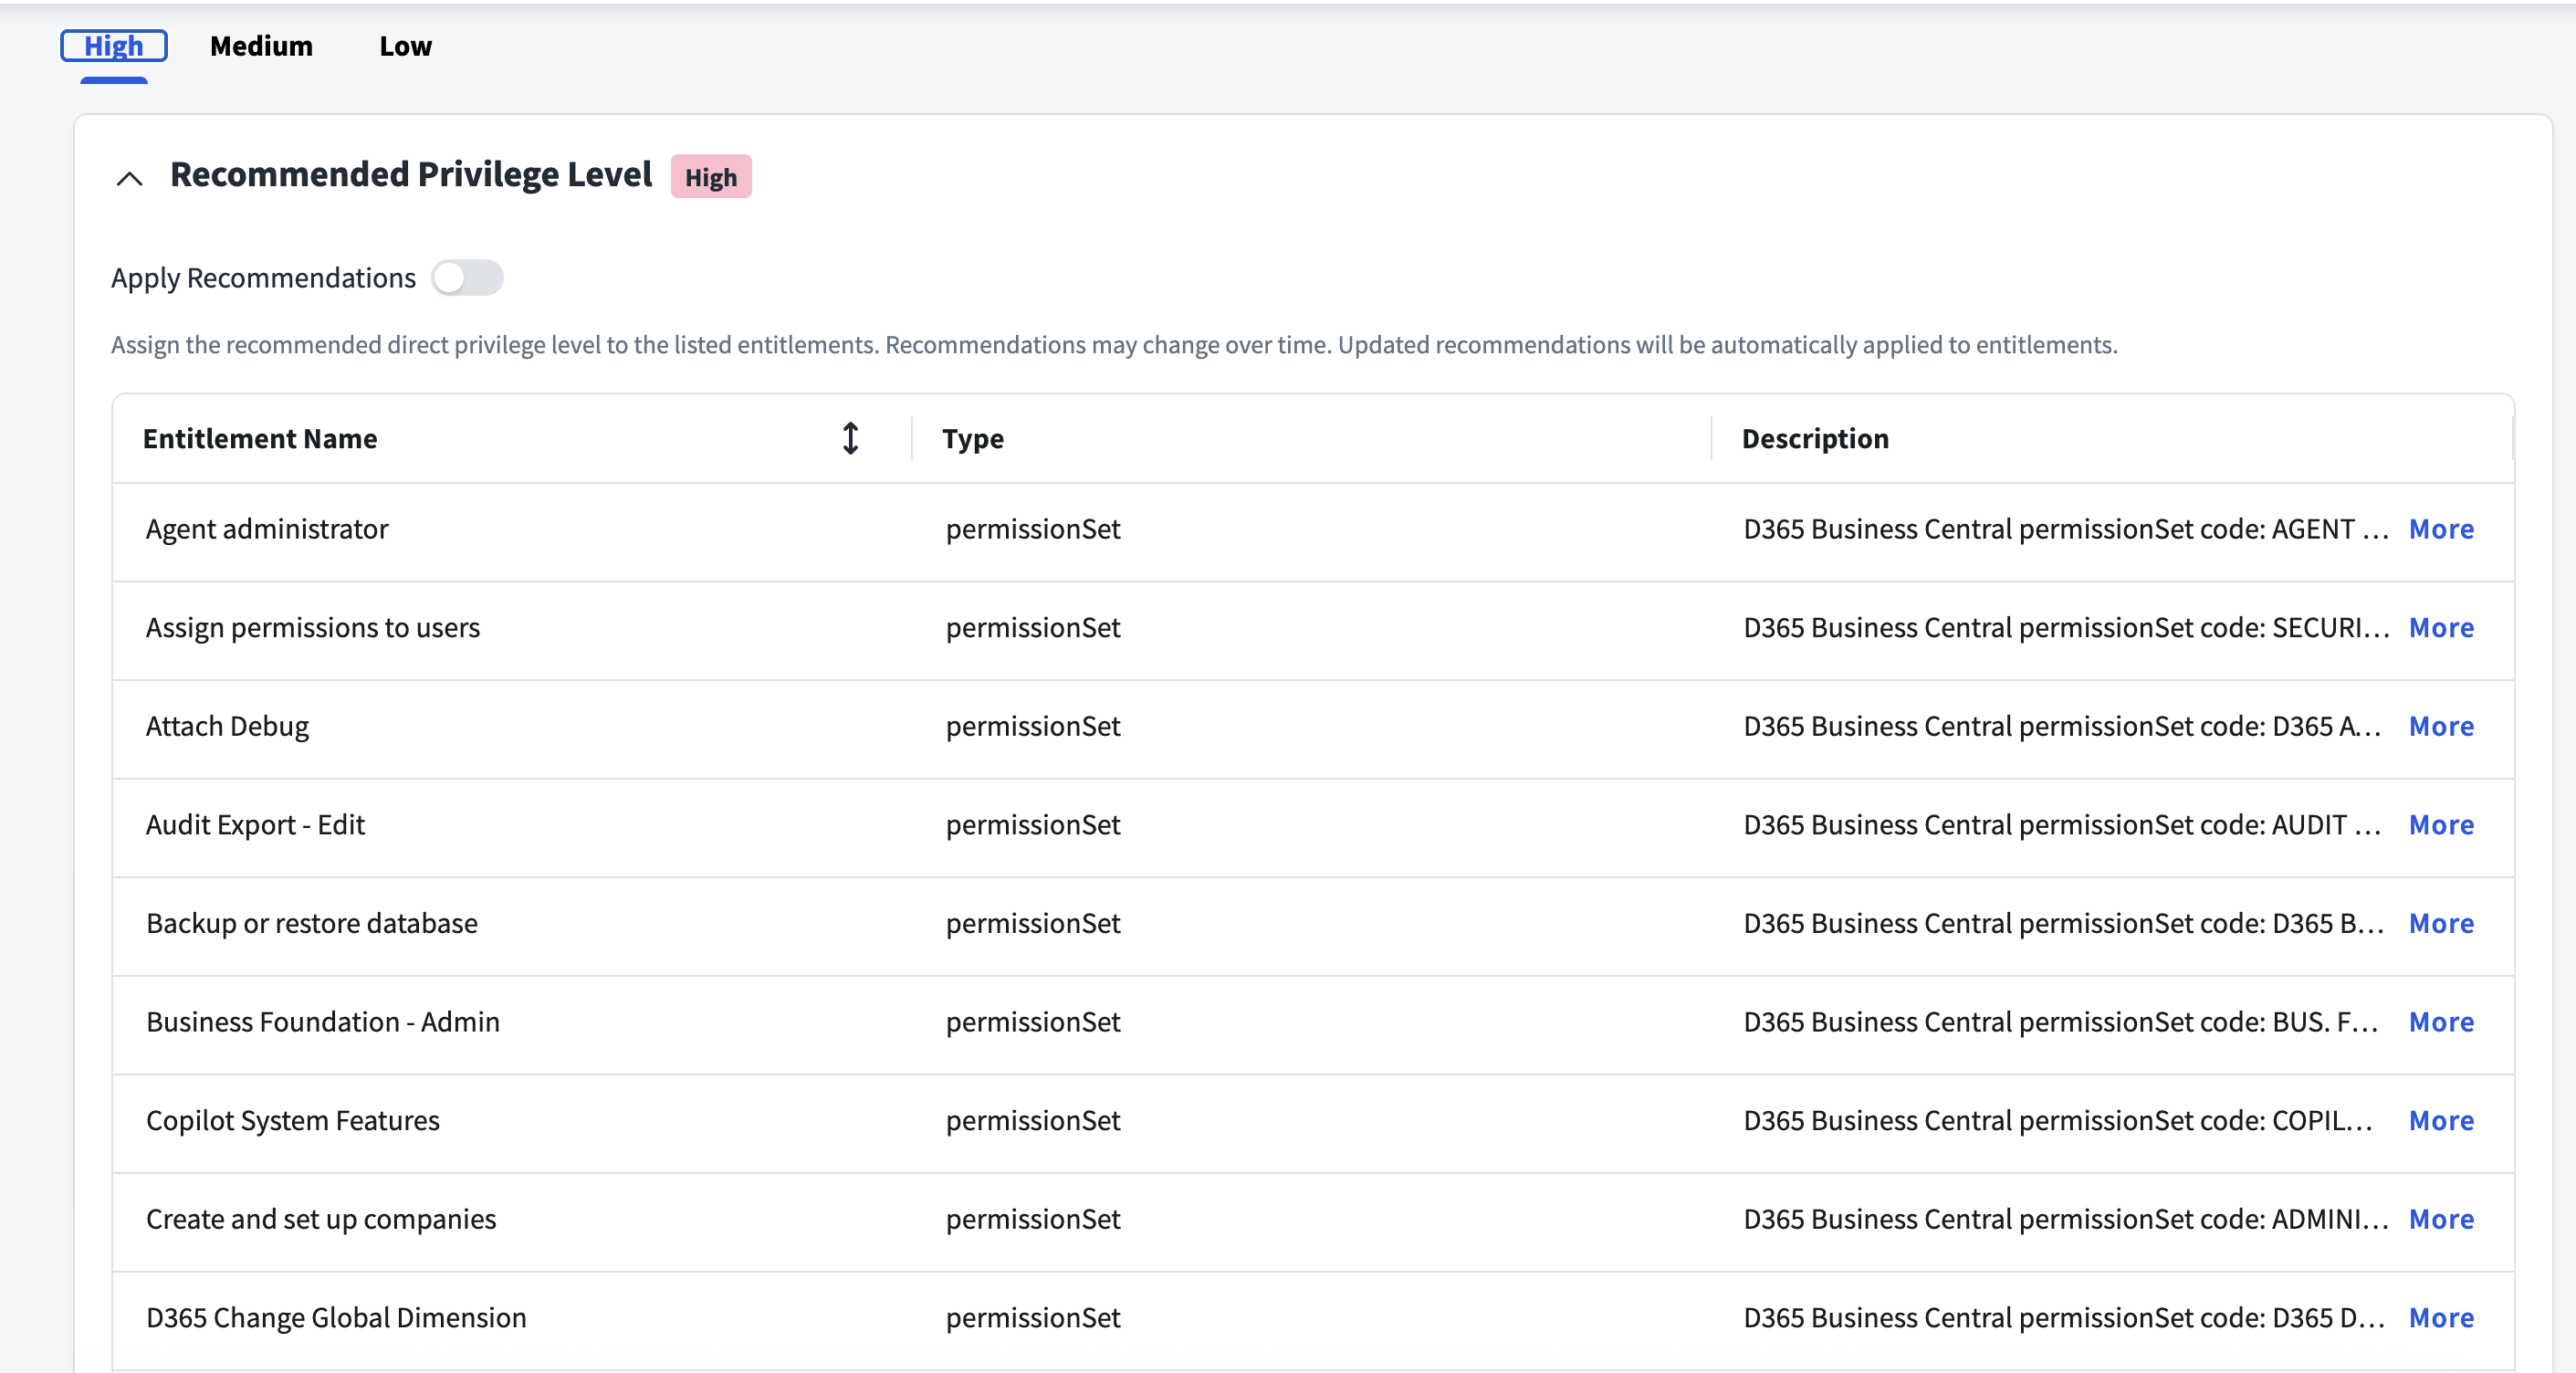
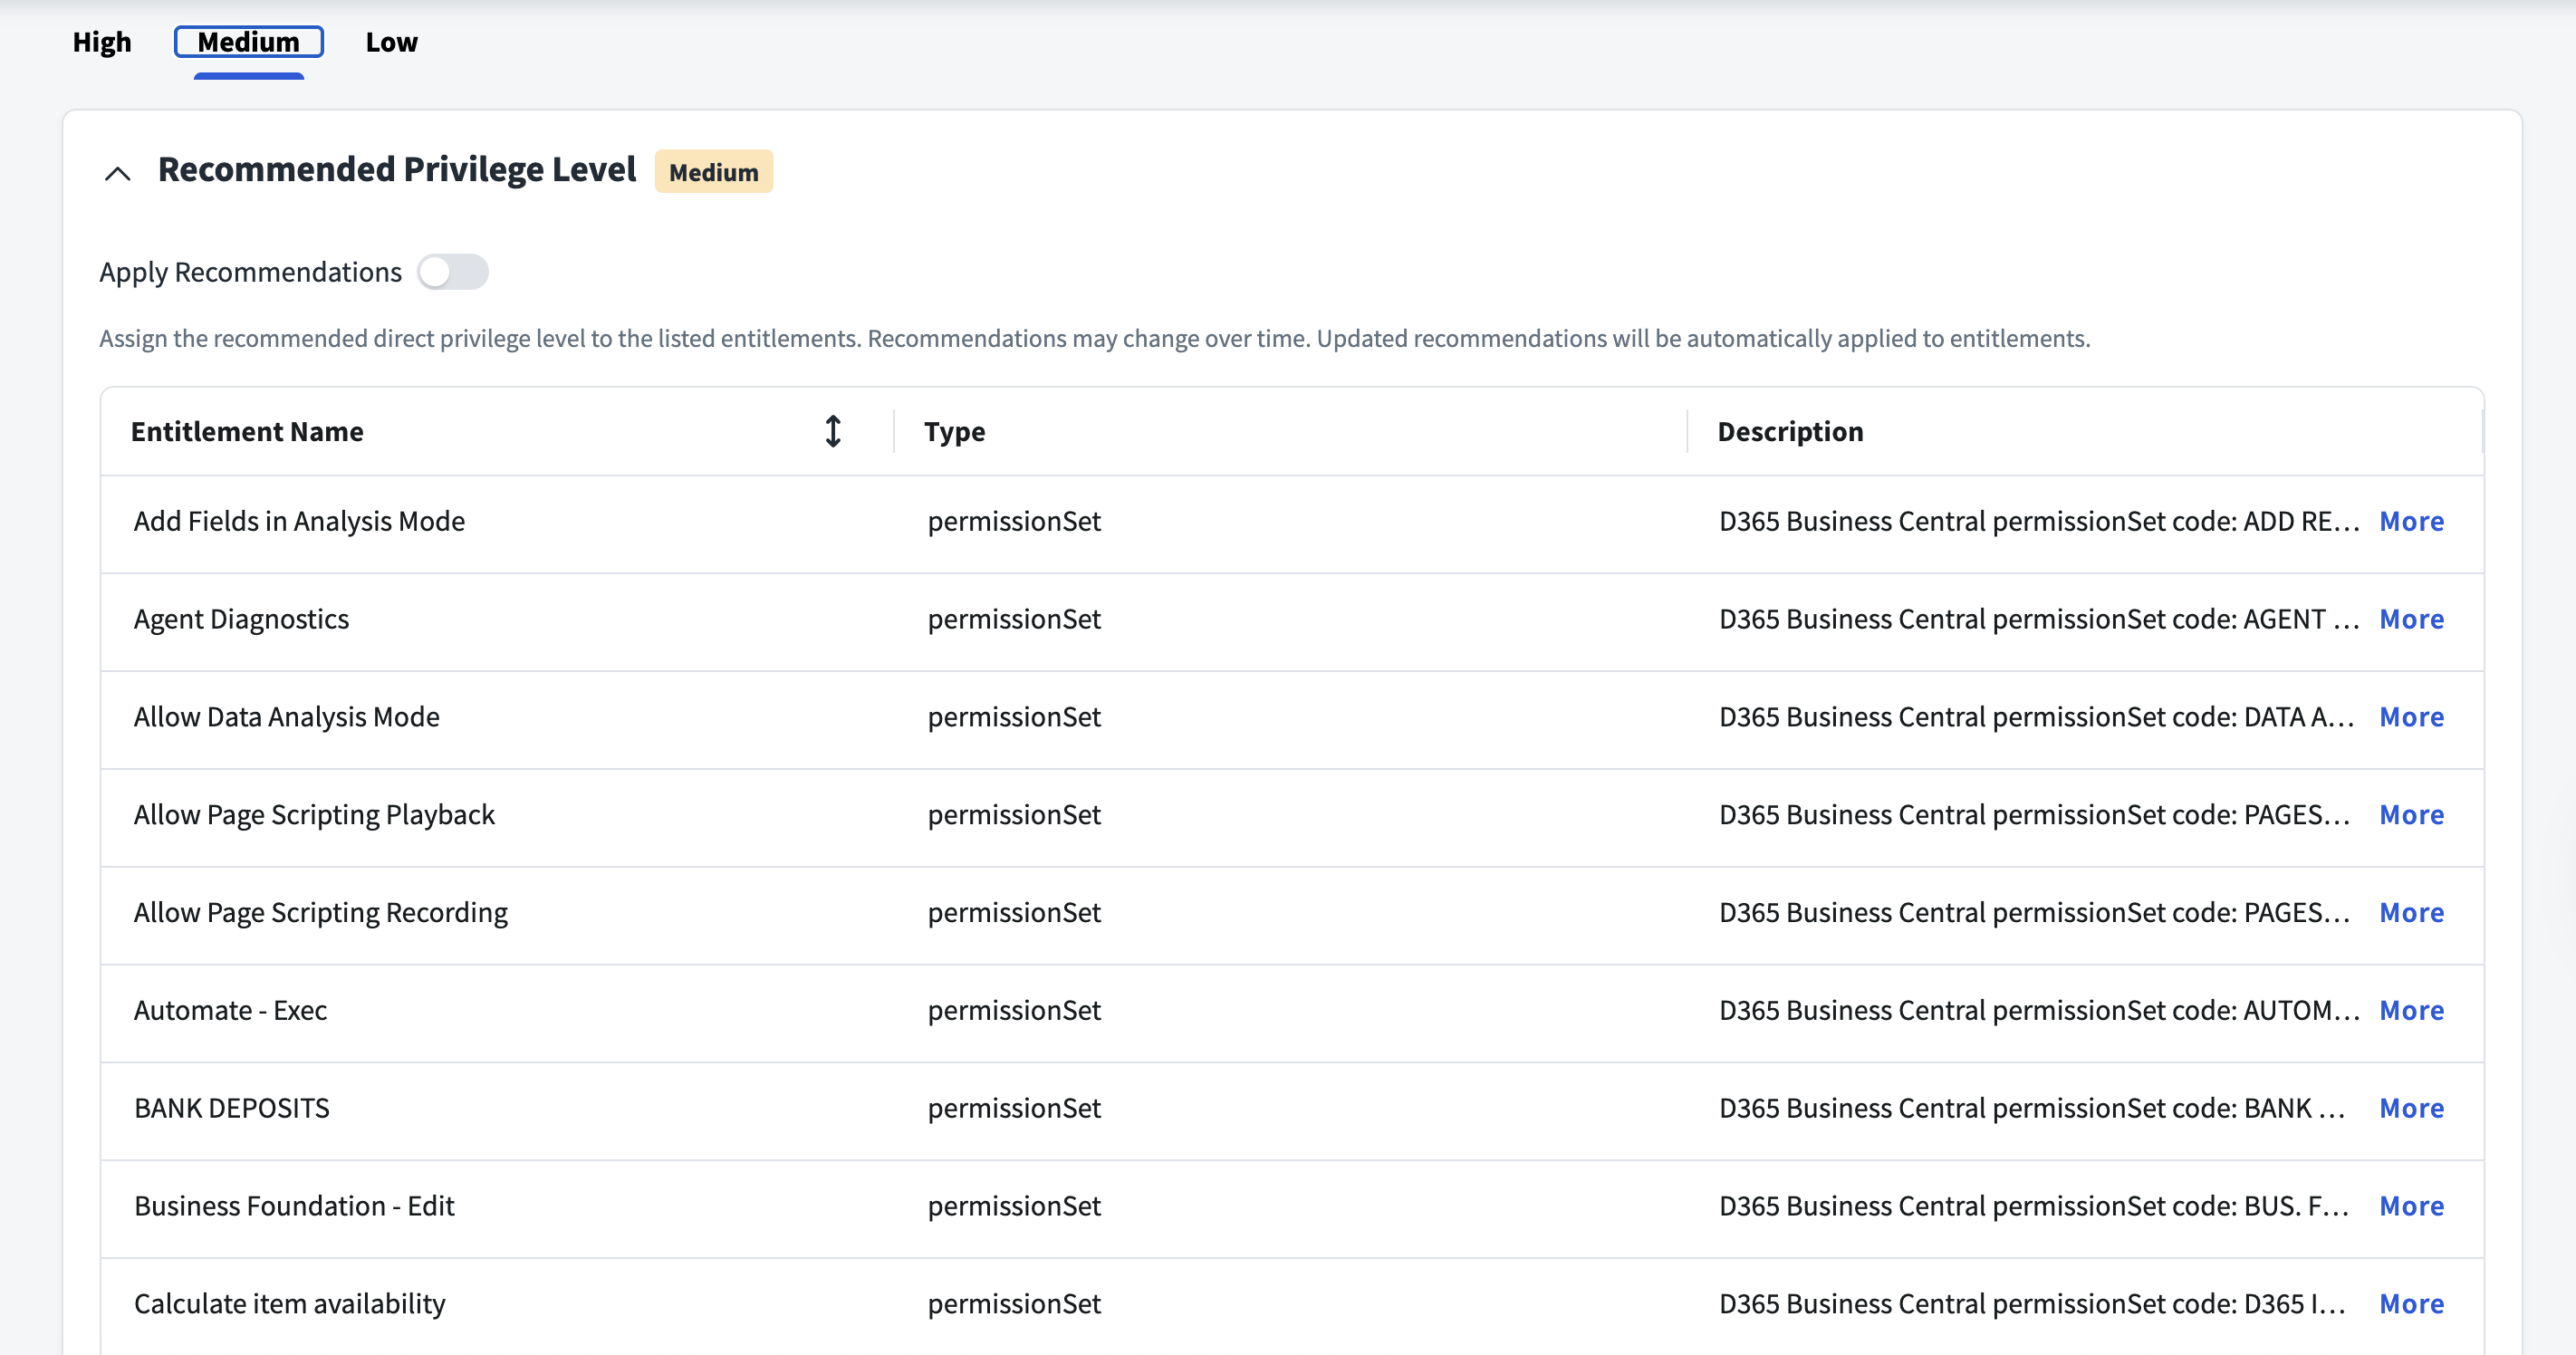
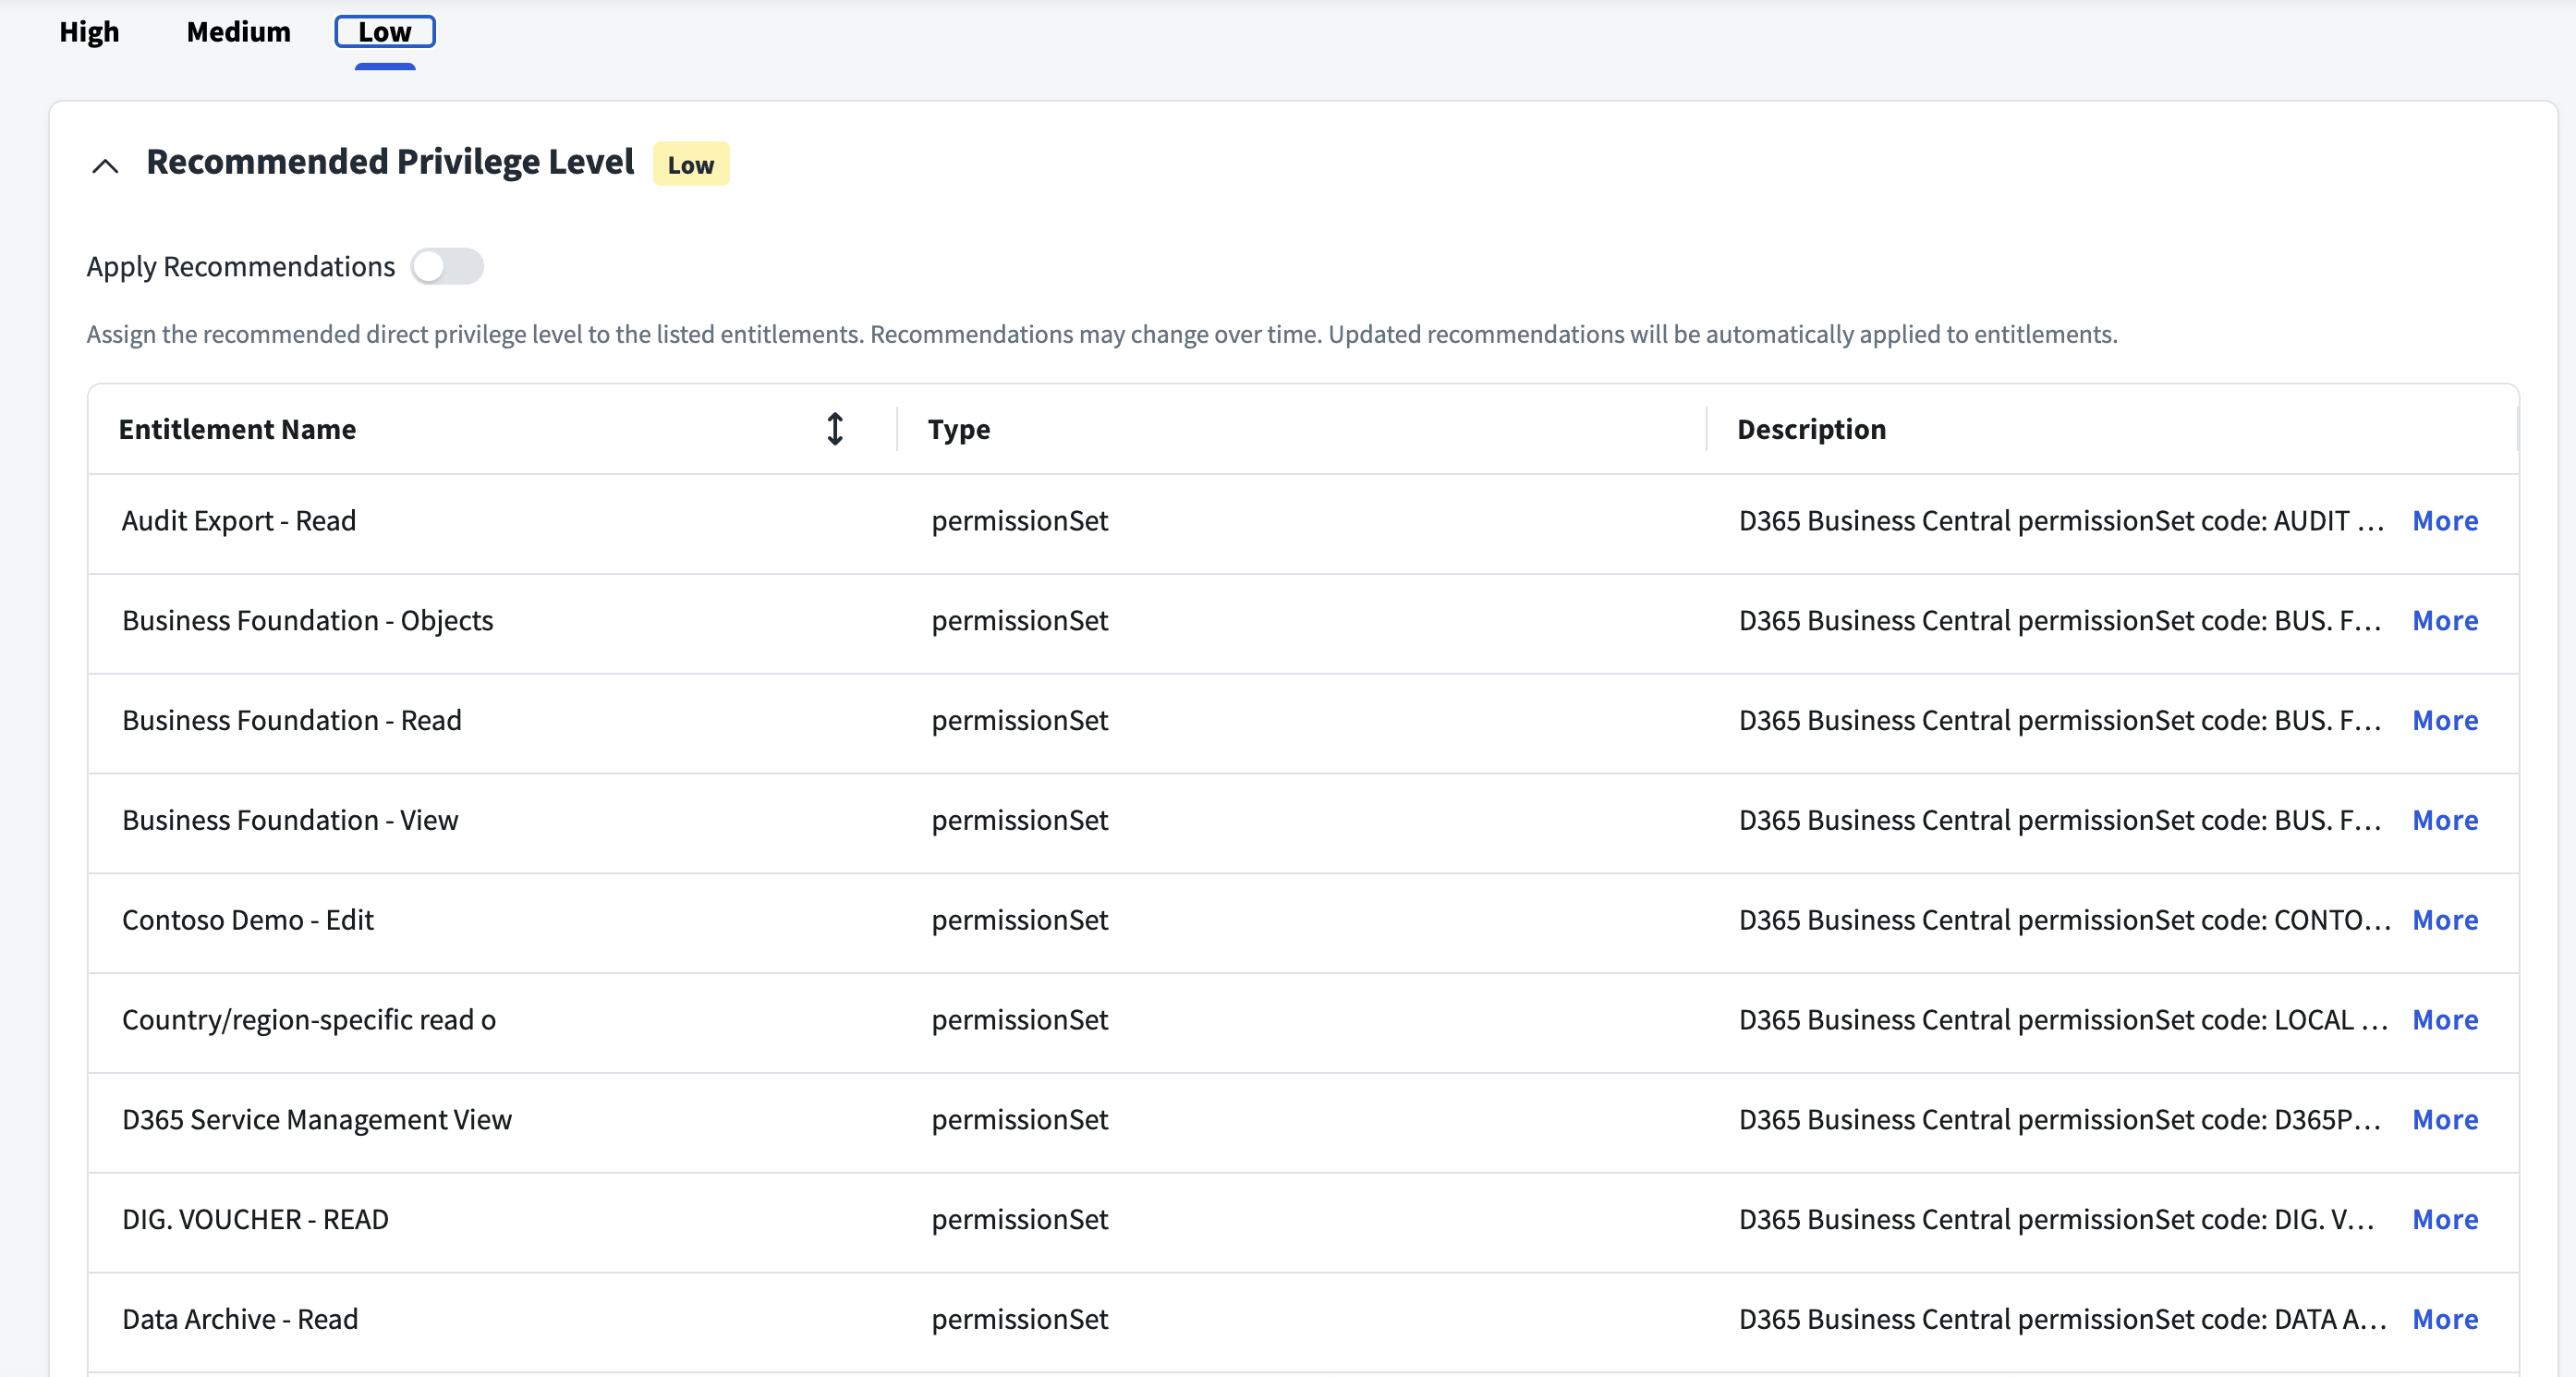
Privilege Classification
SailPoint Privilege Classification helps organizations systematically categorize and manage the privilege levels of entitlements within their sources. By classifying entitlements as high, medium, or low, administrators can better understand the potential risk and impact associated with specific access rights. This allows automatic assignment of privilege levels based on system recommendations, custom-defined criteria, or a same level across all entitlements.
| Privilege Level | Description |
|---|---|
| High | Administrative level access to accounts |
| Medium | Administrative level access for a specific role or function |
| Low | Only basic access of data |
Note
To manage Privilege Classification, users must have administrative roles such as Org Admin, Source Admin or Source Sub-Admin.
For more information, refer to Managing Privilege Classification.
Examples
Prerequisites
- Configure at least one virtual appliance cluster and successfully test the connection. For more information, refer to the Virtual Appliance Reference Guide.
The Microsoft Dynamics 365 Business Central Online connector supports OAuth 2.0 authentication with the following grant types:
- Client Credentials
- JWT Certificate Credentials
- Refresh Token/ Auth Code
The following sections describe the configuration that must be performed for each grant type.
Registering an Application on Microsoft Entra ID
Perform the following:
-
User can use any of the following Entra Management Portal to perform the configuration:
-
Select Entra ID in the left pane.
- Select App registrations.
- Select New registration.
-
On the Register an application page, in the Name field, enter the name of the application that you want to set up.
-
Set the Redirect URI to
https://businesscentral.dynamics.com/OAuthLanding.htm. -
Select Register. An Application is created. On the Application page the Application ID (Client ID) and Tenant ID are displayed.
- On the left-hand panel, select Certificates & secrets. On the Certificates & secrets page, in the Client secrets section, select New client secret.
- On the Add a client secret page, enter the Description to generate a secret, select the validity duration in the Expires list. Select Add.
- Note the value of the client secret that you have just created.
Client Credentials
For the default Client Credentials grant type based authentication, following are the required configurations:
- Obtain Tenant ID, Client ID, Client Secret from Entra ID by registering the application (steps mentioned in Registering an Application on Microsoft Entra ID).
JWT Certificate Credentials
JWT Certificate Credentials supports Authentication based on JWT assertion prepared from Certificate and Private Key.
- Obtain Client ID from Entra by registering the application (up to step 7 mentioned in Registering an Application on Microsoft Entra ID).
-
To create a Certificate (self-signed or CA signed) of type X.509, the Private Key must be encrypted with the RSA algorithm and registered at the Entra ID portal. Complete the following steps to register the certificate with the Microsoft identity platform:
- Sign in to the Entra Portal.
- Select the client application. In the Entra app registration for the client application, select Certificates & secrets.
- Select Upload certificate and select the certificate file to upload.
- Select Add.
-
Obtain values for the following configurations:
- Certificate: Obtain the text file of the same certificate which was uploaded on the Entra portal.
- Private Key: Obtain the private key text file.
- Private Key Password
Refresh Token
For refresh token, the delegated permissions on the Entra application are used (while Registering an Application on Microsoft Entra ID). For more information on assigning the appropriate permissions to the Business Central, refer to Required Permissions.
Perform the following to obtain the authorization code:
-
Obtain the authorization code using the following sample request URL:
https://login.microsoftonline.com/<tenantname>.onmicrosoft.com/oauth2/v2.0/authorize?client_id=<client_id>&scope=offline_access https://api.businesscentral.dynamics.com/.default&response_type=code&redirect_uri=https://businesscentral.dynamics.com/OAuthLanding.htm&response_mode=query&state=<randomnumber>Note
In the above URL, replace the values of
<tenantname>,<client_id>, and<randomnumber>.Add the following parameter details:
Parameter Description client_id Client ID of the registered application. response_type For authorization code the value must be code. redirect_uri The value of this must be a redirect URI to the URL that was configured while registering the application, that is, https://businesscentral.dynamics.com/OAuthLanding.htmresponse_mode To get the code in string parameter on your redirect URI, it must be a query. scope offline_access https://api.businesscentral.dynamics.com/.defaultstate This can be any number. The same value is returned along with the authorization code. -
The response in the address bar would be displayed as follows:
https://businesscentral.dynamics.com/OAuthLanding.htm?code=OAQABAAIAAAAm-06blBE1TpVMil8KPQ41U9..&state=1234566&session_state=9557b1f1-0fd8-4e12-a39f-213cfcd12153From the above response, copy the code present between
code=and&state. -
Obtain the Refresh Token as follows using the Auth code you copied:
-
Execute the following POST:
- Request URL:
https://login.microsoftonline.com/<tenantname>/oauth2/v2.0/token - Content-Type:
application/x-www-form-urlencoded -
Request body:
client_idclient_secretgrant_type: As you intend to redeem the Auth Code it should be authorization_codecode: Authorization code obtained in previous stepsredirect_uri: The value of this must be a redirect URI to the URL that was configured while registering the applicationscope: Enteroffline_access https://api.businesscentral.dynamics.com/.default
- Request URL:
-
Copy
Refresh Tokenfrom the response.
-
Creating an Application User on Business Central Online
Perform the following:
- Open the Dynamics 365 Business Central portal.
- In the Search field, search for Entra ID Application.
- Select New.
-
Add the Client ID (created in Client Credentials/JWT Certificate Credentials depending on the Grant Type selected).
Note
Application ID is the Client ID of the Application registered in Entra.
-
Under User Groups and User Group permissions add permissions in Administrator permissions section and save the application.
Required Permissions
Assign the following permissions based on the operation to be performed:
- Read operations: The registered Entra ID application must have the Automation.ReadWrite.All permission on the Entra portal.
- The Entra ID application must be a member of D365 AUTOMATION and D365 SECURITY groups on Business Central Online.
- Write operations: In addition to permissions required for read operation, the Entra ID application or the delegated user of refresh token must be a member of SUPER permission set on Business Central Online.
Perform the following steps to assign the permissions:
-
The Client Credentials /JWT Certificate Credentials Grant Type requires the following permissions on the Entra ID application:
- Under API permissions select Add Permissions, and then select Dynamics 365 Business Central > Application Permissions > Automation.ReadWrite.All.
- After assigning permission select Grant admin consent for...
- Add the same application on Dynamics Business Central using the Entra ID Applications page. Assign D365 AUTOMATION and D365 SECURITY under the User Groups table, clear the value in Company Name column if present.
- To support all write operations, assign SUPER permission set under User Permissions table, and clear the value in Company Name column if present.
- After assigning the permissions select Grant Consent and enable the toggle.
-
The Refresh Token Grant Type requires the following permission on the Entra ID application:
- Under API permissions select Add Permissions > Dynamics 365 Business Central > Delegated permissions > user_impersonation.
- Business Central user under which access code and refresh token would be generated must be a member of D365 AUTOMATION and D365 Security group to support read operations and add assign SUPER permission set to support write operation.
Documentation Feedback
Feedback is provided as an informational resource only and does not form part of SailPoint’s official product documentation. SailPoint does not warrant or make any guarantees about the feedback (including without limitation as to its accuracy, relevance, or reliability). All feedback is subject to the terms set forth at https://developer.sailpoint.com/discuss/tos.