Creating an Azure Active Directory Application in IdentityIQ
To facilitate SAML-based Single sign-on (SSO) authentication in IdentityIQ, it is essential to establish an Azure Active Directory (Azure AD) application. This application serves as the Identity Provider (IdP) for the SAML authentication process.
To create the application in IdentityIQ, perform the following steps:
-
Log in as an IdentityIQ administrator and navigate to Applications > Application Definition.
-
Select Add New Application.
-
Under the Details tab, provide the following details:
-
Name of the application.
-
Owner of the application.
-
Application Type – Select Azure Active Directory. On selecting the application type, additional tabs will be displayed on the page.
-
-
Under the Configuration tab, provide the following details:
-
Add Client ID noted during Creating a Connector Application in Azure.
-
Add Client Secret Key noted during Creating a Connector Application in Azure.
-
Type a Domain Name of the format; <tenant name>.onmicrosoft.com.
-
Select Enable Microsoft Teams Notifications checkbox. On selecting the checkbox, the following fields will be displayed:
-
Add Microsoft Teams Bot URL to notify endpoint. For example, https://<VM Name/IP>:<PORT>/<TeamsAPPID without dash>/api/notify.
-
Add Tenant ID. You can get the ID on the Application overview page on Azure Active Directory.
-
Microsoft Teams Approvals Tab ID is the Application (client) ID as mentioned in Creating an SSO Entra Application Proxy in Azure.
-
Microsoft Teams Approvals Bot ID is the Application (client) ID as mentioned in Creating a Microsoft Teams Application for IdentityIQ in Azure.
-
Microsoft Teams Bot Secret is the App (Client) Secret as mentioned in Creating a Microsoft Teams Application for IdentityIQ in Azure.
-
-
-
Under the Correlation tab, provide the following details:
Note: Determine the best attribute to use based on the accounts created, or set it to what you want it to be and create accounts accordingly.
-
Select New. The Correlation Wizard window is displayed.
-
Select Next. The Name Configuration settings are displayed.
-
Enter a name for this new configuration and select Next. The Define Attribute based Correlation Assignments settings are displayed.
-
Select ObjectId as the Application Attribute.
-
Select Display Name as the Identity Attribute.
-
Select Add.
-
Select Save.
-
On the Edit Application <Name> page, under Account Correlation, select the newly created Configuration.
-
Select Save.
-
-
Debug page must be updated with IPs and Entra URL for Approvals screen to load in IdentityIQ application in Microsoft Team. Perform the following steps to update IPs and Entra URL in debug page:
-
Navigate to the Debug page through the Debug URL:https://<hostname>/identityiq/debug.
-
Select Application object.
-
Select the Azure Active Directory Application created in IdentityIQ. The Object Editor will open, showing the configuration settings in XML format.
-
Add the following snippet the XML:
Copy<Attributes>
<Map>
......
<entry key="entraProxyConnectorIps">
<value>
<List>
<String> <Connector Group VM IP/IP's> </String>
</List>
</value>
</entry>
</Map>
</Attributes>Note: entraProxyConnectorIps contains a list of IPs or CIDR (Classless Inter-Domain Routing) block. Keep the connector IPs in this configuration. System compares these IPs with httpRequest.getRemoter Addr() to validate if the request has originated from the configured IPs.
-
Select Save
-
-
Navigate to Setup > Tasks.
-
Create an Account Aggregation task for the Azure Active Directory Application and run it.
-
Create an Account Group Aggregation task for the Azure Active Directory Application and run it.
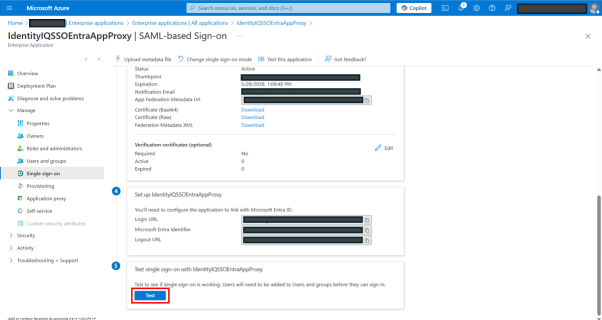
Testing SSO Entra Application Proxy Connection
There are two methods to test the SSO Entra Application Proxy connection. You can use one of the two methods.
-
First method:
-
Navigate to Azure portal and open the SSO Entra Application Proxy that was created in Creating an SSO Entra Application Proxy in Azure.
-
Under Manage > Single sign-on, select SAML tile.
-
Select Test.
-
-
Second method:
-
Open the SSO Entra Application Proxy URL in a browser.
If you're redirected to the Microsoft login page, it indicates that the SSO Entra Application Proxy connection test is successful.
-
You now have successfully created an Azure Active Directory application in IdentityIQ. For next step, refer Configuring Single Sign-On to IdentityIQ from Microsoft Teams.