Integrating SailPoint with SAP S/4HANA Cloud
Integration
This is an integration and requires additional licensing or subscriptions to utilize it. For more information, contact your customer success manager.
SAP S/4HANA is an Enterprise Resource Planning (ERP) Business Suite based on the SAP HANA in-memory database with which transactions and business data analysis can be performed in real time.
This guide is designed to give specific information about the requirements and field definitions needed for SAP S/4HANA Cloud.
Note
To view the latest features, enhancements, and fixes for all SaaS connectors, refer to the SaaS Release Notes page.
Supported Features
SAP S/4HANA Cloud supports the following features:
- Aggregation of SAP S/4HANA Business Users as Accounts
- Add/Remove Entitlements (supported entitlements are Business Roles)
- Enable/Disable SAP S/4HANA Cloud accounts
- Aggregation of Business Role as Account-Group
-
Create Business User Account on S/4HANA Cloud
Note
Create Business User is supported for user type "Employee" (BUP003).
-
Update User Attributes (User Date Valid From and User Date Valid To)
Refer to Source Features for more information on features.
Contact your CSM or SailPoint Services for feature settings.
Note
The S/4HANA Cloud Connector now supports direct role aggregation using the SCIM API. To migrate from file-based aggregation to direct aggregation, refer to Migration from CSV Role Aggregation to Direct Role Aggregation.
Privilege Classification
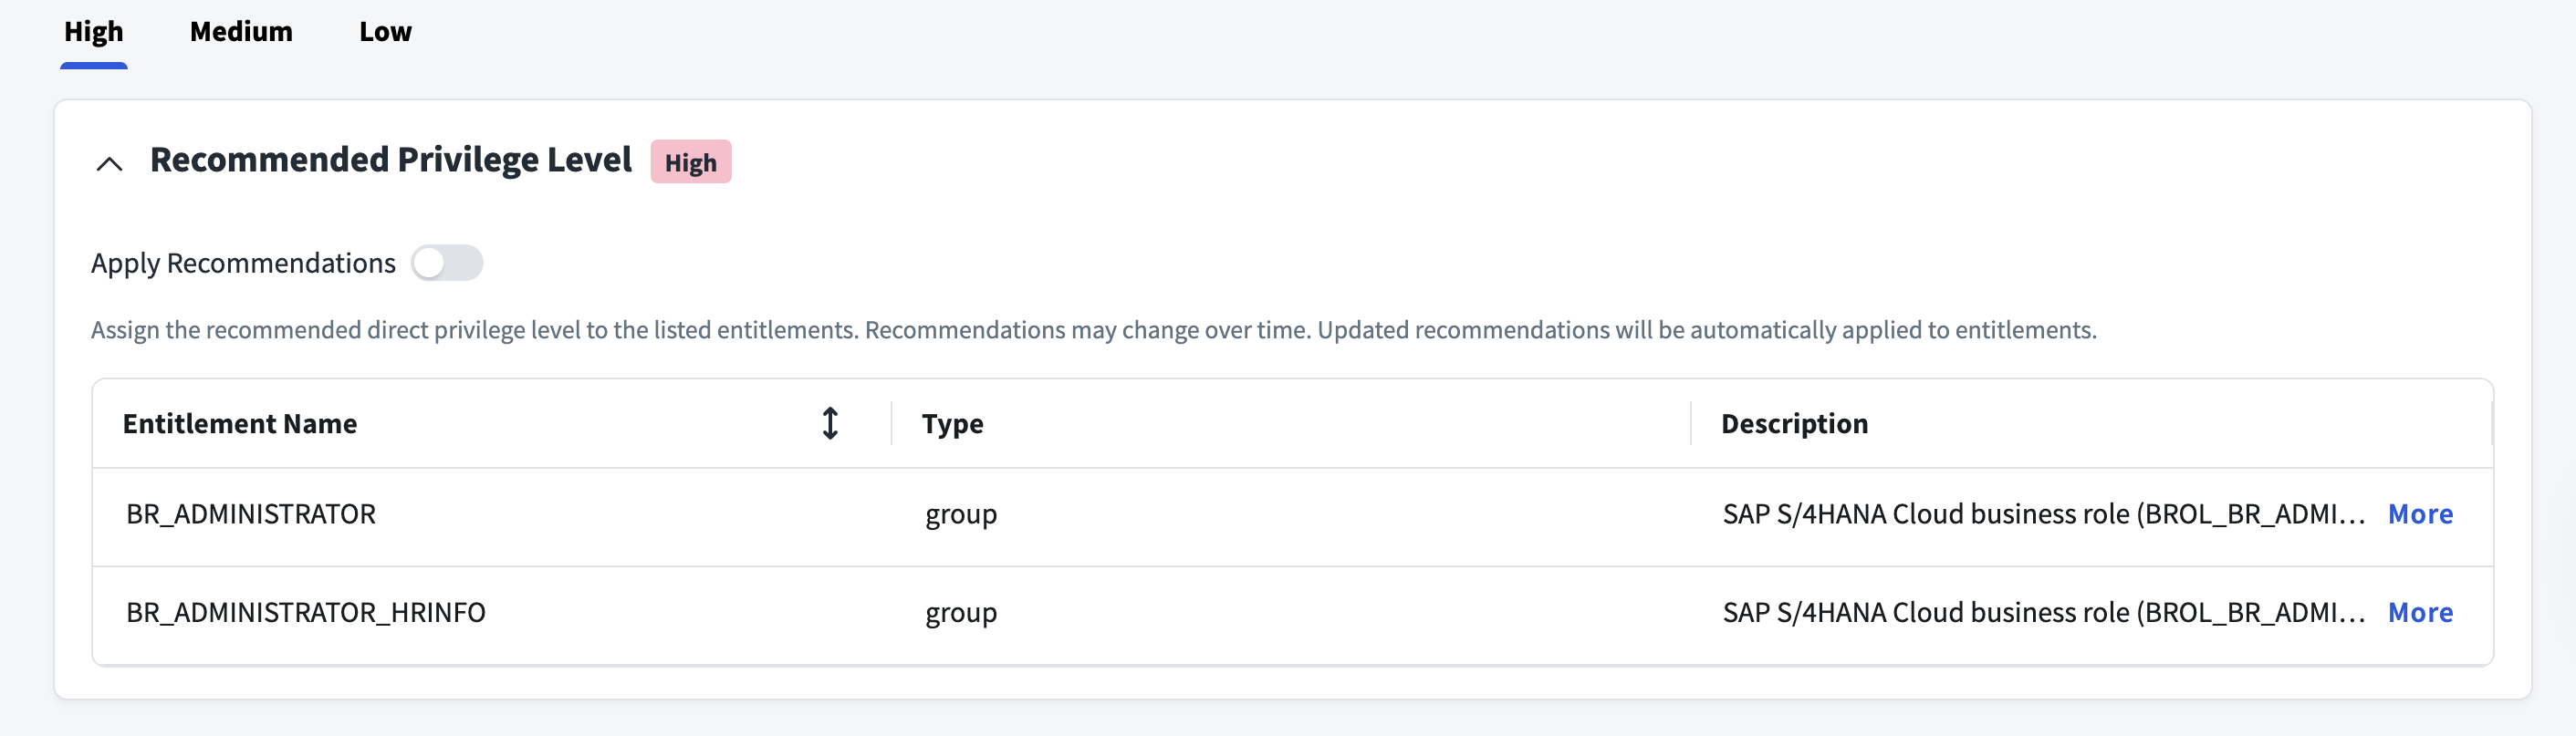
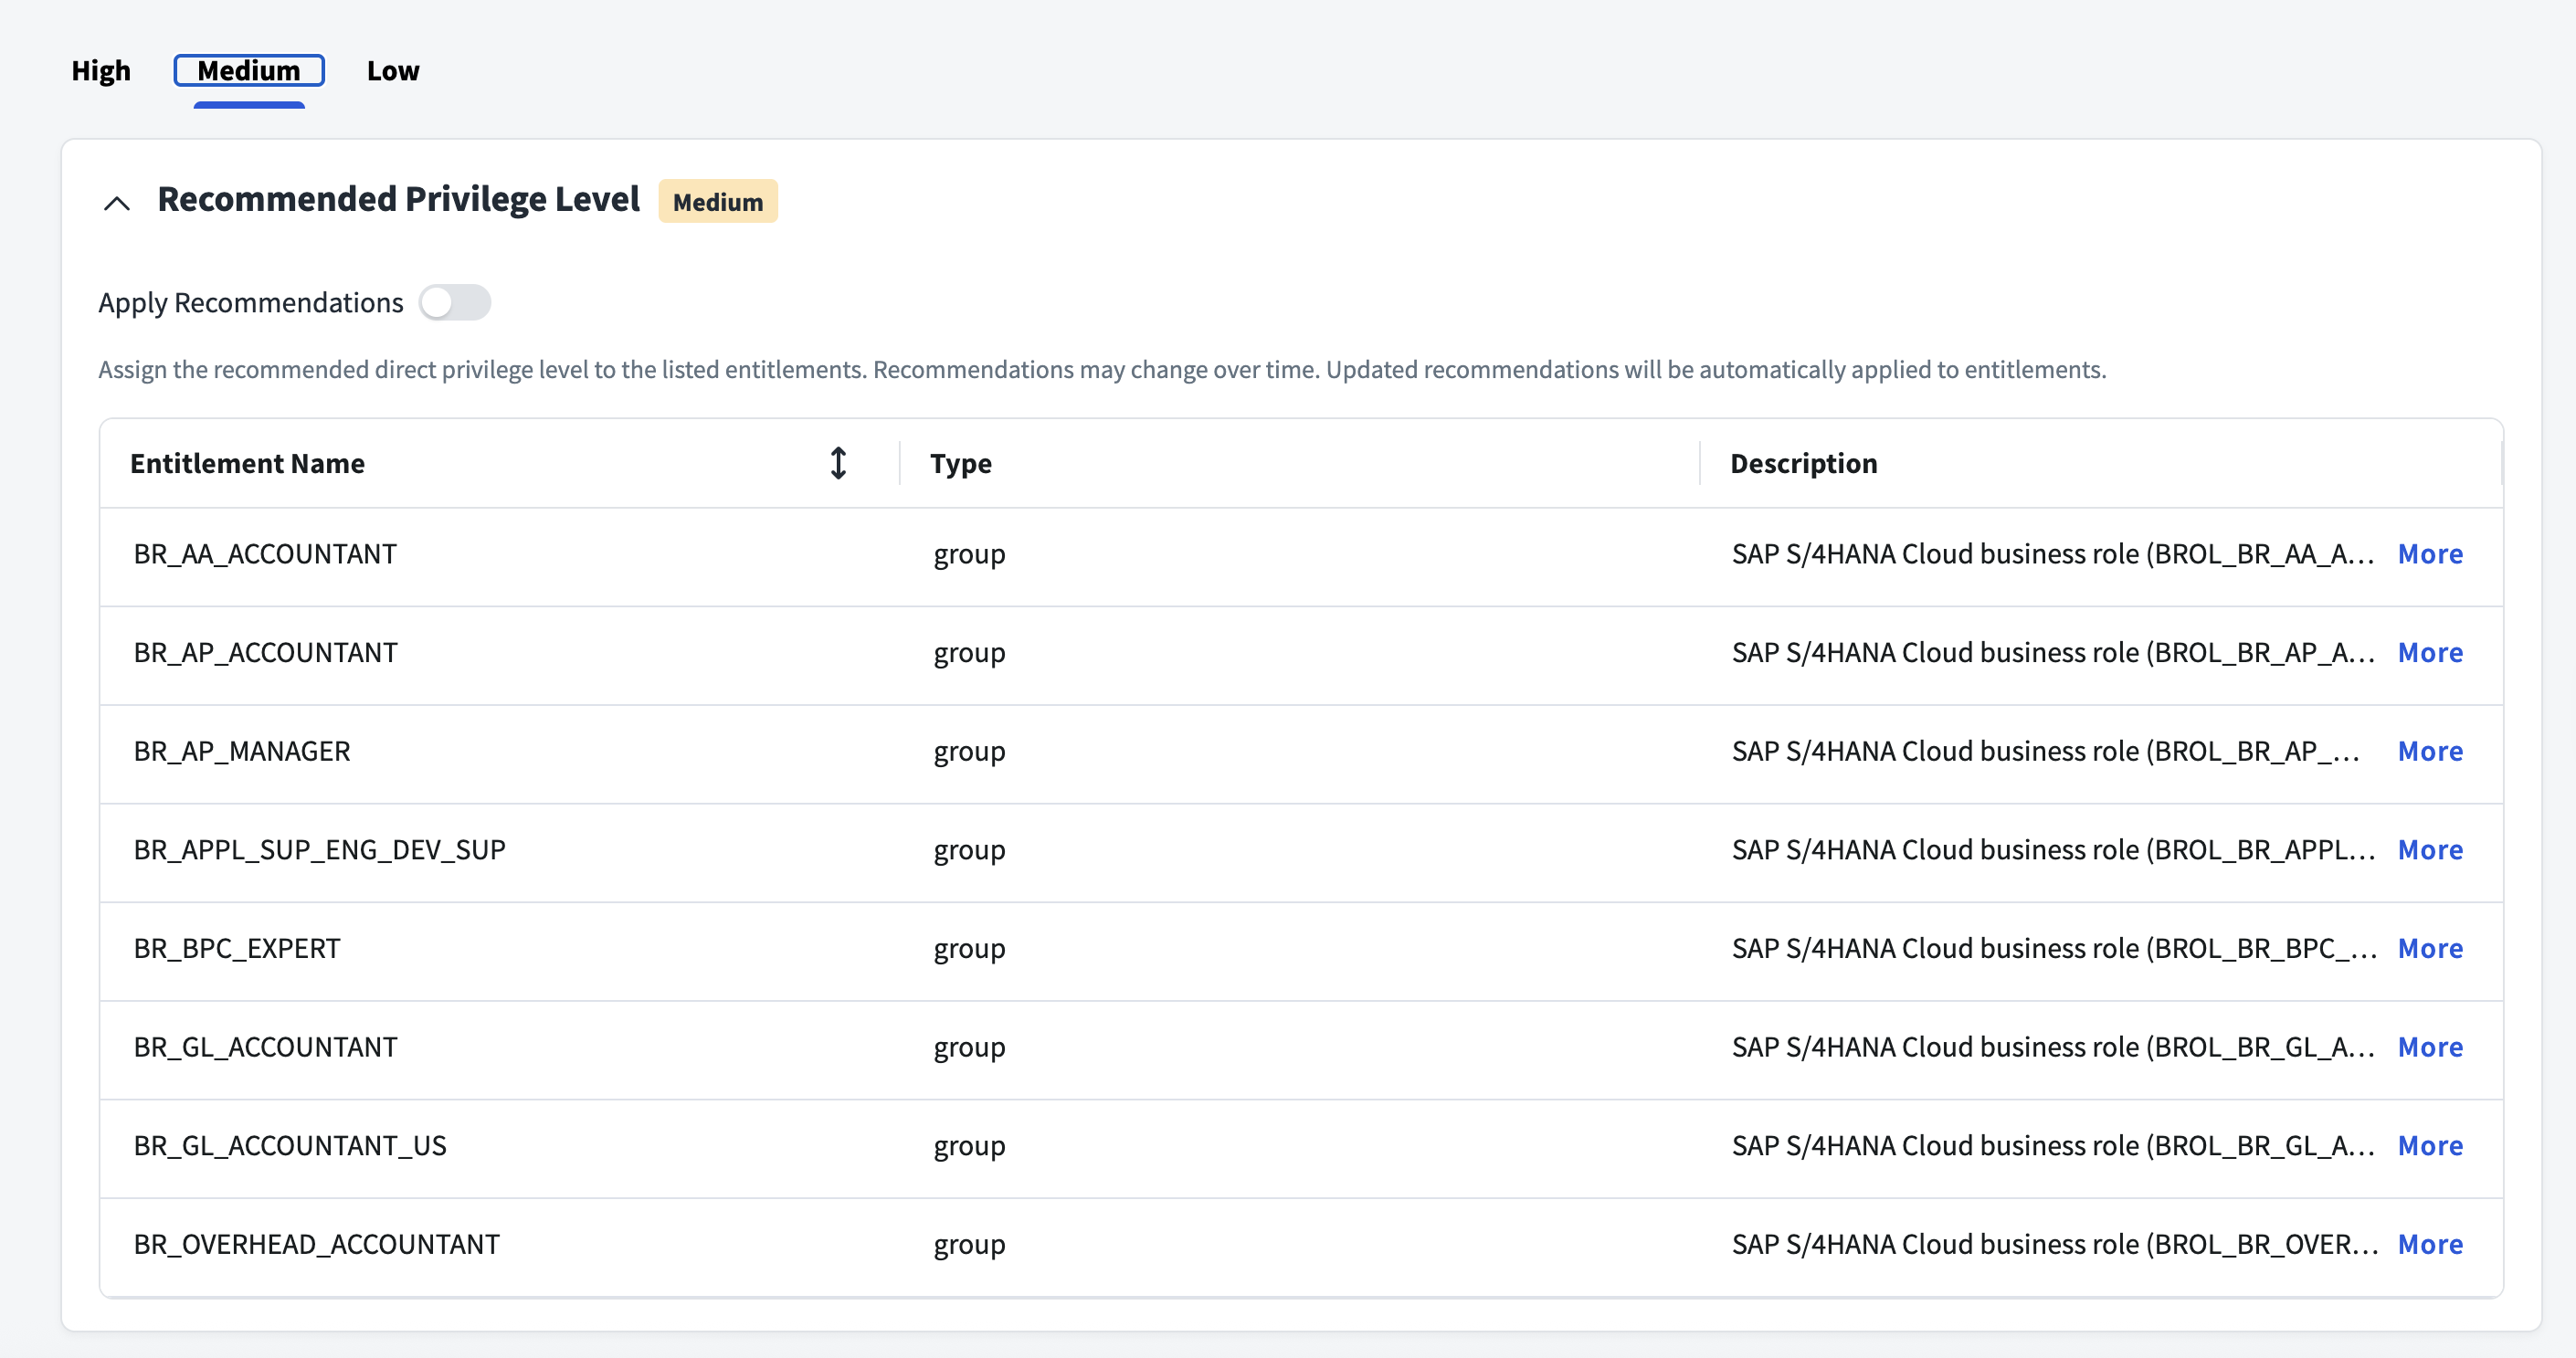
SailPoint Privilege Classification helps organizations systematically categorize and manage the privilege levels of entitlements within their sources. By classifying entitlements as high, medium, or low, administrators can better understand the potential risk and impact associated with specific access rights. This allows automatic assignment of privilege levels based on system recommendations, custom-defined criteria, or a same level across all entitlements.
| Privilege Level | Description |
|---|---|
| High | Administrative level access to accounts |
| Medium | Administrative level access for a specific role or function |
| Low | Only basic access of data |
Note
To manage Privilege Classification, users must have administrative roles such as Org Admin, Source Admin or Source Sub-Admin.
For more information, refer to Managing Privilege Classification.
Example
Prerequisites
-
Configure at least one virtual appliance cluster and successfully test the connection. Refer to the Virtual Appliance Reference Guide for instructions.
-
Create the Communication User, Communication System, and Communication Arrangement on the SAP system, and export Role Data for SAP S/4HANA Cloud.
- The role details must be exported in a .csv file.
File Upload Utility
The file upload utility provides a way for you to upload files to the cloud automatically. For more information about downloading and using the file upload utility with the SAP S/4HANA Cloud source, refer to File Upload Utility.
Create Communication User
A Communication User is a user defined in the SAP S/4HANA Cloud system for inbound communication and processing messages in the system.
- Sign in as an administrator to the SAP S/4HANA Cloud system. In the Communication Management panel, select Maintain Communication Users. A list of existing communication users page is displayed.
- To create a new communication user, select New.
-
Enter the following details and select Create:
- User Name*
- Description*
- Password
-
Note the details of the User Name and Password used above.
Create Communication System
A Communication system is defined in the SAP S/4HANA Cloud system as a target system. Communication systems must be created for inbound and outbound communication.
- Sign in as an administrator to the SAP S/4HANA Cloud system. In the Communication Management panel, select Communication Systems. A list of existing communication systems page is displayed.
- To create a new communication system, select New.
-
Enter the following details, and select Create:
- System ID*
- System Name*
-
For inbound communication, perform the following:
- Enter the details for the Host Name*.
- In the User for Inbound Communication panel, select Add (+) to add a new user.
- Select an Authentication Method from the dropdown list, specify a relevant User Name, and select OK.
-
For outbound communication, perform the following:
- In the User for Outbound Communication panel, select an Authentication Method from the dropdown list and specify the User Name and Password.
- Select Create.
-
Select Save to complete the creation of the communication system.
Create Communication Arrangement
Communication Arrangement is defined in the SAP S/4HANA Cloud system to enable key users to create and edit communication arrangements that are set up with a communication partner.
- Sign in as an administrator to the SAP S/4HANA Cloud system. In the Communication Management panel, select Communication Arrangements. A list of existing communication arrangements page is displayed.
- To create a new communication arrangement, select New.
-
Enter the following details and then select Create:
-
Scenario*
- The Scenario ID is SAP_COM_0093 and SAP_COM_0465
-
Arrangement Name
-
-
Select the ID of the Communication System* and enter other details.
- Select Save to complete the creation of a communication arrangement.
Obtaining the URL Details
The existing list of Communication Arrangements page is updated to include the newly created communication arrangement for the SAP_COM_0093 and SAP_COM_0465 scenario as explained above.
To obtain the URL details, perform the following:
- Select the newly created communication arrangement with Scenario ID SAP_COM_0093 and SAP_COM_0465. The details of the SAP_COM_0093 and SAP_COM_0465 communication arrangement are displayed.
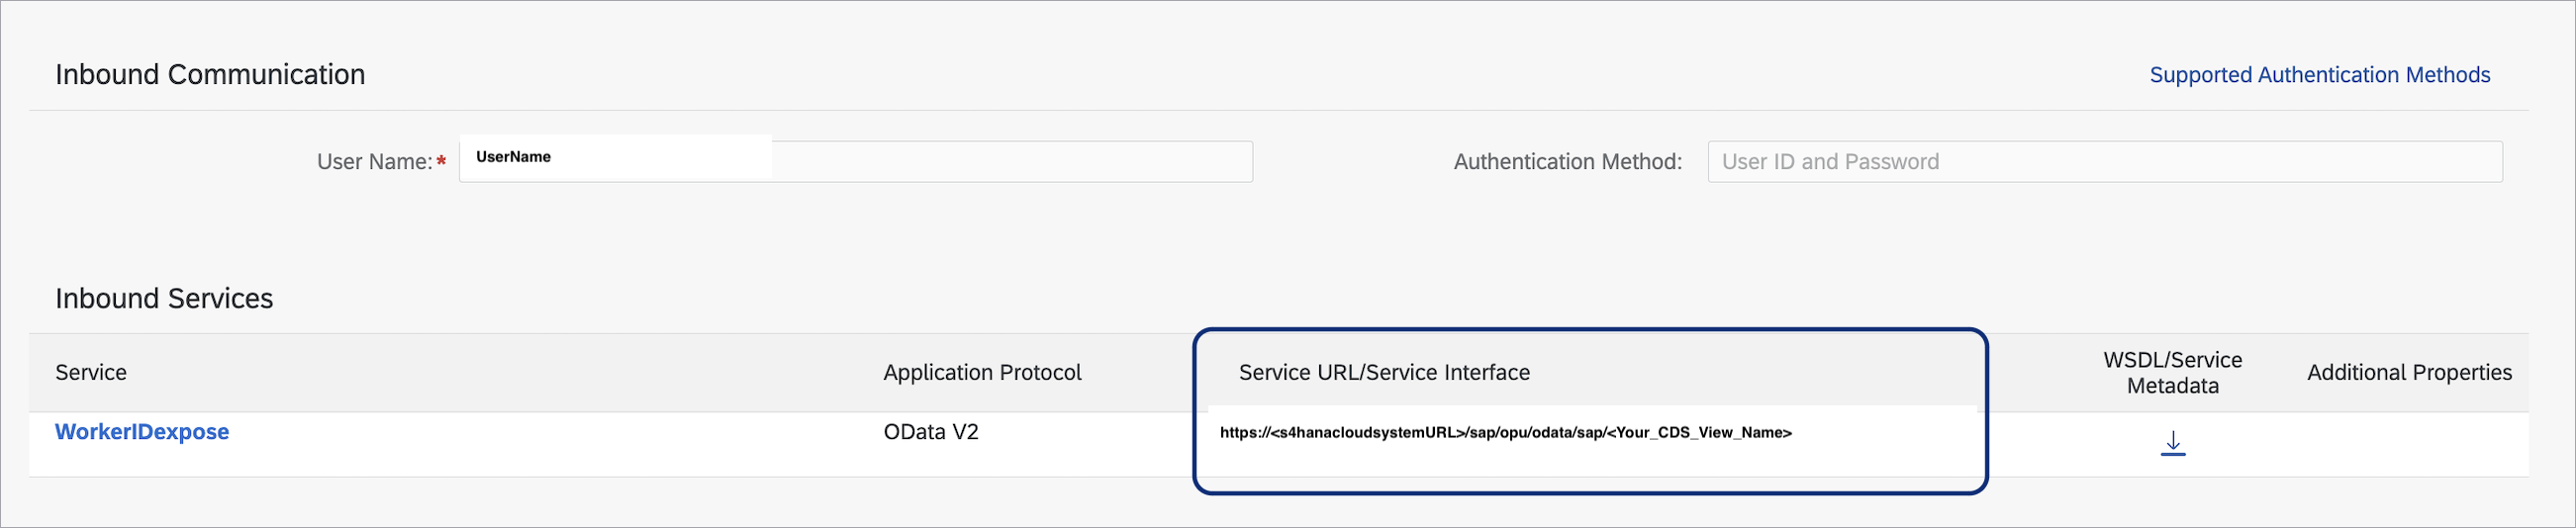
- Under the Inbound Services section, copy the URL mentioned in Service URL/Service Instance.
Create Business User Account
The S/4HANA Cloud system supports the creation of Business User accounts. A key requirement for creating a Business User is the presence of a Worker ID. The Worker ID must be passed when creating the user.
Additionally, you can use the custom-exposed Worker ID API to fetch worker details from the S/4HANA Cloud system.
Note
The Worker ID API is an optional parameter. If the Worker ID is not known, the Worker ID API can be used to retrieve it. For instructions on obtaining the Worker ID API for your system, refer to Obtain Worker ID API in S/4HANA Cloud.
Note
In the S/4HANA Public Cloud, you can only create a Business User Account with a reference to a valid Worker ID.
Approaches for Creating a Business User in S/4HANA Cloud System
-
Create Business User using Worker ID API
- Ensure that the Email ID and Username in the provisioning plan are unique values.
- Ensure that the First Name, Last Name, and Email ID in the provisioning plan must be valid to fetch the Worker ID.
If both options are provided, Approach B (Passing Worker ID) takes precedence over Approach A (Using Worker ID API).
-
Create Business User using Worker ID
This is the standard method for creating a Business User in the S/4HANA Cloud system.
- Ensure that the Worker ID, First Name, Last Name, and Email ID in the provisioning plan are appropriate for creating the Business User.
Obtain Worker ID API in S/4HANA Cloud
This is the optional setup process to retrieve the Worker ID from the S/4HANA Cloud System using an API. The Worker ID can be fetched by passing Email, First Name, and Last Name as filters.
Note
This is an optional custom-exposed API that must be explicitly configured in the S/4HANA Cloud system before use.
To configure the Worker ID API:
-
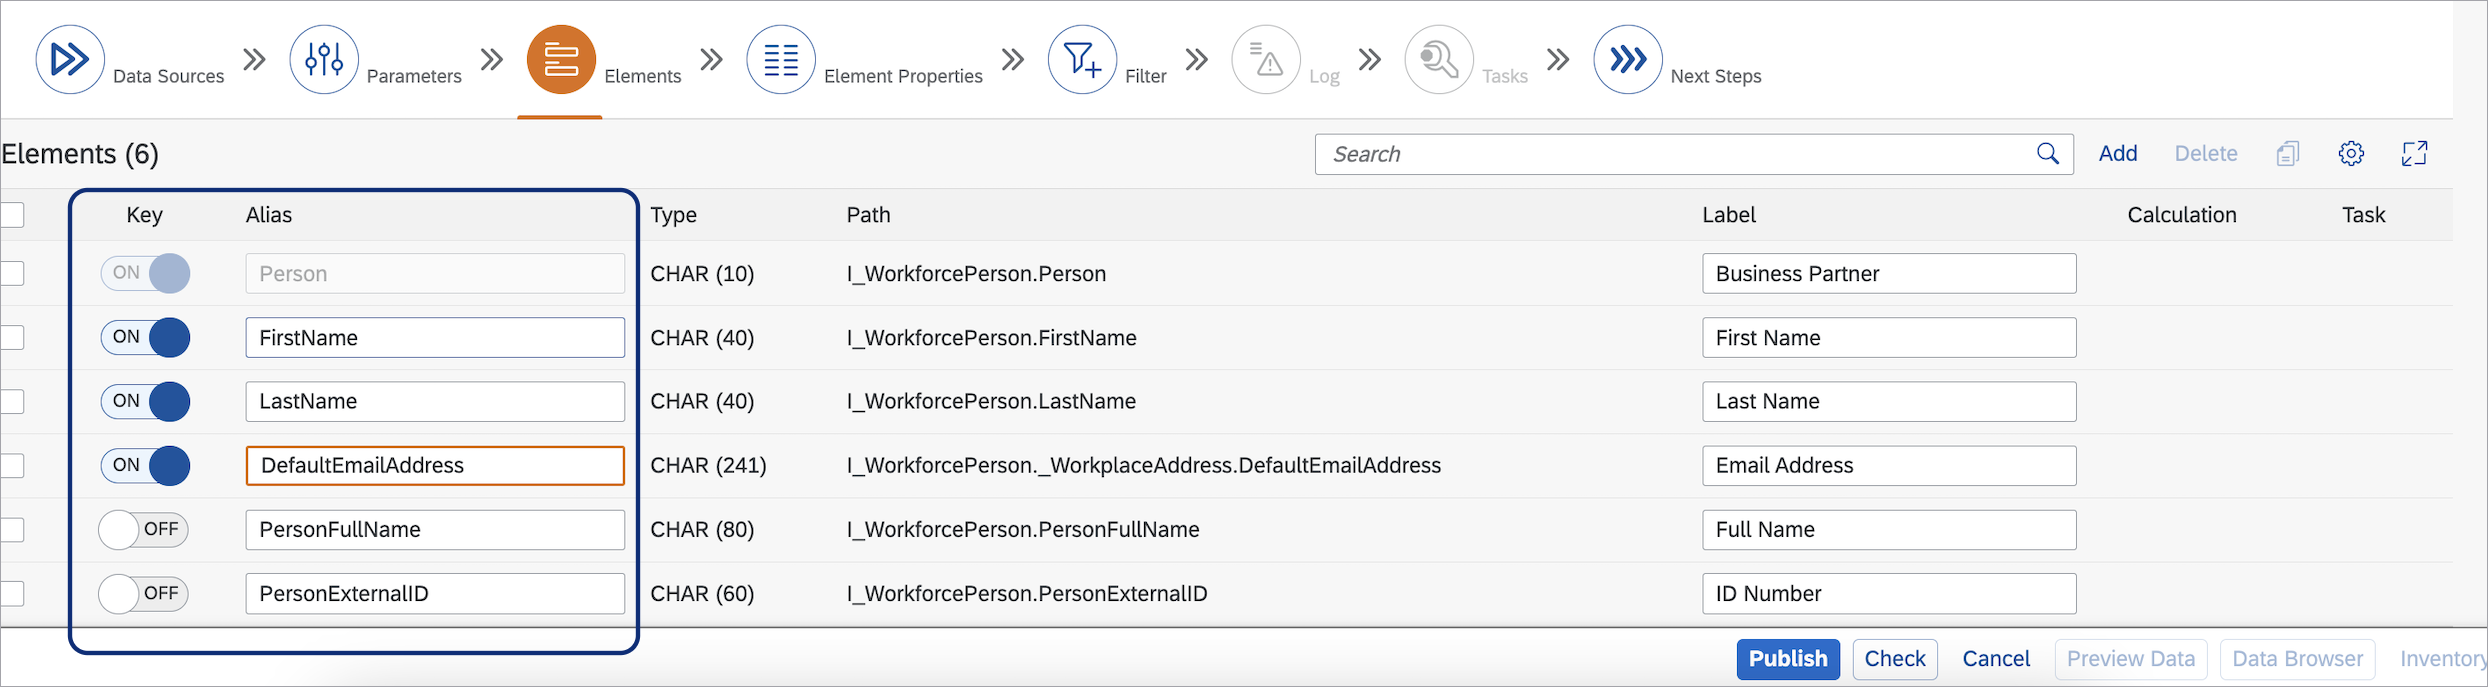
Create an External API CDS View:
- Open the Fiori App for creating custom CDS views (Custom CDS View).
- Search for the standard CDS view I_WorkforcePerson.
- Select the following fields: FirstName, LastName, DefaultEmailAddress, PersonFullName, and PersonExternalID.
-
Select Publish to make the view available for use.
-
Create a Communication Scenario:
- In the Fiori App, create a new Communication Scenario.
- Go to Inbound Services and add the service generated from the custom CDS view.
- Publish the service to make it accessible.
-
Set Up the Communication Arrangement:
- Go to Communication Arrangements. Select the Communication Scenario you created earlier.
- Enter the required fields such as System and User Name.
-
Retrieve the generated URL for the communication arrangement.
-
Configure the Worker ID API in the Connector Settings:
- Add the Entity Name (from the API metadata) to the API URL.
- Enter the complete URL in the Worker ID API field on the configuration settings page of the connector.
Required Permissions
The following table lists the required permissions for the specific operations mentioned later in this section:
| Operation | Required Permissions |
|---|---|
| Test Connection | Test Connection |
| Aggregation | Test Connection and Aggregation |
| Provisioning | Test Connection, Aggregation and Provisioning |
The administrative user must have access to the following Inbound Services to perform the operations:
| Operation | Inbound SOAP Services | Service Interface |
|---|---|---|
| Test Connection /Account Aggregation | Business User - Read | https://<hostname>/sap/bc/srt/scs_ext/sap/querybusinessuserin |
| Group Aggregation | Business User - Read | https://<hostname>/sap/bc/http/sap/aps_iam_api_scim/Groups |
| Provisioning | Business User - Update | https://<hostname>/sap/bc/srt/scs_ext/sap/managebusinessuserin |
| Provisioning | Business User - Update | https://<hostname>/sap/bc/http/sap/aps_iam_api_scim/Users |
Note
After you create the Communication Arrangement SAP_COM_0093 and SAP_COM_0465 on the SAP managed system and the Communication User is assigned, the service account for the SAP S/4HANA Cloud source will have all the permissions. Refer to SAP S/4HANA Prerequisites for more information.
Upgrade Considerations
SAP has introduced SCIM-based APIs for the S/4HANA Public Cloud, which now support group aggregation.
Currently, the connector uses a file-upload based functionality for role aggregation. However, SailPoint recommends migrating to direct role aggregation in the future.
Refer to Migration from CSV Role Aggregation to Direct Role Aggregation to migrate from file-based aggregation to direct aggregation.
Schema Attributes for Upgraded Source
For Schema Attributes, the following updates are necessary:
Account Attributes
- User Date Valid From - Valid From Date of the Business User
- User Date Valid To - Valid To Date of the Business User
Group Attributes
Note
The Group attributes continue to be Business Role UUID and Business Role ID.
Create Business User Account
For the existing source, manually add a provisioning policy to enable business user account creation.
For reference on how to configure the policy, refer to Create Business User on S/4HANA Cloud Public.
Migration from CSV Role Aggregation to Direct Role Aggregation
The S/4HANA Cloud Connector now supports direct role aggregation using the SCIM API.
Caution
- Ensure that all necessary backups are taken before starting the migration process.
- Any discrepancies between the CSV file and the S/4HANA Cloud system may result in errors during migration.
To migrate from CSV-based role aggregation to direct role aggregation:
Note
If the CSV file is already up to date with the correct Business Role count, you can skip obtaining and verifying the CSV file and proceed directly to uploading it.
- Obtain the latest CSV file from the S/4HANA Public Cloud system.
- Verify that the business role count in the CSV matches the one in the S/4HANA Cloud system.
- Go to Base Configuration and upload the latest CSV file. Then, enable the Direct Role Aggregation option under Account and Aggregation Settings. Ensure that the Role Details File Name is correct.
- Save the changes.
- Perform a Test Connection, followed by Account and Role Aggregation.
- Once the aggregation is successful, the connector will mark the migration activity as complete.
Note
- If you encounter any issues during the migration process, raise a support ticket for assistance.
- The direct role aggregation process may take some time, depending on the number of roles and accounts. Monitor the progress throughout the aggregation process.
- Once the migration is complete, ensure that the roles and accounts are correctly aggregated in your system.
Warning
- The CSV file is required for the initial migration to direct role aggregation. After the migration is complete, the CSV upload method will no longer be supported for role aggregation.
- This change is permanent and aims to streamline the aggregation process moving forward.
Role Data Export
The SAP S/4HANA Cloud connector has the following respective fields in the UI:
- (For SailPoint) Role Details File Name: Enter the name of the file that has the exported details of the roles.
- (For IdentityIQ) Role Details File Path: Enter the CSV file path.
You can use methods as per your requirement to export the role data that is consistent with the API data.
Note
For Direct Role Aggregation, the export of a CSV file is not required.
The following are the Role Data procedure examples for:
Windows OS (Microsoft Excel)
The SAP S/4HANA Cloud connector has the following respective fields in the UI:
- For the SailPoint Role Details file name, enter the name of the file that has the details of roles exported for the Windows OS.
Steps for a Business User with SAP_CORE_BC_IAM_RM Permission Business Catalogs
-
Sign in to the S/4 HANA cloud tenant, and execute the following query to export results in JSON format:
https://<hostname>/sap/opu/odata/sap/APS_IAM_BRT_SRV/aps_iam_brt_br?sap-client=100&$format=json&$select=UUID,IDNote
You can add more fields to the above URL, separated by commas, to get the dates. The available fields are UUID, TemplateID, LongText, Description, ID, ChangedOn, DifferFromTemplate, and BusinessCatalogAssignmentCount.
-
Save the response in a .json file.
- Open Microsoft Excel and select Data > Get Data > From JSON. Browse and select the previously saved .json file.
-
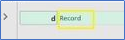
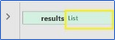
Select Record, and then select List.
Screenshot
-
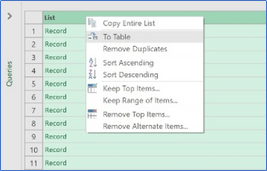
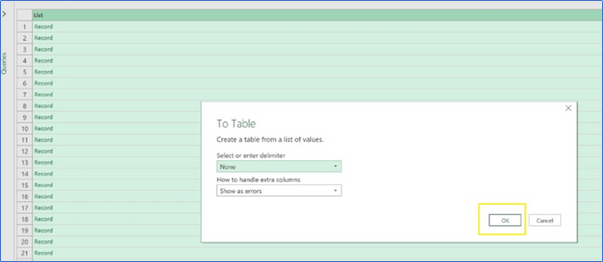
Right-click List, select To Table, and then select OK.
Screenshot
-
Select Column. Deselect the checkboxes for the columns that are not required, then select OK.
Screenshot
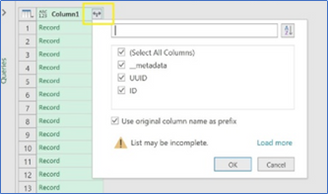
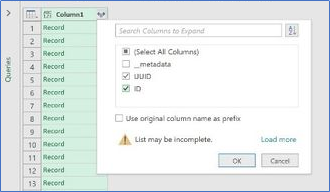
-
Verify that the selected column values are rendered. Select Close & Load.
Screenshot
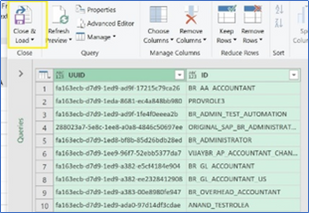
-
Rename the UUID column to Business Role UUID, and rename the ID column to Business Role ID.
- Select File > Save As, enter the file name, and select the .csv format for the file type.
Mac OS (Microsoft Excel)
The SAP S/4HANA Cloud connector has the following respective fields in the UI:
-
For the SailPoint Role Details file name, enter the name of the file that has the details of roles exported for the Windows OS.
-
Sign in to the S/4HANA Cloud tenant, and execute the following query to export results in the JSON format:
https://<hostname>/sap/opu/odata/sap/APS_IAM_BRT_SRV/aps_iam_brt_br?sap-client=100&$format=json&$sel...Note
You can add more fields to the above URL, separated by commas, to get the dates. Available fields are UUID, TemplateID, LongText, Description, ID, ChangedOn, DifferFromTemplate, and BusinessCatalogAssignmentCount.
-
Open Microsoft Excel for Mac (License: Office 356 Subscription/ Version 16.32).
-
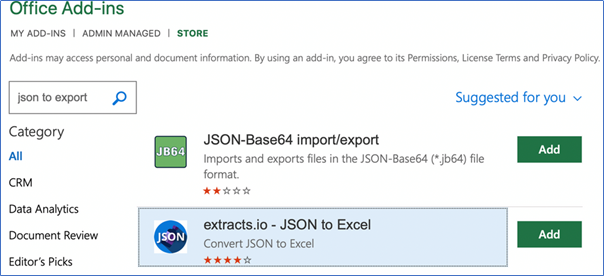
In the Excel menu, go to Insert > Add-ins > Get Add-ins.
Screenshot
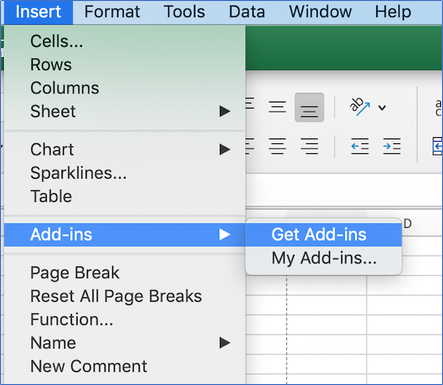
-
Search for the JSON to Excel add-in, and select Add.
Screenshot
-
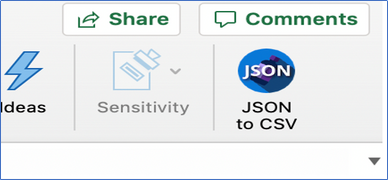
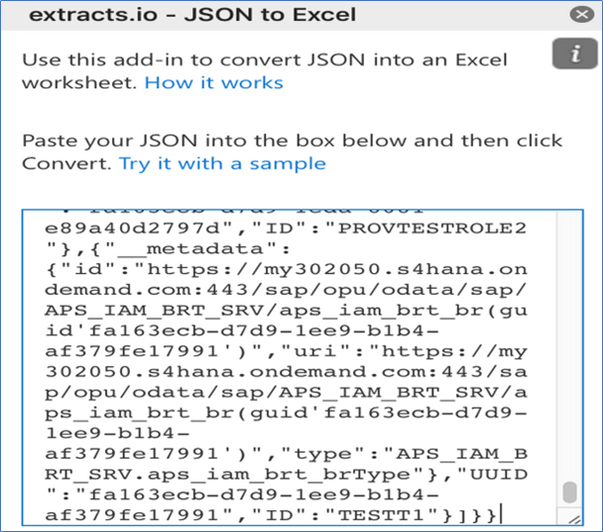
Select the JSON to CSV icon, and copy the API response JSON. Paste it into the Paste your JSON here field.
Screenshot
-
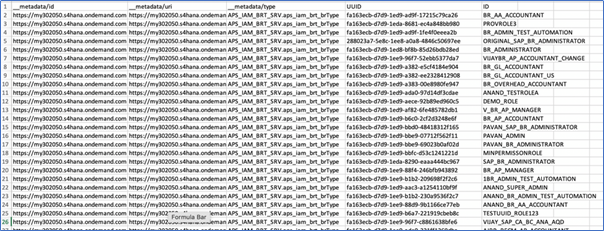
Select Convert to see the data loaded in the sheet.
Screenshot
-
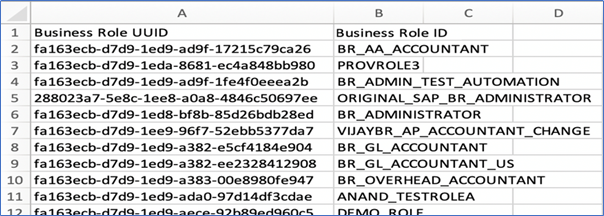
Delete the first three columns and rename the UUID column to Business Role UUID, and rename the ID column to Business Role ID.
Screenshot
-
Go to File > Save As and save the file in .csv format.
Documentation Feedback
Feedback is provided as an informational resource only and does not form part of SailPoint’s official product documentation. SailPoint does not warrant or make any guarantees about the feedback (including without limitation as to its accuracy, relevance, or reliability). All feedback is subject to the terms set forth at https://developer.sailpoint.com/discuss/tos.