Account Schema Query Setup
Set up how the connector queries the JDBC source for account and/or group schema information.
Screenshot
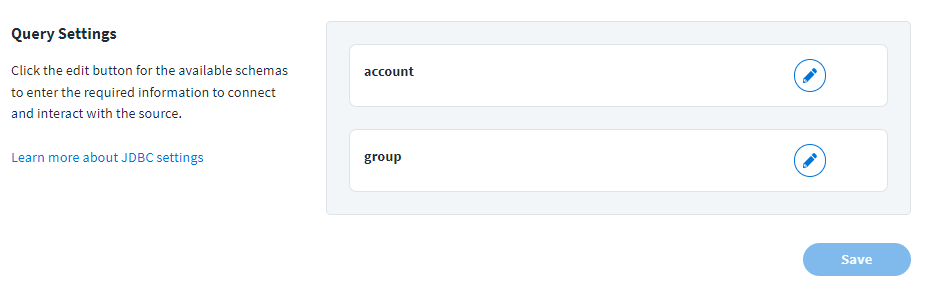
Select the Edit icon  for the schema you want to configure to launch additional settings.
Perform the following tasks to configure the queries for JDBC accounts.
Account Connection Settings
Configure how SailPoint connects to the JDBC server to load account information.
Account Connection Settings for Other Database
Enter the connection information to allow SailPoint to locate and connect to the JDBC server to load account information.
Screenshot
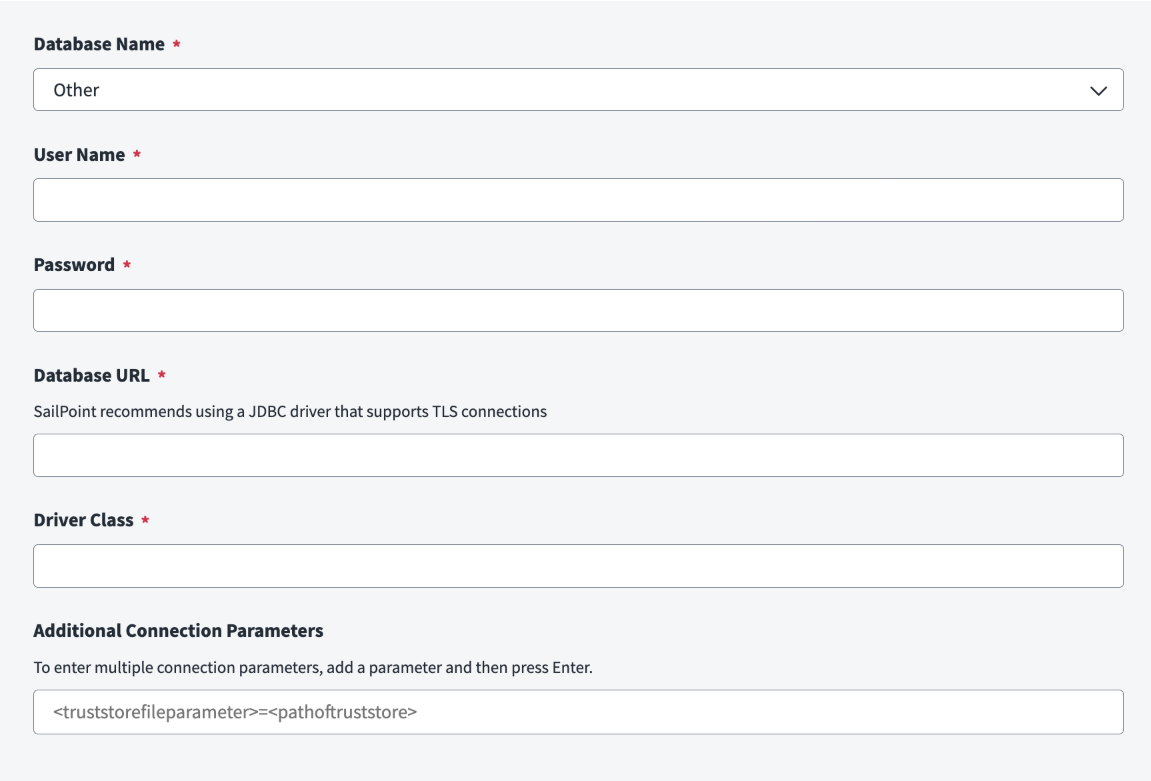
-
Select Other from the Database Name dropdown.
Note
Other is selected by default. If another value is selected, select Other.
-
Enter the User Name required to access the data files server.
- Enter the Password associated with the user name to access the server.
-
Enter the server's address into the Database URL field. The generic format is as follows:
Substitute the values for your database in the bolded text. For example:
Note
The JDBC connector is a generic connector that supports connecting to a database, provided that the database has a JDBC driver available.
For Windows Authentication
To properly support Windows authentication, the virtual appliance must be able to resolve the SQL server host, the key distribution center (KDC), and the default Kerberos realm. For more information about configuring Windows authentication, refer to Windows Authentication and Kerberos.
Important
To use Windows authentication, you must upload SQLJDBCDriver.config and krb5.config files. For more information, refer to Connector Files.
Connections using Windows authentication are supported for JDBC drivers only.
jdbc:sqlserver://><[serverName[\instanceName][:portNumber]];integratedSecurity=true;authenticationScheme=JavaKerberos;trustServerCertificate=true;Consider the following for this URL:
jdbc:sqlserver- (Required) This is known as the sub-protocol and is constant.-
serverName- The fully qualified domain name of the SQL server host machine. This is typically in the following format:For example, if the SQL server host is MYSQLSERVER and the domain is EXAMPLE.COM, your entry would be as follows:
-
instanceName- The instance used to connect toserverName. portNumber- The port used to connect toserverName.authenticationScheme- Used for integrated authentication using Kerberos in addition to theintegratedSecurityconnection property.
For example:
jdbc:sqlserver://PUWSQLSERVER.SQLKERB.LAB;databaseName=master;trustServerCertificate=true;integratedSecurity=true;authenticationScheme=JavaKerberos;Alternatively, you can establish a connection without specifying the
databaseNamein the URL. If you do so, the connection is made to the default database. For example: -
Enter the Driver Class path according to database you want to connect. For example:
-
(Optional) In the Additional Connection Parameters field, enter the parameters to be passed in the form of key-value pair. If you need to specify multiple parameters, press the Enter key after adding each value. For example:
-
Select Save.
Account Connection Settings for Snowflake
Enter the connection information to allow SailPoint to locate and connect to the JDBC server to load account information from a Snowflake database.
Note
Upload the Snowflake JDBC driver before you configure connection settings. For more information, refer to Connector Files. SailPoint requires Snowflake JDBC driver version 3.24.0 or later.
To configure account connection settings, complete the following steps:
- Select Snowflake from the Database Name dropdown.
- Enter the User Name required to access the data files server. Enter the user name that matches the authentication type you select. For OAuth 2.0, enter the
LOGIN_NAMEvalue from Snowflake. -
In the Database URL field, provide the JDBC connection string corresponding to the database with which to connect. The generic format is as follows:
For example:
-
Enter the Driver Class path according to the database you want to connect. For example:
-
Select an Authentication Type.
-
OAuth 2.0 Authentication
Screenshot
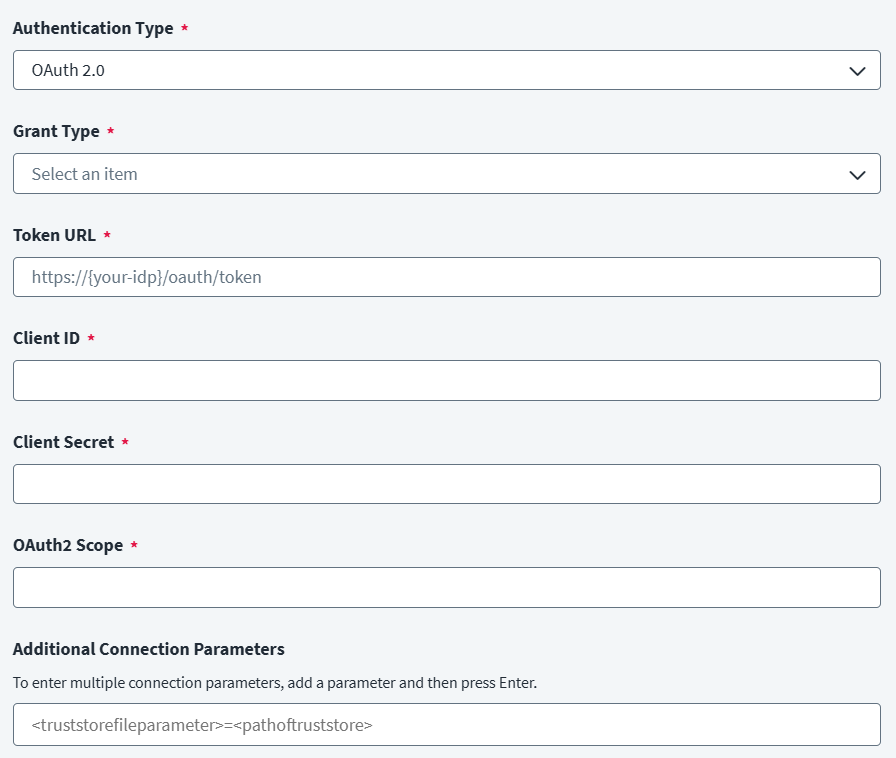
Complete the following steps when you select OAuth 2.0 as the authentication type. For more information about configuring the external identity provider, refer to Configuring an External IdP for OAuth 2.0.
-
Select Client Credentials as the Grant Type.
Note
The JDBC connector supports only the Client Credentials grant type for Snowflake OAuth 2.0.
-
Enter the Token URL required to obtain the access token.
- Enter the Client ID required for authentication.
- Enter the Client Secret required for authentication.
- Enter the OAuth2 Scope required to access the server.
-
-
Key Pair
Screenshot
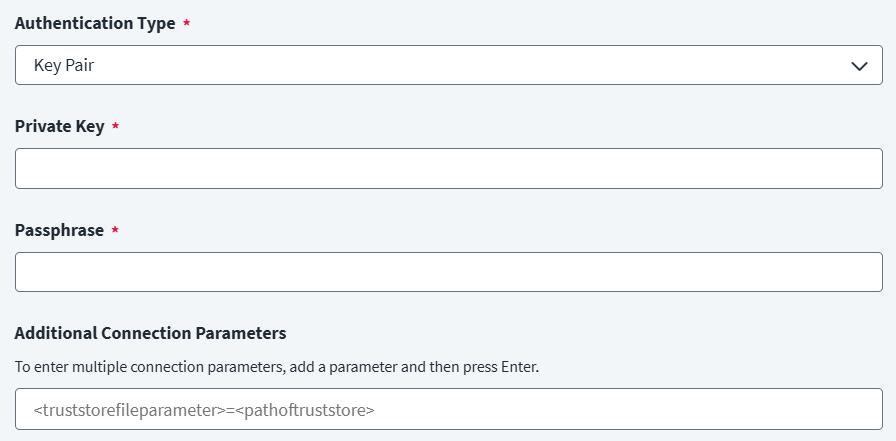
Complete the following steps when you select Key Pair as the authentication type.
- Enter the Private Key used to authenticate with Snowflake. For more information about generating private keys, refer to Generating Keys for Snowflake.
- Enter the Passphrase to validate the private key. Enter the passphrase you created when you generated the public and private keys.
-
-
(Optional) In the Additional Connection Parameters field, enter the parameters to be passed in the form of key-value pair. If you need to specify multiple parameters, press the Enter key after adding each value. For example:
-
Select Save.
Account Query Settings
Configure the SQL queries SailPoint uses to retrieve account data from your JDBC server.
Important
SQL entries can't end with a semicolon (;). Ending an SQL entry with a semicolon (;) can cause a general error message to display.
Screenshot
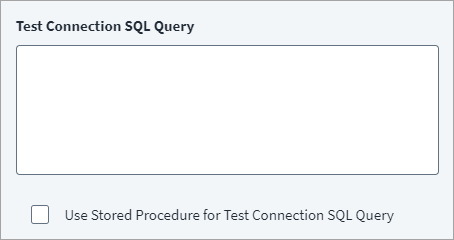
- (Optional) Enter a simple SQL query to test the connection to the database in the Test Connection SQL Query field. Select the Use Stored Procedure for Test Connection SQL Query checkbox to execute a stored procedure on the database.
-
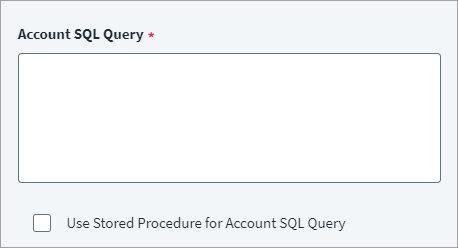
Enter an SQL query to load all accounts into the Account SQL Query field. For example, you can use the following:
Select the Use Stored Procedure for Account SQL Query checkbox to execute a stored procedure on the database.
-
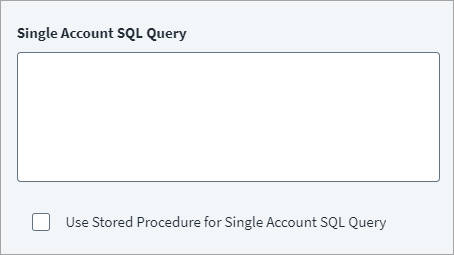
(Optional) Enter an SQL query to load a single account into the Single Account SQL Query field. This query may match the Account SQL Query, but the single account query includes a
WHEREclause to filter results for one specific user. To accomplish this, the query uses the$(identity)placeholder which the connector dynamically replaces with the actual NativeIdentity of the user at runtime. For example, if your NativeIdentity isuserid, you can use the following:Select the Use Stored Procedure for Single Account SQL Query checkbox to execute a stored procedure on the database.
-
Select Save.
Additional Query Settings
Set additional query settings to support the SQL queries.
Important
SQL entries can't end with a semicolon (;). Ending an SQL entry with a semicolon (;) can cause a general error message to display.
Screenshot
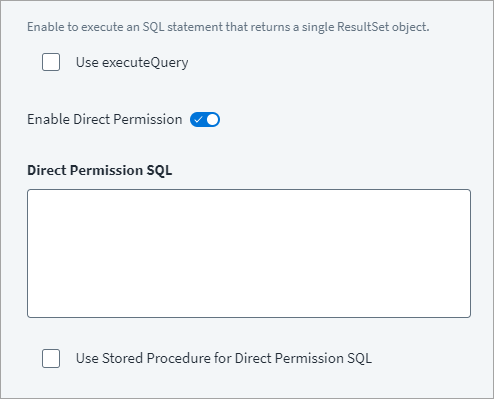
- (Optional) Select the Use executeQuery checkbox to return a single ResultSet object when it queries the JDBC database.
-
(Optional) Enable Direct Permission and add the Direct Permission SQL query. For more information on supported direct permissions, refer to Direct Permissions.
The Direct Permission Execute Query is used to pull the direct permission data from a permission table. The permission table must contain at least an Identity attribute column. SailPoint pulls permission data using an SQL query to refer to the Identity attribute during aggregation process.
The SQL query must be written in such a way that ResultSet data contains Target as a first column and Permission as a second column. Optionally, you can add a third column and set it as Annotation.
For example, if you reference a permission table named Permission and you use
$(identity)as the Identity attribute, you could use the following SQL query:SELECT column4 AS TARGET,column5 AS PERMISSION FROM Permission p WHERE CONCAT(TRIM(CONCAT(p.column1,'\ ')), TRIM(p.column2)) = '$(identity)'Another example:
Select the Use Stored Procedure for Single Account SQL Query checkbox to execute a stored procedure on the database.
-
Select Save.
Direct Permissions
The JDBC source supports:
- Permissions directly assigned to accounts and groups as direct permissions during account and entitlement aggregation.
- Revocation of the aggregated permissions for an account through certification.
Account Delta Aggregation
Enable Delta Aggregation when SailPoint queries the JDBC database. Delta Aggregation enables SailPoint to only update new information since the previous data query.
Important
You must configure a delta aggregation table for delta aggregation to work. For more information, refer to Delta Aggregation Tables.
Screenshot
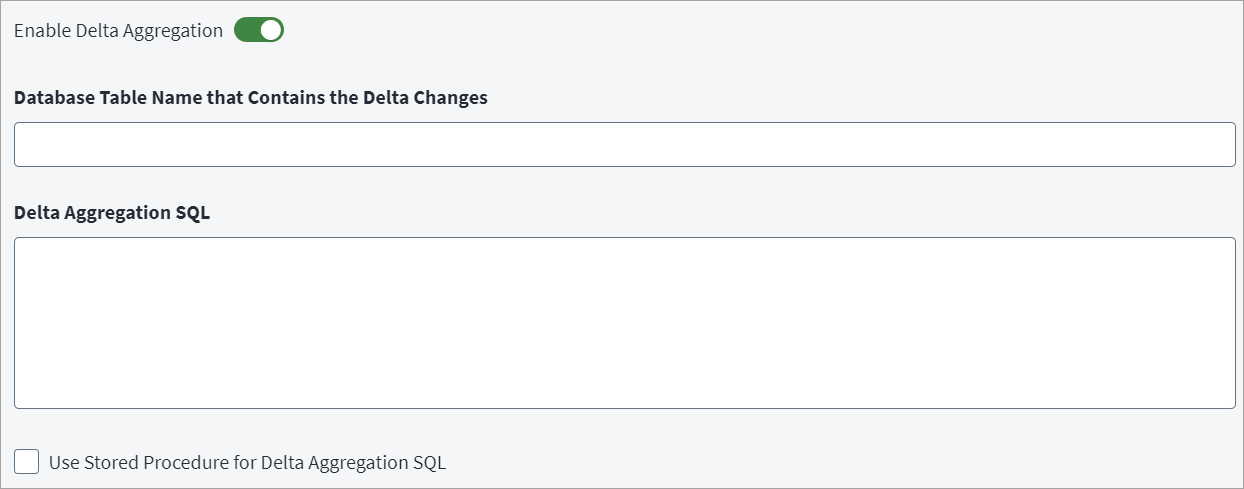
- In the JDBC source configuration, go to Query Settings, select the Edit icon for the schema you want to configure, and then select Delta Aggregation.
- Select Enable Delta Aggregation to enable delta aggregation.
- (This field is only available when delta aggregation is enabled) In the Database Table Name that Contains the Delta Changes field, provide the table name in which delta changes are captured.
-
Use the Delta Aggregation SQL field when the alias is used in the main SQL. Example of delta aggregation SQL query:
Where
masterTableis the table name that is being used in the main SQL, andIdentityAttributeis the identity attribute defined in the masterTable schema. For more information, refer to Delta Aggregation Tables. -
Select the Use Stored Procedure checkbox to execute a stored procedure on the database.
- Select Save.
Provisioning Query Settings
Provisioning can be carried out in two ways:
- Using provisioning rules. For more information, refer to Provisioning Rules.
- Create SQL queries or stored procedures to configure provisioning operations.
This topic describes how to configure provisioning operations using SQL queries or stored procedures for JDBC sources.
Prerequisites
To support this feature, be sure to enable Configure Provisioning Operations in the Connector in the source configuration pages.
Supported Functions
This feature supports the following functionality.
- Single SQL query execution
- Multiple SQL query execution
-
Stored procedures
For example:
Call
procedure_name($plan.attribute1$, $plan.attribute2$) -
Inline variables for defined queries
Defined queries support inline variables from the provisioning plan using the
$plan.fieldname.fieldtype$variable syntax. -
Response items from priorly executed queries in the same SQL query set
Queries can use response items from the result set of prior queries, via the
$response.fieldname.fieldtype$variable syntax. -
Type safety
The provisioning plan and prior-query response objects may be restricted to specific data types.
If a data type isn't defined, the field is treated as a string. Define a data type using the following entry:
For example:
$plan.firstName.string$$response.id.int$
The connector supports the following data types:
- String -
Str,Varchar - Integer -
Int - Boolean -
Bool - Date -
Date - Double -
Dbl - Float -
Flt
Note
Data type definitions are case-insensitive
Configure Provisioning Operations as Part of the Connector Configuration
Create SQL queries and stored procedures to handle provisioning in the JDBC connector's configuration interface.
Create Account
Select Create Account to provide an SQL query or stored procedure to create an account. Enter the SQL query or stored procedure into the SQL Query or Stored Procedure field as appropriate.
SQL Query
The SQL query format is as follows:
For example:
If the native identity is included in the provisioning plan:
If the native identifier is not included in the Provisioning Plan, enter an SQL query to pull the native identifier into the Get Native Identifier SQL Query field.
For example, PersonID is returned as the native identifier in the following SQL query:
Stored Procedure
The stored procedure format is as follows:
Prerequisites
To support this feature, you must set up a provisioning policy and define the account attribute mappings as required. When SailPoint provisions new accounts to a directly connected JDBC source, it uses the attributes in the provisioning policy as a set of instructions or a template to create a new account.
Add Entitlement
Select Add Entitlement to add SQL queries which add entitlements during create operations.
- Under Add Entitlement, select Add.
-
In the Entitlement Type field, add the entitlement key in the following format:
For example, if the entitlement attribute in the account schema is
Roles, add the following: -
In the Query field, add an SQL query or a stored procedure to add the
Rolesentitlement to an account.-
SQL Query
-
If the attribute is included in the Provisioning Plan:
Or
-
If the attribute is not included in the Provisioning Plan, you can fetch it using a
SELECTquery, then insert the response of the first query into the second query:
-
-
Store Procedure
-
-
Repeat this process for multiple entitlement types.
Update Account
Select Update Account to enter the name of a table and its database to update according to the Provisioning Plan. The connector forms a full SQL query using the attributes defined in the Provisioning Plan.
The query is as follows:
For example, to update sales_accounts table in the human_resources database with an email attribute and an associated value defined in the Provisioning Plan, enter:
The connector generates the following SQL query based on the Provisioning Plan:
Important
You only need to enter the name of the table and its database for this query. Changes to the information you want to update should be made in the Provisioning Plan.
If the schema attribute name is different than the database column name, map the schema attribute name to its associated database column name in the Attribute Database Mappings field. Select Add to create a new mapping by adding the schema attribute name and its associated database column name.
Prerequisites
To support this feature, you must ensure that Attribute Sync is enabled in the source for the attributes you need to change.
Add Entitlements
Select Add Entitlement to add SQL queries to add entitlements during update operations.
- Under Add Entitlement, select Add.
-
In the Entitlement Type field, add the entitlement key in the following format:
For example, if the entitlement attribute in the account schema is
Roles, add the following: -
In the Query field, add an SQL query or a stored procedure to add the
Rolesentitlement to an account.-
SQL Query
-
If the attribute is included in the Provisioning Plan:
Or
-
If the attribute is not included in the Provisioning Plan, you can fetch it using a
SELECTquery, then insert the response of the first query into the second query:
-
-
Store Procedure
-
-
Repeat this process for multiple entitlement types.
Remove Entitlements
Select Remove Entitlement to add SQL queries to remove entitlements during updated account operations.
- Under Remove Entitlement, select Add.
-
In the Entitlement Type field, add the entitlement key in the following format:
For example, if the entitlement attribute in the account schema is
Roles, add the following: -
In the Query field, add an SQL query to remove the
Rolesentitlement from an account.-
SQL Query
-
If the attribute is included in the Provisioning Plan:
delete from databasename.tablename where attribute1 = $plan.nativeIdentity$ and attribute2 = $plan.Roles$Or
-
If the attribute is not present in the Provisioning Plan, you can fetch it using a
SELECTquery, then insert the response of the first query into the second query:
-
-
Stored Procedure
-
-
Repeat this process for multiple entitlement types.
Enable, Disable, and Unlock Account
Select Enable Account, Disable Account, or Unlock Account to provide SQL queries or stored procedures to enable or disable accounts. Provide the query or stored procedure according to the column which defines the account Enable, Disabled, and Locked statuses.
For example:
Query:
update DatabaseName.dbo.[TableName] set AttributeName='value' where AccountID Attribute Name=$plan.nativeIdentity$
Stored Procedure:
Use Case Examples
This section lists examples the SQL queries and stored procedures to enable, disable, and unlock accounts.
Enable Account Examples
Query:
Stored Procedure:
Disable Account Examples
Query:
Stored Procedure:
Unlock Account Examples
Query:
Stored Procedure:
Delete Account
Select Delete Account to provide an SQL query or stored procedure to delete an account. Enter the SQL query or stored procedure into the SQL Query or Stored Procedure field as appropriate.
SQL Query
The SQL query format is as follows:
Stored Procedure
The stored procedure format is as follows:
Use Case Examples
SQL Query
Stored Procedure
Multiple Query Execution
Multiple SQL query execution is supported for create, add/remove entitlement, enable, disable, and unlock operations.
Queries can use response items from the result set of prior queries, via the $response.fieldname.fieldtype$ variable syntax.
For example, if the response of the first SQL query is used in the execution of the second entry, use the following SQL query:
SELECT id FROM databasename.tablename WHERE fname = $plan.firstname$;
INSERT INTO databasename.tablename (fname, lname, email) VALUES ($response.id.Int$, $plan.lastname$, $plan.mail.string$);
Documentation Feedback
Feedback is provided as an informational resource only and does not form part of SailPoint’s official product documentation. SailPoint does not warrant or make any guarantees about the feedback (including without limitation as to its accuracy, relevance, or reliability). All feedback is subject to the terms set forth at https://developer.sailpoint.com/discuss/tos.