Shares & Folders
-
Click +Request Access under Shares & Folders. The button changes from
 (gray letters on a white background) to
  (white letters on a green background) to indicate that this access requested is now selected.
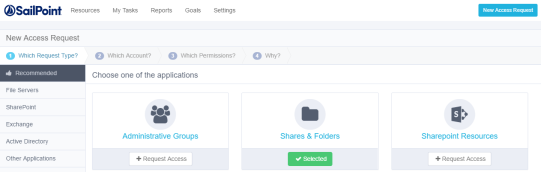
-
Follow Steps 2-5 in Administrative Groups .
Note: If there is only one account, the wizard will skip the Which Account? step, and will display the Which Permissions? step.
-
Click Next.
The Which Permissions? window displays.
-
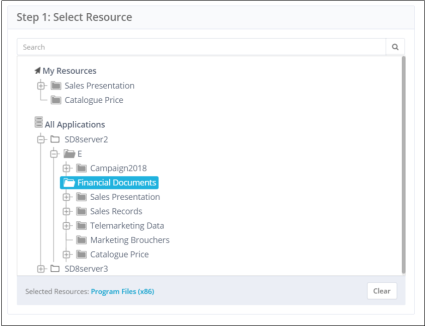
From Step 1: Select Resource, select a resource or type the name of the resource in the search box above the list of resources.
Note: Click Clear at the bottom right of the Step 1 window to clear the selection and select another resource.
Note: If a label was added, it will display next to the resource name.
-
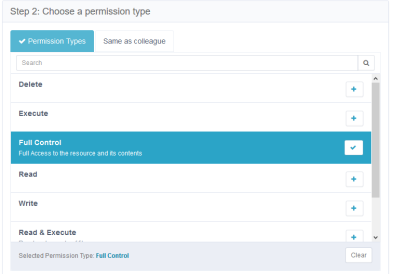
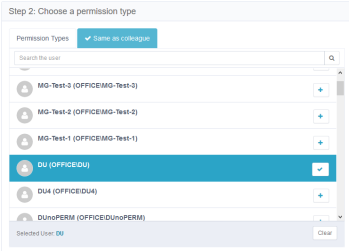
From Step 2: Choose a permission type, select a permission type or select the same permissions as those of a colleague (another user).
-
If you select Permission Types, select one of the available types.
-
If you click Same as colleague, either select one of the users (only if that user has relevant permissions) in the list or type the name of a user in the search box above the list of users.
Note: Click Clear at the bottom right of the Step 2 window to clear the selection and select another user.
Note: At the bottom right of each screen, click:
Cancel to cancel all your selections on this screen, or
Previous, to return to the previous screen or
Click one of the path milestones at the top of the screen, immediately under “New Access Request,” or
Add Another Permission to add an additional permission, or
Next to proceed to the next screen.
-
Follow Steps 8-13 in Administrative Groups.