Administrative Groups
-
Click +Request Access under Administrative Groups. The button changes from
 (gray letters on a white background) to
  (white letters on a green background) to indicate that this access requested is now selected.
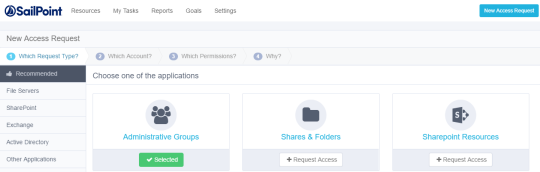
-
Click Next at the bottom right of the screen.
Note: At the bottom right of each screen, click:
Cancel to cancel all your selections on this screen, or
Previous, to return to the previous screen or
Click one of the path milestones at the top of the screen, immediately under “New Access Request,” or
Next to proceed to the next screen -
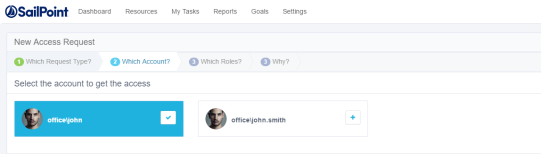
The Which Account? window displays.
Note: If the logged-in user is associated with more than one account the wizard displays those accounts in the Which Account? window. The logged-in user will be associated with more than one account if the administrator configured the Unique User Account Mapping in the Identity Collector configuration in the administrative client. If there is only one account, the wizard skips the Which Account? step, and displays the Which Groups? step.
-
Select the account to access by clicking the + sign to the right of the name of the account.
-
The plus sign next to the selected account changes to a check mark, and the account changes from gray letters on a white background to white letters on a blue background.
Note: Deselect accounts by unchecking the check mark next to the selected account.
The selected account name displays after the word “Selected” at the top of the window.
-
Click Next.
-
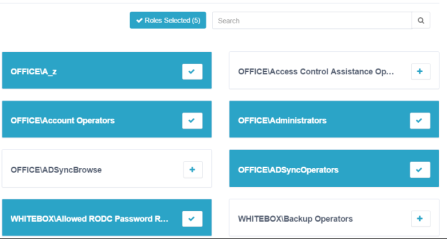
The Which Groups? window displays, with the top 50 results of available groups. These groups are all from the Authentication Store, which is the main domain, containing all users and groups.
Note: You can also search for a group by typing the name of the group in the Search box at the top of the list of available groups.
-
Select the groups by clicking the + sign next to the name of each group to be selected.
-
The plus sign next to the selected groups changes to a check mark, and the number of selected groups displays in the Groups Selected box, to the left of the Search box.
Deselect groups by unchecking the check mark next to the selected groups.
-
The selected group names display after the word “Selected” at the top of the window.
-
Click Next.
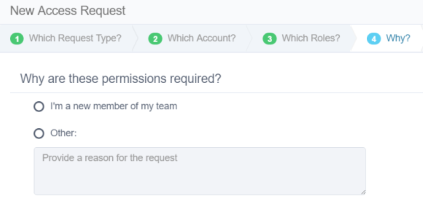
The Why? window displays.
-
Click I’m a new member of my team or Other.
If you click Other, provide a reason for the request in the box below Other. -
Click Finish at the bottom right of the window.
If the access request process succeeds, an Information dialog displays, noting that “Your request was successfully submitted.” -
Click OK.
The My Requests button shows the updated total number of requests.
-
Click View on the right side of each request to view the details of that request.
Note: The File Access Manager Administrator Guide provides additional information the section Permissions / Access Requests.