Connecting SailPoint with Jamf
Use the following configuration options to set up the connection with Jamf:
Adding the Receiver in SailPoint
Follow these steps to configure the receiver:
Screenshot
- Go to Admin > Connections > Shared Signals.
- Select Continue on the Receiver Streams card.
- Select Create New button to initiate the creation of a new SSF Receiver.
-
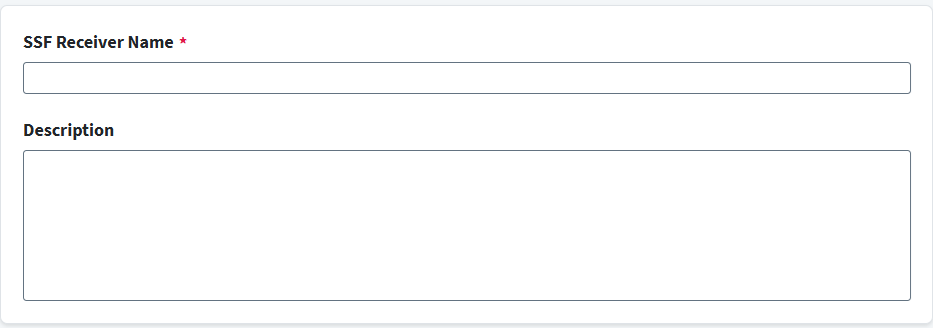
Provide the necessary information for the new receiver:
-
SSF Receiver Name: Enter a descriptive name for the new receiver.
Choose a name that clearly identifies the purpose or origin of the receiver. For example,
Jamf Pro SSF Receiver -
Description: Enter a brief description for the new receiver.
Provide any additional details that will help distinguish this receiver from similar ones and clarify its purpose.
-
-
Select Save to create the new SSF Receiver based on the provided information.
Connection Settings
To connect to Jamf and establish the SSF integration, provide the following information:
Screenshot
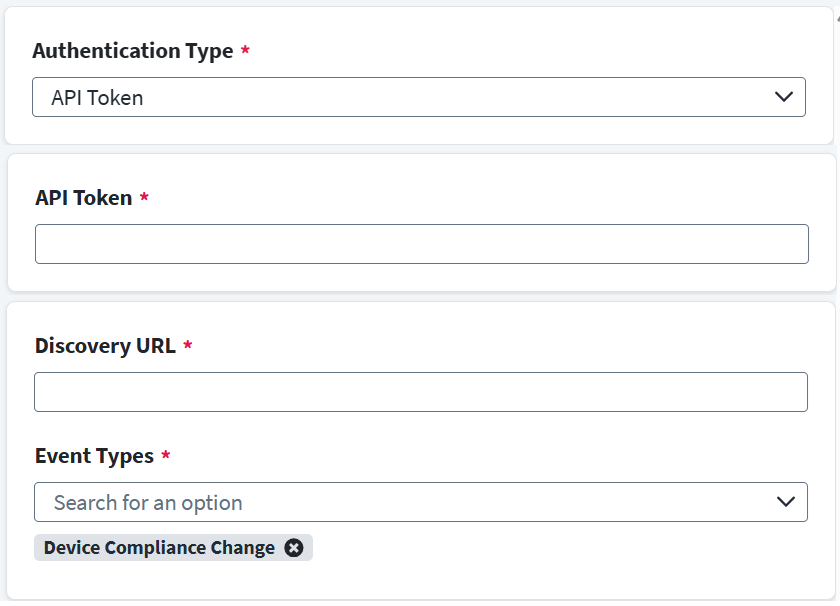
- Select the Authentication Type as API Token ONLY.
- Enter the API token provided by Jamf for authentication. For API Token and Discovery URL, refer to SSF Stream Registration in Jamf Security Cloud.
- Enter the Discovery URL of the Jamf transmitter to discover and connect to the SSF event stream. This URL should be provided by Jamf and is called a Well known URL in the Jamf SSF stream details page. For example,
https://ssf.caep.dev/.well-known/ssf-configuration. - Select the Event Types as
CAEP Device Complianceto receive the device compliance related event details from Jamf. -
The Stream Status field indicates the current status of the SSF event stream connection. It will display the connection status once the configuration is saved. This field is visible only after you have created a stream.
-
To ensure that the stream is properly created and active, use the Create Stream option to create the SSF event stream.
After creating the stream, the status should display as
Enabledif the stream is successfully established. -
To verify the stream status and connectivity, select the Verify Stream button. If the verification is successful, the stream is properly configured and ready to receive events from Jamf. For more information, refer to When should I use the Verify button for JAMF event streams?
-
Documentation Feedback
Feedback is provided as an informational resource only and does not form part of SailPoint’s official product documentation. SailPoint does not warrant or make any guarantees about the feedback (including without limitation as to its accuracy, relevance, or reliability). All feedback is subject to the terms set forth at https://developer.sailpoint.com/discuss/tos.