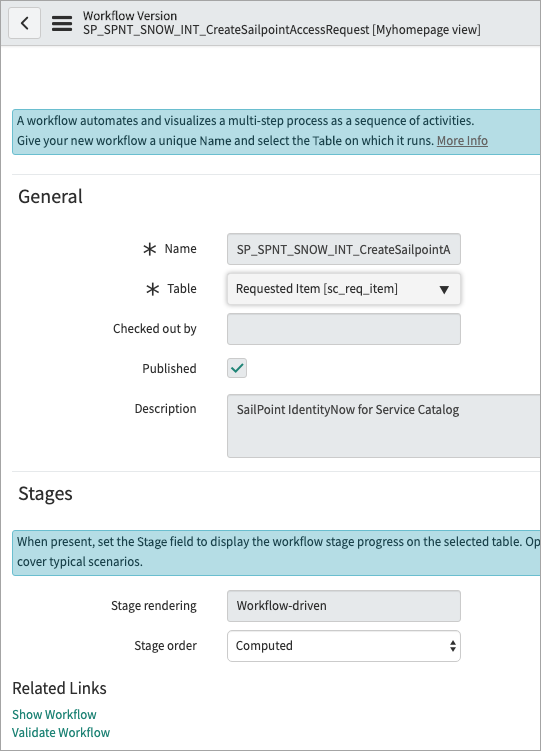
Using the ServiceNow Portal Integration for Identity Security Cloud
After your System Administrator has successfully integrated Identity Security Cloud with the ServiceNow Portal, you’ll be able to use it to generate access requests.
Note
Users who are managers can submit requests to revoke access for their directly managed employees. Managers cannot revoke access for themselves.
To request access profiles and roles for users:
-
Sign in to the ServiceNow Portal with your credentials.
-
Select Manage Access to access the application.
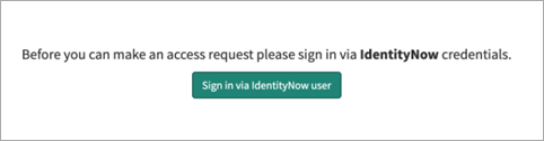
Depending on the type of authorization used for your integration, you may receive a dialog to sign into Identity Security Cloud before continuing.
Note
This is the default configuration. Your organization may use a different method to access the app from within your ServiceNow Service Portal.

-
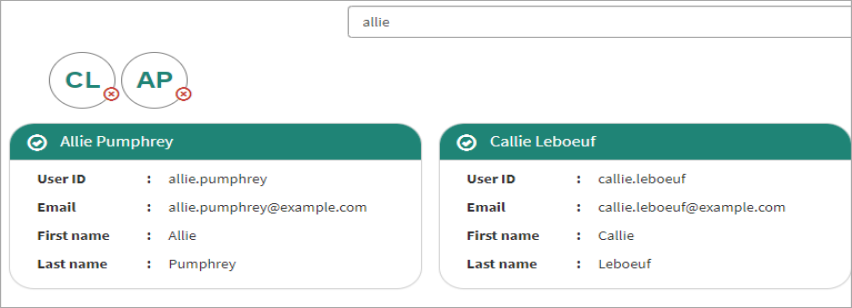
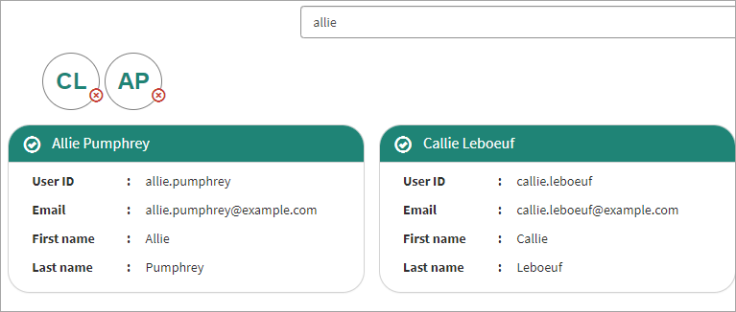
In stage 1 – User Details you can search for a specific user by entering their name in the search field. You can also use the controls below the set of cards to page through the users.
-
To select a user, click the top section of their "card" that contains a check mark and their name, and then select Next.
Note
You can select multiple users to request access for them all at once. The initials of each selected user are listed at the top of the page so you can see a summary of them in a glance. Hover over each circle to view their name and the name of their manager, if applicable.

-
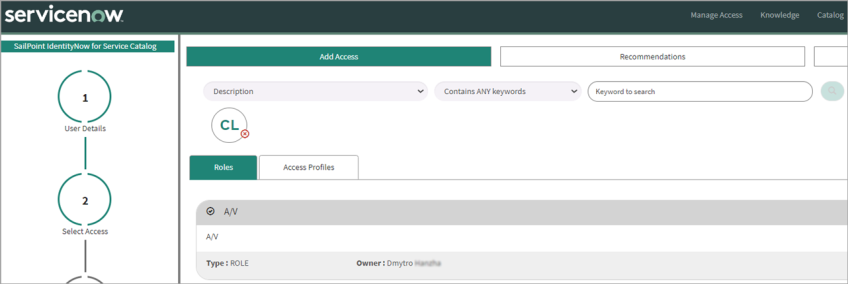
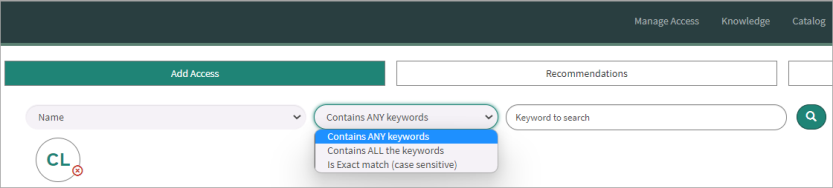
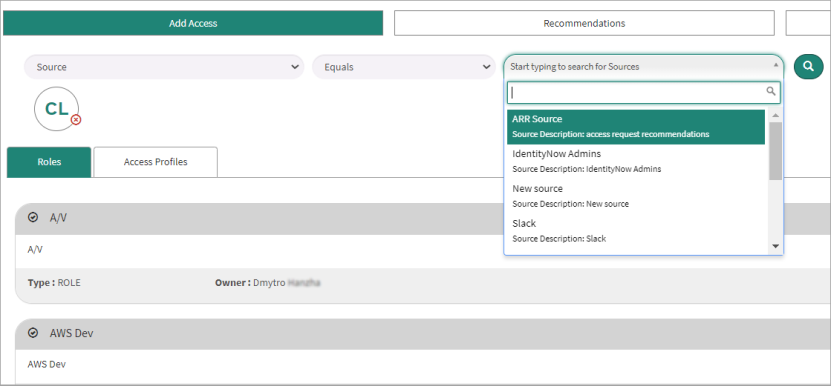
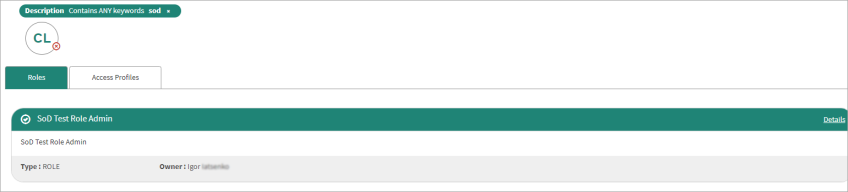
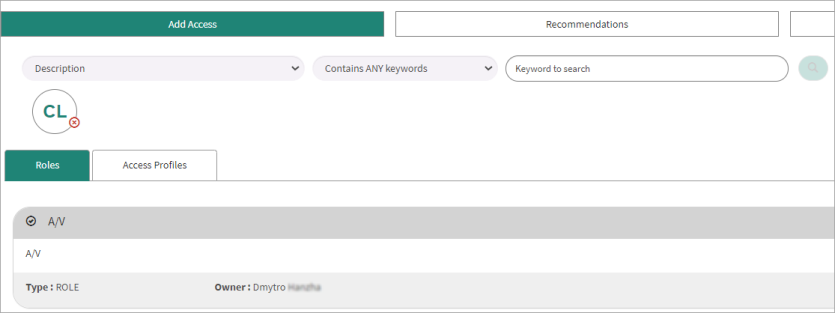
In stage 2 – Select Access you can use the Add Access tab to choose options to refine your search to a specific subset of roles and / or access profiles.
-
Description
-
Name
-
Owner
-
Source (searches for access profiles only, not roles)
For each filter option you select, the corresponding operator options are displayed beside it.
The Description and Name filters offer the following three options for the operator. Expand each one to learn more.
-
 Contains ANY keywords
-
Ability to search for ANY keywords
-
the default option
-
case insensitive
-
does not support searching for special characters
Example Table
Search Term
Expected Results
Excluded from Results
Ep
Epic Admin, Epic Admin123, Epic Admin Role
Admin, Admin123, Admin Role, Admin Role Owner
Epic
Epic Admin, Epic Admin123, Epic Admin Role
Admin, Admin123, Admin Role, Admin Role Owner
Epic Ad
Admin, Admin123, Admin Role, Admin Role Owner, Epic Admin, Epic Admin123, Epic Admin Role
Epic Admin
Admin, Admin123, Admin Role, Admin Role Owner, Epic Admin, Epic Admin123, Epic Admin Role
Epic Admin R
Admin, Admin123, Admin Role, Admin Role Owner, Epic Admin, Epic Admin123, Epic Admin Role
Ad
Admin, Admin123, Admin Role, Admin Role Owner, Epic Admin, Epic Admin123, Epic Admin Role
Admin
Admin, Admin123, Admin Role, Admin Role Owner, Epic Admin, Epic Admin123, Epic Admin Role
Admin R
Admin, Admin123, Admin Role, Admin Role Owner, Epic Admin, Epic Admin123, Epic Admin Role
Admin Role
Admin, Admin123, Admin Role, Admin Role Owner, Epic Admin, Epic Admin123, Epic Admin Role
Admin Role O
Admin, Admin123, Admin Role, Admin Role Owner, Epic Admin, Epic Admin123, Epic Admin Role
-
-
-
Contains ALL the keywords
-
Ability to search for ALL keywords
-
case insensitive
-
does not support searching for special characters
Example Table
Search Term
Expected Results
Excluded from Results
Ep
Epic Admin, Epic Admin123, Epic Admin Role
Admin, Admin123, Admin Role, Admin Role Owner
Epic
Epic Admin, Epic Admin123, Epic Admin Role
Admin, Admin123, Admin Role, Admin Role Owner
Epic Ad
Epic Admin, Epic Admin123, Epic Admin Role
Admin, Admin123, Admin Role, Admin Role Owner
Epic Admin
Epic Admin, Epic Admin123, Epic Admin Role
Admin, Admin123, Admin Role, Admin Role Owner
Epic Admin R
Epic Admin Role
Admin, Admin123, Admin Role, Admin Role Owner
Ad
Admin, Admin123, Admin Role, Admin Role Owner, Epic Admin, Epic Admin123, Epic Admin Role
Admin
Admin, Admin123, Admin Role, Admin Role Owner, Epic Admin, Epic Admin123, Epic Admin Role
Admin R
Admin, Admin123, Admin Role, Admin Role Owner, Epic Admin, Epic Admin123, Epic Admin Role
Epic Admin, Epic Admin123
Admin Role
Admin Role, Admin Role Owner, Epic Admin Role
Epic Admin, Epic Admin123, Epic Admin Role
Admin Role O
Admin Role Owner
Admin, Admin123, Admin Role, Epic Admin, Epic Admin123, Epic Admin Role
-
-
-
Is exact match (case sensitive)
-
Ability to search for EXACT match
-
case sensitive
-
supports searching for special characters
Example Table
Search Term
Expected Results
Excluded from Results
Ep
Admin, Admin123, Admin Role, Admin Role Owner, Epic Admin, Epic Admin123, Epic Admin Role
Epic
Admin, Admin123, Admin Role, Admin Role Owner, Epic Admin, Epic Admin123, Epic Admin Role
Epic Ad
Admin, Admin123, Admin Role, Admin Role Owner, Epic Admin, Epic Admin123, Epic Admin Role
Epic Admin
Epic Admin
Admin, Admin123, Admin Role, Admin Role Owner, Epic Admin123, Epic Admin Role
Epic Admin R
Admin, Admin123, Admin Role, Admin Role Owner, Epic Admin, Epic Admin123, Epic Admin Role
Ad
Admin, Admin123, Admin Role, Admin Role Owner, Epic Admin, Epic Admin123, Epic Admin Role
Admin
Admin
Admin123, Admin Role, Admin Role Owner, Epic Admin, Epic Admin123, Epic Admin Role
Admin R
Admin, Admin123, Admin Role, Admin Role Owner, Epic Admin, Epic Admin123, Epic Admin Role
Admin Role
Admin Role
Admin, Admin123, Admin Role Owner, Epic Admin, Epic Admin123, Epic Admin Role
Admin Role O
Admin, Admin123, Admin Role, Admin Role Owner, Epic Admin, Epic Admin123, Epic Admin Role
-
-
The Owner and Type filters offer one option for the operator; Equals. This operator is read-only and cannot be changed.
-
- For Description and Name, select one of the three provided operators, enter the keyword to search for, and then select the magnifying glass to add the filter.
-
For Owner and Source, select a specific value from the corresponding dropdown list and select the magnifying glass icon to add the filter.
-
Combine these filters as needed to refine the results returned.
Note
Unlike access profiles, roles are not associated with a specific source. If you use the Type filter and choose Role, you cannot combine that filter with the Source filter. If you attempt to combine these filters, a message is displayed to notify you that your Source filter will be effectively ignored. -
When you've finished building your search query, all the search results that match your criteria are displayed.
View information about the specific entitlements:
-
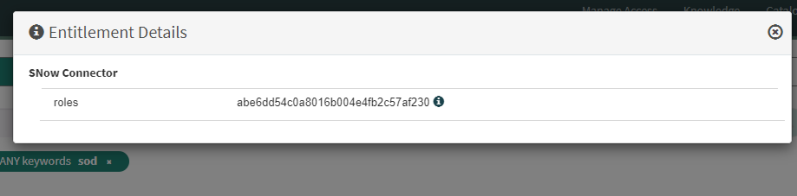
To view information about the specific entitlements that comprise an access profile, select the Details link in its card.
-
To select an access profile or role in the search results, click the top section of the card that contains a check mark and its name, and then select Next.

-
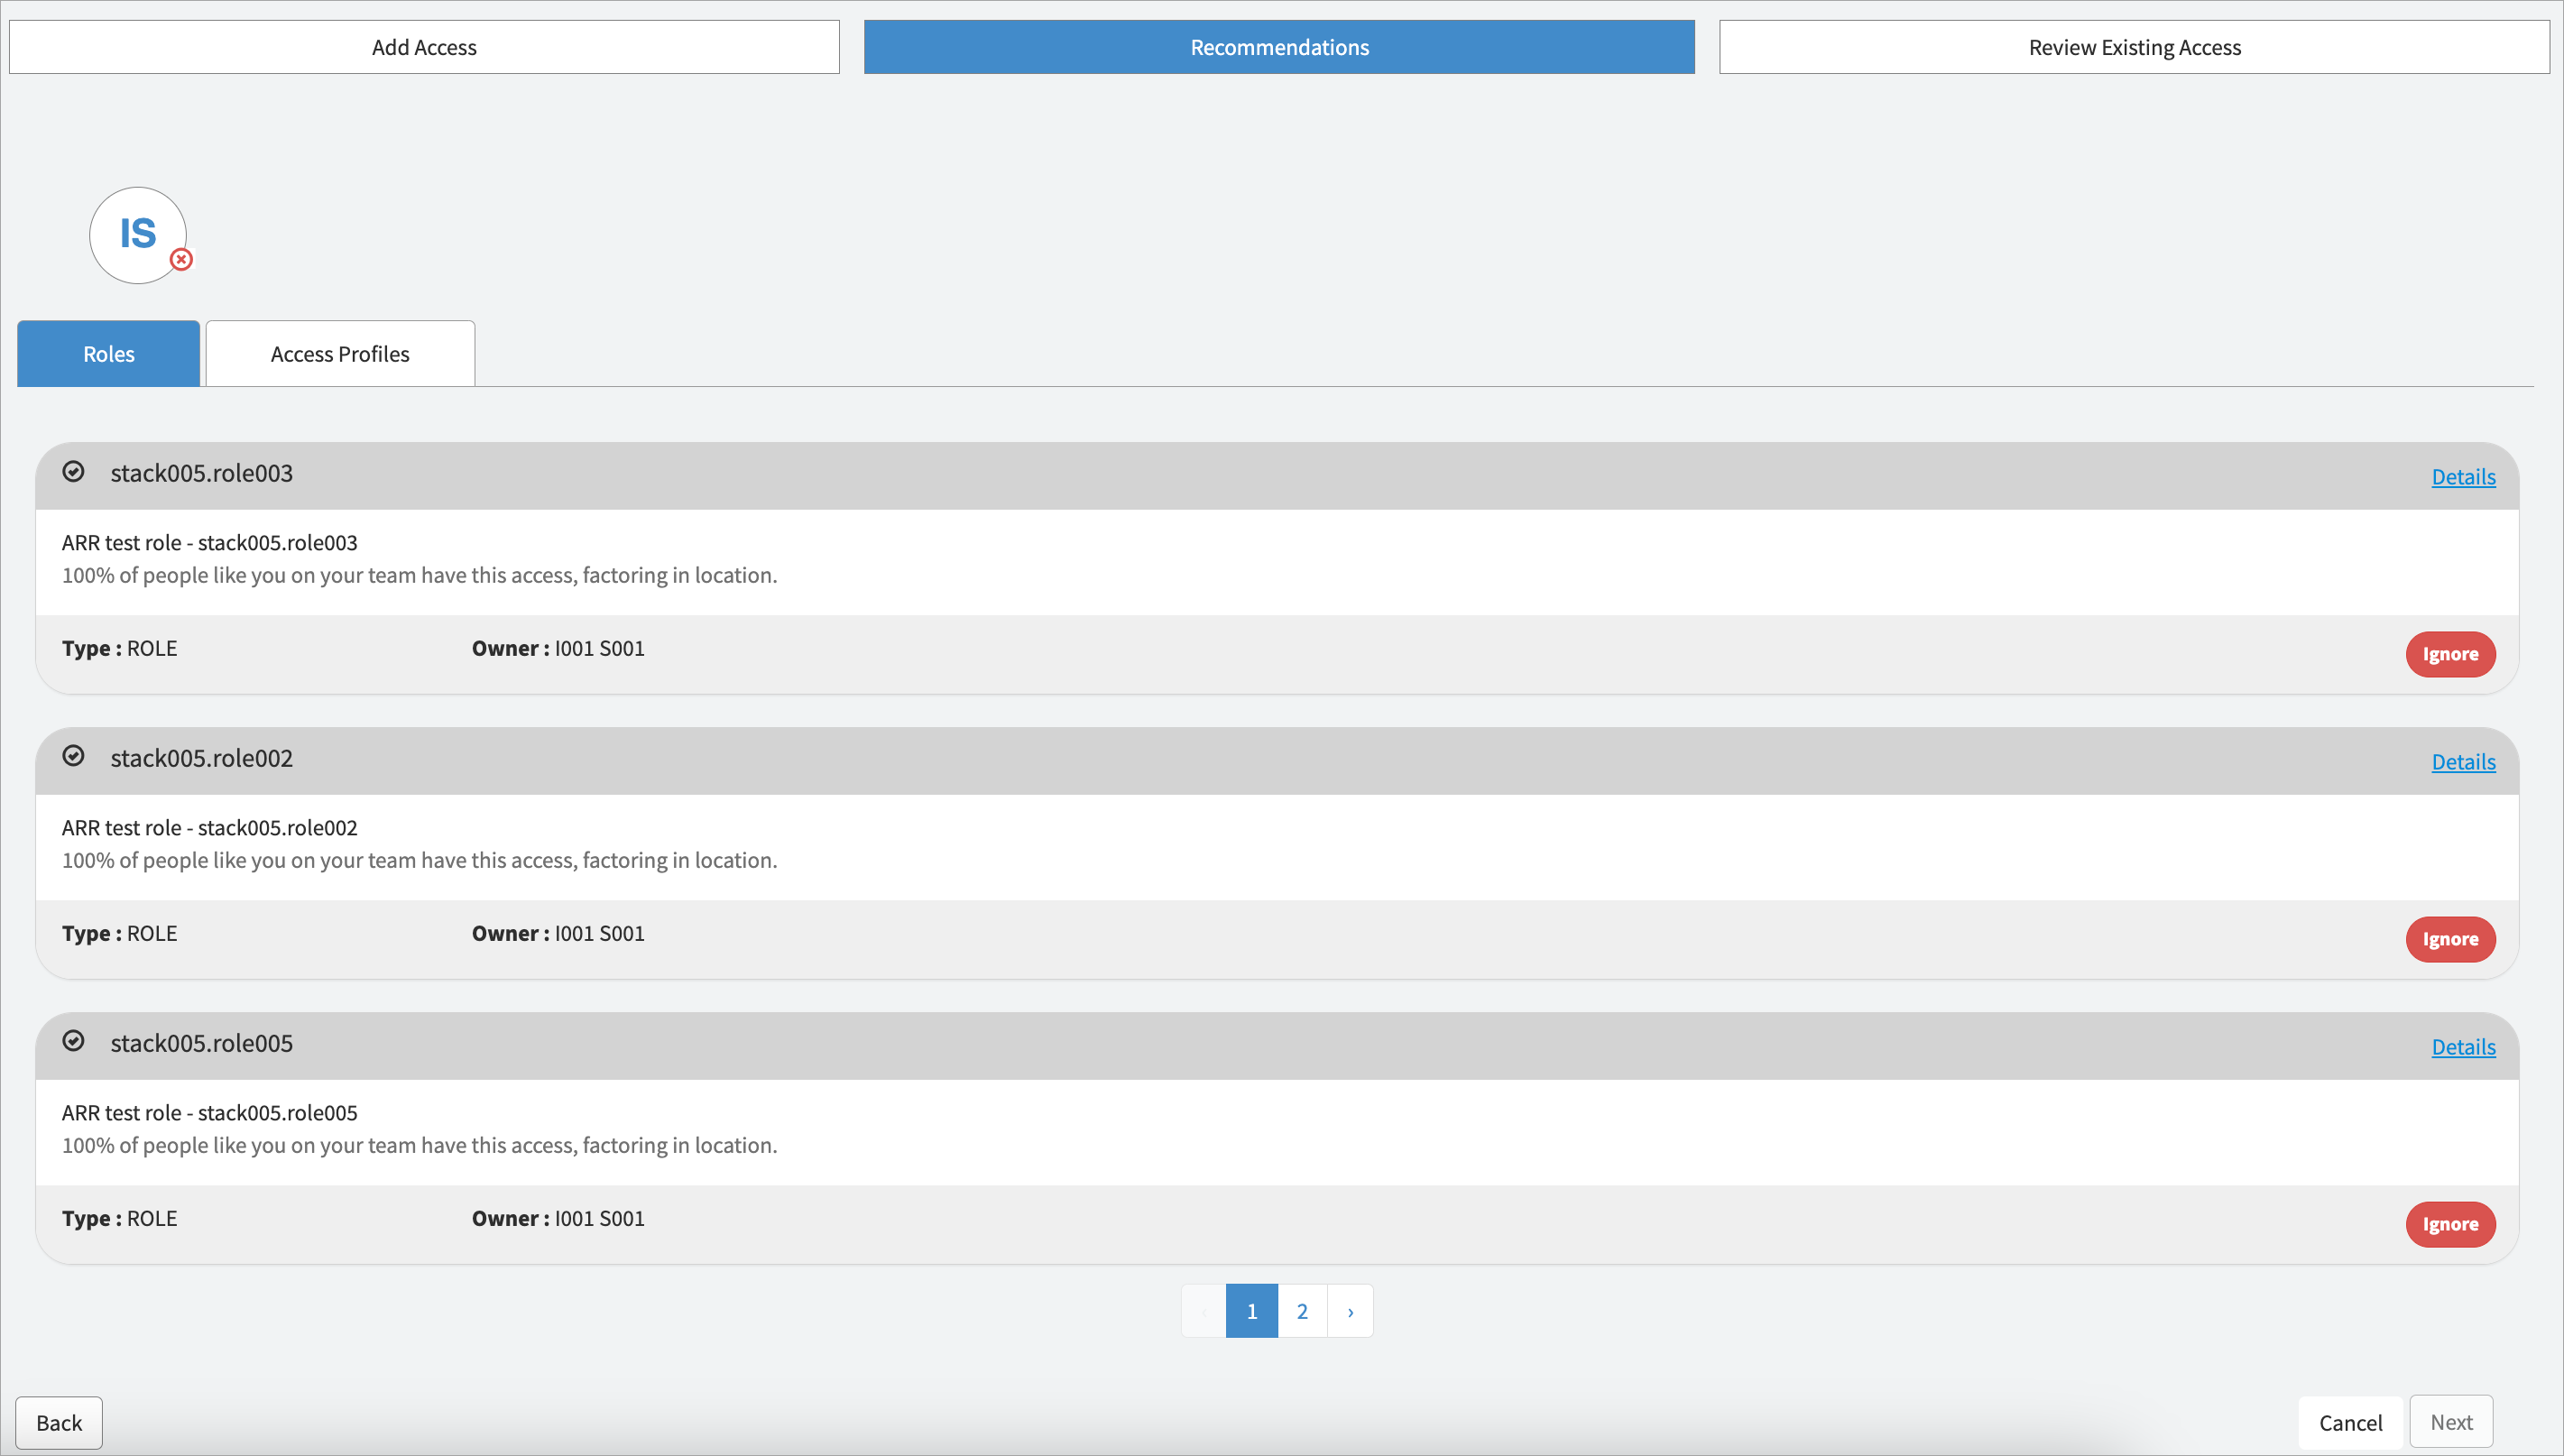
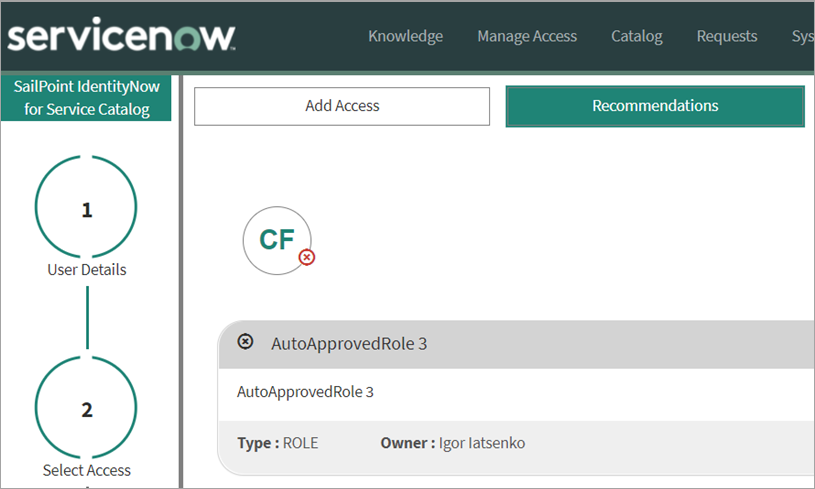
In stage 3 – Recommendations Review you can review recommended items in tabular form.
-
Tabbed and pagination helps the user to navigate between result sets. Tabs and their order will be the same as in the Add Access page configuration.
-
The recommendations view is only visible when a single user is selected. It is not applicable for multi-user selections.
-
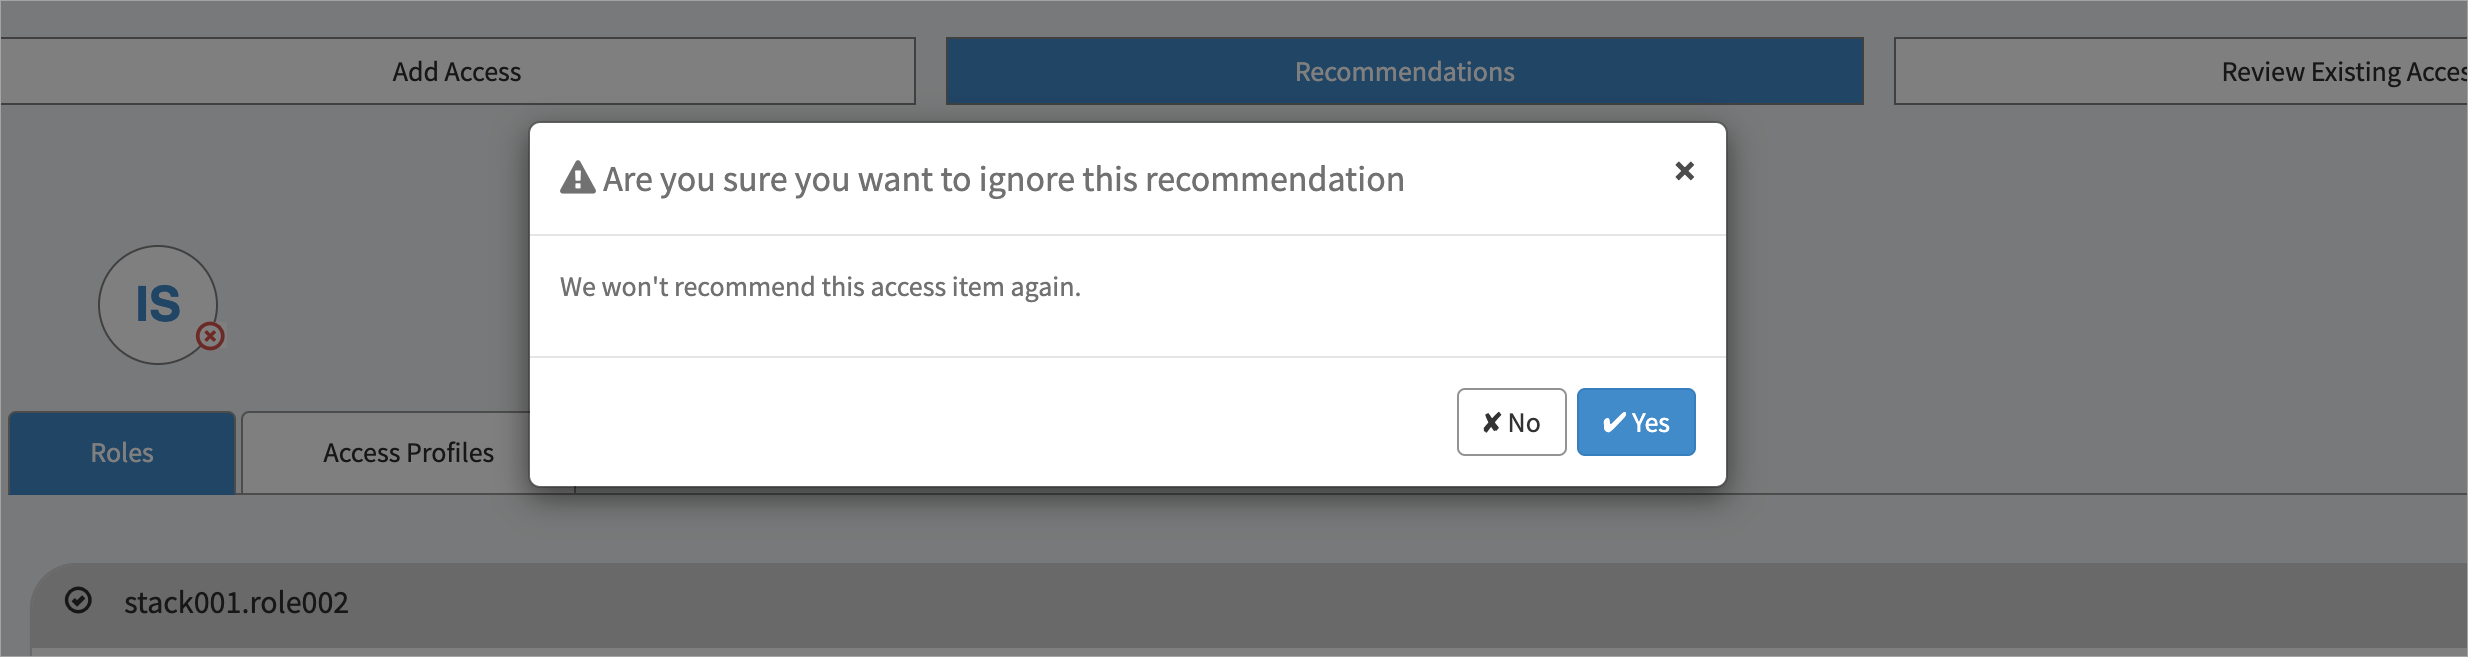
It's possible for users to ignore recommended items. Refer to the Access Recommendations feature documentation of Identity Security Cloud (ISC) for details.
ServiceNow administrators have the ability to determine whether to display or conceal the recommendation tab by following the steps outlined below.
-
-
Go to SailPoint Identity Security Cloud for Service Catalog > Setup.
-
For Show Recommendations, applicable only if required license available? leave the default value of
Yesto show the recommendation tab. Change the value toNoto hide the tab.
-
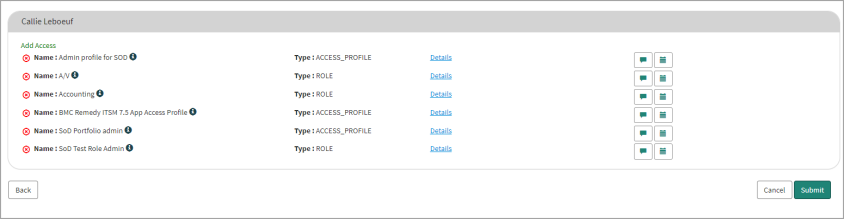
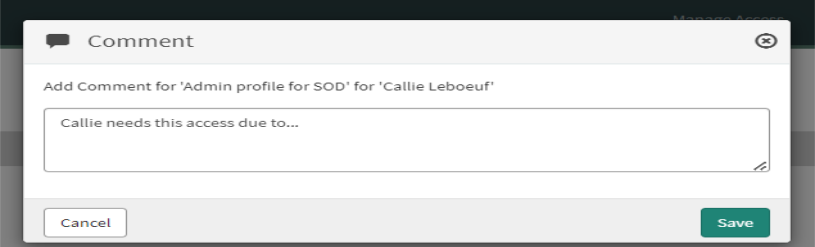
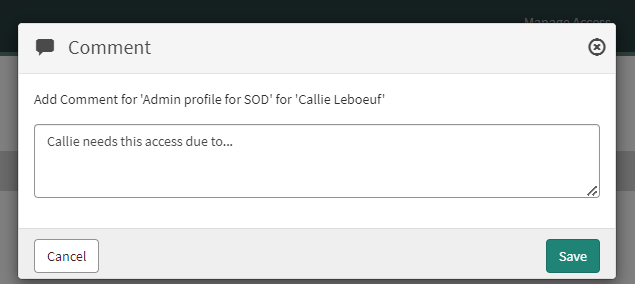
In stage 4 – Review & Submit you can review the access you are requesting and add comments to help any reviewers make more informed decisions about the request.
-
When you’ve finished reviewing the access being requested and are confident that reviewers will have all of the information they’ll need to make an informed decision on whether or not to grant the access, select Submit.
-
Sign in to the ServiceNow Portal with your credentials.
-
Select Manage Access.
-
To review the access for a user who also exists in Identity Security Cloud, search for the user and click the top section of the card that contains a check mark and their name, and then select Next.
Note
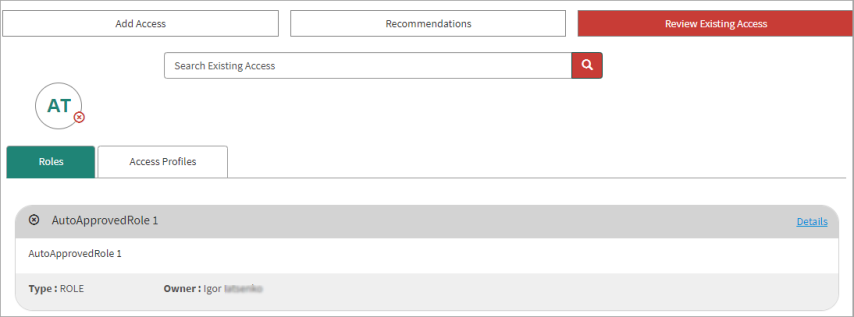
You can select multiple users and create a request to add the same access to them all at once. You cannot remove access this way, as each user has a unique combination of access.At the top of the page, you’ll see options to Add Access, Recommendations, and Review Existing Access. Use these to request the level of access that’s appropriate for the user.
-
Use the Add Access tab to search for roles, access profiles, and entitlements that are currently eligible to be added to the user’s access by selecting the appropriate tab component. For each filter option you select, the corresponding operation is displayed beside it.
To filter the search results by owner or source, select a filter from the Select Filters list, and then enter the owner or source in the Keyword Search. The Add Access pagination supports up to 10,000 search results.
-
Use the Recommendations tab to view recommended access profiles or roles.
Note
- The Recommendations tab only displays if you enable the IdentityAI feature in Identity Security Cloud for the selected organization.
- Generation of available recommendations per user requires additional configuration of Identity Security Cloud organization. For more information about configuration, please contact the support team.
-
Use the Review Existing Access tab to see the access associated with the user's profile. You can select and remove any existing roles or access profiles that are revocable.
Note
A tab to view Entitlements may (or may not) exist. This is based on the setup in Admin settings.Whether you are adding or removing access, you can view information about the specific entitlements that comprise an access profile by selecting the Details link in the access profile’s card.
-
When you are finished selecting access to be added or removed, select Next.
-
In stage 3 – Review & Submit you can review the access you are adding or removing and add comments to help any reviewers make more informed decisions about the request.
- When you're finished reviewing your request to add and / or remove access to determine the appropriate access for one or more users, select Submit.

-
A single request containing all related items is generated and assigned a unique number for tracking purposes.
-
Depending on how Access Requests are configured for your site, the request will either be fulfilled automatically, or it will generate a request for manual approval.
-
Administrators can view the current status of requests that have been generated by going to Account Requests in the main ServiceNow Service Catalog menu.

Note
Suitably entitled users can also view their own requests in the ServiceNow Portal.
To view details for a specific request in the list, select its name.