Creating a Data Classification Policy
Creating a data classification policy involves defining several policy details to make the policy unique. Any new policy can be used as a template and the basis for additional policies.
To create a new policy:
-
In the web client, navigate to Compliance > Data Classification > Policies > New Policy.
A New Policy window displays.
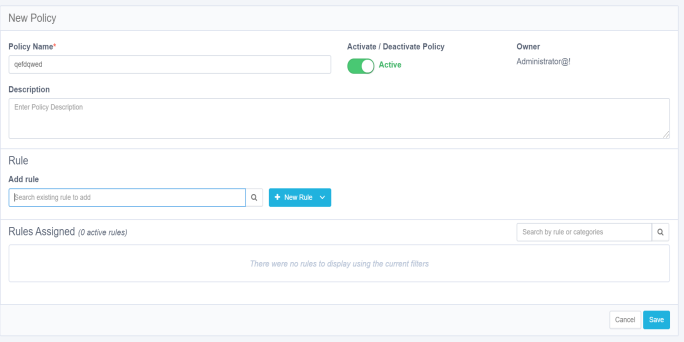
The available Classification Policy fields / buttons that display in this window include:
Policy Name
Policy names are unique. It is best to create a naming convention that avoids using the same name twice.
Activate/Deactivate Policy
Users can activate or deactivate a policy using this button
Owner
The login user is the creator of the policy. (This field is read-only.)
Description
Free text
-
Users can add existing rules or create a new rule for a policy.
-
Add an existing rule, using the Add Rule search field.
-
Click +New Rule to add a new rule.
The rule you added displays in the Rules Assigned list
Users can perform the following actions on rules:
-
Activate/deactivate
-
Edit (only user-defined rules)
-
Remove
-
-
Click Save to save the new policy.
-
The system adds the policy to the Policies list.
To search for an existing policy:
-
Navigate to: Compliance > Data Classification > Policies
The Policy window displays.
-
Search for existing policies by typing a name or part of a name in the following search fields:
-
Policy Name
-
OwnerSearch by status by selecting an option from the Status dropdown menu.
-
-
Fine tune the search even further by selecting an option from the Scope Type dropdown menu or by typing a name or part of a name in the Application Type search field.
-
You can perform the following actions on a selected policy:
-
Activate/deactivate
-
Edit (only user-defined policies)
-
Duplicate
-
Delete (only user-defined policies)
-