Campaign Templates
Compliance managers and administrators can manage campaign templates by selecting one of the following actions:
-
Create a new template
-
Edit an existing template
-
Duplicate an existing template
-
Delete an existing template
-
Create a campaign, based on an existing template
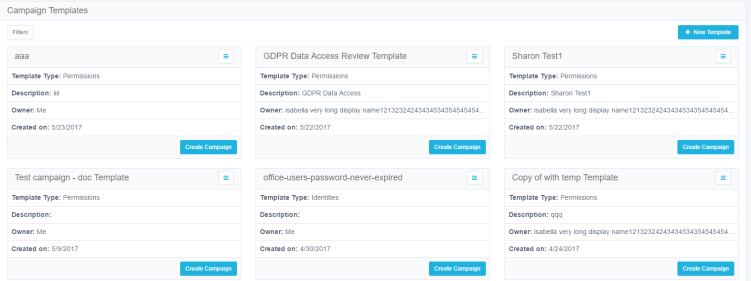
The templates display from left to right, row by row, sorted chronologically by date of template creation.
You can filter the display of current templates to find the templates more quickly.
To filter the available campaign templates, perform the following steps:
-
Click Filters.
-
Under Filters, type or select the relevant data in the following fields to narrow your search of campaign templates:
Template Name
Type the first letter or letters of the template name, and then click Search next to that field.
Owner
Type the first letter or letters of the owner (user), and then click Search next to that field.
Type
Select All, Permissions, or Identities from the dropdown menu.
Create a New Template
To create a new Access Certification template, perform the following steps:
-
In the web client, navigate to Compliance > Access Certification > Campaign Templates.
-
Click +New Template.
-
The Create Template screen displays, and includes the same steps (in order) as described in Create Campaign:
General Details
This step has the same fields as the Create Campaign step, except that the name field is for a template (not a campaign), and the description field is for a template (not a campaign).
Filter Selection
This step has the same fields as the Create Campaign step.
Review Process
This step has the same fields as the Create Campaign step.
Summary
This step has the same fields as the Create Campaign step.
Save
The Save fields displayed in the Create Template process differ from the Save fields displayed in the Create Campaign process.
-
Follow the process steps described in Create Campaign, from General Details to Save.
-
When you reach the Save step, the Save tab is highlighted and the tab fields display.
-
You may save the template with or without a schedule.
-
Save the new template without a schedule by leaving the Enable Schedule checkbox unchecked, or
-
Save the new template with a schedule by checking the Enable Schedule checkbox, and then type or select the relevant data in the following fields:
Frequency Type
Select Monthly or Yearly from the dropdown menu.
Starts On
Click on the calendar icon to the right of this field and select a start date from the calendar that displays.
Ends On
Select either the Never or the On radio button.
If you want the selection to be available indefinitely, select Never, and the end date selection will not be enabled.
If you want the selection to be available for a set period, select On, then click on the calendar icon to the right of this field, and select an end date from the calendar that displays.
Note: The new campaign will be created from the Starts on date to the Ends on date, based on the selected frequency and interval in months or years.
Interval Of
Type the number of months or years (depending upon your Frequency Type selection above) to indicate how often you want to schedule the template.
Summary
This field is a display that summarizes the selections you made in the previous fields (for example, “every 2 months on [start date] until [end date]).
Time
Use the up and down arrows to select a schedule time, based on the 24-hour clock (for example, 1:05 p.m. displays as 13:05).
-
Run the campaign manually, and not per the schedule you just set, by leaving the Campaign will run automatically on the set schedule checkbox unchecked,
or
-
Run the campaign automatically on the set schedule by checking the Campaign will run automatically on the set schedule checkbox.
Note: All campaigns created from this template that are set to run automatically will continue to run until they are reset manually.
-
-
Click Save.
-
An Information pop-up window displays to indicate that the template has been saved successfully, and a task is created to create the template. A Template Management link displays to redirect you to a screen from where you can view the template. Alternatively, you can view the campaign by navigating to Compliance > Access Certification > Campaign Management.
To make changes to an existing template, edit the template.
To make a new template, based on an existing template with some changes, duplicate the template.
Editing an existing Access Certification template
-
In the web client, navigate to Compliance > Access Certification > Campaign Templates.
-
Select a template from the displayed templates.
-
Click Menu on the top right of the selected template.
-
The Edit, Duplicate, and Delete options display.
-
Click Edit.
-
The Edit Template screen displays, and includes the same steps (in order) as the Create Template screen:
-
General Details
-
Filter Selection
-
Review Process
-
Summary
- Save
-
-
Review each step and make any relevant changes.
-
Click Next to proceed to the next step, or click Previous to return to the previous step.
-
When you click Save, an information pop-up window displays to indicate that the template has been saved successfully.
-
Click Close.
To duplicate an existing Access Certification template:
-
Navigate to Compliance > Access Certification > Campaign Templates.
-
Select a template from the displayed templates.
-
Click Menu on the top right of the selected template.
-
The Edit, Duplicate, and Delete options display.
-
Click Duplicate.
-
The Duplicate Template screen displays, and includes the same steps (in order) as the Edit Template screen.
-
Review each step and make any relevant changes.
-
Click Next to proceed to the next step, or click Previous to return to the previous step.
-
When you click Save, an information pop-up window displays to indicate that the template has been saved successfully.
-
Click Close.
-
The duplicated template will be the newest template in the Campaign Templates display, and will have the same name as the original template, with “Copy of” before the name.
If you no longer need a template, you can delete it. Once deleted, it cannot be recovered.
To delete an existing Access Certification template
-
Navigate to Compliance > Access Certification > Campaign Templates.
-
Select a template from the displayed templates.
-
Click Menu on the top right of the selected template.
-
The Edit, Duplicate, and Delete options display.
-
Click Delete.
-
A question pop-up window displays, asking if you are sure you want to delete the template.
-
Click Yes to delete the template, or click No to retain the template.
-
If you created campaigns using a template, you cannot delete that template without first deleting the campaigns from which it was created. If you attempt to delete the template, a notification will display those campaigns, requesting that you delete them before you delete the template.
To create an Access Certification campaign, based upon an existing Access Certification template:
-
In the web client, navigate to Compliance > Access Certification > Campaign Templates.
-
Select a template from the displayed templates.
-
Click Create Campaign on the bottom left of the selected template.
-
The Create Campaign screen displays, with the General Details step displayed automatically.
- In General Details, type or select the relevant data in the following fields:
Name
Enter the name of the campaign. This is a mandatory field.
Description
Enter a description of the campaign.
Instruction to Reviewers
This instruction text displays to the reviewer in the approval screen. It can also be used in the campaign email templates.
Duration
Select Days, Weeks, or Months from the dropdown menu, and type in the relevant number of days, weeks, or months. This is a mandatory field.
The system sets the due date of a campaign, based upon the campaign duration. The due date is the date on which it is recommended that a campaign should end, but the campaign does not end automatically on that date.
-
Click Next.
-
The Save step displays.
-
Under Scheduling Campaign, click one of the following options:
Save & run manually
This option saves the campaign for you to run manually in the future.
Save & run automatically
This option saves the campaign, and runs it automatically when the template was set to run (in the Create Template or Edit Template steps).
-
Click Save.
-
An Information pop-up window displays to indicate that the campaign has been saved successfully, and a task is created to create the campaign. A Campaign Management link displays to redirect you to a screen to view the campaign.
You can see the campaigns and campaign statuses on the Campaign Management screen.