Adding a Permission to a User (Administrative Client)
Permissions are listed as the path within the File Access Manager Administrative Client. To add a permission to a user, you must first identify the permission in the list of available permissions.
The following example demonstrates granting a user permission to configure responses for activities.
-
Identify the permission path within the File Access Manager Administrative Client. The path for accessing this screen is:
 > Applications > Configuration > Activity Monitoring > Responses> Manage Responses.
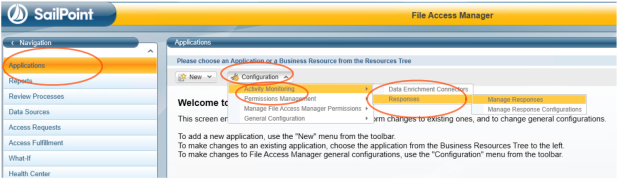
-
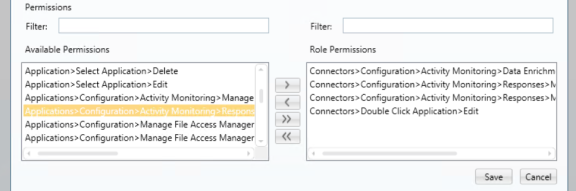
Identify this permission in the list of permissions by drilling into the detail of any role in Applications > Configuration > Manage File Access Manager Permissions > Roles and checking the Role Permissions list. This is the list of permissions that are assigned to the selected role. Note that the permission window can scroll to show longer permission paths.
In this case, the closest permission is Applications > Configuration > Activity Monitoring > Responses.
-
Once identified, you can add this permission to a user in one of three ways:
-
Find a role that already has this permission, and assign the user to this role.
-
Add this permission to an existing role, and verify that the user has this role. Note that this permission will be added to all users with this role.
-
Create a new role that includes this permission and add it to the user.
-