Create the Report
Important
You will need Analytics access for creating and updating the Fieldsglass reports.
Note
The report creation steps are the same for all Fieldglass modules. In our case we need Buyer and Worker modules for report creation.
-
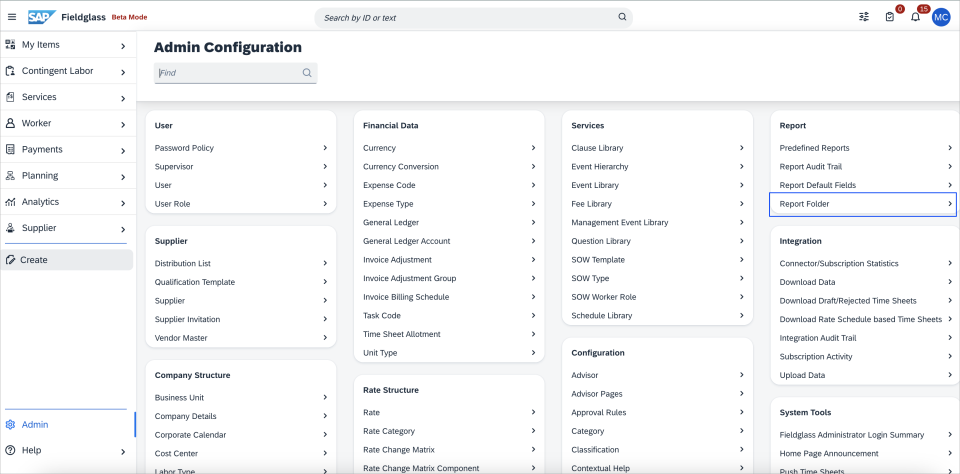
Create a report folder named “SailPoint“ to maintain reports needed for the Fieldglass source. In SAP Fieldglass, go to Admin Configuration > Reports > Report Folder and create the SailPoint folder. Folders created under the SailPoint folder are used to associate reports to user roles.
-
From the home page, select the Analytics button, and then select Create Report.
-
Select the desired reporting category. For example: User, Worker, etc. A report template based on your selection will appear. You will need to create three reports:
-
User Report
-
Worker Report
-
Single Worker Report
-
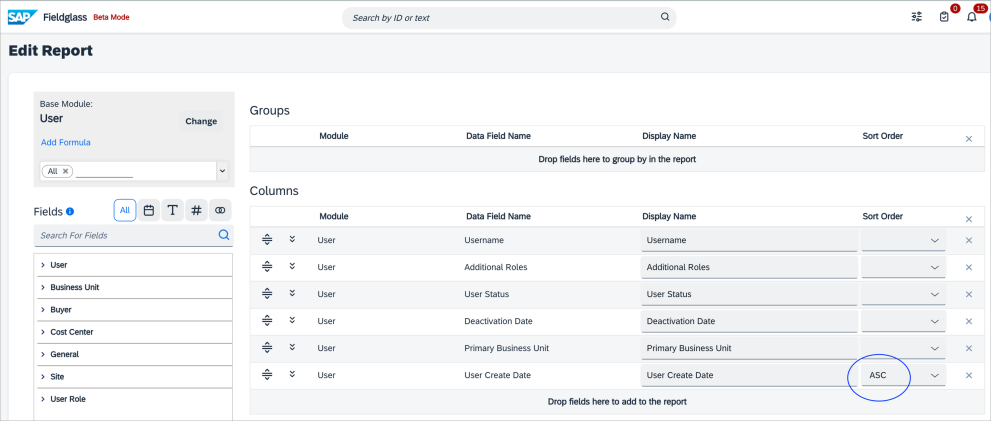
User Report Settings
-
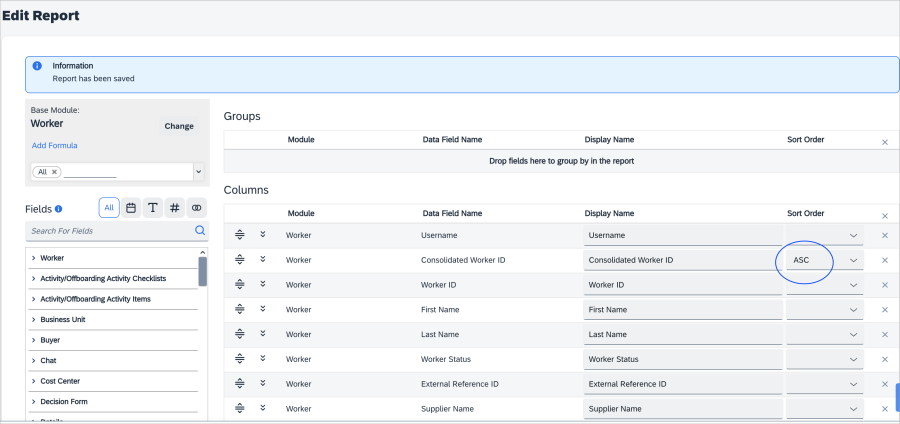
For User Report Settings, select Edit Report > ASC
-
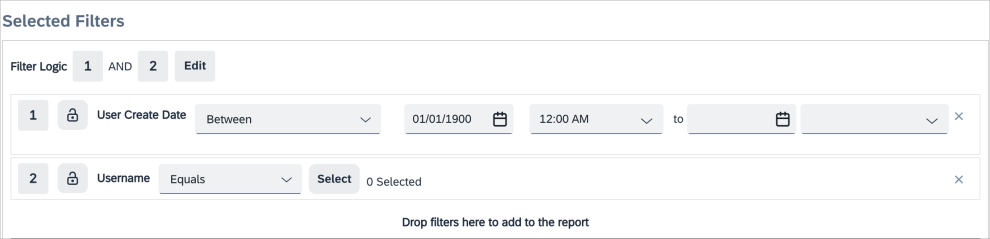
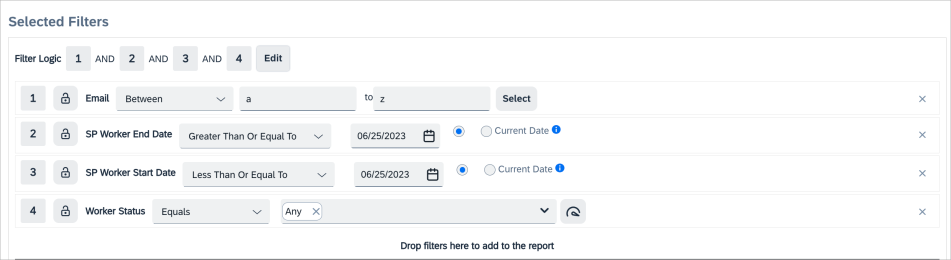
Set the report filters as shown in the following screenshot.
-
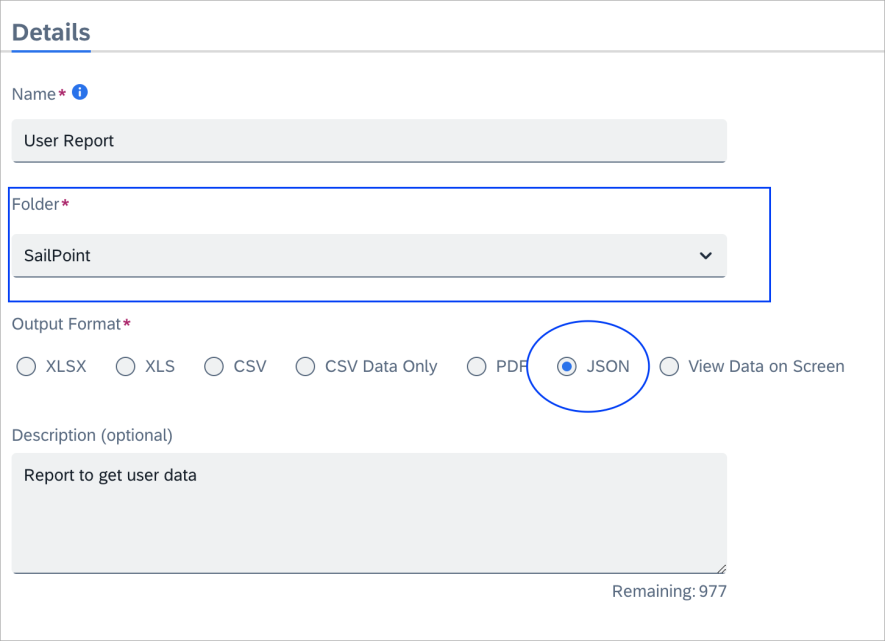
Select Details, and then select the JSON radio button.
-
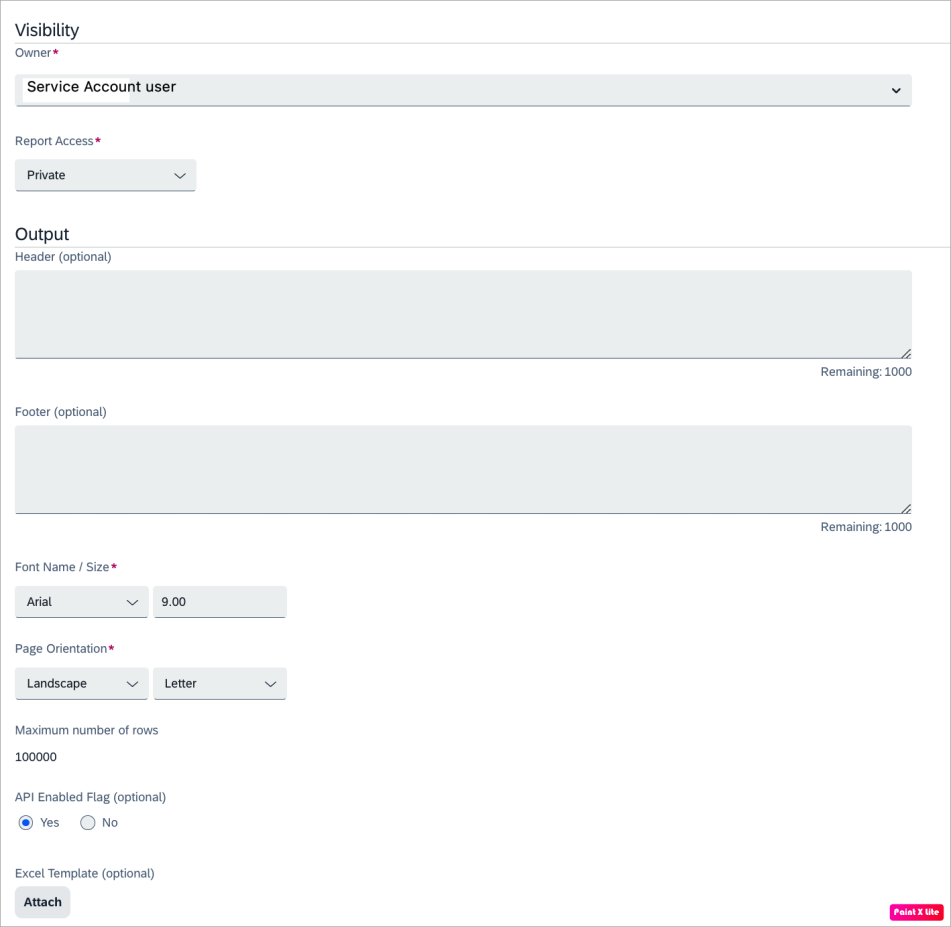
Select the Visibility settings.

Single Worker Report Settings
Note
The following fields, filters, and details are required for each report creation of the Worker Report and Single Worker Report. This information is needed for worker data aggregation.
-
For Worker Report Settings, select Edit Report > ASC.
-
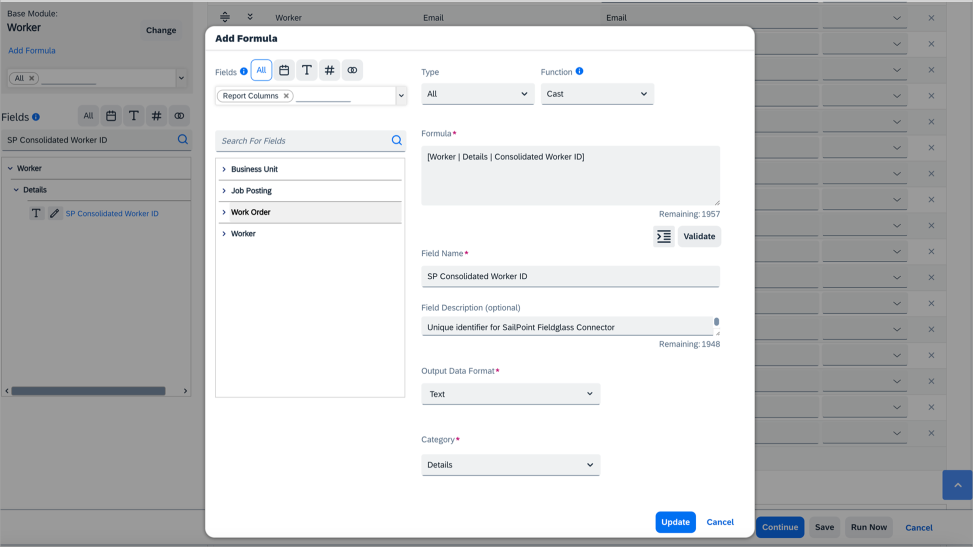
The SP Consolidated Worker ID is a custom field. It must be created using the Add Formula link on the report creation page with the following details.
Worker Report Settings


-
For Worker Report Settings, select Edit Report > ASC.
-
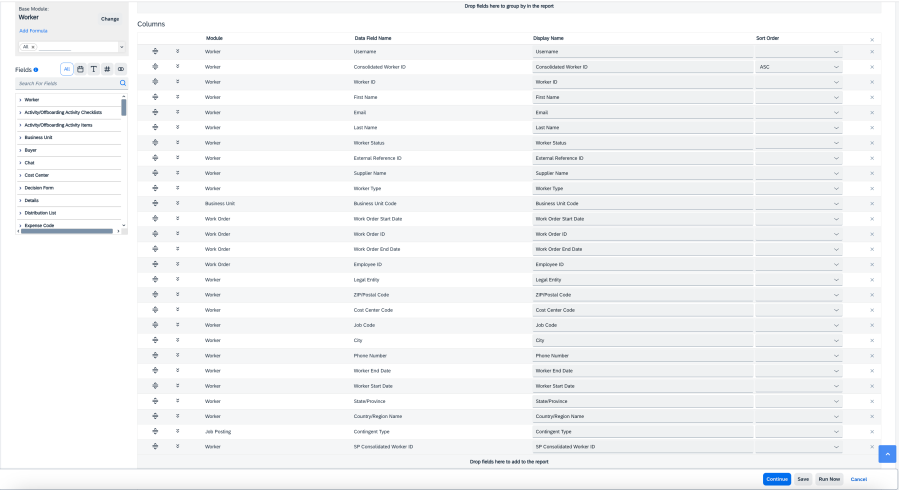
Create two more fields.
-
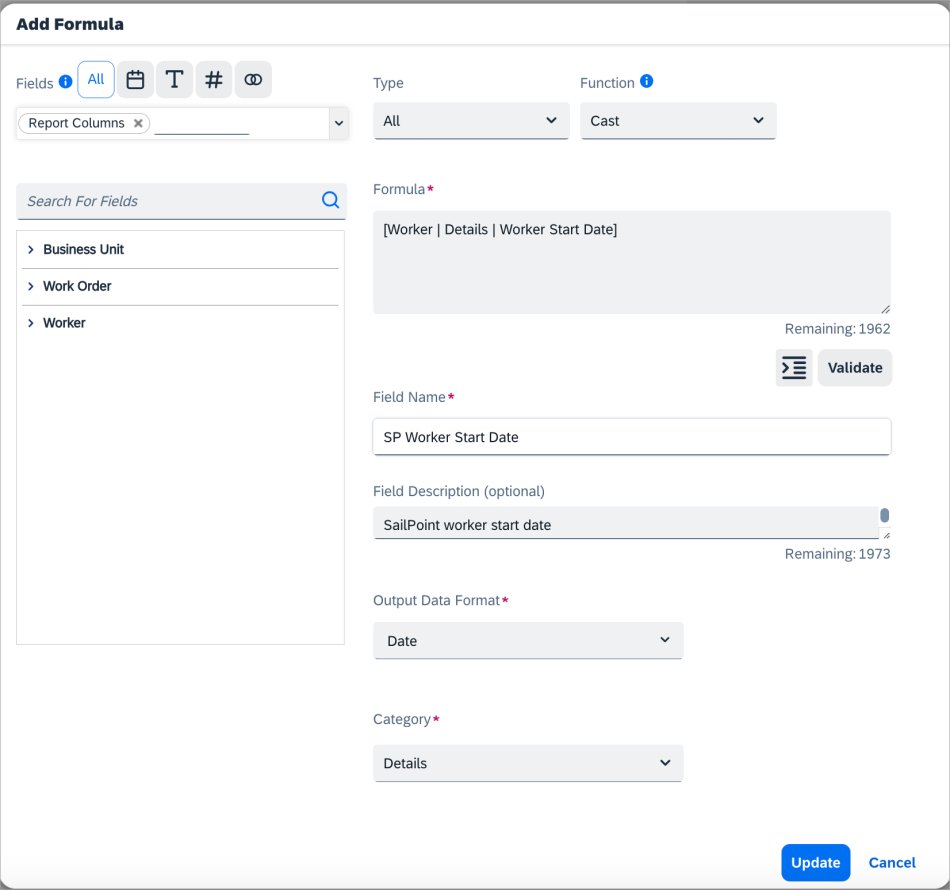
SP Worker Start date.
Formula:
Copy[Worker | Details | Worker Start Date]-
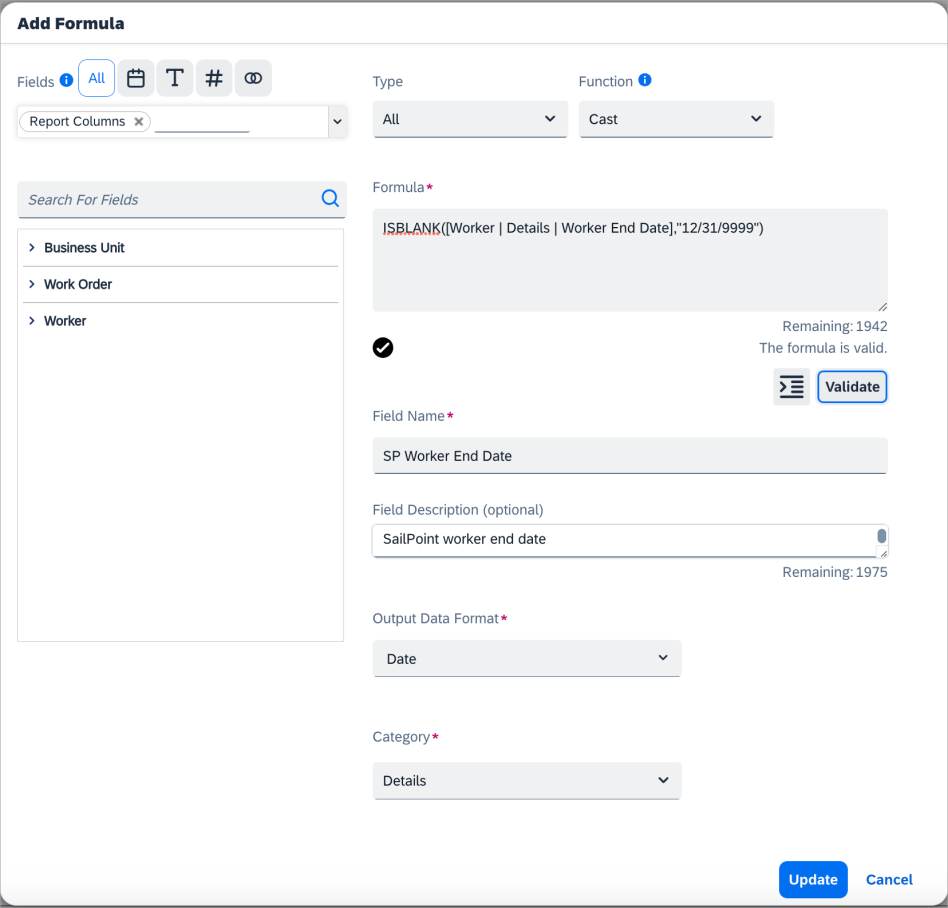
SP Worker End Date
Formula:
CopyISBLANK([Worker | Details | Worker End Date],"12/31/9999")
-
-
Select Validate to validate the formula.
-
The following filters are mandatory to fetch the workers' report. However, users can change the values of the filters according to their requirements. The date format in User Preferences must be set to MM/DD/YYYY.
-
Select Details, and then select the JSON radio button.
-
Select the Visibility settings.
-
Templates can be modified based on the requestors needs. From the Fields side bar, any field can be added to the current template via the drag and drop method. The columns can be reordered and renamed, and the values can be sorted in ascending or descending order. Filters can be applied regarding time or a specific status on the report.
Note
- Remember that the template filters differ based on the reporting category selected earlier.
- SP Worker End Date and SP Worker Start Date will be overridden with the current date when aggregation executes. Additionally, if the Future or Terminated offset is configured. then it is used along with the current date to fetch the worker records.
-
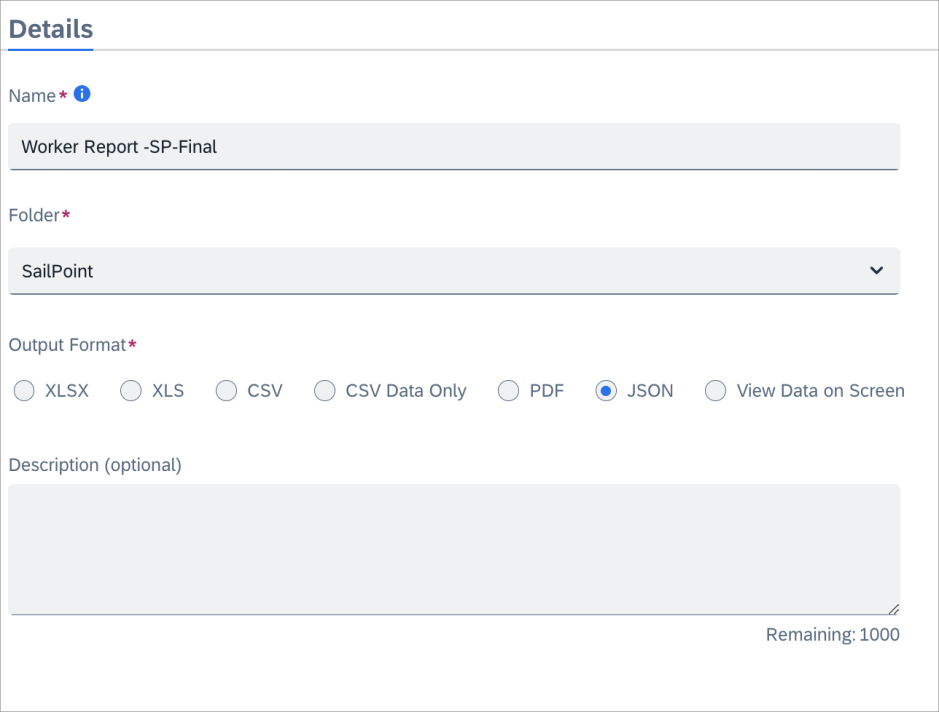
Once the report has been configured, give it a name and choose the desired output format.
-
Select the Show More Configuration link, and set the API Enabled option to Yes.
-
Save the report.
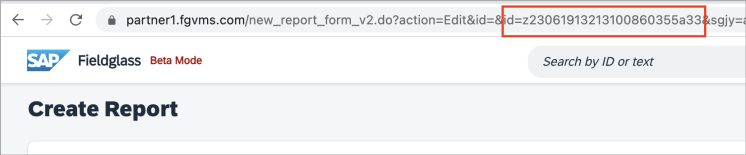
How to obtain the ID of the Report
You will need the ID of the created report to provide in Aggregation Settings for the user and worker configurations.
-
Select your report name from the list.
-
Select the Edit option
-
The link url will contain the ID of the report