Configure the OAuth Client and APIs
OAuth Client
-
Sign in to the SAP Ariba Developer Portal.
-
Create an app for each relevant API. Allow 12 hours for Ariba to auto-approve API access.
-
SCIM API for User and Group Master Data for Parent and Child realms in a single application
-
-
Generate the secret key for the API.
SCIM API for User and Group Master Data
-
Sign in to the SAP Ariba Developer Portal, select Data Center, and then select SAP ID Service SSO.
-
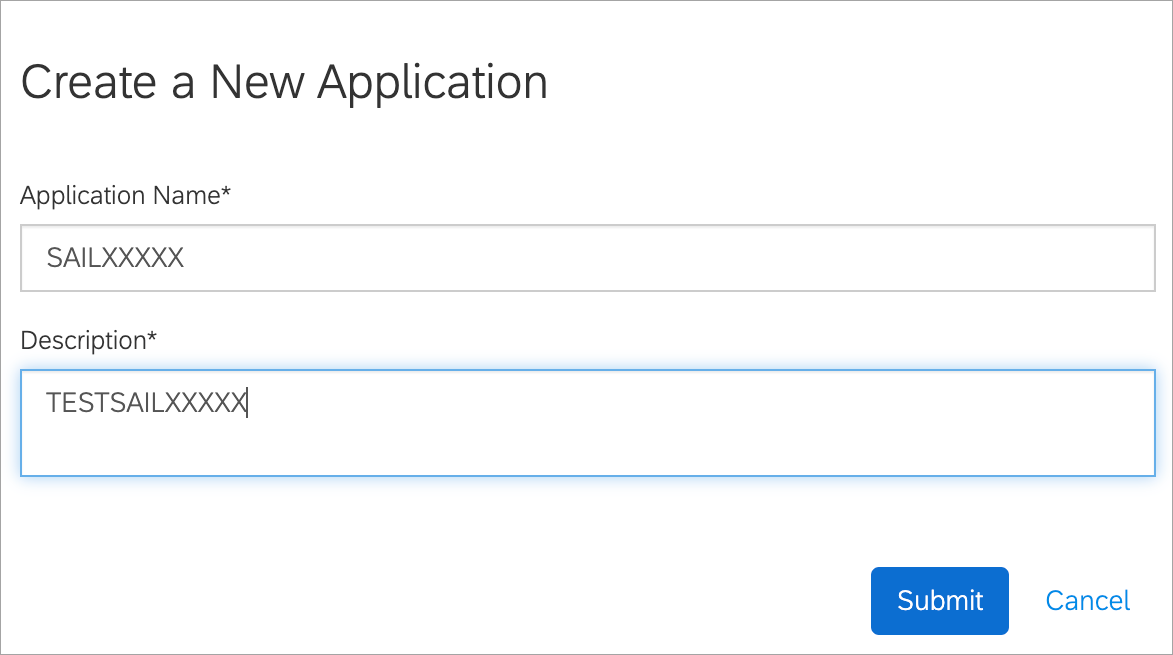
On the Create a New Application page, enter a user friendly Application Name and Description, then select Submit.
-
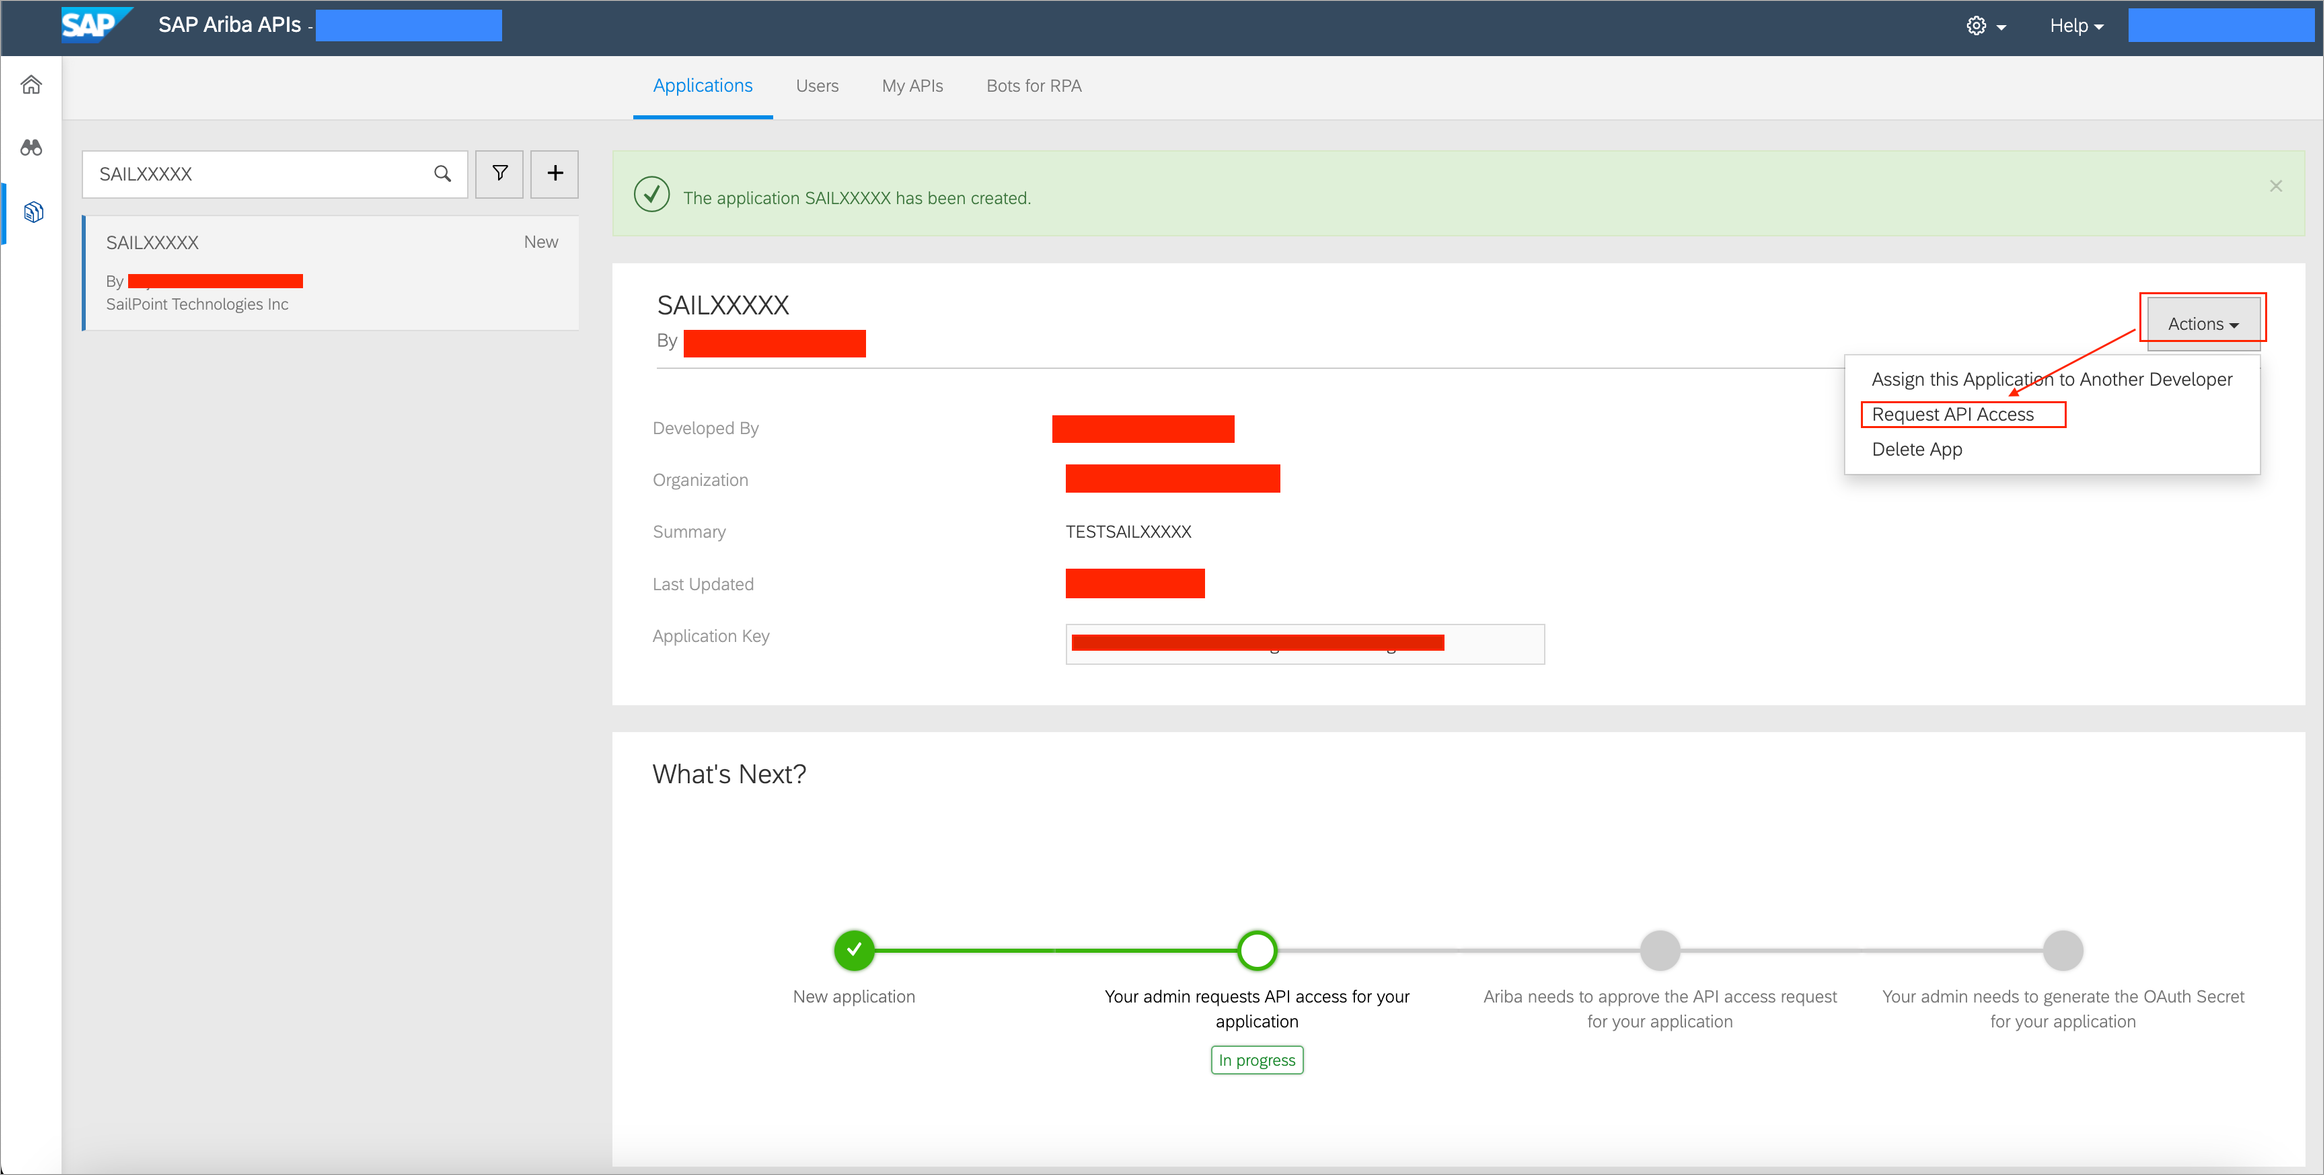
Select Actions > Request API Access > SCIM API for User and Group Master Data.
Note
SCIM API for user and group master data is not made available by SAP directly. After creating the application you must raise an SAP support case to get the API configured for Parent and Child realms in a single application. -
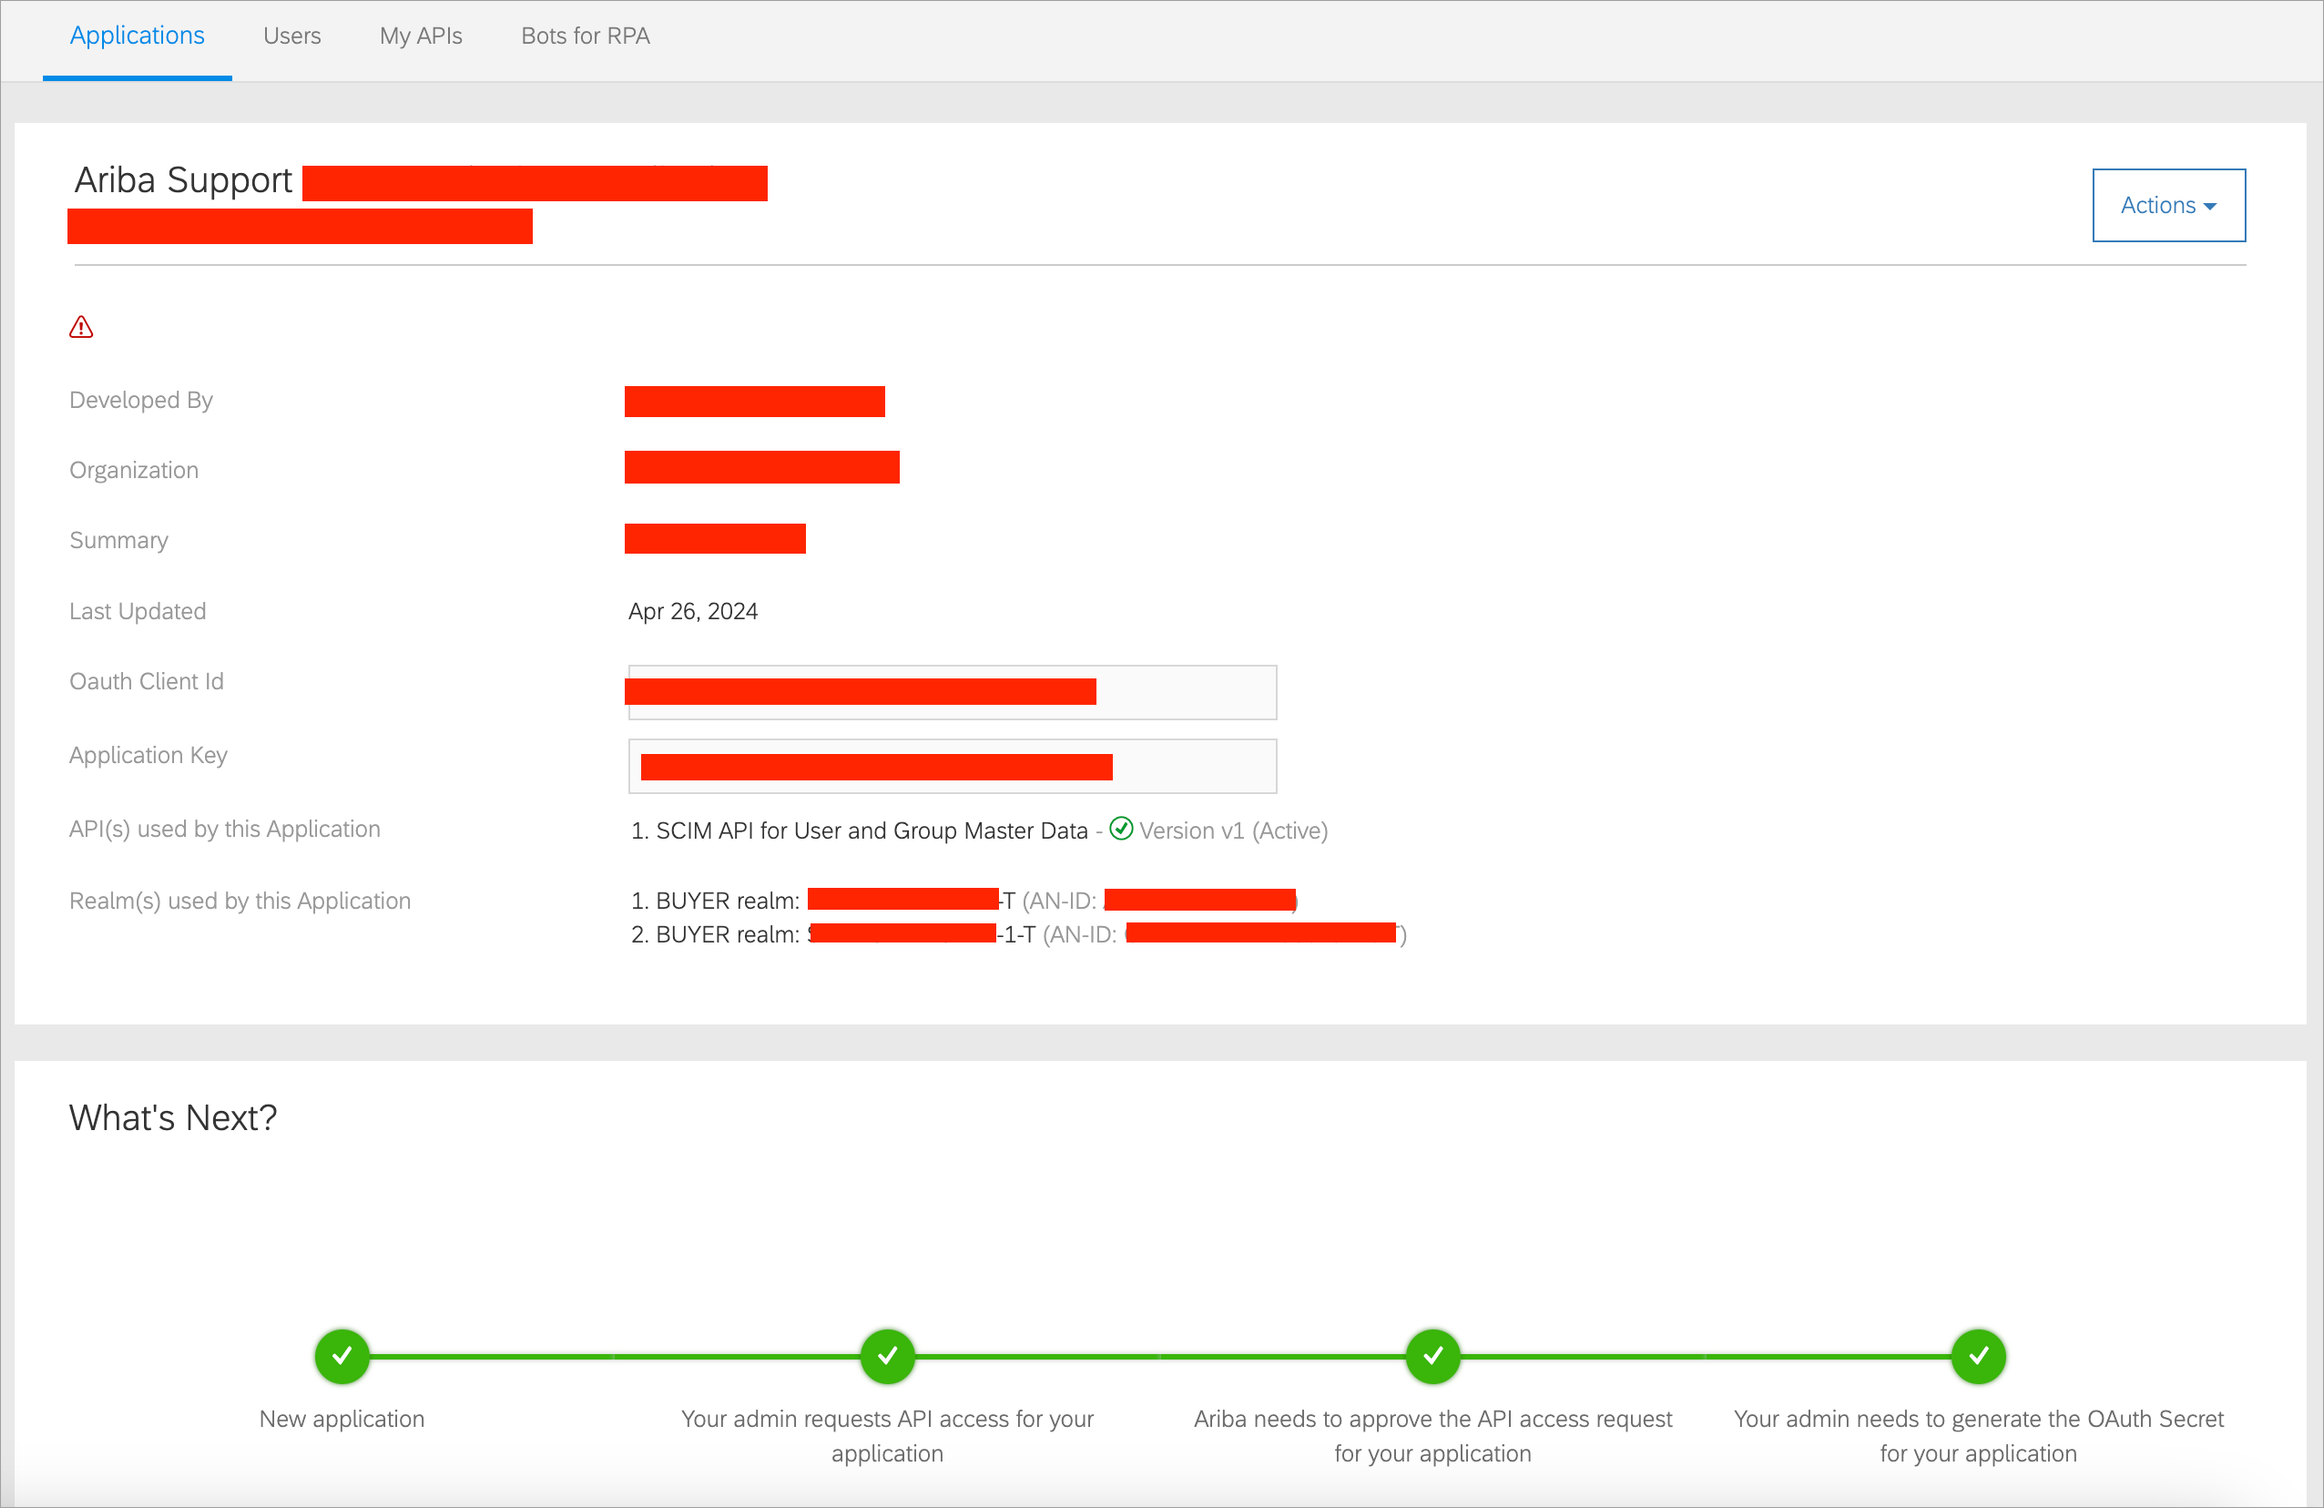
Once created, go to Actions > Generate OAuth Secret, and copy the OAuth Client Secret. Make note of the OAuth Client Id, Application Key, and OAuth Client Secret. You will enter these into the Proxy Properties to create an IPS proxy application.
Next, copy the AN-ID, which is required for configuring the SCIM API for aggregation. This can be found in the Realm(s) used by this Application section.
Note
In the Realms field under an application, add all the Buyers' Realms in the same configuration to enable IPS Proxy set up per realm.
-
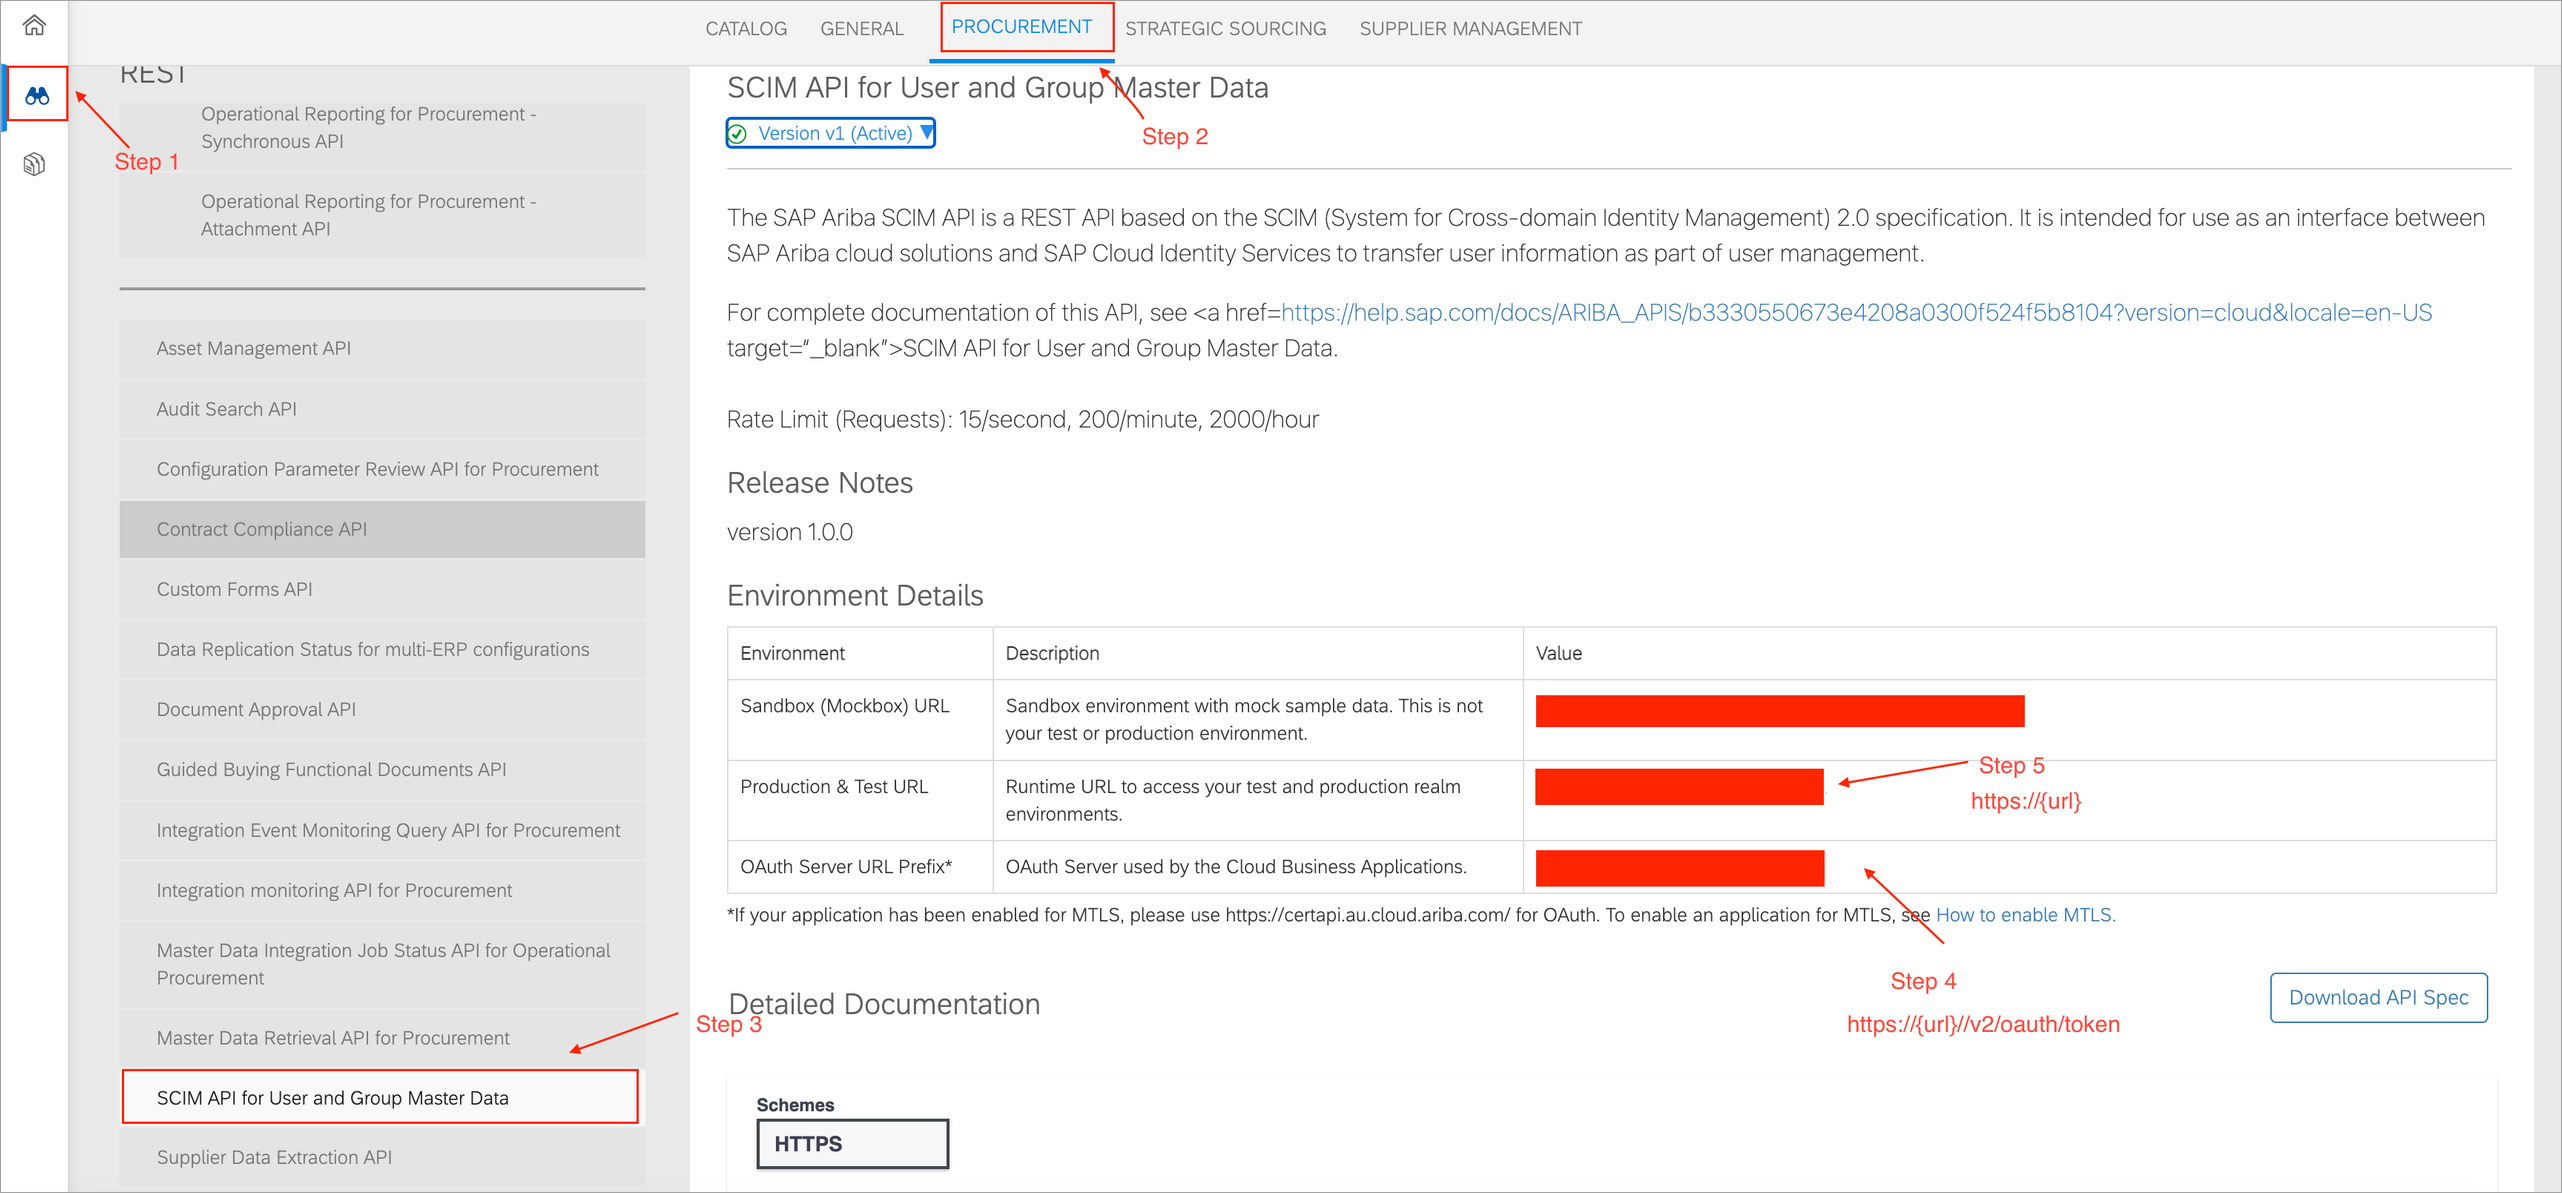
Go to the Discover tab and select Procurement > SCIM API for User and Group Master Data. Copy the value of the OAuth Server URL Prefix and append
v2/oauth/tokento it.The OAuth2TokenServiceURL(IPS) will be:
https://{url}/v2/oauth/tokenThe URL(IPS) will be:
https://{url}Note
Don't includeapi/mds/v1/prodin the URL. Make a note of both the OAuth2TokenServiceURL and the URL to use in the IPS configuration.