Basic Structure of Component Interface (CI) from USERMAINT Component for Users
This topic contains the following sections:
Creating a Component Interface
You must create the basic structure of component interface (CI) from the USERMAINT component.
To create a component interface from the USERMAINT component, complete the following:
-
Log into the Application Designer and go to File > New.
The New Definition dialog box is displayed.
-
Select Component Interface > OK.
The Select Source Component for Component Interface dialog box is displayed.
-
In the Selection Criteria tab, enter the name as USERMAINT and then select the Select button.
The following message is displayed:
Do you want to default the properties based on the underlying component definition? -
Select Yes.
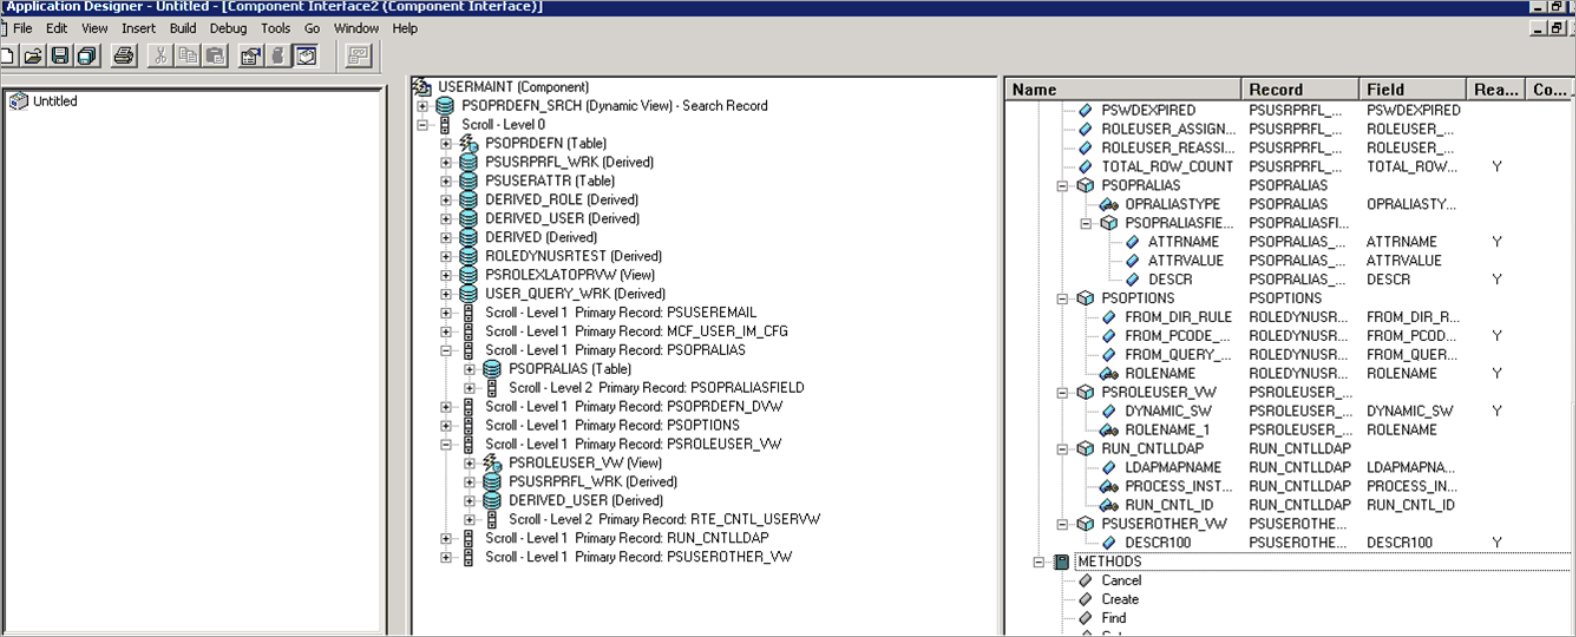
The following screen is displayed:
-
Select File > Save As.
A dialog box is displayed with a request for the name of the CI.
-
Enter the name of the CI as {New_Name}. For example, SAILPOINT_USERS.
-
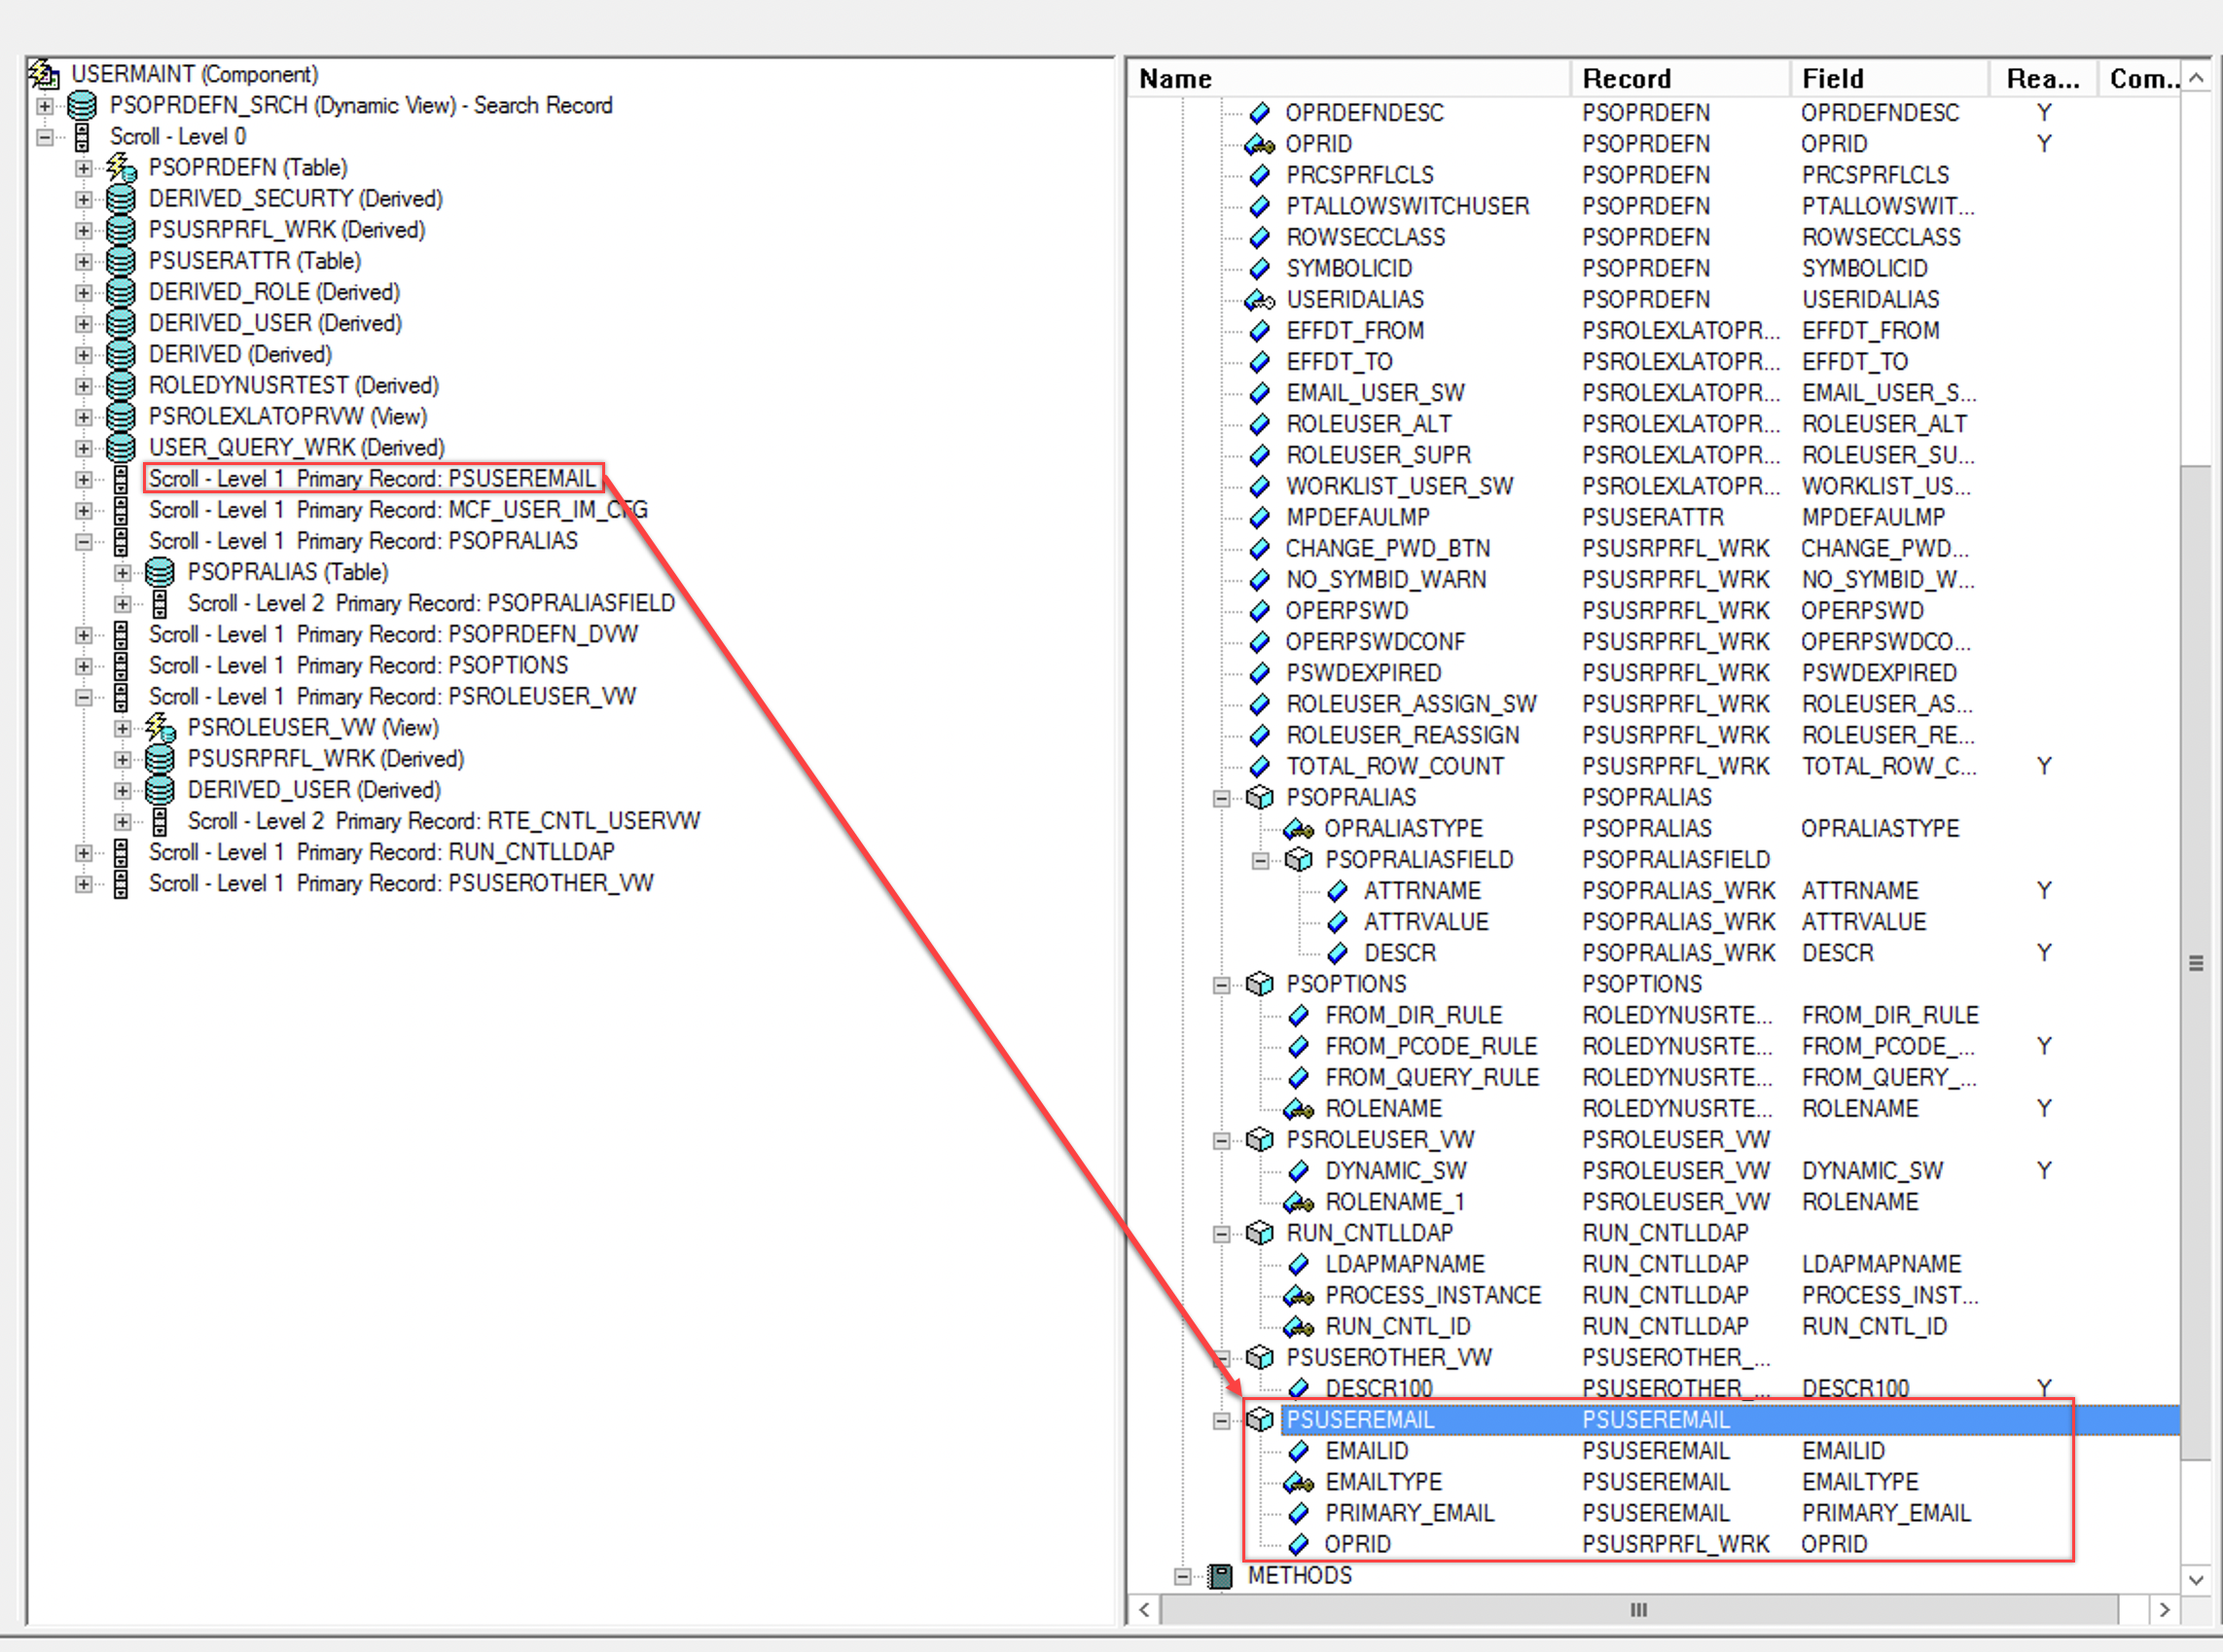
Drag the Scroll-Level 1 Primary Record: PSUSERMAIL from the source component (USERMAINT) to the PROPERTIES of the new created CI {New_Name}.
After dragging and dropping the Scroll-Level 1 Primary Record: PSUSERMAIL attribute, a new property is listed in the properties of the new created CI.
-
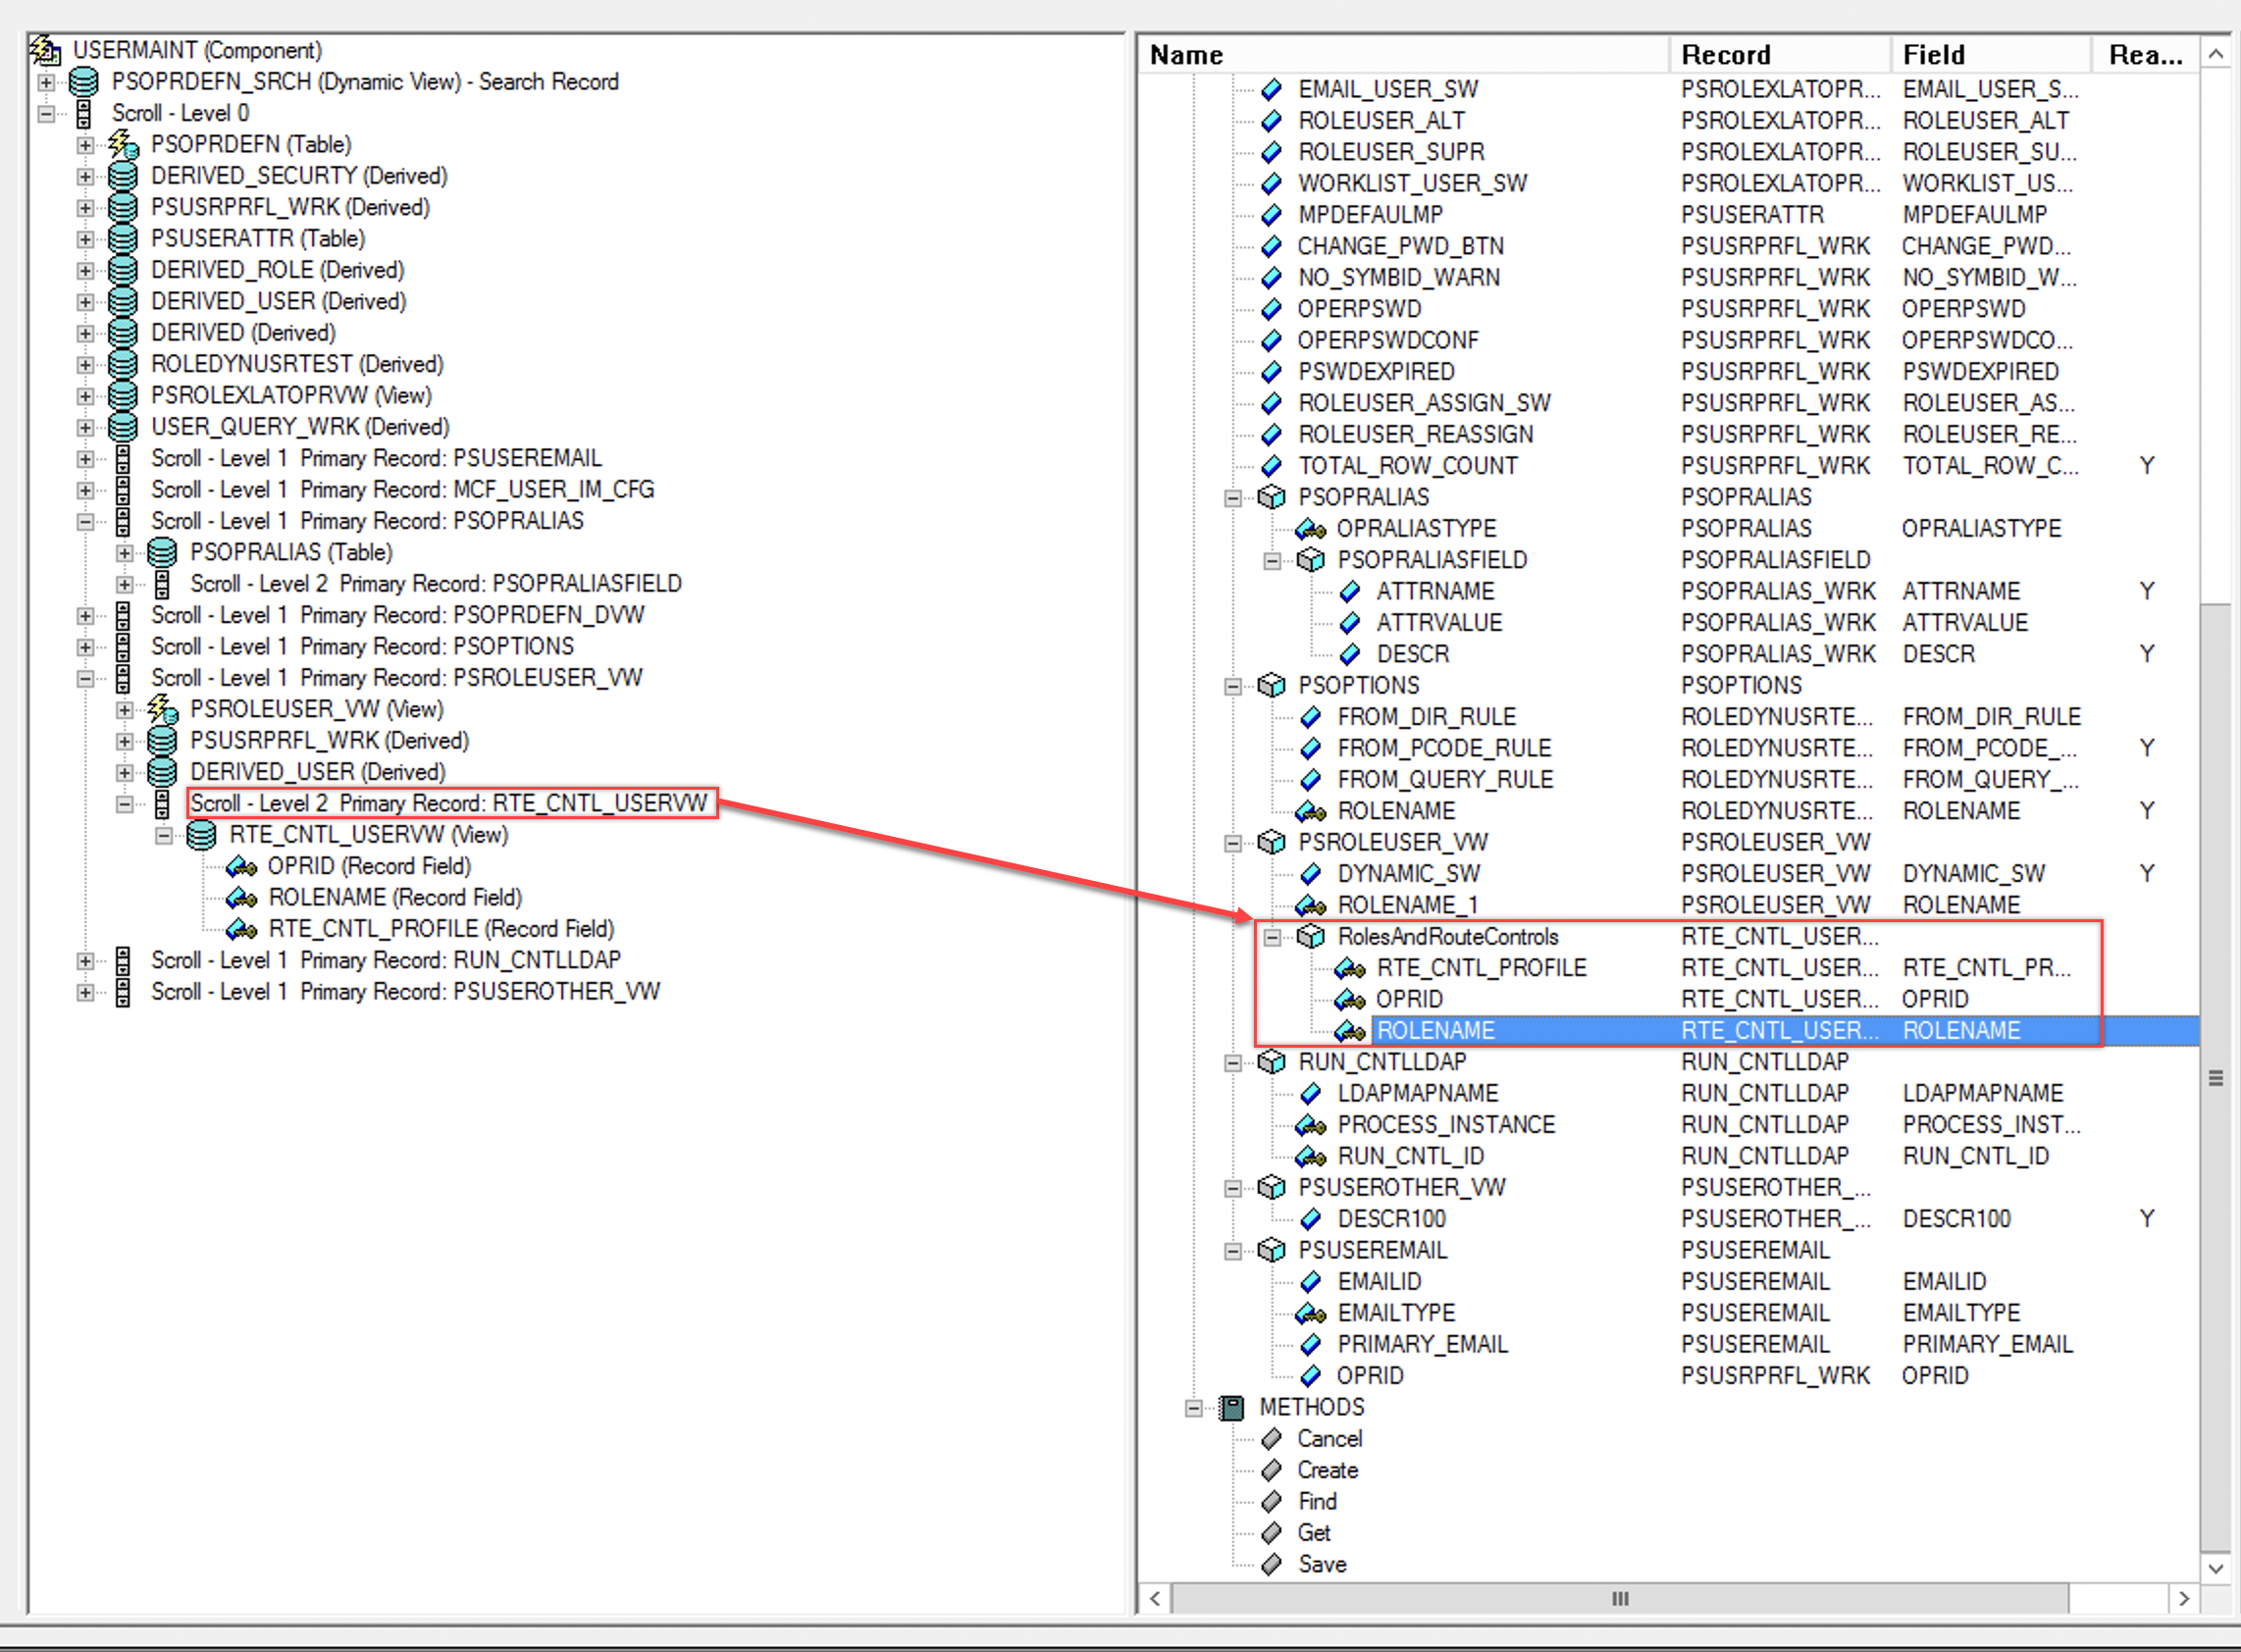
Drag the Scroll-Level 2 Primary Record: RTE_CNTL_USERVW from the source component (USERMAINT) to the PROPERTIES of the newly created CI.
After dragging and dropping the Scroll-Level 2 Primary REcord: RTE CNTL_USERVW attribute, a new property is listed in the properties of the newly created CI. Rename this property to RolesAndRouteControls.
Changing GETKEYS, FINDKEYS, and CREATEKEYS for the Newly Created CI
To change GETKEYS, FINDKEYS, and CREATEKEYS, complete the following:
-
In the Attribute window, expand FINDKEYS.
-
Right-click OPRID and select Edit Name.
-
Update the name to UserID.
-
Right-click OPRDEFNDESC and select Edit Name.
-
Update the name to UserDescription.
-
Expand GETKEYS.
-
Right-click OPRID and select Edit Name.
-
Update name to UserID.
-
Expand CREATEKEYS.
-
Right-click OPRID and select Edit Name.
-
Update name to UserID.
Changing PROPERTIES for the Newly Created CI
To change the PROPERTIES, complete the following:
-
Expand PROPERTIES.
-
Delete the SERVERNAME collection.
-
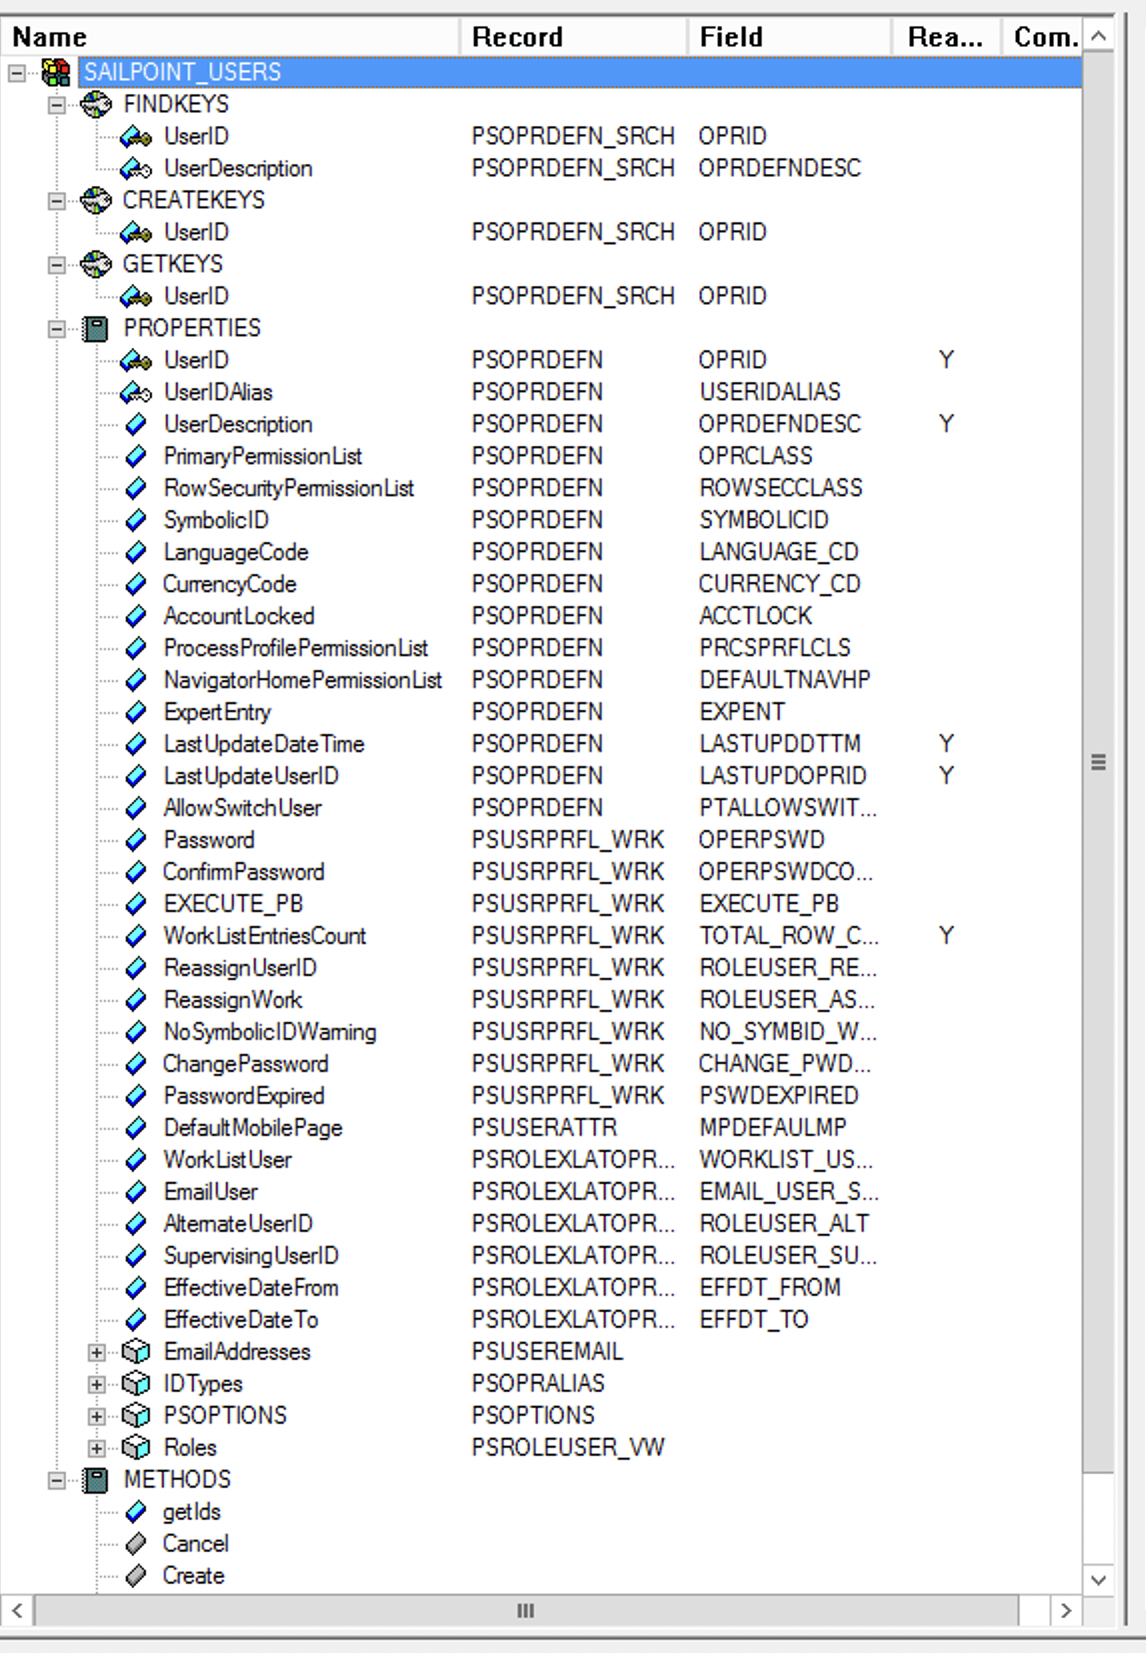
Right-click each attribute and select Edit Name. Update each attribute with the following:
Original Attribute Name
New Attribute Name
OPRID
UserID OPRDEFNDESK
UserDescription
OPRCLASS
PrimaryPermissionList
ROWSECCLASS
RowSecurityPermissionList
OPERPSWD
Note
Use the PTPSWDCLEARTXTINPT field when using PeopleTools version 8.60.05.Password
SYMBOLICID
SymbolicID
LANGUAGE_CD
LanguageCode
CURRENCY_CD
CurrencyCode
ACCTLOCK
AccountLocked
PRCSPRFLCLS
ProcessProfilePermissionList
DEFAULTNAVHP
NavigatorHomePermissionList
EXPENT
ExpertEntry
USERIDALIAS
UserIDAlias
LASTUPDDTTM
LastUpdateDateTime
PTALLOWSWITCHUSER
AllowSwitchUser
OPERPSWDCONF
Note
Use the PTPSWDCLEARTXTCONF field when using PeopleTools version 8.60.05.ConfirmPassword
TOTAL_ROW_COUNT
WorkListEntriesCount
ROLEUSER_REASSIGN
ReassignUserID
ROLEUSER_ASSIGN_SW
ReassignWork
NO_SYMBID_WARN
NoSymbolicIDWarning
PSWDEXPIRED
PasswordExpired
MPDEFAULTMP
DefaultMobilePage
WORKLIST_USER_SW
WorkListUser
EMAIL_USER_SW
EmailUser
LASTUPDOPRID
LastUpdateUserID
ROLEUSER_ALT
AlternateUserID
ROLEUSER_SUPR
SupervisingUserID
EFFDT_FROM
EffectiveDateFrom
EFFDT_TO
EffectiveDateto
CHANGE_PWD_BTN
ChangePassword
Note
This attribute is only applicable to PeopleTools version 8.55 and later.
Changing Collection Attributes
Some attributes when expanded, have other attributes under them. These attributes are called collection attributes.
To change the collection attribute, complete the following:
-
Update the following collection attributes by right-click the attribute and selecting Edit Name:
Original Collection Attribute Name
New Collection Attribute Name
Original Child Attribute Name
New Child Attribute Name
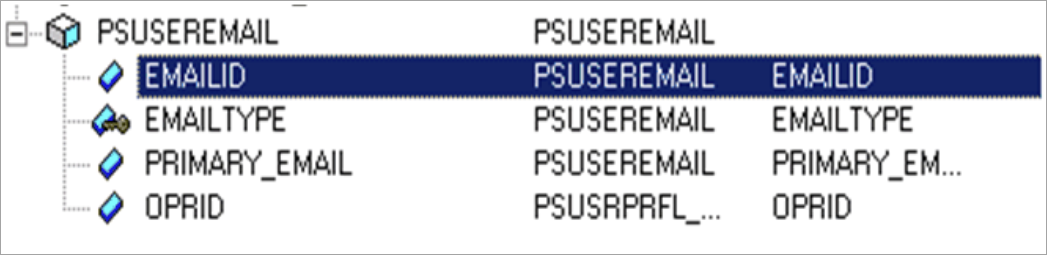
PSUSEREMAIL
EmailAddresses
EMAILID
EmailAddress
EMAILTYPE
EmailType
PRIMARY_EMAIL
PrimaryEmail
OPRID
OPRID
PSOPRALIAS
IDTypes
OPRALIASTYPE
IDType
PSOPRALIASFIELD
Attributes
ATTRNAME
AttributeName
ATTRVALUE
AttributeValue
DESCR
DESCR
PSROLEUSER_VW
Roles
DYNAMIC_SW
Dynamic
ROLENAME_1
RoleName_1
-
Delete the following attributes:
-
PSOPTIONS
-
RUN_CNTLLDAP
-
PSUSEROTHER_VW
-