Authenticate with OAuth 2.0
Configure your source to authenticate with Okta using OAuth 2.0.
Note
For more information on retrieving some of the credentials used in this process, refer to Implement OAuth for Okta with a Service App.
 Screenshot
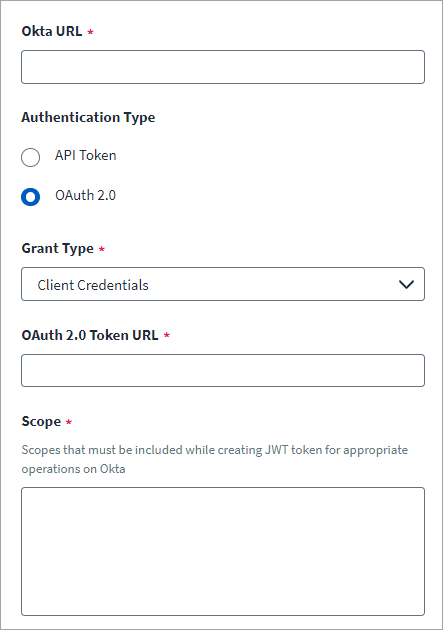
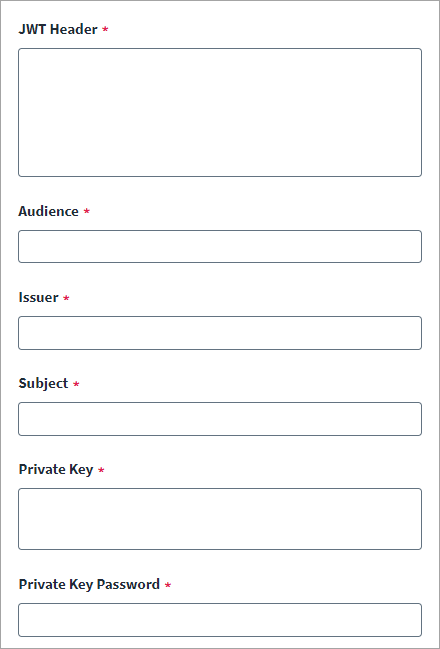
-
Enter the Okta URL of the host. For example, https://{yourOktaDomain}.com.
-
Client Credentials is selected for Grant Type. Currently, this is the only grant type supported by this source.
-
Enter the OAuth 2.0 Token URL for token generation.
For example:
https://{yourOktaDomain}/oauth2/v1/token
-
Enter the Scopes that must be included while creating JWT token for appropriate operations on the Okta managed system. Scopes must be provided as a space-separated value.
For example:
Operation
Scopes Mandatory Scopes okta.logs.read okta.users.manage okta.groups.manage For more information on Scopes, refer to Administrator Permissions.
-
Enter the JWT Header that has the algorithm being used for signing the JWT assertion.
For example:
Copy{
"typ": "JWT",
"alg": "RS256"
} -
Enter the JWT Audience for authorization.
-
Enter the JWT Issuer for authorization. This value must be same as the
client_id. -
Enter the JWT Subject for authorization, This value must be same as the
client_id. -
Enter the Private Key text in PKCS#1 Privacy Enhanced Mail (PEM) format to encrypt the JWT assertion. Confirm that the first line of the private key is
-----BEGIN RSA PRIVATE KEY-----.Important
The connector does not support private keys in PKCS#8 format. Do not useopenssl genpkey, which generates a PKCS#8 key.For OpenSSL 3.x, use the
-traditionaloption to generate a PKCS#1 private key:Copyopenssl genrsa -traditional -out okta_private.pem 2048For OpenSSL 1.x, generate a PKCS#1 private key:
Copyopenssl genrsa -out okta_private.pem 2048Generate the public key from the private key:
Copyopenssl rsa -in okta_private.pem -pubout -out okta_public.pemIf you have a PKCS#8 private key that begins with
-----BEGIN PRIVATE KEY-----, convert it to PKCS#1 format:For OpenSSL 3.x:
Copyopenssl rsa -in okta_private.pem -traditional -out okta_private_pkcs1.pemFor OpenSSL 1.x:
Copyopenssl rsa -in okta_private.pem -out okta_private_pkcs1.pemIf Okta provides the private key in JWK format, convert it to PKCS#1 PEM format before you enter it.
-
Enter the Private Key Password to decrypt the private key that was used for assertion.
Note
The private key password may be referenced as a "KID" or KEY ID in Okta. -
Select Save.
OAuth 2.0 for Pre-existing Sources
For existing Okta sources, the Authentication Type is displayed as an API Token. While changing the Authentication Type to OAuth 2.0 for the existing source:
-
Add the
private_key,private_key_password, and accessToken attributes to the encrypted tag with the connector-encrypted key, using the REST API. For more information, refer to REST API - Update Source (Partial). -
Remove the type_name and type_displayName attributes from account schema if they are present.
Note
Aggregation of the type_name and type_displayName is not supported in Okta managed system for OAuth 2.0 authentication type. It is recommended to use API token authentication for aggregating these attributes.