Using the ServiceNow Portal Integration for IdentityIQ
After IdentityIQ has been successfully integrated with the ServiceNow Service Portal, you’ll be able to use it to view and manage access for users.
-
Log in to the ServiceNow Service Portal using your existing credentials.
-
In the ServiceNow Service Portal, click “Manage Access” to access the app.
This is the default configuration. Your organization may use a different method to access the app from within your ServiceNow Service Portal.
-
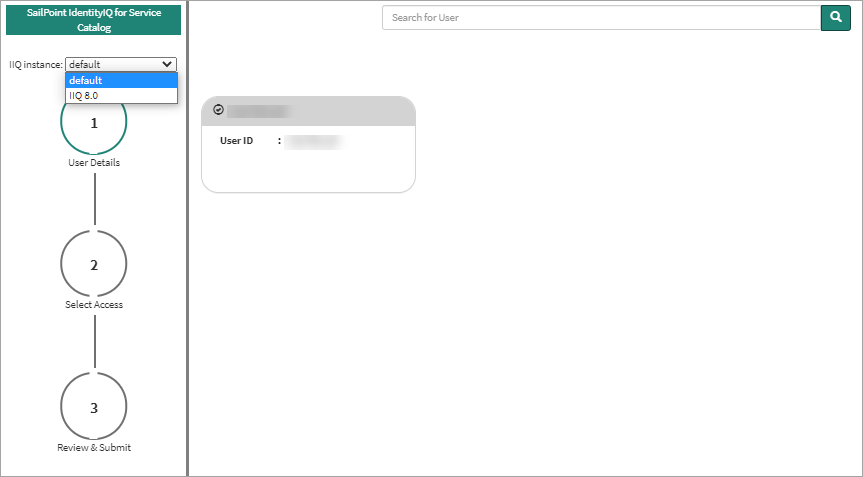
Select the appropriate IdentityIQ instance from the dropdown list.
Now that you’re in the app, you can search for a specific user by name or page through the list.
-
To view a summary of a user’s current access, click their “card” in the search results returned and click Select Access (2) in the menu on the left.
You can also filter the list to view only your Direct Reports or click Other to display only those users who are not direct reports.
-
When you’re finished using the User Details panel, click Next to proceed to Select Access.
-
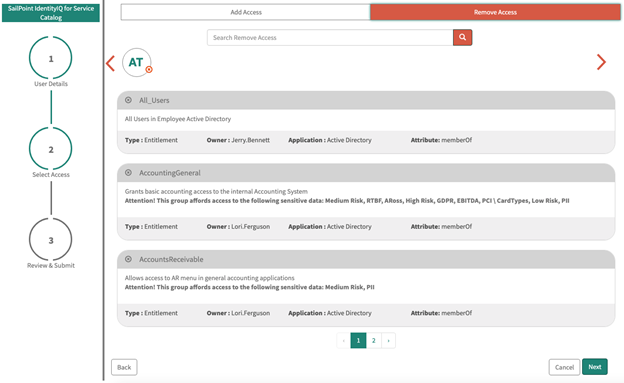
6. At the top of the page, you’ll see options to Add Access and Remove Access. Use these tabs to view the list of roles and entitlements that are currently eligible to be added or removed and determine the level of access that’s appropriate for the user.
-
Click Remove Access to see the user’s current roles and entitlements.
-
Click Add Access and search for the roles and entitlements you want to request.

If you’ve selected more than one user, the Add Access and Remove Access options are not available. Instead, search for the roles and entitlements you want to add.
-
-
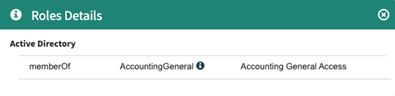
Click the Details link for the role to view the entitlements that comprise that role.
-
Select the role(s) and / or entitlement(s) that you want to request and click Next to review the access request and determine whether access should be added or removed.
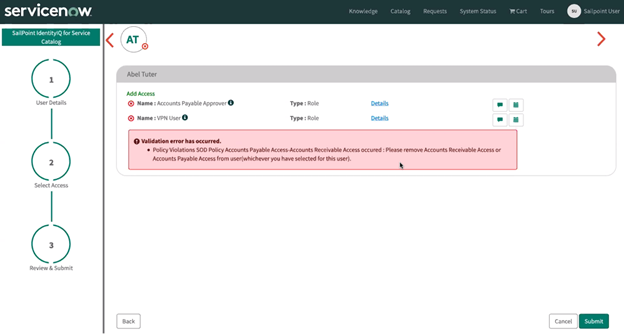
In this example, the access request violates an existing Separation of Duties (SOD) policy. The validation error includes the step to take to remediate the violation.
-
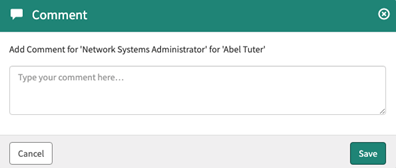
To assist the approver by including additional information they may find useful, click the message icon and add a comment to the request.
-
To specify start and end dates for access being requested, click the calendar icon and select an appropriate timeframe. These dates will be used to trigger events to add (sunrise) and remove (sunset) access for the user.
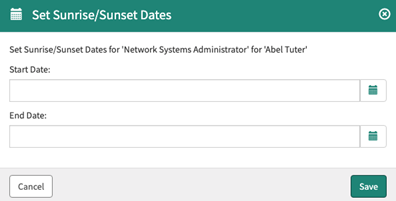
When removing access, you can only specify the date you want the access removed. This essentially defers the removal until the sunset date is reached.
-
When you are finished reviewing the access request and determining the access that’s appropriate for the user(s), click Submit.
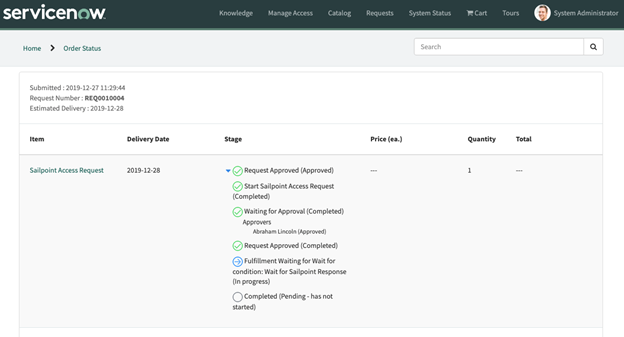
A single request listing all related items is generated and assigned a unique number for tracking purposes.
Click Requests in the main Service Portal menu (or use your traditional method for viewing requests).
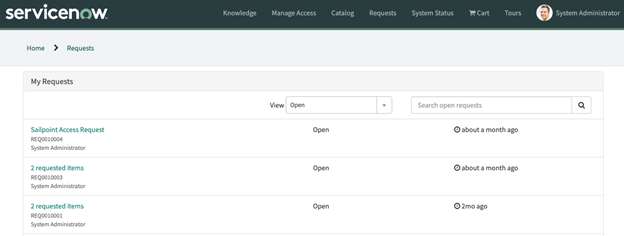
Select it in the list.
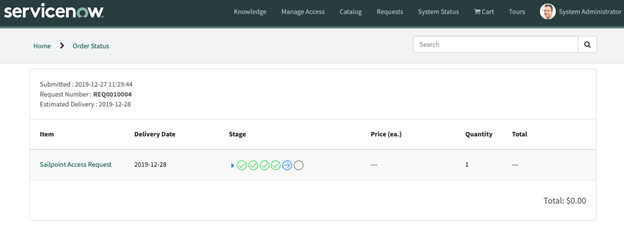
Expand the small blue triangle to the left of the icons in the Stage column to view addition details related to the workflow for the request.
Depending on how Access Requests are configured for your site, the request will either be fulfilled automatically, or it will generate a request for manual approval.
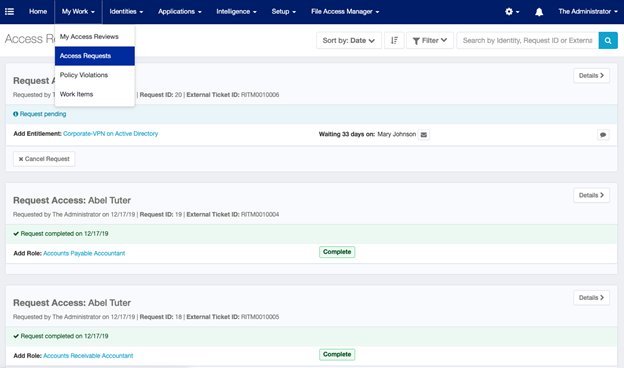
If you’re a SailPoint IdentityIQ Admin, these requests will be displayed along with other requests in the Access Requests page in IdentityIQ.
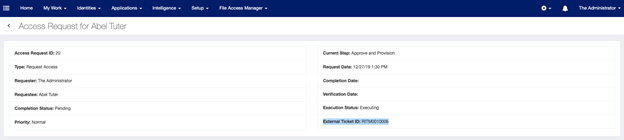
In addition to the typical Access Request ID, you’ll notice that each associated ticket also includes an External Ticket ID (in the form of a RITM number).
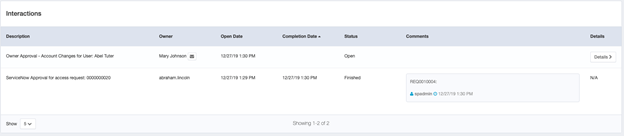
Additionally, in the Interactions section of the Access Request view, you’ll see that the Description identifies ServiceNow as the source of access requests initiated within ServiceNow, and provides a timestamped parent REQ number for each associated RITM.
For more information about managing approvals, see the IdentityIQ online help or product documentation that matches your version of IdentityIQ.