IdentityIQ Installables for New Installation
For new installations, IdentityIQ needs compatible jar files deployed to integrate seamlessly with SailPoint’s Catalog App for ServiceNow. The zip files are available on the Integrating IdentityIQ with ServiceNow Service Catalog - Prerequisite Installables page.
Attachments available on this page are:
-
IdentityIQforServiceNowCatalog_IIQComponents_v{$version}.zip
-
Previous IdentityIQ for ServiceNow Catalog Releases.zip
Steps to import XML files and deploy jar files on IdentityIQ
-
Download IdentityIQforServiceNowCatalog_IIQComponents_v{$version}.zip from Integrating IdentityIQ with your ServiceNow Service Catalog
-
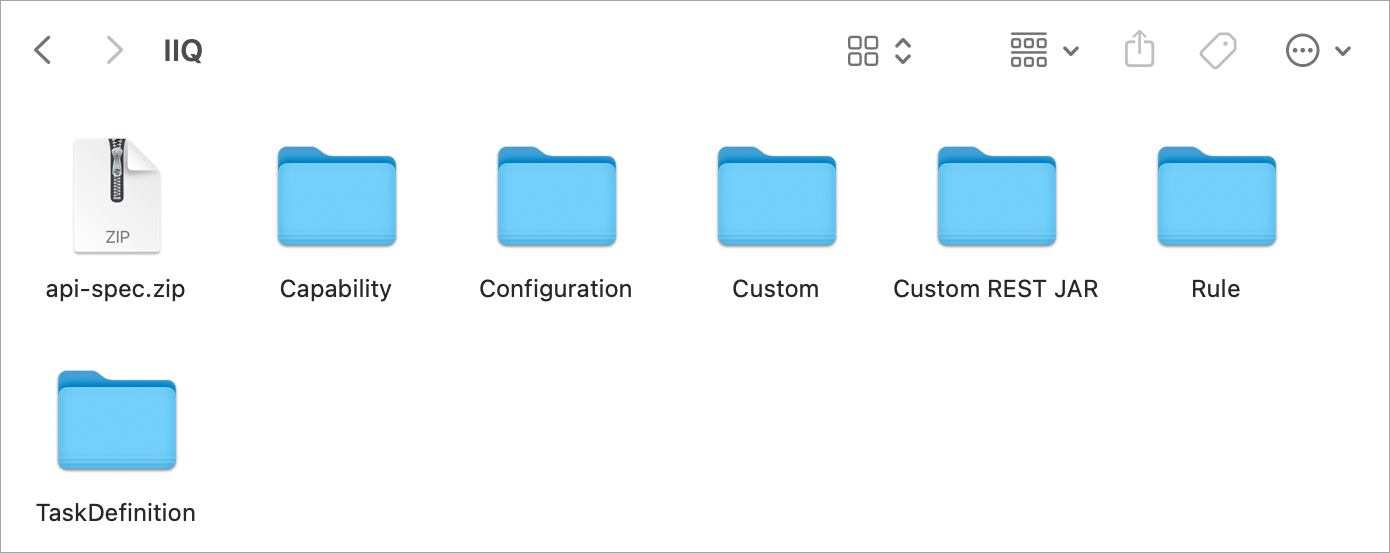
Extract the zip. The subfolder contains configuration XML files and jar files. Refer to the following screenshot for more details.
-
Sign in to IdentityIQ as an administrator.
-
From the IdentityIQ admin dashboard select the gear icon, and then Global Settings.
-
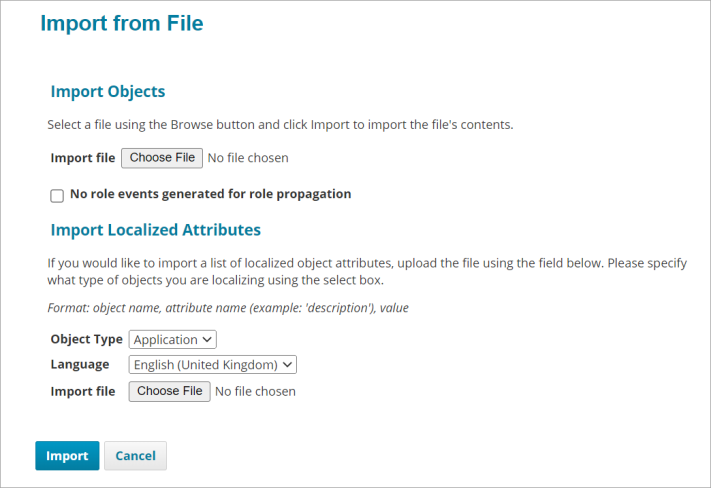
Select Import from File from the list.
-
Select Choose File, then open and Import the following files from the directory you downloaded them into previously:
-
SP_SPNT_SNOW_INT_ServiceNow_Task_Rule.xml
-
SP_SPNT_SNOW_INT_ServiceNow_Update_RITM_Status.xml
-
SP_SPNT_SNOW_INT_ServiceNowCredentialConfig.xml
-
SP_SPNT_SNOW_INT_IIQServiceNowStatusMapping.xml
-
SP_SPNT_SNOW_INT_SystemConfig_ShowExternalTicketId.xml
-
SP_SPNT_SNOW_INT_ServiceNow_Service_Catalog_Admin_Capability.xml
Note
- The purpose of the SP-SPNT-SNOW-INT-ServiceNow-Update-RITM-Status task is that it updates the RITM on ServiceNow based on the access request status in IdentityIQ. For example, if the access request is rejected by the approver in IdentityIQ then the task will update the corresponding RITM status to "rejected". If the access request is completed in IdentityIQ by the approver, then the task will update the corresponding RITM status to "closed", "completed", etc.
- The SP-SPNT-SNOW-INT-ServiceNow-Update-RITM-Status task can be a scheduled job. For more information on scheduling it, refer to the Scheduled Tasks Page.
-
-
Copy the
SP_SPNT_SNOW_INT_CustomRest.jarfile that you previously downloaded into the/WEB_INF/libfolder for your IdentityIQ installation. For example,<C:/Prog/Tomcat 8.5_Tomcat8-IdentityIQ/webapps/identityiq/WEB-INF/lib/> -
Copy the
org.apache.oltu.oauth2.client-1.0.2.jarfile that you previously downloaded into the/WEB_INF/libfolder for your IdentityIQ installation. For example,<C:/Prog/Tomcat 8.5_Tomcat8-IdentityIQ/webapps/identityiq/WEB-INF/lib/> -
Open the web.xml file in the
/WEB_INFfolder and change the value of thejavax.ws.rs.Applicationparameter fromsailpoint.rest.SailPointRestApplicationtosailpoint.rest.ServiceNowIIQCustomRest.Before:

After:

-
Go to
tomcat_home/binand run the./shutdown.shcommand to stop Tomcat services, followed by the./startup.shcommand to restart Tomcat. IdentityIQ is now ready to receive and process access requests initiated using the ServiceNow Portal integration.