Basic Structure of Component Interface (CI) from ROLEMAINT Component for Roles
This topic contains the following sections:
Creating a Component Interface
You must create the basic structure of component interface (CI) from the ROLEMAINT component.
To create a component interface from the ROLEMAINT component, complete the following:
-
Log into the Application Designer and go to File > New.
The New Definition dialog box is displayed.
-
Select Component Interface > OK.
The Select Source Component for Component Interface dialog box is displayed.
-
In the Selection Criteria tab, enter the name as ROLEMAINT and then select the Select button.
The following message is displayed:
Do you want to default the properties based on the underlying component definition? -
Select Yes.
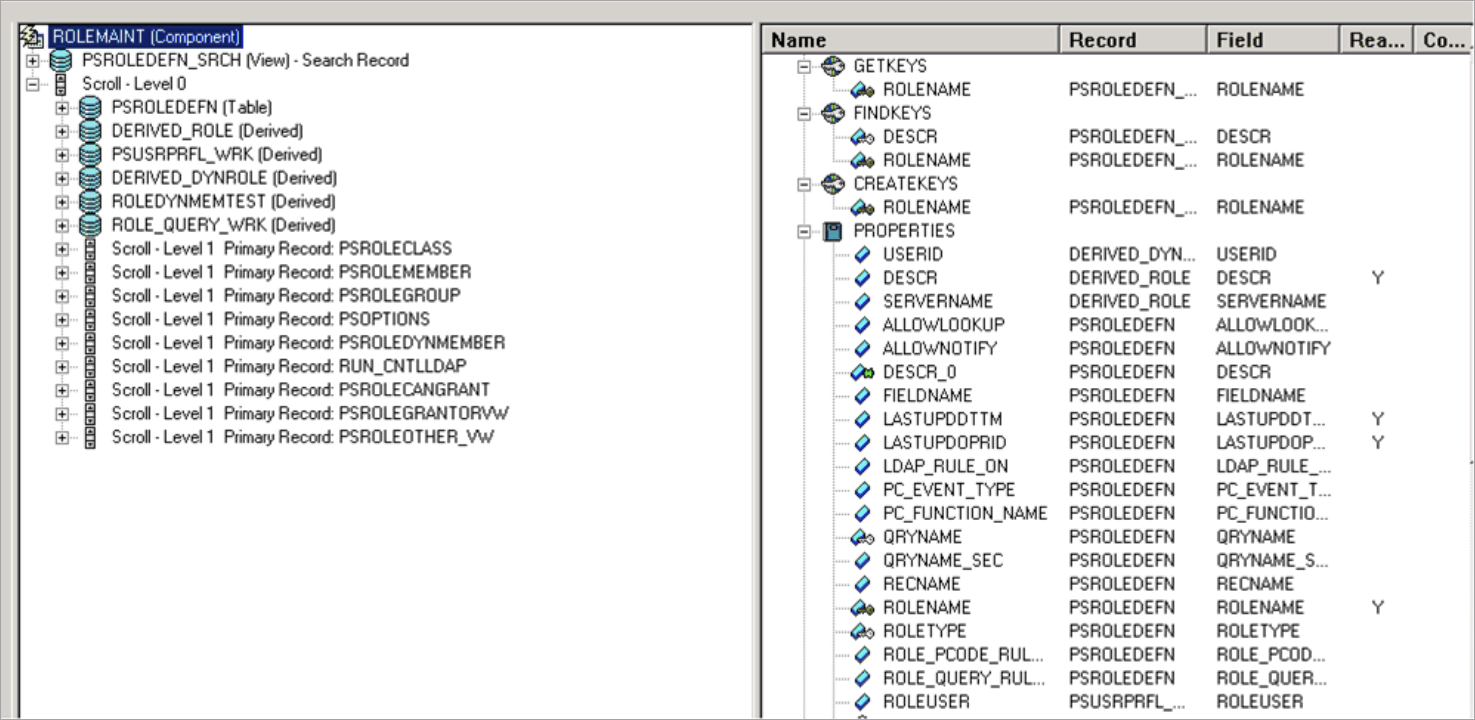
The following screen is displayed:
-
Select File > Save As.
A dialog box is displayed with a request for the name of the CI.
-
Enter the name of the CI as {New_Name}. For example, SAILPOINT_ROLES.
-
Delete the following collective attributes:
-
PSOPTIONS
-
RUN_CNTLLDAP
-
- Verify the standard methods are selected for the newly created component interface. For more information, see Verification of the Standard Methods for Newly Created CI.
-
To copy the description for the Role in